
Related Manuals for Sony MHC-V90W


Summary of Contents for Sony MHC-V90W
- Page 1 Home Audio System Getting Started Disc/USB Playback Operating Instructions USB Transfer Tuner BLUETOOTH Network Gesture Control Sound Adjustment Other Operations Additional Information MHC-V90W...
- Page 2 The model and serial numbers are located on the rear of the unit. Record these numbers in the spaces provided below. Refer to them whenever you call upon your Sony dealer regarding this product. This appliance is classified as a CLASS Model No.
- Page 3 Important Safety Instructions 13) Unplug this apparatus during lightning storms or when unused 1) Read these instructions. for long periods of time. 2) Keep these instructions. 14) Refer all servicing to qualified 3) Heed all warnings. service personnel. Servicing is 4) Follow all instructions.
- Page 4 In other • “CD” logo is trademark. words, this device automatically • WALKMAN® and WALKMAN® logo discontinue transmission in case are registered trademarks of Sony of either absence of information to Corporation. transmit or operational failure. • MPEG Layer-3 audio coding Frequency Tolerance: ±20 ppm...
- Page 5 Bluetooth SIG, Inc. and third-party-licenses any use of such marks by Sony • ClearAudio+ and Corporation is under license. Other trademarks of Sony Corporation. trademarks and trade names are •...
-
Page 6: About This Manual
About this manual This manual mainly explains • • operations using the remote control, but the same operations can also be performed using the keys on the touch panel of the unit having the same or similar names. Icons, such as , listed at the •... -
Page 7: Table Of Contents
Table of Contents About this manual ....6 USB Transfer Unpacking ......9 Before using the USB Playable discs or files on device ........28 discs/USB device ....9 Transferring music ....28 Websites for compatible devices ........11 Tuner Guide to parts and Listening to the radio ....31 controls .........12... - Page 8 Creating your own sound effect ........43 Other Operations Controlling the system using a smartphone or tablet (Sony | Music Center) ...44 Getting frenzied parties with the “Fiestable” app ..44 Using the Party Chain function ........46 Singing along: Karaoke ..49 Enjoying sound from a guitar ........50...
-
Page 9: Unpacking
Unpacking Playable discs or files on discs/USB device This unit (MHC-V90W) (1) • • (composed of the satellite unit and the subwoofer unit) Playable discs Mounting screws (M5 × 30) (4) • • AUDIO CD • • Remote control (1) •... - Page 10 Discs/files that cannot be played Note on CD-R/-RW back In some cases, a CD-R/-RW cannot • • be played back on this system You cannot play back the • • due to the recording quality or following discs • physical condition of the disc, or —...
-
Page 11: Websites For Compatible Devices
USB and BLUETOOTH devices. The playback order may not be • • For customers in the United States: applicable depending on the <https://esupport.sony.com/US/> software used for creating the For customers in Canada: audio file. <http://esupport.sony.com/CA/> Compatibility with all encoding/ •... -
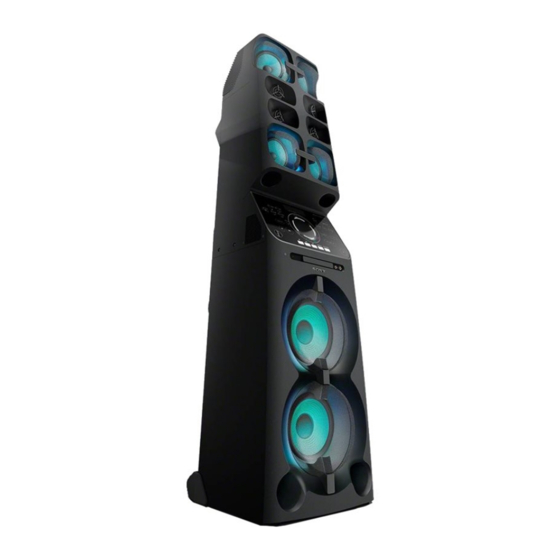
Page 12: Guide To Parts And Controls
Guide to parts and controls Unit (Front): Unit (Rear): Midrange speaker × 4 Subwoofer unit (Speaker light function Spread sound generator equipped*) Spreads sound around the rear Tweeter × 4 of the unit. Connector panel (page 19) ... - Page 13 Touch panel: You can lock the keys except (power) on the unit to prevent them from being operated by mistake (page 52). Disc tray area: BLUETOOTH indicator (USB) (REC/PLAY) port (page 32) Use to connect a USB device. This port can be used for both BLUETOOTH key playback and music transfer.
- Page 14 Direct function key (CD, USB, Display FM, AUDIO IN, MUSIC GESTURE CONTROL sensor SERVICE) (page 40, 41) To use this key, touch PLAYBACK (), then the function key you GUITAR indicator want. Lights up when guitar mode is VOCAL FADER key turned on.
- Page 15 NETWORK key (power) button Touch to select NETWORK Press to turn on the system, or function. set it to standby mode. WPS (Wi-Fi Protected (stop) key Setup™) key (page 37) Touch to stop playback. When Touch and hold to set up a Wi-Fi touched twice, resume playback network.
- Page 16 Remote control BACK button OPTIONS button Press to enter or exit options menu. / button Press to select the menu items. (folder) +/– button Press to select a folder on a data disc or a USB device. (enter) button Press to enter/confirm the settings.
- Page 17 When pressed twice, resume playback can be canceled. — Press to stop transfer during music transfer. — Press to stop the built-in sound demonstration. KEY CONTROL / button (page 49) VOL (volume) +/–* button Press to adjust the volume. ...
-
Page 18: Getting Started
Getting Started Assembling the unit Make sure that two people handle the unit when mounting it. Dropping the unit may cause personal injury and/or property damage. Mount the satellite unit on the subwoofer unit, then secure firmly by tightening the supplied screws (M5 × 30). Hand placement Supplied screws (M5 ×... -
Page 19: Hooking Up The System Securely
Hooking up the system securely Unit (Rear): White To store the speaker cords tidily Route the cords through the cord stopper. Connector panel:... - Page 20 Audio input and output jacks LED SPEAKER terminal Use an audio cable (not supplied) Connect the LED speaker to make either connection as connector of the speakers to follows: this terminal. The lighting on the AUDIO/PARTY CHAIN OUT speakers will react according to •...
-
Page 21: Deactivating The Demonstration
To operate the unit using the AC power cord (mains lead) remote control Connect the AC power cord Point the remote control at the unit’s (mains lead) (supplied) to the remote control sensor. unit, then to the wall outlet. When the AC power cord (mains lead) is connected, the system is performing initialization. -
Page 22: Listening To Tv Sound Via The System
Listening to TV sound via the system Before connecting cables, be sure to disconnect the AC power cord (mains lead). Audio cable (not supplied) To listen to TV sound, press FUNCTION repeatedly to select “AUDIO IN”. Hint You can also enjoy the sound of external equipment (DVD players, etc.) via the system •... -
Page 23: Attaching The Unit To A Wall
Attach the wall anchor to a wall. Attaching the unit to a Attach the wall anchor securely to a wall wall beam or reinforced wall. Attach the wall anchor to the position that is horizontal or slightly To prevent the unit from falling higher than the position of the rope down, attach the unit to a wall by tied to the unit. -
Page 24: Carrying The Unit
• — on uneven surfaces: Carrying the unit The unit has caster wheels so that you can roll it easily. Before carrying the unit, disconnect the AC power cord (mains lead). Carrying the unit by this method is recommended: • —... -
Page 25: Changing The Display Mode
For children Do not allow children • • to climb on the unit. Warning: Keep small • • accessories out of the reach of children, so that they are not mistakenly swallowed (e.g., batteries, screws, etc.). Changing the display mode Press DISPLAY repeatedly while the system is turned off. -
Page 26: Disc/Usb Playback
Touch on the unit again to close Disc/USB Playback the disc tray. Do not forcibly push the disc tray to Before using the USB close it as this may cause a malfunction. device For USB function: Connect a USB device to the (USB) For compatible USB devices, see port. -
Page 27: Using Play Mode
Other operations Using play mode Do this Stop playback Press . Press . Pause playback Playing in sequential order Press . Resume (Normal Play) playback or return to normal When playback is stopped, press playback PLAY MODE repeatedly. Press twice. Cancel the The following indicator lights up on resume point... -
Page 28: Viewing Information On The Display
USB Transfer Playing repeatedly (Repeat Play) Before using the USB Press REPEAT repeatedly. device The following indicators light up on the display. “ ”: repeats all tracks or audio For compatible USB devices, see • • files on a folder/disc/USB device. “Websites for compatible devices”... - Page 29 Press / repeatedly to select Press FUNCTION repeatedly to “BIT RATE”, then press select “CD”, then load a disc. Press / repeatedly to select Prepare the sound source. the bit rate you want, then press Synchronized Transfer: If the system starts playback “128 KBPS”: encoded MP3 files •...
- Page 30 Notes on transfer When transferring to a USB device, a “MUSIC” folder is created directly While transferring, no sound is output. • • CD-TEXT information is not transferred below “ROOT”. Folders and files are • • to the created MP3 files. generated within this “MUSIC”...
-
Page 31: Tuner
Press / repeatedly to select Tuner “ERASE”, then press Listening to the radio Press / repeatedly to select a folder, then press Press FUNCTION repeatedly to Press / repeatedly to select select “TUNER FM”. an audio file you want to erase, then press Alternatively, touch PLAYBACK, then touch FM on the unit. -
Page 32: Bluetooth
BLUETOOTH Presetting radio stations About the BLUETOOTH You can store up to 20 FM stations as your favorite stations. wireless technology Tune to the station you want. BLUETOOTH wireless technology is Press TUNER MENU. a short-range wireless technology that enables wireless data Press / repeatedly to select communication between digital the preset number you want,... -
Page 33: Pairing This System With A Bluetooth Device
Select “MHC-V90W” on the Pairing this system display of the BLUETOOTH with a BLUETOOTH device. Perform this step within 5 minutes, device otherwise pairing will be canceled. In this case, repeat from step 3. Pairing is an operation where Note... -
Page 34: Listening To Music On A Bluetooth Device
Adjust the volume. Listening to music on a Adjust the volume of the BLUETOOTH device BLUETOOTH device first. If the volume level is still too low, adjust the volume level on the system. You can operate a BLUETOOTH Note device by connecting the system When the system is not connected to •... -
Page 35: Setting The Bluetooth Audio Codecs
Start playback of an audio Compatible smartphones source on the smartphone. Smartphones with a built-in NFC For details, refer to the operating function (OS: Android 2.3.3 or instructions of your BLUETOOTH later, excluding Android 3.x) device. Hint Note If pairing and the BLUETOOTH connection The system can only recognizes and •... -
Page 36: Network
Select the Hint appropriate connecting method LDAC is an audio coding technology for your network environment from developed by Sony that enables the below. transmission of High-Resolution (Hi-Res) Audio content, even over a BLUETOOTH Note connection. Unlike other BLUETOOTH... -
Page 37: Listening To The Same Music From The Multiple Speakers
USB device.) You can enjoy your favorite music stored in your PCs or mobile phones, furthermore, music from streaming services with ultimate sound quality in any rooms via Wi-Fi. Install the “Sony | Music Center” application on your smartphone/iPhone. -
Page 38: Listening To An Internet Music Service (Chromecast Built-In)
Chromecast-enabled app and play back on the system. Chromecast built-in requires the Select music to listen to on your initial setup using “Sony | Music Chromecast-enabled app. Center”. The music is played on the system. Refer to Help Guide for detailed Install the “Sony | Music Center”... -
Page 39: Spotify Connect
Spotify Connect Use your phone, tablet or computer as a remote control for Spotify. Go to spotify.com/connect to learn how. After the connection is established, touch PLAYBACK, then touch MUSIC SERVICE on the unit. You can start/ resume the music service. Note Depending on the country and region, music services and their periods of... -
Page 40: Gesture Control
To deactivate the Gesture Gesture Control Control Touch GESTURE ON/OFF. Enjoying the Gesture The GESTURE CONTROL lights off. Control Using the Gesture You can control the operations Control during for PLAYBACK, DJ, SAMPLER and KARAOKE mode by swiping your playback hand over the GESTURE CONTROL sensor on the unit. -
Page 41: Creating A Party Atmosphere (Dj Effect)
For SAMPLER mode: Creating a party Swipe in this atmosphere (DJ Effect) direction Output “Come Use the keys and GESTURE On!” CONTROL sensor on the touch panel Output “Let’s Go!” of the unit to perform this operation. Output Reggae Horn sound effect Touch GESTURE ON/OFF. -
Page 42: Using The Gesture Control During Karaoke Function
Sound Adjustment Using the Gesture Control during Karaoke Adjusting the sound function Do this Use the keys and GESTURE Reinforce bass Press MEGA BASS CONTROL sensor on the touch panel sound and create repeatedly to select of the unit to perform this operation. more powerful “BASS ON”. -
Page 43: Selecting The Virtual Football Mode
Selecting the Virtual Adjusting the Football mode subwoofer level You can experience the feeling of Press OPTIONS. being in the stadium when watching a football match broadcast. Press / repeatedly to select Note that you can only select Virtual “S-WOOFER”, then press Football mode during AUDIO IN function. -
Page 44: Other Operations
• • “Sony | Music Center” on Google “Sony | Music Center” version. • • If the “Sony | Music Center” application Play or App Store and download it does not work properly, touch using your smartphone or tablet. BLUETOOTH on the unit to terminate the “Sony | Music Center”... - Page 45 “Fiestable” icon is not displayed on the remote device home screen. It is embedded in the “Sony | Music Center” app as a plug-in. Search and download “Sony | Music Center” app on your remote device (page 44). Search and download “Fiestable”...
-
Page 46: Using The Party Chain Function
Using the Party Chain function You can connect multiple audio systems in a chain to create a more interesting party environment and to produce higher sound output. An activated system in the chain will be the “Party Host” and share the music. Other systems will become “Party Guests”... - Page 47 The last system must be connected to the first system. • • Any system can become a Party Host. • • You can change the Party Host to another system in the chain. For details, • • see “To select a new Party Host (when all the systems are equipped with Party Chain function)”...
- Page 48 • • For detailed operation on other Enjoying the Party Chain systems, refer to the operating instructions of the systems. Plug in the AC power cord To select a new Party Host (when (mains lead) and turn on all the all the systems are equipped systems.
-
Page 49: Singing Along: Karaoke
Press / repeatedly to select Note the mode you want, then press Touch MIC/GUITAR LEVEL +/– on • • the unit repeatedly to adjust the microphone volume level. You cannot “STEREO”: outputs the stereo • • adjust the microphone volume level sound. -
Page 50: Enjoying Sound From A Guitar
To use the score mode, be sure to Enjoying sound from a connect a microphone at least to the MIC1 jack, otherwise the score mode guitar will not work. For the MIC2/GUITAR jack, the score You can listen to the sound from the mode is available only while the guitar by connecting a guitar to the guitar mode is turned off. -
Page 51: Enjoying Music With The Party Light And Speaker Light
Enjoying music with the Using the Voice Party Light and Speaker Guidance Light You can hear English Voice Guidance on the following situations via the system. Press PARTY LIGHT repeatedly • — When entering BLUETOOTH to select “LED ON”. pairing. •... -
Page 52: Using Optional Equipment
To turn off the Child Lock function, Using optional touch and hold on the unit for more than 5 seconds until “CHILD LOCK OFF” equipment appears on the display. Note Press VOL – repeatedly until Child Lock function will be turned off •... -
Page 53: Setting The Bluetooth/Network Standby Mode
• • BLUETOOTH signal is off To exit the options menu, press OPTIONS. Note You cannot perform the following operations when BLUETOOTH/Wi-Fi signal is set to off: — Pairing and/or connecting with BLUETOOTH device — Using “Sony | Music Center”... -
Page 54: Updating The Software
Press / repeatedly to select your smartphone/iPhone, and “YES”, then press set [Auto Update] in the [Settings] To exit the options menu, press menu. OPTIONS. Refer to “Sony | Music Center” Help for more details. Manual update via a USB http://info.vssupport.sony.net/ device help/ Hint... -
Page 55: Additional Information Troubleshooting
Check the connection of the • • If the problem persists, consult your optional equipment, if any nearest Sony dealer. (page 19). Note that if the service personnel Turn on the connected equipment. • • changes some parts during repair, Unplug the AC power cord (mains •... - Page 56 “LOCKED” appears on the display. The ID3 version is not in Version 1 • • Consult your nearest Sony dealer • • (1.0/1.1) or Version 2 (2.2/2.3). or local authorized Sony service The character codes that can be •...
- Page 57 USB device Audio files or folders on the USB device cannot be erased. Transferring results in an error. Check if the USB device is write- • • You are using an unsupported USB • • protected. device. Check the information on The USB device was disconnected •...
- Page 58 USB device. device, only files on the first If this display pattern persists, partition can be played back. contact your nearest Sony dealer. Erroneous display. * This system supports FAT16 and FAT32, but some USB devices may not support The data stored in the USB •...
- Page 59 BLUETOOTH device If there is equipment that • • generates electromagnetic Pairing cannot be performed. radiation, such as a wireless LAN, Move the BLUETOOTH device • • other BLUETOOTH device, or a closer to the system. microwave oven nearby, move Pairing may not be possible if •...
- Page 60 LAN connection. restart the “Sony | Music Center” If you wish to use a wireless LAN application. connection, do not connect a network (LAN) cable to the system.
- Page 61 The communications speed of the Make sure the Child Lock function • • • • wireless LAN may become slower is not activated (page 52). for IEEE802.11n-compliant wireless The Gesture Control does not LAN routers/access points if the operate properly. security method is set to WEP Move your hand closer to •...
- Page 62 Press / repeatedly to select FOLDER FULL You cannot transfer onto the USB “SYSTEM”, then press device because the number of Press / repeatedly to select folders has reached its maximum. “RESET”, then press GUEST Press / repeatedly to select The system has become a Party “YES”, then press Guest as the Party Chain function...
-
Page 63: Precautions
PROTECT Notes on discs The USB device is write-protected. Before playing, wipe the disc with a • • cleaning cloth from the center outward PUSH STOP to the edge. You tried to perform an operation Do not clean discs with solvents, such •... - Page 64 • • Do not touch the cabinet if it has been without prior notice. Sony shall not be used continuously at a high volume held responsible in these situations. because the cabinet may have become On BLUETOOTH communication hot.
- Page 65 BLUETOOTH technology. Sony cannot be held liable in any way • • for damages or other loss resulting from information leaks during communication using BLUETOOTH technology.
-
Page 66: Specifications
Services offered by third parties may be power, with no more than 0.7% total changed, suspended, or terminated harmonic distortion from without prior notice. Sony does not 250 milliwatts to rated output. bear any responsibility in these sorts of situations. Satellite unit (Speaker System... - Page 67 MIC2/GUITAR: Maximum communication range: Sensitivity 1 mV, impedance Line of sight approx. 30 m 10 kilohms (When guitar mode is (98.4 feet)* turned off.) Operating frequency: Sensitivity 200 mV, impedance 2,400 - 2,483.5 MHz 1 Megaohm (When guitar mode is Maximum output power: <...
- Page 68 Supported audio formats Mass (Approx.): Assembled unit: Supported bit rate and sampling 50.5 kg (1,781 oz) frequencies: Satellite unit: MP3: 13.5 kg (476 oz) 16/22.05/24/32/44.1/48 kHz, Subwoofer unit: 16 kbps – 320 kbps (CBR/VBR) 37 kg (1,305 oz) AAC: 16/22.05/24/32/44.1/48/88.2/ Design and specifications are subject 96 kHz, 16 kbps – 320 kbps (CBR/ to change without notice.
- Page 72 ©2017 Sony Corporation Printed in Malaysia 4-728-217-12(1)