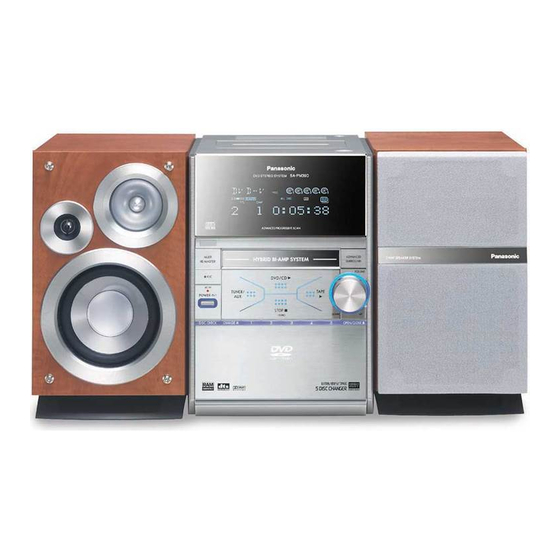
Panasonic SC-PM39D Operating Instructions Manual
Dvd stereo system
Hide thumbs
Also See for SC-PM39D:
- Operating instructions manual (40 pages) ,
- Operating instructions manual (40 pages)
Table of Contents
Advertisement
Before connecting, operating or adjusting this product,
please read these instructions completely.
Please keep this manual for future reference.
Region number
The player plays DVD-Video marked with labels containing
the region number or "ALL".
Region
For U.S.A. and Canada
For Latin America
Example:
For U.S.A. and Canada
1
1
P
PC
PL
Number
1
4
2
4
DVD Stereo System
Operating Instructions
Model No.
For U.S.A. only
The warranty can be found on page 39.
As an ENERGY STAR
Panasonic has determined that this
product meets the ENERGY STAR
guidelines for energy efficiency.
\
For Canada only: The word "Participant" is used in place of
the word "Partner".
SC-PM39D
®
Partner
,
\
®
RQT7509-1P
Advertisement
Table of Contents

Related Manuals for Panasonic SC-PM39D


Summary of Contents for Panasonic SC-PM39D
-
Page 1: Operating Instructions
For Canada only: The word “Participant” is used in place of Operating Instructions SC-PM39D Model No. As an ENERGY STAR ® Partner Panasonic has determined that this product meets the ENERGY STAR ® guidelines for energy efficiency. the word “Partner”. RQT7509-1P... - Page 2 The exclamation point within an equilateral triangle is intended to alert the user to the presence of important operating and maintenance (servicing) instructions in the RQT7509 literature accompanying the appliance. System SC-PM39D Main unit SA-PM39D Speakers SB-PM39 THE FOLLOWING APPLIES ONLY IN THE U.S.A. CAUTION:...
-
Page 3: Table Of Contents
The model number and serial number of this product can be found on either the back or the bottom of the unit. Please note them in the space provided below and keep for future reference. SC-PM39D MODEL NUMBER SERIAL NUMBER Table of contents Getting started Accessories ... -
Page 4: Important Safety Instructions
For product information or assistance with product operation: In the U.S.A., refer to “Customer Services Directory” on page 39. In Canada, contact the Panasonic Canada Inc. Customer Care Centre at 1-800-561-5505, or visit the website (www.panasonic.ca), or an authorized Servicentre closest to you. -
Page 5: Disc Information
DVD-V To play DVD-Video content, select “Play as DVD-Video” in Other Menu (A page 21). — DVD-V Panasonic DVD-R recorded and finalized or DVD-Video camera are played as DVD-Video on this unit. — Conforming to IEC62107. This unit is compatible with HDCD, but does not support Peak Extend function (A function which expands the dynamic range of high level signals). -
Page 6: Simple Setup
Simple setup STEP Speaker Main unit (SB-PM39) (SA-PM39D) Place the speakers so that the tweeter is on the inside. Caution Use the speakers only with the recommended system. Failure to do so may lead to damage to the amplifier and/or the speakers, and may result in the risk of fire. -
Page 7: Step3 Television
2. In QUICK SETUP, set “Progressive Out” to “Enable”. 3. Change “Progressive” to “480P” (A page 20, Picture Menu— Video Output Mode). • All televisions manufactured by Panasonic and that have 480P input connectors are compatible. Consult the manufacturer if you have another brand of television. •... -
Page 8: Step4 Connecting The Antennas And Ac Power Supply Cord
STEP Connect the AC power supply after all other connections are complete. Conserving power The unit consumes power (approx. 0.5 W) even when it is turned off with [ time, unplug it from the household AC outlet. You will need to reset some memory items after plugging in the unit. AM loop antenna Stand the antenna up on its base. -
Page 9: Step6 Quick Setup
STEP Turn on the television and select the appropriate video input on the television to suit the connection for the unit. Power ON. Select the option from the screen. STEP Setting the time SLEEP SETUP CLOCK/ / REW TIMER Select Set the time “CLOCK”. -
Page 10: Control Reference Guide
Control reference guide Main unit Cassette lid DVD/CD button TUNER/AUX button 22, 32) Remote control sensor MULTI RE-MASTER button ( REC (record button) DISC CHECK (disc check button) AC IN (AC supply indicator) This indicator lights when the unit is connected to the AC power supply. POWER Press to switch the unit from on to standby mode or vice versa. -
Page 11: Remote Control View
Remote control Clock/timer, Sleep timer button [CLOCK/TIMER, SLEEP] ... 9, 28 Standby/on, TV standby/on switch [f f f f f , TVf f f f f ] ... 9, 28 Angle/Page, Subwoofer button [ANGLE/PAGE, SUBWOOFER] ... 12, 15, 26 Disc select, All disc button [DISC, ALL DISC], Disc buttons [1–5] ... -
Page 12: Discs - Basic Play
Discs — Basic play Open the disc tray. • The unit turns on automatically and a tray opens. Close the disc tray. Volume adjustment VOLUME Stop DISC PAUSE Pause RQT7509 DVD/CD DISC CHECK CHANGE • If the disc contains both audio data (WMA and MP3) and JPEG, select “Audio” to play WMA/MP3, “Picture”... - Page 13 • DVD-A only. Frame-by- • forward direction only. frame ENTER • Pressing [J DISC PAUSE] (during pause) also activates forward direction. Select On-screen item select ENTER Confirm RAM DVD-A DVD-V Example: To select 12: [X10] A [1] A [2] with playback control Enter •...
-
Page 14: Discs - Convenient Functions
Discs — Convenient functions Soundtracks RAM DVD-A DVD-V VCD (Discs with multiple soundtracks) During play Press [DISPLAY] then [9, 8] to select “Audio” (soundtrack). (A page 19, Audio) Subtitle (Motion picture parts only) DVD-A (Discs with multiple subtitle languages) DVD-V During play Press [DISPLAY] to select the subtitle language. -
Page 15: Random Play
Random play (There is no on-screen display) 1-disc random: All the items on a disc in random order. All-disc random: All the items on all the discs in random order. DVD-A DVD-V WMA MP3 JPEG 1-disc random only: Selected items on a disc in random order. During stop Press [PLAY MODE] until the RANDOM screen appears. -
Page 16: Discs - Using Navigation Menus
Discs — Using navigation menus Using the tree screen to find a group While the navigation menu is displayed, press [DISPLAY]. Press [9 9 9 9 9 ] to select “Tree” and press [ENTER]. Press [8 8 8 8 8 , 9 9 9 9 9 ] to select a group and press [ENTER]. -
Page 17: Playing Highmat Discs
Tips for making WMA/MP3, CD text and JPEG discs • Discs must conform to ISO9660 level 1 or 2 (except for extended formats). • This unit is compatible with multi-session but if there are a lot of sessions it takes more time for play to start. Keep the number of sessions to a minimum to avoid this. -
Page 18: Playing Programs On Dvd-Ram
Discs — Using navigation menus Playing programs on DVD-RAM Using the play list on DVD-RAM RQT7509 Select ENTER DIRECT NAVIGATOR Shows the Select the item. program list. The selected program plays in the background. • Titles appear only if you have entered them. •... -
Page 19: Discs - Using On-Screen Menu
Discs — Using On-screen menu To get disc information or to play from a specified item Select DISPLAY ENTER Return to the previous menu Press once. Select the menu. Items shown differ depending on the type of software. Example: Program, Group, Title, Track, Chapter, Playlist, Content To start from a specific item. - Page 20 Discs — Using On-screen menu Play Menu Repeat (A page 14, Repeat play) RAM DVD-A DVD-V Except JPEG A-B Repeat RAM DVD-A DVD-V VCD Except (still picture part). Repeat a section between points A and B within an item. [ENTER] (start point) A [ENTER] (finish point) Ä...
-
Page 21: To See The Playback Position
Display Menu Subtitle Position DVD-V 0 to –60 in 2 unit steps. Subtitle Brightness DVD-V “Auto” to automatically adjust the brightness against the background, or 0 to –7. Information On ¡ ™ Off : Off, Date, Details.) JPEG 4:3 Aspect RAM DVD-A DVD-V VCD To select how to show images made for 4:3 aspect screens on a 16:9 aspect television. -
Page 22: The Radio
The radio 7 7 7 7 7 FM frequency step (main unit only) The step is factory-set to 0.2 MHz, but you can change it to receive broadcasts allocated to 0.1 MHz steps. 1. Select “FM”. 2. Press and hold [TUNER/AUX]. After a few seconds the display changes to show the current minimum frequency. -
Page 23: Cassette Tapes
Cassette tapes TAPE Press to open and Start play. insert a cassette • To play the other side of the tape, (tape facing you, see turn the tape over – make sure that the and restart play. cassette is fully inserted and close the lid by hand). -
Page 24: Recording
Recording Recording from disc(s) • Do the preparatory steps (A see above). • Insert the disc(s) you want to record (A page 12, Discs—Basic play). ALL DISC DISC Select the Press to stop disc. playback. • When recording stops, disc play stops automatically. Recording specific disc(s) or tracks. -
Page 25: Sound Field And Sound Quality
Sound field and sound quality SHIFT Advanced Surround Press [SURROUND] (main unit: [ADVANCED SURROUND]). Every time you press the button: ADV SURR 1: Natural effect ADV SURR 2: Enhanced effect SURR OFF: Cancel (factory preset) (A page 20, Audio Menu) Multi Re-master —... -
Page 26: Convenient Functions
Convenient functions SHIFT Auto-off function When disc or tape is selected as the source To save power, the unit turns off if it is left unused for 10 minutes. Press [SHIFT] + [AUTO OFF]. “A.OFF” is shown on the display. This function does not work if the source is tuner or AUX. -
Page 27: The Play/Record Timer
The play/record timer You can set the timer to come on at a certain time to wake you up (play timer) or to record a radio station or from the aux source (record timer). The play and record timers cannot be used together. •... -
Page 28: The Sleep Timer / Operating A Television
Convenient functions SHIFT The sleep timer This timer turns the unit off after a set time. While enjoying the desired source: Press [SHIFT] + [SLEEP] to select the time (minutes). Every time you press the button: SLEEP 60 SLEEP 90 SLEEP 30 To cancel the sleep timer Press [SHIFT]+[SLEEP] to select “SLEEP OFF”. -
Page 29: Discs - Changing The Player's Settings
Discs — Changing the player’s settings Select SETUP SHIFT / REW ENTER right Shows SETUP Select the menu. menu tab. • The settings remain intact even if you switch the unit to standby. • Underlined items are the factory preset. 7 7 7 7 7 “Disc”... - Page 30 Discs — Changing the player’s settings 7 7 7 7 7 “Audio” tab —To make settings to suit your digital connection and other audio settings PCM Digital Output (A page 31, Digital output) Digital Audio Output (A page 31, Digital output) Dolby Digital (A page 31, Digital output) DTS Digital Surround (A page 31, Digital output) Dynamic Range Compression...
-
Page 31: Digital Output
Digital output RAM DVD-A DVD-V VCD CD WMA MP3 Change the settings when you have connected equipment through this unit’s OPTICAL OUT terminal (A page 32, Home Theater— Enjoying more powerful sound). PCM Digital Output Select the maximum sampling frequency of PCM digital output. Check the digital input limitations of the equipment you connect. -
Page 32: Using Other Equipment
Using other equipment Before connection • Disconnect the AC power supply cord. • Turn off all equipment and read the appropriate operating instructions. • The equipment connections described are examples only. • Peripheral equipment and optional cables sold separately unless otherwise indicated. Home Theater —... -
Page 33: Optional Antenna Connections
Language code list Danish: Abkhazian: 6566 Dutch: Afar: 6565 English: Afrikaans: 6570 Esperanto: Albanian: 8381 Estonian: Ameharic: 6577 Faroese: Arabic: 6582 Fiji: Armenian: 7289 Finnish: Assamese: 6583 French: Aymara: 6588 Frisian: Azerbaijani: 6590 Galician: Bashkir: 6665 Georgian: Basque: 6985 German: Bengali;... -
Page 34: Troubleshooting Guide
Troubleshooting guide Before requesting service, make the following checks. If you are in doubt about some of the check points, or if the remedies indicated in the chart do not solve the problem, refer to the “Customer Services Directory” on page 39 if you reside in the U.S.A., or refer to “Product information” on page 4 if you reside in Canada. - Page 35 Listening to the radio • Adjust the position of the FM or AM antenna. Noise is heard. • Use an outdoor antenna. “ST” flickers or doesn’t light. Sound is distorted. • A beat sound is heard. Turn the television off or separate it from the unit. •...
-
Page 36: Maintenance
Troubleshooting guide Recording Television displays “Cannot display group xx, content xx.” “The progressive out is set to “Disable”. No on-screen display. The disc’s menu is displayed in a different language. EST. 1924 Selecting fine audio equipment such as the unit you’ve just purchased is only the start of your musical enjoyment. Now it’s time to consider how you can maximize the fun and excitement your equipment offers. -
Page 37: Glossary
Glossary Decoder A decoder restores the coded audio signals on DVDs to normal. This is called decoding. Dolby Digital This is a method of coding digital signals developed by Dolby Laboratories. Apart from stereo (2-channel) audio, these signals can also be multi-channel audio. A large amount of audio information can be recorded on one disc using this method. -
Page 38: Specifications
Specifications AMPLIFIER SECTION RMS Output Power Stereo mode (Both channel driven) 10% total harmonic distortion 1 kHz 8 kHz Total RMS Stereo mode power FTC Output Power Stereo mode (Both channel driven) 10% total harmonic distortion 60 Hz – 3 kHz 3 kHz –... -
Page 39: Limited Warranty (Only For U.s.a.)
Monday-Friday 9 am-9 pm; Saturday-Sunday 10 am-7 pm, EST. For hearing or speech impaired TTY users, TTY: 1-877-833-8855 Accessory Purchases Purchase Parts, Accessories and Instruction Books online for all Panasonic Products by visiting our Web Site at: http://www.pasc.panasonic.comm or, send your request by E-mail to: npcparts@panasonic.com... - Page 40 Panasonic Consumer Electronics Company, Division of Matsushita Electric Corporation of America One Panasonic Way Secaucus, New Jersey 07094 http://www.panasonic.com © 2004 Matsushita Electric Industrial Co., Ltd. Printed in Malaysia Panasonic Sales Company, Division of Matsushita Electric of Puerto Rico, Inc. (“PSC”) Ave.