Table of Contents
Advertisement
Available languages
Available languages
Advertisement
Table of Contents

Related Manuals for Panasonic SC-HC40


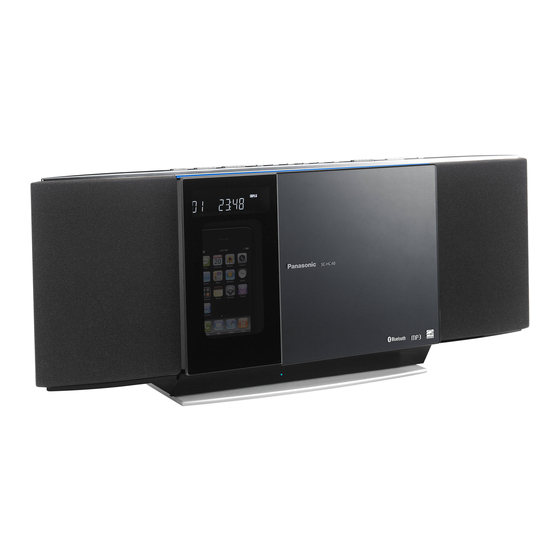
Summary of Contents for Panasonic SC-HC40
- Page 1 RQTX1146-1P...
-
Page 2: Important Safety Instructions
IMPORTANT SAFETY INSTRUCTIONS Read these operating instructions carefully before using the unit. Follow the safety instructions on the unit and the applicable safety instructions listed below. Keep these operating instructions handy for future reference. 1) Read these instructions. 2) Keep these instructions. 3) Heed all warnings. -
Page 3: Listening Caution
The Bluetooth word mark and logos are owned by the Bluetooth SIG, Inc. and any use of such marks by Panasonic Corporation is under license. Other trademarks and trade names are those of their respective owners. -
Page 4: Table Of Contents
Supplied accessories Please check and identify the supplied accessories. Use numbers indicated in parentheses when asking for replacement parts. (Product numbers are correct as of February 2010. These may be subject to change.) To order accessories, refer to “Accessory Purchases (United States and Puerto Rico)”... -
Page 5: Attaching The Unit To A Wall (Optional)
When tightening screws, make sure the screws are not loosely-tightened or overtightened. g Secure a safe surrounding area and pay attention to safety during installation. g Panasonic is not liable for incidental or consequential damages resulting from improper installation or operation. Safety precautions... - Page 6 Attaching the unit to a wall (Optional) Wall mount instructions • Before installation, turn the unit off and disconnect the AC power supply cord plug from the AC receptacle. • Tighten screws firmly to prevent slack in each step. 1. Detach the stand from the unit. ...
- Page 7 Attaching the unit to a wall (Optional) Wall mount instructions (continued) 4. Hang the unit on the wall. Hook the unit securely onto the mounting screws • Connect the FM/AM antenna before hanging the main unit on the wall (➡ page 4). •...
-
Page 8: Control Guide
Control guide Remote control • Refer to the numbers in parentheses for page reference. RADIO Main unit • Buttons such as function the same as the remote control. They can be used interchangeably. Top View POWER Front View Display Approx. 30° Standby/on switch [^], [8, POWER] (9, 11, 14) Press to switch the unit from on... -
Page 9: Disc Operations
Disc operations g Inserting a disc Press [^] to turn the unit on. Press [;, CD] to open the sliding door. With the label of the disc facing towards you, tilt the disc into the disc tray under the sliding door. ... -
Page 10: Radio Operations
Disc operations Play Mode function Press [CD q/h]. Press [PLAY MODE] repeatedly to select the following modes. Mode To play 1-TRACK one selected track on the disc. Press the numeric buttons to select the track. 1-ALBUM one selected album on the disc. (MP3) Press [e,r] to select the album. -
Page 11: Timer
Timer Setting the clock This is a 12-hour clock. Press [CLOCK/TIMER] to select “CLOCK”. Within 5 seconds, press [e,r] to set the time. (Press and hold to change the time faster.) Press [OK]. • To display the clock, press [CLOCK/TIMER]. •... -
Page 12: Compatible Ipod
External unit (continued) Enjoying audio from iPod g Inserting an iPod /iPhone ® Press [;, iPod] to open the sliding door. Insert the suitable dock adapter (not included) for the iPod /iPhone. ® Insert the side of the Dock adapter iPod /iPhone dock... -
Page 13: Bluetooth Operations
Use caution when transmitting data wirelessly. • Please be aware that Panasonic accepts no responsibility for data and/or information that may be compromised during a wireless transmission. g Range of use Use this device within an unobstructed 10 m range. -
Page 14: Memory Reset (Initialization)
While this unit is in pairing mode, access the Bluetooth menu of the Bluetooth device and execute a Bluetooth search to find this unit (SC-HC40). • If prompted for the passkey, enter “0000”. g To select communication quality Connected profiles ... -
Page 15: Troubleshooting Guide
Troubleshooting guide Before requesting service, make the following checks. If you are in doubt about some of the check points, or if the remedies indicated in the chart do not solve the problem, refer to “Customer Services Directory (United States and Puerto Rico)” on page 17. g Common problems Incorrect display or play will not start •... -
Page 16: Maintenance
Maintenance Pull out the power plug from the outlet for maintenance beforehand and then wipe it using a soft and dried cloth. • When dirt is heavy, wring the cloth moistened in water tightly to wipe the dirt, and then wipe it with a dried cloth. •... -
Page 17: Limited Warranty
“as is”. Carry-In or Mail-In Service To find a service center please visit http://www.panasonic.com/help or call 1-800-211-PANA (7262). When shipping the unit, carefully pack, include all accessories, and send it prepaid, adequately insured and preferably in the original carton. - Page 18 CA. La marca de la palabra y logotipos de Bluetooth son propiedad de Bluetooth SIG, Inc., y todo uso de tales marcas por Panasonic Corporation se realiza bajo licencia. Otras marcas registradas y nombres comerciales pertenecen a sus propietarios respectivos.
- Page 19 (1) Este dispositivo no podría causra interferencia dañina, y (2) este dispositivo debe aceptar toda interferencia recibida, incluida la interferencia que podría causar su operación no deseada. Parte responsable: Panasonic Corporation of North America One Panasonic Way Secaucus, NJ 07094 Contacto de Soporte: Panasonic Consumer Electronics Company Número de teléfono: 1-800-211-PANA (7262)
- Page 20 Accesorios incluidos Por favor verifique e identifique los accesorios incluidos. Use los números indicados entre paréntesis cuando solicite refacciones. (Los números de producto son correctos a febrero de 2010. Podrían estar sujetos a cambio sin previo aviso.) Para pedir accessorios, llame al distribuidor con el que realizó su compra. ...
-
Page 21: Precauciones De Seguridad
Cuando apriete los tornillos, asegúrese de no apretarlos insuficiente o excesivamente. g Disponga un área segura alrededor y preste atención a la seguridad durante la instalación. g Panasonic no es responsable de daños incidentales o consecuenciales que resulten de la instalación u operación inapropiadas. Precauciones de seguridad ¡ADVERTENCIA! - Page 22 Fijación de la unidad en un muro (Opcional) Instrucciones de montaje en el muro • Antes de la instalación, apague la unidad y desconecte el enchufe del cable de alimentación eléctrica del tomacorriente de CA. • Apriete con firmeza los tornillos en cada paso para evitar que estén flojos. 1.
- Page 23 Fijación de la unidad en un muro (Opcional) Instrucciones de montaje en el muro 4. Cuelgue la unidad del muro. Enganche de manera segura la unidad en los tornillos de montaje • Conecte la antena de FM/AM antes de colgar la unidad principal del muro (➡...
-
Page 24: Mando A Distancia
Guía de control Mando a distancia • Los números entre paréntesis indican las páginas de referencia. RADIO Unidad principal • Los botones marcados como funcionan igual que en el mando a distancia. Se pueden usar indistintamente. Vista superior POWER Vista frontal Pantalla Aprox. - Page 25 Operaciones de discos g Insertar un disco Presione [^] para encender la unidad. Presione [;, CD] para abrir la puerta deslizante. Con la etiqueta del disco volteada hacia usted, incline el disco sobre la bandeja de disco, bajo la puerta deslizante. ...
- Page 26 Operaciones de discos Función del modo de reproducción Presione [CD q/h]. Presione repetidamente [PLAY MODE] para seleccionar los modos siguientes. Modo Para reproducir 1-TRACK una pista seleccionada en el disco. Presione los botones numéricos para seleccionar la pista. 1-ALBUM un álbum seleccionado en el disco.
- Page 27 Temporizador Ajustes del reloj El reloj tiene formato de 12 horas. Pulse [CLOCK/TIMER] para seleccionar “CLOCK”. Antes de que transcurran 5 segundos, presione [e,r] para ajustar la hora. (Presione sin soltar para cambiar más rápidamente la hora.) Presione [OK]. •...
- Page 28 Unidad externa Disfrute el audio del iPod g Inserción del iPod /iPhone ® Presione [;, iPod] para abrir la puerta deslizante. Inserte el adaptador de puerto adecuado (no incluido) para el iPod /iPhone. ® Inserte primero la Adaptador cara del adaptador de puerto de puerto del...
- Page 29 Sea cauteloso cuando transmita datos de manera inalámbrica. • Por favor tenga en mente que Panasonic no acepta responsabilidad alguna por los datos o información que podrían estar en entredicho durante una transmisión inalámbrica.
- Page 30 Mientras la unidad está en el modo de emparejamiento, acceda al menú del dispositivo Bluetooth y ejecute una búsqueda de Bluetooth para identificar esta unidad (SC-HC40). • Si se le pide la contraseña, escriba “0000”.
- Page 31 Guía de solución de problemas Antes de pedir servicio, realice las comprobaciones siguientes. Si tiene dudas sobre algunos puntos de comprobación o si las soluciones indicadas en la tabla no resuelven el problema, consulte “Directorio de Atención al Cliente” en la contraportada. g Problemas comunes Despliegue incorrecto o no se inicia la reproducción...
- Page 32 Las especificaciones están sujetas a cambio sin previo aviso. • La distorsión armónica total se mide con el analizador de espectro digital. Panasonic Consumer Electronics Company, Division of Panasonic Corporation of North America One Panasonic Way, Secaucus, New Jersey 07094 http://www.panasonic.com...