Table of Contents
Advertisement
Quick Links
Advertisement
Table of Contents

Related Manuals for Electrolux EDV854N3SB


Summary of Contents for Electrolux EDV854N3SB
- Page 1 EDV754H3WB EDV854J3WB EDV854N3SB Tumble Dryer User Manual...
-
Page 2: Table Of Contents
CONTENTS 7. DRYING HINTS ........19 SAFETY INFORMATION ....4 7.1 Preparing the laundry .....19 1.1 Conditions Of Use ......4 7.2 Guide ..........20 1.2 Child Safety ........5 1.3 Dryer Safety........5 8. CARE AND CLEANING ......21 1.4 Installation ........6 8.1 Cleaning the lint filter ......21 1.5 Electrical connection......6... - Page 3 Products must be used, installed and operated in accordance with this manual. You may not be able to claim on the Electrolux manufacturer’s warranty in the event that your product fault is due to failure to adhere to this manual.
-
Page 4: Safety Information
SAFETY INFORMATION 1.1 Conditions Of Use This appliance is intended to be used in household and similar applications such as: • staff kitchen areas in shops, offices and other working environtment; • farm houses; • by clients in hotels, motels, and other residential type environments;... -
Page 5: Child Safety
ENGLISH 1.2 Child Safety • This washing machine is not intended for use by young children or infirm persons without supervision. • Young children should be supervised to ensure that they do not play with the appliance. • Keep children and pets away from the appliance when the door is open. -
Page 6: Installation
• The appliance must not be supplied when it is being moved. through an external switching device, • The rear surface of the appliance such as a timer, or connected to a must be put against a wall. circuit that is regularly switched on •... -
Page 7: Fire Hazards
ENGLISH 1.6 Fire Hazards Some fabrics are not suitable for tumble Foam rubber materials can produce drying. The following MUST NOT be fire by spontaneous combustion placed in your dryer due to the risk of a when heated. fire or an explosion: •... -
Page 8: Product Description
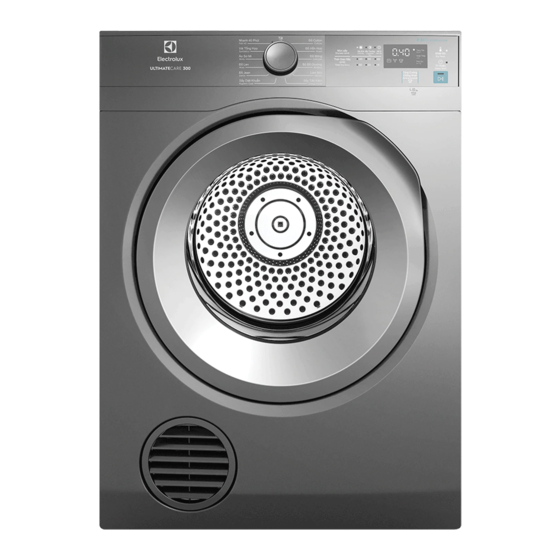
2. PRODUCT DESCRIPTION Work top Control panel Drum lifter Lint filter Appliance door Exhaust grille Front feet Air inlet duct Outlet cover Outlet cover Back feet... -
Page 9: Accessories
ENGLISH 2.1 Accessories Wall Mounting Kit: to invert the dryer on a wall upside down. Dryer Venting Kit: designed for dryers positioned directly against an outside wall. -
Page 10: Control Panel
3. CONTROL PANEL Press the touch buttons with your Program selector knob finger in the area with the symbol Dryness Level touch button or name of the option. Do not wear Time Dry touch button gloves when you operate the control Extra Anticrease touch button panel. -
Page 11: Display
ENGLISH 3.1 Display Symbol on the display Symbol description Digital Number; will show: Drying cycle time. • Delay start time. • The alarm codes. Refer to the chapter • “Troubleshooting” for their description. Delay start option on. Indicator: clean filter The Clean Filter indicator turns on and blinks at the end of each dry cycle to serve as a reminder to user to clean lint filter at the end of each load. -
Page 12: Program Table
4. PROGRAM TABLE Program Load Fabric type This position to reset program/switching off the machine. Cottons Max. Ideal for towels or similar such as cotton and linen. Mixed Half Select this cycle to dry everyday fabrics including cottons, linens and sheets. -
Page 13: Options And Settings
ENGLISH 5. OPTIONS AND SETTINGS 5.1 Option Table 1. Program with Dryness Level Option Selected 1. Select Dryness Level option, then 2. Select Dry Temp Dryness Level Dry Temp Delay start Program Boost Airing ■ ■ ■ ■ ■ ■ Cottons ■... -
Page 14: Dryness Level
Time Dry (mins.) Dry Temp Delay Program start 60 30 20 15 Boost Airing ■ ■ ■ ■ ■ ■ ■ ■ ■ ■ Cottons ■ ■ ■ ■ ■ ■ ■ ■ ■ ■ Mixed Delicates Bedding Refresh... -
Page 15: Dry Temp
ENGLISH Dry Time Option Guidelines: 5.5 Delay Start Type of Load Suggested This option makes it possible to delay fabric Times the start of the program by 30 min, 60 min or 90 min and then by every hour 5 kg to 120 mins from 2 to 20 hours. -
Page 16: Enabling/Disabling End-Of-Dry Buzzer
5.8 Enabling/Disabling End-Of- • To disable the buzzer sound, press “Dryness Level” and “Time Dry” Dry Buzzer touchpads at the same time for 3 seconds, the display will show “bOF” This setting permits you to either enable with the “BEEP, BEEP” sound. -
Page 17: Daily Use
ENGLISH 6. DAILY USE 6.1 Start a program without 6.2 Starting the program with delay start delay start 1. Prepare the laundry and load the 1. Set the correct program and appliance. For best result we options for the type of load. recommend to sort out your 2. -
Page 18: At The End Of The Program
6.5 At the end of the program 6.6 Stand-by function Changing a running program is possible To reduce energy consumption, this only by resetting it. function automatically deactivates the appliance: The appliance stops automatically. • After 5 minutes if you do not start •... -
Page 19: Drying Hints
ENGLISH 7. DRYING HINTS Your load, when dry must not Separate the lint “givers” and the exceed the rated capacity of your lint “collectors” to minimise this dryer. problem. • Clothes that give int include towels, 7.1 Preparing the laundry nappies, chenille. -
Page 20: Guide
To help you, here is a list of the average • Fibre or leather materials - always weights of some common laundry items. check the manufacturer’s instructions. • Baby clothes and night gowns Sheet 700g - 1000g - acrylic clothing or sleepwear use... -
Page 21: Care And Cleaning
ENGLISH 8. CARE AND CLEANING 8.1 Cleaning the lint filter LINT BUILD-UP IS A FIRE HAZARD A clean lint filter reduces drying times, saves energy and avoids overheating. Overheating may also damage your clothes. What happens If I forget to clean the lint filter? tripled doubled... -
Page 22: Cleaning The Control Panel
8.3 Cleaning the control panel Use a standard neutral soap detergent to clean the control panel. Use a moist cloth to clean. Dry the cleaned surfaces with a soft cloth. CAUTION! Do not use furniture cleaning agents or cleaning agents which can cause... -
Page 23: Troubleshooting
ENGLISH 9. TROUBLESHOOTING 9.1 Troubleshooting Problem Possible solution Make sure that the mains plug is connected to You cannot activate the the mains socket. appliance. Check fuse in fuse box (domestic installation). Press Start/Pause. The program does not start. Make sure that the appliance door is closed. Make sure that the installation of the filter is correct. -
Page 24: If The Drying Results Are Not Satisfactory
9.2 If the drying results are not satisfactory • The set program was incorrect. • The filter is clogged. • There was too much laundry in the appliance. • The drum is dirty. • Room temperature is too low or too high ( optimal room temperature 19°C... -
Page 25: Technical Data
ENGLISH 10. TECHNICAL DATA Dimensions (Height / Width / Depth) 795 mm x 600 mm x 560 mm Power Supply (Voltage / Frequency) 230 - 240 V / 50 Hz Heater Power (Watt) 2100 W Drum volume 102 litres Maximum Capacity Max. -
Page 26: Installation
There are 2 venting options • Front • Rear - using a included kit Important: Use only kits approved by Electrolux with your dryer. The exhaust duct must not exceed 2... -
Page 27: Machine Leveling
ENGLISH metres in length at 100mm diameter. appliances burning other fuels, including open fires, when operating the tumble If connecting the dryer to a common dryer. This is not applicable where a ducting system, safety advice should be venting hose is directed to an open requested from the manufacturer. -
Page 28: Electrical Connection
11.4 Electrical Connection This machine is designed to operate on a 230-240 V, single-phase, 50 Hz supply. “An incorrect power supply may void your warranty.” Check that your domestic electrical installation can take the maximum load required, also taking into account any other appliances in use. -
Page 29: Environmental Concerns
ENGLISH 12. ENVIRONMENTAL CONCERNS Recycle materials with the symbol Put the packaging in relevant containers to recycle it. Help protect the environ- ment and human health by recycling waste of electrical and electronic appli- ances. Do not dispose of appliances marked with the symbol with the household waste. - Page 32 www.electrolux.com...