
Related Manuals for Western Digital HGST 4U60


Summary of Contents for Western Digital HGST 4U60
- Page 1 Installation Guide 4U60 G2 Storage Enclosure Rev. 1.9 June 2017 1ET0398 Long Live Data | www.hgst.com...
- Page 2 The following paragraph does not apply to the United Kingdom or any country where such provisions are inconsistent with local law: HGST a Western Digital company PROVIDES THIS PUBLICATION "AS IS" WITHOUT WARRANTY OF ANY KIND, EITHER EXPRESS OR IMPLIED, INCLUDING, BUT NOT LIMITED TO, THE IMPLIED WARRANTIES OF MERCHANTABILITY OR FITNESS FOR A PARTICULAR PURPOSE.
-
Page 3: Table Of Contents
Contents Installation Guide Contents Revision History....................6 Chapter 1 Document Summary..............7 1.1 Product Overview................7 Specification Summary..............8 Chapter 2 For More Information..............10 2.1 Points of Contact................10 Chapter 3 Regulatory Compliance Notices..........11 3.1 FCC Verification Statement (USA)...........11 3.2 ICES-003 (Canada)................11 3.3 Europe (CE Declaration of Conformity)..........11 VCCI (Japan)...................11 3.5 BSMI (Taiwan)..................12 Chapter 4 Disclaimers................13... - Page 4 Contents Installation Guide 5.5 Power Cords..................16 Rackmountable Systems..............16 5.7 Safety and Service................17 Chapter 6 Pre-Installation Site Requirements........18 6.1 Required Equipment for Installation..........18 Servicing Space Requirement............18 6.3 Delivery Route Inspection..............18 6.3.1 Walking Path Inspection...............19 Airflow Consideration...............19 Chapter 7 Enclosure Unpacking.............20 Packaging Inspection...............20 7.1.1 Damaged Packaging..............20 Unpacking the Enclosure Pallet............21...
- Page 5 Contents Installation Guide 9.2 Changing Network Configurations via SES........38 Chapter 10 Firmware Upgrade..............40 10.1 Linux Upgrade Preparation............40 10.1.1 Linux Upgrade to New Firmware..........40 10.2 Windows Upgrade Preparation............41 10.2.1 Windows Upgrade to New Firmware..........42 10.3 Enclosure Management Interface and Confirmation of Code Load....................42 10.3.1 Connecting to the Enclosure Management Interface....42...
-
Page 6: Revision History
Revision History Installation Guide Revision History Date Revision Comment March 2017 Revision 1.0 Initial Release March 2017 Revision 1.1 1. Removed cabling information from the Connecting to the Network on page 37 chapter. 2. Removed drive information from the Connecting to the Network on page 37 chapter. -
Page 7: Chapter 1 Document Summary
Document Summary Installation Guide Product Overview Chapter 1 Document Summary The Installation Guide for the 4U60 G2 Storage Enclosure provides detailed information for installation of the enclosure into a rack. The Pre-Installation Site Requirements chapter provides preliminary information that is necessary to consider before receiving the enclosure. The System Unpacking and Installation Chapters provide the procedures needed to receive and install the Hardware at the site. -
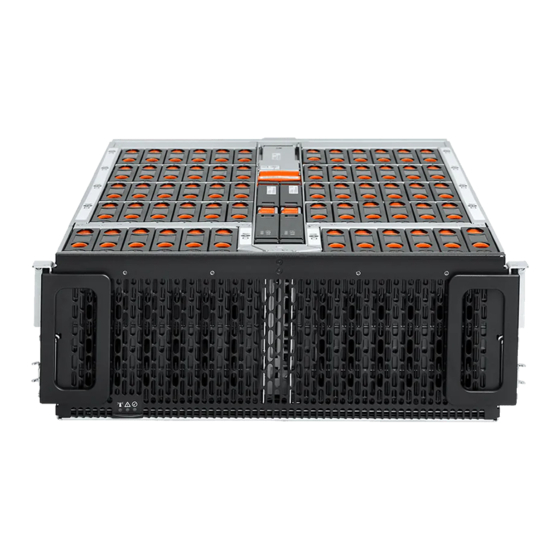
Page 8: Specification Summary
Document Summary Installation Guide Specification Summary The following diagram maps out the drive slots, locations of PSUs, and ESMs. The diagram also identifies the direction of airflow by labeling the cold and hot aisles. Figure 2: 4U60 G2 Storage Enclosure Block Diagram 1.2 Specification Summary The following table is a summary of relevant specs and represents a fully configured enclosure: Table 1: Specification Summary... - Page 9 Document Summary Installation Guide Specification Summary Condition (Fully Non-operating Operating Configured) Altitude -300m to 12,000m -300m to 3,048m -984 ft. to 39,370 ft. 984 ft. to 10,000 ft. Power Typical: 1.0 kVA Requirements Max: 1.8 kVA Weight Minimum Enclosure Weight (without drives): 99.6 lbs./45 kg Maximum Enclosure Weight (full configuration—HDD): 207.6 lbs./93.71 kg Enclosure Dimensions (Enclosure):...
-
Page 10: Chapter 2 For More Information
For More Information Installation Guide Points of Contact Chapter 2 For More Information This chapter provides points of contact for the 4U60 G2 Storage Enclosure. 2.1 Points of Contact For further assistance with the 4U60 G2 Storage Enclosure, contact HGST support. Please be prepared to provide the following information: serial number (S/N), product name, model number, and a brief description of the issue. -
Page 11: Chapter 3 Regulatory Compliance Notices
Regulatory Compliance Notices Installation Guide FCC Verification Statement (USA) Chapter 3 Regulatory Compliance Notices The following chapter describes the regulatory compliance notices for the 4U60 G2 Storage Enclosure. 3.1 FCC Verification Statement (USA) This device complies with Part 15 of the FCC Rules. Operation is subject to the following two conditions: •... -
Page 12: Bsmi (Taiwan)
Regulatory Compliance Notices Installation Guide BSMI (Taiwan) This is a Class A product based on the standard of the Voluntary Control Council for Interference (VCCI) from Information Technology Equipment. If this is used near a radio or television receiver in a domestic environment, it may cause radio interference. -
Page 13: Chapter 4 Disclaimers
Disclaimers Installation Guide Regulatory Statement Chapter 4 Disclaimers The following chapter describes the Regulatory Statement of Compliance, Safety Compliance, and Electromagnetic Compatibility Agency Requirements for the 4U60 G2 Storage Enclosure. 4.1 Regulatory Statement Product Name: 4U60 G2 Storage Enclosure Regulatory Model: G460-J-12 Electromagnetic Compatibility Emissions: Class A This product has been tested and evaluated as Information Technology Equipment (ITE) at accredited third-party laboratories for all safety, emissions and immunity testing required for the countries and regions... -
Page 14: Country Certifications
Disclaimers Installation Guide Regulatory Statement • EN 55032 • CISPR 32 • CE – EMC Directive 2014/30/EU • VCCI V-3 • BSMI CNS14338 • KN32 • AS/NZS CISPR 32 • TR CU 020/2011 Immunity • EN 61000-3-2 Harmonic Current Emissions •... -
Page 15: Chapter 5 Safety
Safety Installation Guide Optimizing Location Chapter 5 Safety The following chapter provides safety and regulatory information for the 4U60 G2 Storage Enclosure. 5.1 Optimizing Location Failure to recognize the importance of optimally locating your product and failure to protect against electrostatic discharge (ESD) when handling your product can result in lowered system performance or system failure. -
Page 16: Power Connections
Safety Installation Guide Power Connections Electrostatic discharge (ESD) is a discharge of stored static electricity that can damage equipment and impair electrical circuitry. It occurs when electronic components are improperly handled and can result in complete or intermittent failures. Wear an ESD wrist strap for installation, service and maintenance to prevent damage to components in the product. -
Page 17: Safety And Service
Safety Installation Guide Safety and Service Reliable earthing of rack-mounted equipment should be maintained. If installed in a closed or multi-unit rack assembly, the operating ambient temperature of the rack environment may be greater than room ambient. Therefore, consideration should be given to installing the equipment in an environment compatible with the maximum ambient temperature (Tma) specified by the manufacturer. -
Page 18: Chapter 6 Pre-Installation Site Requirements
Pre-Installation Site Requirements Installation Guide Required Equipment for Installation Chapter 6 Pre-Installation Site Requirements This chapter describes the tasks that are necessary to complete before the installation of the product in order to make the installation process as smooth and safe as possible. 6.1 Required Equipment for Installation Before you begin the installation, ensure that you have the following items: •... -
Page 19: Walking Path Inspection
Pre-Installation Site Requirements Installation Guide Airflow Consideration 6.3.1 Walking Path Inspection Walking paths must be clear of obstructions and wide enough to allow passage of the enclosure to the site where it will be unpacked. The following is a list of obstructions to consider when conducting a walking path inspection: •... -
Page 20: Chapter 7 Enclosure Unpacking
Enclosure Unpacking Installation Guide Packaging Inspection Chapter 7 Enclosure Unpacking This chapter provides the steps that are necessary to properly unpack the 4U60 G2 Storage Enclosure. The unpacking process also includes inspection recommendations to ensure that the enclosure has not been damaged or tampered with. -
Page 21: Unpacking The Enclosure Pallet
Enclosure Unpacking Installation Guide Unpacking the Enclosure Pallet 7.2 Unpacking the Enclosure Pallet The 4U60 G2 Storage Enclosure ships on one small pallet. The pallet contains the Rail Kit (1 box), Cable Management Assembly (1 box), Cables, Chassis (containing the ESM(s), PSUs, and cables) (1 box), and the drives (3 boxes). - Page 22 Enclosure Unpacking Installation Guide Unpacking the Enclosure Pallet 1. Remove the overwrap and box cap to reveal the boxes containing the accessories, chassis, and drive boxes. Figure 5: Removing the Box Cap 2. Remove the Accessory Tray and temporarily store it away from the unpacking area. 3.
- Page 23 Enclosure Unpacking Installation Guide Unpacking the Enclosure Pallet a) Open the chassis box and remove padding surrounding the chassis. Figure 6: Inspecting the Chassis b) Inspect the chassis for damage or tampering. c) Store the chassis box in an ESD safe location until it is ready to be installed. 4.
-
Page 24: Chapter 8 Installing The 4U60 G2 Storage Enclosure
Installing the 4U60 G2 Storage Enclosure Installation Guide Recommended Torque of Machined Fasteners Chapter 8 Installing the 4U60 G2 Storage Enclosure The following chapter instructs you on how to install the 4U60 G2 Storage Enclosure. 8.1 Recommended Torque of Machined Fasteners The following list is the recommended torque of the machined fasteners being used during replacement or installation of 4U60 G2 Storage Enclosure components. - Page 25 Installing the 4U60 G2 Storage Enclosure Installation Guide Installing the Rail Kit b) Pull the inner rail out of the rack mount rail. Figure 7: Removing Inner Rails c) Repeat the previous steps to remove the remaining inner rail from the rack mount rail. 4.
-
Page 26: Installing The Cable Management Assembly
Installing the 4U60 G2 Storage Enclosure Installation Guide Installing the Cable Management Assembly c) From the front of the rack, latch the front rack mount clip. Figure 9: Rack Mount Rail—Front d) Repeat the previous step to connect the other front rack mount clip. Note: Ensure that the front and rear of the rails are attached to the same U location. - Page 27 Installing the 4U60 G2 Storage Enclosure Installation Guide Installing the Cable Management Assembly a) From the inside of the rack, slide the bracket over the 1U location below the rail kit. Figure 10: Installing the CMA Arm b) Tighten the captive screw while pressing the CMA mounting bracket to the top of the U location. Figure 11: Tightening the Captive Screw c) Install the M4 screw in the lower hole in bracket.
-
Page 28: Installing The Chassis
Installing the 4U60 G2 Storage Enclosure Installation Guide Installing the Chassis 2. Connect CMA arm to the ESM handle. a) Connect the network cable to the ESM. b) To connect the arm to the enclosure, press down on the thumb release and push arm clip onto the ESM handle. -
Page 29: Installing Hdds Into The Chassis
Installing the 4U60 G2 Storage Enclosure Installation Guide Installing HDDs into the Chassis a) From the front of the enclosure, push on the enclosure rack ears until the enclosure is full seated into the rack. Figure 14: Chassis—Push In b) Turn the thumbscrews clockwise until the enclosure is secure. Figure 15: Chassis—Thumbscrews Clockwise 8.5 Installing HDDs into the Chassis Required Tools... - Page 30 Installing the 4U60 G2 Storage Enclosure Installation Guide Installing HDDs into the Chassis 1. Slide the enclosure out of the rack. a) From the front of the enclosure, turn the thumbscrews counterclockwise. Figure 16: Chassis—Thumbscrews Counterclockwise b) To slide the enclosure out of the rack, pull on the enclosure rack ears until the drive bay is fully accessible. Figure 17: Chassis—Pull Out 2.
- Page 31 Installing the 4U60 G2 Storage Enclosure Installation Guide Installing HDDs into the Chassis f) Press on the drive carrier lever until there is an audible click. This means the drive is securely locked into place. Figure 18: HDD—Install g) Install the remaining drives in the last row. h) Continue to populate the drive bay rows, one at a time, until the enclosure reaches the expected capacity.
- Page 32 Installing the 4U60 G2 Storage Enclosure Installation Guide Installing HDDs into the Chassis j) From the front of the enclosure, turn the thumbscrews clockwise until the cover is secure. Figure 20: Drive Bay Cover—Thumbscrews Clockwise 3. Seat and secure the enclosure into the rack. a) From the front of the enclosure, push on the enclosure rack ears until the enclosure is full seated into the rack.
-
Page 33: Installing The Network Cables
Installing the 4U60 G2 Storage Enclosure Installation Guide Installing the Network Cables b) Turn the thumbscrews clockwise until the enclosure is secure. Figure 22: Chassis—Thumbscrews Clockwise 8.6 Installing the Network Cables Required Tools Warnings Personnel None Disconnect cabling before servicing. To install the Network Cables, do the following: 1. -
Page 34: Installing The Minisas Hd Cables
Installing the 4U60 G2 Storage Enclosure Installation Guide Installing the MiniSAS HD Cables 8.7 Installing the MiniSAS HD Cables Required Tools Warnings Personnel None Disconnect cabling before servicing. To install the MiniSAS HD Cables, do the following: 1. Run the cable through the CMA arm. 2. -
Page 35: Installing The Power Cords
Installing the 4U60 G2 Storage Enclosure Installation Guide Installing the Power Cords 6. Attach the clip that secures the power cord to the PSU. Figure 25: Clip Closed 7. Connect the clip that secures the power cord to the PSU. 8.8 Installing the Power Cords Required Tools Warnings... -
Page 36: Cabling Storage Enclosure
Installing the 4U60 G2 Storage Enclosure Installation Guide Cabling Storage Enclosure d) Repeat the previous steps to connect the remaining CMA arm to the ESM handle. 4. Connect the power cord to the PSU power port. 5. Attach the clip that secures the power cord to the PSU. Figure 27: Clip Closed 6. -
Page 37: Chapter 9 Connecting To The Network
Connecting to the Network Installation Guide Reading Network Configurations via SES Chapter 9 Connecting to the Network This section provides information and instruction on how to properly connect the enclosure to the network. 9.1 Reading Network Configurations via SES To read the network configurations, do the following: 1. -
Page 38: Network Flags Definition
Connecting to the Network Installation Guide Changing Network Configurations via SES 7. Verify a similar result appears. 60 01 00 14 00 00 00 00 00 ff ff ff f0 c0 a8 00 0a ff ff ff 00 c0 a8 00 01 Table 9: ESM B Default Value Hex Name... - Page 39 Connecting to the Network Installation Guide Changing Network Configurations via SES 5. In the terminal, for ESM B, type sg_wr_mode <dev> --dbd --page=20,02 --contents=e0,02,00,14,0,0,0,0,<flags 4 bytes>,<IP 4 bytes>,<Netmask 4 bytes>,<Gateway 4 bytes>. 6. Press Enter. 7. Verify the values returned look similar to this example: sg_wr_mode /dev/sgx --dbd --page=20,02 --contents=e0,02,00,14,00,00,00,00,ff,ff,ff,fe,c0,a8,00,0b,ff,ff,ff,00,c0,a8,00,01.
-
Page 40: Chapter 10 Firmware Upgrade
Firmware Upgrade Installation Guide 10.1 Linux Upgrade Preparation Chapter 10 Firmware Upgrade The following chapter displays the information and steps required for the online firmware upgrade. There are separate sections for Windows and Linux based server systems. 10.1 Linux Upgrade Preparation To prepare the firmware package for download, do the following: 1. -
Page 41: Windows Upgrade Preparation
Firmware Upgrade Installation Guide 10.2 Windows Upgrade Preparation The code is activated. Note: An ESM fault LED will illuminate after upgrading the first ESM. This is expected behavior and is due to the FW mismatch between ESMs. Once both ESMs have been upgraded the fault LEDs should turn off. -
Page 42: Windows Upgrade To New Firmware
Firmware Upgrade Installation Guide 10.3 Enclosure Management Interface and Confirmation of Code Load 10.2.1 Windows Upgrade to New Firmware To download the new firmware package, do the following: 1. Locate the SCSIX: X.X.X in the resulting code for the SES device handle. 2. -
Page 43: Accessing The Command Line Interface
Firmware Upgrade Installation Guide 10.3 Enclosure Management Interface and Confirmation of Code Load Note: If there are any issues accessing the enclosure through the default IP address, the IP address of the enclosure may be changed through in-band (SAS) interface. To change the IP address through in-band (SAS) interface, see: Reading Network Configurations via SES on page 37. - Page 44 Firmware Upgrade Installation Guide 10.3 Enclosure Management Interface and Confirmation of Code Load Command Details work on the primary expander but only some commands are available on the secondary expanders. For example, “show fw”, “sec1 show fw” and “sec2 show fw”...
-
Page 45: Verifying The Firmware Version
Firmware Upgrade Installation Guide 10.3 Enclosure Management Interface and Confirmation of Code Load 10.3.4 Verifying the Firmware Version To verify the code load version, do the following: 1. From the laptop or PC that is connected to the enclosure, open a command line interface (CLI). 2. -
Page 46: Chapter 11 System Upgrades
System Upgrades Installation Guide 11.1 Daisy Chaining Enclosures Chapter 11 System Upgrades The 4U60 G2 Storage Enclosure comes with a number of system upgrades that add increased capacity and functionality to the system. This section describes these upgrades and any information that must be understood by the user to integrate them into their system. - Page 47 System Upgrades Installation Guide 11.1 Daisy Chaining Enclosures Source Device Destination Device Cable Type ESM2B.H2 ESM1B.H4 ESM3A.H1 ESM2A.H3 ESM3A.H2 ESM2A.H4 ESM3B.H1 ESM2B.H3 ESM3B.H2 ESM2B.H4 ESM4A.H1 ESM3A.H3 ESM4A.H2 ESM3A.H4 ESM4B.H1 ESM3B.H3 ESM4B.H2 ESM3B.H4 ESM4A.H4 HST2.P3 ESM4B.H4 HST1.P3 Table 13: Four Storage Enclosures—Two Hosts with Two Customer HBA Connection Source Device Destination Device Cable Type...
-
Page 48: Daisy Chain Cabling
System Upgrades Installation Guide 11.1 Daisy Chaining Enclosures Source Device Destination Device Cable Type ESM4B.H4 HST1.P4 Note: For more information on this configuration, see: Figure 29: Daisy Chaining—Redundant Servers on page 49. 5. From a computer, connect to an sg_utils enabled server. 6. - Page 49 System Upgrades Installation Guide 11.1 Daisy Chaining Enclosures This diagram displays the each of the ports used, per component, to cable the system: Figure 28: Daisy Chaining—Single Server Figure 29: Daisy Chaining—Redundant Servers...
-
Page 50: Cabling For Two Storage Enclosures
System Upgrades Installation Guide 11.1 Daisy Chaining Enclosures 11.1.2.2 Cabling for Two Storage Enclosures This section provides information on the connections necessary for daisy chaining the 4U60 G2 Storage Enclosure to a host server. Follow the information to connect to a host server. Table 15: Two Storage Enclosures—One Host with One Customer HBA Connection Source Device Destination Device... - Page 51 System Upgrades Installation Guide 11.1 Daisy Chaining Enclosures Source Device Destination Device Cable Type ESM1B.H4 ESM2B.H2 Table 16: Two Storage Enclosures—One Host with Two Customer HBA Connection Source Device Destination Device Cable Type HST1.P1 ESM1A.H1 HST1.P2 ESM1B.H1 HST1.P3 ESM1A.H2 HST1.P4 ESM1B.H2 MiniSAS HD Cable ESM1A.H3...
-
Page 52: Cabling For Three Storage Enclosures
System Upgrades Installation Guide 11.1 Daisy Chaining Enclosures Source Device Destination Device Cable Type ESM1B.H2 HST2.P2 ESM2A.H1 ESM1A.H3 ESM2A.H2 ESM1A.H4 ESM2B.H1 ESM1B.H3 ESM2B.H2 ESM1B.H4 ESM2A.H3 HST2.P3 ESM2A.H4 HST2.P4 ESM2B.H3 HST1.P3 ESM2B.H4 HST1.P4 Note: For more information on this configuration, see: Figure 29: Daisy Chaining—Redundant Servers on page 49. - Page 53 System Upgrades Installation Guide 11.1 Daisy Chaining Enclosures Source Device Destination Device Cable Type ESM1B.H3 ESM2B.H1 ESM1B.H4 ESM2B.H2 ESM2A.H3 ESM3A.H1 ESM2A.H4 ESM3A.H2 ESM2B.H3 ESM3B.H1 ESM2B.H4 ESM3B.H2 Note: For more information on this configuration, see: Figure 28: Daisy Chaining—Single Server page 49. This section provides information on the connections necessary for daisy chaining to the 4U60 G2 Storage Enclosure to a host server.
-
Page 54: Cabling For Four Storage Enclosures
System Upgrades Installation Guide 11.1 Daisy Chaining Enclosures Source Device Destination Device Cable Type ESM2A.H1 ESM1A.H3 ESM2A.H2 ESM1A.H4 ESM2B.H1 ESM1B.H3 ESM2B.H2 ESM1B.H4 ESM3A.H1 ESM2A.H3 ESM3A.H2 ESM2A.H4 ESM3B.H1 ESM2B.H3 ESM3B.H2 ESM2B.H4 ESM3A.H3 HST2.P3 ESM3A.H4 HST2.P4 ESM3B.H3 HST1.P3 ESM3B.H4 HST1.P4 Note: For more information on this configuration, see: Figure 29: Daisy Chaining—Redundant Servers on page 49. - Page 55 System Upgrades Installation Guide 11.1 Daisy Chaining Enclosures Source Device Destination Device Cable Type HST1.P2 ESM1B.H1 HST1.P3 ESM1A.H2 HST1.P4 ESM1B.H2 ESM1A.H3 ESM2A.H1 ESM1A.H4 ESM2A.H2 ESM1B.H3 ESM2B.H1 ESM1B.H4 ESM2B.H2 ESM2A.H3 ESM3A.H1 ESM2A.H4 ESM3A.H2 ESM2B.H3 ESM3B.H1 ESM2B.H4 ESM3B.H2 ESM3A.H3 ESM4A.H1 ESM3A.H4 ESM4A.H2 ESM3B.H3 ESM4B.H1 ESM3B.H4...
- Page 56 System Upgrades Installation Guide 11.1 Daisy Chaining Enclosures Source Device Destination Device Cable Type ESM4A.H1 ESM3A.H3 ESM4A.H2 ESM3A.H4 ESM4B.H1 ESM3B.H3 ESM4B.H2 ESM3B.H4 ESM4A.H4 HST2.P3 ESM4B.H4 HST1.P3 Table 26: Four Storage Enclosures—Two Hosts with Two Customer HBA Connection Source Device Destination Device Cable Type HST1.P1 ESM1A.H1...
-
Page 57: Cabling For Four Non-Redundant Storage Enclosures
System Upgrades Installation Guide 11.1 Daisy Chaining Enclosures Source Device Destination Device Cable Type ESM4B.H4 HST1.P4 Table 27: Four Storage Enclosures—Two Hosts with Two Customer HBA Connection (decreased latency from host port 1 on each server) Source Device Destination Device Cable Type HST1.P1 ESM1A.H1... -
Page 58: Cabling For Four Sata Storage Enclosures
System Upgrades Installation Guide 11.2 Drive Kits Note: For more information on this configuration, see: Figure 29: Daisy Chaining—Redundant Servers on page 49. 11.1.2.6 Cabling for Four SATA Storage Enclosures This section provides information on the connections necessary for daisy chaining the 4U60 G2 Storage Enclosure containing SATA drives to a host server. -
Page 59: Installing Drive Kits
System Upgrades Installation Guide 11.2 Drive Kits Condition Specification • Ultrastar He12 12TB HDD SAS 512e (SE, ISE, and TCG) • Ultrastar He12 12TB HDD SAS 4Kn (SE, ISE, and TCG) Hot Swappable Quantity (per enclosure) Minimum: 24 Maximum: Up to 60 Weight 1.4 lbs. - Page 60 System Upgrades Installation Guide 11.2 Drive Kits a) From the front of the enclosure, turn the thumbscrews counterclockwise. Figure 30: Chassis—Thumbscrews Counterclockwise b) To slide the enclosure out of the rack, pull on the enclosure rack ears until the drive bay is fully accessible. Figure 31: Chassis—Pull Out 6.
- Page 61 System Upgrades Installation Guide 11.2 Drive Kits a) From the front of the enclosure cover, turn the thumbscrews counterclockwise. Figure 32: Drive Bay Cover—Thumbscrews Counterclockwise b) Slide the drive bay cover towards the front of the enclosure and up. Figure 33: Drive Bay Cover—Remove c) Unpack the first HDD from the drive box and inspect it for damage or tampering.
- Page 62 System Upgrades Installation Guide 11.2 Drive Kits g) Press on the drive carrier lever until there is an audible click. This means the drive is securely locked into place. h) Install the remaining drives in the last row. i) Continue to populate the drive bay rows, one at a time, until the enclosure reaches the expected capacity. Attention: If the enclosure will not be fully populated, it is required that the row following the last drive populated row be filled with drive blanks.
- Page 63 System Upgrades Installation Guide 11.2 Drive Kits a) From the front of the enclosure, push on the enclosure rack ears until the enclosure is full seated into the rack. Figure 36: Chassis—Push In b) Turn the thumbscrews clockwise until the enclosure is secure. Figure 37: Chassis—Thumbscrews Clockwise 8.
- Page 64 Index Installation Guide Index electrostatic enclosure access enclosure management accessing the CLI enclosures agency airflow fasteners BSMI firmware for more information four 57–58 cable cabling 57–58 Canada caution changing network configurations chassis CLI commands ICES-003 compatibility Inspection 18–20 compliance install confirming code load installing connecting to the enclosure management interface...
- Page 65 Index Installation Guide SATA service network Site Requirements network cables Space network connection specification network flags definition statement non-redundant summary notice system notices System optimizing Taiwan overview three torque Packaging points of contact power Unpacking power cords unpacking instructions Pre-Installation unpacking the enclosure preparation 40–41...