Table of Contents
Advertisement
Quick Links
Advertisement
Table of Contents

Related Manuals for LG HB806TM


Summary of Contents for LG HB806TM
- Page 1 SIMPLE MANUAL 3D Blu-ray™ Home Theater Please read this manual carefully before operating your set and retain it for future reference. HB806TM (HB806TM, SH86TM-S/ C, SH85TM-W) P/NO: MFL67164748 HB806TM-F0_BAUSLLK_SIM_ENG_4748.indd 1 2011-04-11 10:53:43...
-
Page 2: Safety Information
Any of these conditions could result in electric WARNING: TO PREVENT FIRE OR ELECTRIC SHOCK shock or fire. Periodically examine the cord of your HAZARD, DO NOT EXPOSE THIS PRODUCT TO RAIN appliance, and if its appearance indicates damage OR MOISTURE. or deterioration, unplug it, discontinue use of the WARNING: Do not install this equipment in a appliance, and have the cord replaced with an confined space such as a book case or similar unit. exact replacement part by an authorized service CAUTION: Do not block any ventilation openings. centre. Protect the power cord from physical or Install in accordance with the manufacturer’s mechanical abuse, such as being twisted, kinked, instructions. pinched, closed in a door, or walked upon. Pay Slots and openings in the cabinet are provided for particular attention to plugs, wall outlets, and ventilation and to ensure reliable operation of the the point where the cord exits the appliance. To product and to protect it from over heating. The disconnect power from the mains, pull out the openings shall be never be blocked by placing mains cord plug. When installing the product, the product on a bed, sofa, rug or other similar ensure that the plug is easily accessible. surface. This product shall not be placed in a built- in installation such as a bookcase or rack unless proper ventilation is provided or the manufacturer’s instruction has been adhered to. HB806TM-F0_BAUSLLK_SIM_ENG_4748.indd 2 2011-04-11 10:53:43... - Page 3 For example, when the player plays the disc CAUTION: The apparatus shall not be exposed to recorded in the NTSC colour system, the image is water (dripping or splashing) and no objects filled output as an NTSC signal. with liquids, such as vases, shall be placed on the apparatus. Only the multi system colour TV can receive all signals output from the player. y If you have a PAL colour system TV, you will see y The appliance is not intended for use by young just distorted images when using discs or video children or infirm persons without supervision. contents recorded in NTSC. y Young Children should be supervised to y The multi system colour TV changes the colour ensure that they do not play with appliance. system automatically according to input signals. y If the appliance is supplied from a cord In case that the colour system is not changed extension set or an electrical portable outlet automatically, turn it off and then on to see device, the cord extension set on electrical normal images on screen. portable outlet device must be positioned so y Even if the disc recorded in NTSC colour system that it is not subject to splashing or ingress of are well displayed on your TV, these may not be moisture. recorded correctly on your recorder. HB806TM-F0_BAUSLLK_SIM_ENG_4748.indd 3 2011-04-11 10:53:43...
-
Page 4: Supplied Accesorries
From time to time, performance improvements and/or additional features or services may be made available to units that are connected to a broadband home network. If there is new software available and the unit is connected to a broadband home network, the player will inform you about the update as follows. Remote control (1) Battery (1) Option 1: 1. The update menu will appear on the screen when you turn on the player. 2. Use A/D to select a desired option and then press ENTER (b). FM antenna (1) Owner’s Manual & PC Software CD [OK] Starts the software update. [Cancel] Exits the update menu and displays it next booting. [Hide] Exits the update menu and it does not appear until next software is uploaded in the update server. Option 2: If the software update is available from the update server, the “Software Update” icon appears in the Home menu. Press blue (B) coloured button to start the update procedure. HB806TM-F0_BAUSLLK_SIM_ENG_4748.indd 4 2011-04-11 10:53:44... -
Page 5: Table Of Contents
Positioning the system – Open source software notice Speaker Connection – Attaching the speakers to the player Appendix Trademarks and Licenses Specifications To view the Owner's Manual on the CD-ROM Load the supplied CD-ROM into the CD-ROM drive on your PC. After a while, the web page will open automatically. (Windows users only) If the web page does not appear automatically, browse the CD-ROM drive and double-click the "index. html" file. To view the Owner's Manual on the CD-ROM, Adobe Acrobat Reader must be installed on your PC. The "Acrobat Reader" folder on the CD-ROM contains the installation program for Acrobat Reader. HB806TM-F0_BAUSLLK_SIM_ENG_4748.indd 5 2011-04-11 10:53:44... -
Page 6: Introduction
(8 cm, 12 cm) y ISO 9660+JOLIET, UDF and UDF Bridge format DVD-RW (VR) VR mode and finalized only (8 cm, 12 cm) Audio CD Audio CD (8 cm, 12 cm) y CD-R/RW discs that contain Movie, Music or Photo files. CD-R/RW (8 cm, 12 cm) y ISO 9660+JOLIET, UDF and UDF Bridge format Indicates special notes and operating features. Note – > Indicates cautions for preventing possible Caution – damages from abuse. HB806TM-F0_BAUSLLK_SIM_ENG_4748.indd 6 2011-04-11 10:53:46... -
Page 7: File Requirement
Location Extension Disc, “mp3”, “.wma”, within 32 - 48 kHz within 32 - 192 Some wav files are USB, “.wav”, “.m4a” (WMA), within 16 - 48 kbps (WMA), within not supported on this DLNA (DRM free) kHz (MP3) 32 - 320 kbps (MP3) player. Photo files File File Recommanded Note Location Extension Size Disc, “.jpg”, “.jpeg”, Less than 4,000 x 3,000 x 24 bit/pixel Progressive and lossless USB, “.png”, Less than 3,000 x 3,000 x 32 bit/pixel compression photo image files DLNA are not supported. HB806TM-F0_BAUSLLK_SIM_ENG_4748.indd 7 2011-04-11 10:53:46... -
Page 8: Remote Control
• • • • • • d • • • • • BACK (x): Exits the menu or TV Control Buttons resumes playback. The resume play function may not work Battery Installation depending on the BD-ROM disc. TITLE/POPUP: Displays the DVD title menu or BD-ROM’s pop-up menu, if available. Z (STOP): Stops playback. z (PLAY): Starts playback. M PAUSE/STEP: Pauses playback Remove the battery cover on the c/v (SCAN): Searches rear of the Remote Control, and backward or forward. insert a (size AAA) battery with 4 C/V (SKIP): Goes to the and 5 matched correctly. next or previous chapter / track / file. HB806TM-F0_BAUSLLK_SIM_ENG_4748.indd 8 2011-04-11 10:53:46... -
Page 9: Front Panel
Getting Started Front panel c PORT.IN a 1/' (POWER) Button USB Port b R (OPEN/CLOSE) d Volume control T (PLAY/PAUSE) I (STOP) Y/U (SKIP) FUNC. (Function) Changes the input source or function. HB806TM-F0_BAUSLLK_SIM_ENG_4748.indd 9 2011-04-11 10:53:47... -
Page 10: Rear Panel
Getting Started Rear panel e AUX (R/L) IN/VIDEO OUT a Speakers connectors f HDMI OUT (Type A, HDMI™ Connector) b Cooling Fan Connect to TV with HDMI inputs. c Antenna Connector g LAN port d OPTICAL IN HB806TM-F0_BAUSLLK_SIM_ENG_4748.indd 10 2011-04-11 10:53:47... -
Page 11: Connecting
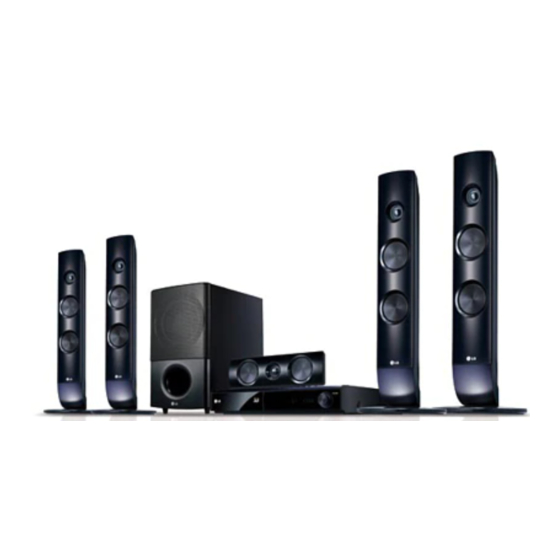
TV screen or PC monitor screen. Please use the speakers away from the TV screen or PC monitor screen. Front left speaker (L)/ Front right speaker (R): Place the front speakers to the sides of the monitor or screen and as flush with the screen surface as possible. Center speaker: Place the center speaker above or below the monitor or screen. Surround left speaker (L)/ Surround right speaker (R): Place these speakers behind your listening position, facing slightly inwards. Subwoofer: The position of the subwoofer is not so critical, because low bass sounds are not highly directional. But it is better to place the subwoofer near the front speakers. Turn it slightly toward the center of the room to reduce the wall reflections. Unit HB806TM-F0_BAUSLLK_SIM_ENG_4748.indd 11 2011-04-11 10:53:47... -
Page 12: Speaker Connection
Attaching the speakers to the player Connect the wires hooked up to the speaker to the unit. - To connect the cable to the unit, press each plastic finger pad to open the connection terminals on the unit. Insert the wire and release the finger pad. - Connect the black stripe of each wire to the terminals marked - (minus) and the other end to the terminals marked + (plus). Colour Speaker Position Grey Rear Rear right Blue Rear Rear left Green Center Centre Orange Sub Any front position woofer Front Front right White Front Front left HB806TM-F0_BAUSLLK_SIM_ENG_4748.indd 12 2011-04-11 10:53:48... -
Page 13: System Setting
2. Use A/D to select the [Setup] and press ENTER [Setup] menu. (b). The [Setup] menu appears. 1. Press HOME (n). 3. Use W/S to select [DISPLAY] option then press D to move to the second level. 4. Use W/S to select the [Resolution] option then press ENTER (b) to move to the third level. 2. Use A/D to select the [Setup] and press ENTER (b). The [Setup] menu appears. 5. Use W/S to select the desired resolution then press ENTER (b) to confirm your selection. Note y If your TV does not accept the resolution 3. Use W/S to select the first setup option, and you have set on the player, you can set press D to move to the second level. resolution to 576p as follows: 1. Press B to open the disc tray. 2 Press Z (STOP) for more than 5 seconds. 4. Use W/S to select a second setup option, and press ENTER (b) to move to the third level. 5. Use W/S to select a desired setting, and press ENTER (b) to confirm your selection. HB806TM-F0_BAUSLLK_SIM_ENG_4748.indd 13 2011-04-11 10:53:49... -
Page 14: Wired Network Setup
You can also test it on the [Connection Status] setting to be adjusted. Adjust the [NETWORK] in the [Setup] menu. setting as follow. Preparation Before setting the wired network, you need to connect the broadband internet to your home network. 1. Select [Connection Setting] option in the [Setup] menu then press ENTER (b). 2. Select [Yes] and press ENTER (b) to continue. The new connection settings reset the current network settings. 3. Use W/S/A/D to select the IP mode between [Dynamic] and [Static]. Normally, select [Dynamic] to allocate an IP address automatically. Note If there is no DHCP server on the network and you want to set the IP address manually, select [Static] then set [IP Address], [Subnet Mask], [Gateway] and [DNS Server] using W/S/ A/D and numerical buttons. If you make a mistake while entering a number, press CLEAR to clear the highlighted part. 4. Select [OK] and press ENTER (b) to apply network settings. HB806TM-F0_BAUSLLK_SIM_ENG_4748.indd 14 2011-04-11 10:53:49... -
Page 15: Operating
Some DVD-VR discs are made with CPRM d [NetCast] - Access to the NetCast Home. data by DVD RECORDER. This unit cannot e [Input] - Changes input mode support these kinds of discs. f [Setup] - Adjusts the system settings. Playing a file on disc/USB device This player can play movie, music and photo files contained in the disc or USB device. 1. Insert a data disc on the tray or connect a USB device. 2. Select [Movie], [Photo] or [Music] using A/D, and press ENTER (b). 3. Select [Data] or [USB] option using W/S, and press ENTER (b). 4. Select a file using W/S/A/D, and press d(PLAY) or ENTER (b) to play the file. HB806TM-F0_BAUSLLK_SIM_ENG_4748.indd 15 2011-04-11 10:53:49... -
Page 16: Basic Operations For Video And Audio Content
To skip to the next/previous c Time – elapsed playing time/total playback time chapter/track/file d Audio – selected audio language or channel During playback, press C or V to go to the e Subtitle – selected subtitle. next chapter/track/file or to return to the beginning of the current chapter/track/file. f Angle – selected angle/total number of Press C twice briefly to step back to the previous angles chapter/track/file. g TV Aspect Ratio – selected TV aspect Ratio In the file list menu of a server, there may have h Picture Mode – selected picture mode many types of contents in a folder together. In this case, press C or V to go to the previous or 2. Select an option using W/S. next content with same type. 3. Use A/D to adjust the selected option value. 4. Press BACK(x) to exit the On-Screen display. HB806TM-F0_BAUSLLK_SIM_ENG_4748.indd 16 2011-04-11 10:53:49... -
Page 17: Troubleshooting
Press and hold the POWER button for at least five seconds. This will force the unit to power off then turn the unit back on. The unit is not operating normally. There is no picture. y Select the appropriate video input mode on the TV so the picture from the unit appears on the TV screen. y Connect the video connection securely. y Check the [HDMI Color Setting] in the [Setup] menu is set to the appropriate item that conforms to your video connection. y Your TV may not suppot the resolution you have set on the player. Change the resolution that your TV accepts. y The player’s HDMI OUT jack is connected to a DVI device that does not support copyright protection. Picture noise appears. y You are playing a disc recorded in a colour system that is different from your TV. y Set the resolution which your TV accepts. Blu-ray 3D disc playback does y Connect the player to your TV with HDMI cable (Type A, High Speed not output 3D views. HDMI™ Cable). y Your TV may not support “HDMI 1.4 3D mandatory format”. y The [3D Mode] option in the [Setup] menu is set to [Off ]. Set the option to [On]. HB806TM-F0_BAUSLLK_SIM_ENG_4748.indd 17 2011-04-11 10:53:49... -
Page 18: Customer Support
The [BD-LIVE connection] option in the [Setup] menu is set to [Prohibited]. Set the option to [Permitted]. Streaming video services (such y Your broadband service speed may not be fast enough to stream as YouTube™, etc.) are often video services. Contact your Internet Service Provider (ISP) and stopped or “buffer” during increase the broadband speed is recommended. playback. Shared folder or files from The player is not connected to the local area network that your media media server are not displayed server are connected. on the device list. There is no sound or the sound y The unit is in scan, slow motion, or pause mode. is distorted. y The sound volume is low. y Check the speaker cable connection. Customer Support You can update the Player using the latest software to enhance the products operation and/or add new features. To obtain the latest software for this player (if updates have been made), please visit http://lgservice.com or contact LG Electronics customer care centre. Open source software notice To obtain the corresponding source code under GPL, LGPL and other open source licenses, please visit http://opensource.lge.com. All referred license terms, warranty disclaimers and copyright notices are available to download with the source code. HB806TM-F0_BAUSLLK_SIM_ENG_4748.indd 18 2011-04-11 10:53:50... -
Page 19: Appendix
Trademarks and Licenses Manufactured under license under U.S. Patent #’s: 5,451,942; 5,956,674; 5,974,380; 5,978,762; 6,226,616; 6,487,535; 7,392,195; 7,272,567; 7,333,929; 7,212,872 & other U.S. and worldwide patents issued & pending. DTS and the Symbol Blu-ray Disc™, Blu-ray™, Blu-ray 3D™, BD-Live™, BONUSVIEW™ and the logos are trademarks of are registered trademarks,& DTS-HD, DTS-HD the Blu-ray Disc Association. Master Audio | Essential and the DTS logos are trademarks of DTS, Inc. Product includes software. © DTS, Inc. All Rights Reserved. “DVD Logo” is a trademark of DVD Format/Logo Licensing Corporation. DLNA®, the DLNA Logo and DLNA CERTIFIED® are trademarks, service marks, or certification marks of the Digital Living Network Alliance. Java and all Java-based trademarks and logos “AVCHD” and the “AVCHD” logo are trademarks of are trademarks or registered trademarks of Sun Panasonic Corporation and Sony Corporation. Microsystems, Inc. in the United States and other countries. DivX®, DivX Certified® and associated logos HDMI, the HDMI logo and High-Definition are trademark of DivX, Inc., and are used under Multimedia Interface are trademarks or registered license. trademarks of HDMI licensing LLC. Manufactured under license from Dolby Laboratories. Dolby and the double-D symbol are trademarks of Dolby Laboratories. HB806TM-F0_BAUSLLK_SIM_ENG_4748.indd 19 2011-04-11 10:53:51... -
Page 20: Specifications
Power consumption Refer to main label. Dimensions (W x H x D) Approx. 360 x 59 x 307 mm without foot Net Weight (Approx.) 2.8 kg Operating temperature 5 °C to 35 °C (41 °F to 95 °F) Operating humidity 5 % to 90 % Inputs/Outputs VIDEO OUT 1.0 V (p-p), 75 Ω, sync negative, RCA jack x 1 HDMI OUT (video/audio) 19 pin (Type A, HDMI™ Connector) ANALOG AUDIO IN 2.0 Vrms (1 kHz, 0 dB), 600 Ω, RCA jack (L, R) x 1 DIGITAL IN (OPTICAL) Optical Connector x 1 PORT. IN 0.5 Vrms (3.5 mm stereo jack) Tuner FM Tuning Range 87.5 to 108.0 MHz or 87.50 to 108.00 MHz Amplifier Power output (3 Ω), (RMS), THD 10 % (3 Ω/ 3 Ω) Total 850 W Front 141 W x 2 Center 141 W Surround 141 W x 2 Sub-Woofer 145 W (Passive) HB806TM-F0_BAUSLLK_SIM_ENG_4748.indd 20 2011-04-11 10:53:51... - Page 21 200 x 550 x 200 mm (W x H x D) Input Power 141 W Net Weight 1.34 kg Center speaker Type 2 Way 3 speaker Max. Input power 282 W Net Dimensions Impedance Rated 3 Ω 311 x 96 x 69 mm (W x H x D) Input Power 141 W Net Weight 1.04 kg Subwoofer Type 1 Way 1 speaker Max. Input power 290 W Net Dimensions Impedance Rated 3 Ω 216 x 382 x 312 mm (W x H x D) Input Power 145 W Net Weight 5.52 kg y Design and specifications are subject to change without notice. HB806TM-F0_BAUSLLK_SIM_ENG_4748.indd 21 2011-04-11 10:53:51...
- Page 22 An extended Owner's Manual that contains information on the advanced features is located on the CD-ROM provided in an electronic version. To read these files, you will need to use a Personal Computer (PC) equipped with a CD-ROM drive. HB806TM-F0_BAUSLLK_SIM_ENG_4748.indd 22 2011-04-11 10:53:51...