Advertisement
Quick Links
Advertisement

Related Manuals for Rowenta FOCUS EXCEL DW52 Series


Summary of Contents for Rowenta FOCUS EXCEL DW52 Series
- Page 1 FOCUS EXCEL DW52XX DURASTEAM ANTICALC DW22XX www.rowenta.com...
- Page 2 * EN Depending on model / FR Selon modèle / ES Según modelo...
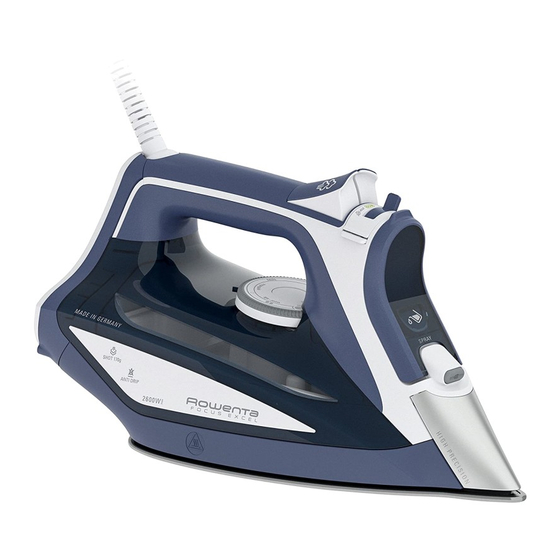
- Page 3 PRODUCT DESCRIPTION 1. Thermostat pilot light 2. Auto off indicator light* 3. Burst of steam button 4. Spray button 5. Steam lever 6. Filling inlet 7. Precision tip 8. Self clean 9. Anti calc valve 10. Anti drip 11. Temperature control dial DESCRIPTIF PRODUIT 1.
-
Page 4: Important Safety Instructions
IMPORTANT SAFETY INSTRUCTIONS When using an iron, basic precautions should always be followed, including the following: READ ALL INSTRUCTIONS BEFORE USING • Only use an iron for its intended use. • To avoid the risk of electric shock, do not immerse the iron in water or other liquids. - Page 5 or instruction concerning use of the appliance by a person responsible for their safety. • Children should be supervised to ensure that they do not play with the appliance. • The iron must be used and rested on a stable surface; •...
- Page 6 If there is a problem? PROBLEM POSSIBLE CAUSE SOLUTION Water drips from the You are using steam while Wait until the thermostat light holes in the soleplate. the iron is not hot enough. goes out. You are using the shot of Wait a few seconds between steam button too often.
-
Page 7: Consignes De Securite
CONSIGNES DE SECURITE • Merci de lire attentivement ces consignes et de les conserver. • Ne laissez jamais l’appareil sans surveillance lorsqu’il est raccordé à l’alimentation électrique ; tant qu’il n’a pas refroidi environ 1 heure. • Le fer doit être utilisé et posé sur une surface plane, stable et résistante à... - Page 8 • Si le cordon électrique est endommagé, faites-le remplacer par un centre service agréé afin d’éviter tout danger. • Ne débranchez pas l’appareil en tirant sur le cordon. • Ne plongez jamais le fer à vapeur dans l’eau ou tout autre liquide. Ne le mettez jamais sous le robinet.
- Page 9 Protection de l’environnement ! Votre appareil contient de nombreux matériaux valorisables ou recyclables. Confiez celui-ci dans un point de collecte ou à défaut dans un centre service agréé pour que son traitement soit effectué. Y a t-il un problème ? PROBLÈME CAUSE POSSIBLE SOLUTION...
- Page 10 PROBLÈME CAUSE POSSIBLE SOLUTION Il y a peu de vapeur Le réservoir d'eau est vide. Remplissez le réservoir d’eau ou pas de vapeur du Votre fer a été utilisé à sec Effectuez une procédure d'auto- tout. pendant trop longtemps. nettoyage. La goupille de la valve n'est Assurez-vous que la goupille pas correctement en place.
-
Page 11: Instrucciones De Seguridad
INSTRUCCIONES DE SEGURIDAD • Lea estas instrucciones con detenimiento y guárdelas para referencias futuras. • Nunca deje el aparato solo cuando esté conectado a la electricidad o si no se enfrió después de 1 hora, aproximadamente. • Se debe usar y apoyar la plancha sobre una superficie plana, estable y resistente al calor. - Page 12 • Si está utilizando un prolongador, asegúrese de que esté correctamente certificado (16A) con una conexión a tierra y que esté totalmente extendido. • Si el cable eléctrico está daño, un Centro de servicio autorizado lo debe reemplazar para evitar daños. •...
- Page 13 contienen desechos orgánicos o elementos minerales que pueden causar salpicado, manchas marrones o el desgaste prematuro del aparato: no debe usarse agua de secarropas, agua ablandada o aromatizada, de refrigeradores, baterías ni aires acondicionados, agua pura destilada ni desmineralizada ni agua de lluvia en la plancha. Tampoco use agua hirviendo ni mineral embotellada.
- Page 14 PROBLEMA POSIBLE CAUSA SOLUCIÓN La placa de asiento está Está planchando con Limpie la placa de asiento sucia o marrón y puede una selección de (consulte el capítulo 9). manchar la tela. temperatura inadecuada Seleccione el programa (la temperatura es adecuado.
- Page 15 1. SET UP / MISE EN ROUTE / PONER EN MARCHA Remove the soleplate cover. Enlevez la protection de la semelle. Retire la proteccion de la suela. Set the steam lever on position. Placez la commande de régulation de la vapeur sur la position Girar el regulador de vapor a la posicion planchado sin vapor...
- Page 16 Stop filling water when MAX level is reached. Arrêtez de remplir le réservoir lorsque le niveau MAX est atteint. Parar de llenar el tanque cuando se haya alcanzado el nivel MAX. Close the filling inlet door. Fermez la trappe de remplissage. Cerrar el orificio de llenado.
- Page 17 The pilot light is switched on when the iron is heating up. Le voyant lumineux est allumé lorsque le fer est en chauffe. Al encedenrse la luz piloto, se indica el calentamiento de la suela. Once the pilot light is switched off the iron is ready to be used and steam can be activated.
- Page 18 When Auto Off function is on the Auto Off indicator light blinks and the iron starts to cool down. Lorsque la fonction Arrêt Automatique est activée l’indicateur lumineux d’arrêt automatique clignote et le fer commence à refroidir. Cuando la funcion Autoapagado está...
- Page 19 3. SETTING THE TEMPERATURE Synthetics Wool - Silk Linen - Cotton 4. DRY IRONING / REPASSAGE A SEC / PLANCHAR SIN VAPOR Set the steam lever on position. Placez la commande de régulation de la vapeur sur la position Girar el regulador de vapor sobre la posición 5.
- Page 20 6. SHOT OF STEAM / JET DE VAPEUR / GOLPE DE VAPOR Set the thermostat knob on MAX position. Placez le bouton de thermostat sur la position MAX. Girar el botón de termostato al MAX. sec. Press the burst of steam button for 1 second.
- Page 21 7. VERTICAL STEAM / VAPEUR VERTICALE / VAPOR VERTICAL Set the thermostat knob on MAX position. Placez le bouton de thermostat sur la position MAX. Girar el botón del termostato al MAX. sec. Hold the iron vertically and press the shot of steam button for 1 second.
- Page 22 Do not do vertical steaming on yourself or on others. Ne défroissez pas verticalement sur vous même ou sur les autres. No realizar el planchado vertical sobre sí mismo u otra persona. 8. WARNING / ATTENTION / ATENCIÓN When the iron is plugged put it on its heel.
- Page 23 Una vez que la suela haya enfriado puede limpiarla con un trapo húmedo ó con un estropajo. Do not use detergent to clean the soleplate. We recommend the Rowenta soleplate cleaning kit. Do not use sharp or abrasive cleaning accessories to clean the soleplate.
- Page 24 10. IRON STORAGE / RANGEMENT DU FER / GUARDAR LA PLANCHA Unplug the iron. Débranchez le fer. Desenchufar la plancha. Switch the steam lever / STORE or iron may leak if some water remains in the iron. Placez la commande de régulation de la vapeur sur la position / STORE pour éviter au fer de fuir si il reste de l’eau...
- Page 25 Wrap the cord around the iron’s heel and store it in vertical position. Enroulez le cordon autour du talon du fer et rangez le en position verticale. Enrollar el cordón del talón y guardar la plancha en posición vertical. Do not store the iron in horizontal position.
- Page 26 11. CLEANING THE ANTI CALC VALVE (every two months) NETTOYAGE DE LA TIGE ANTI CALCAIRE (tous les deux mois) LIMPIEZA DE LA VARILLA ANTICALCAREA (cada dos meses) 6x YEARS/ ANNEE / ANO We recommend to clean the calc collector every 2 months. Nous recommandons de nettoyer le collecteur de calcaire tous les 2 mois .
- Page 27 Empty the water tank over a sink. Videz le réservoir au dessus d’un évier. Vaciar el tanque en un lavabo. Push the 2 buttons on the left & right side of the valve pin to unlock to a mid position. Appuyez sur les 2 boutons situés à...
- Page 28 Soak the anti calc valve in a cup of plain lemon juice or a cup of white vinegar for 4 hours. WARNING: never touch the end of the valve. Laissez tremper la tige anti calcaire pendant 4 heures dans un verre de vinaigre d’alcool blanc ou du jus de citron pur.
- Page 29 12. SELF CLEANING ( every two ) / AUTO NETTOYAGE ( weeks toutes ) / AUTOLIMPIEZA les 2 semaines cada 2 semanas We recommend to clean the calc collector every 2 weeks. Nous recommandons de nettoyer le collecteur de calcaire toutes les 2 semaines.
- Page 30 Set the thermostat knob on MAX position. Placez le bouton de thermostat sur la position MAX. Girar el botón del termostato al posicion MAX. The pilot light is switched on when the iron is heating up. Le voyant lumineux est allumé lorsque le fer est en chauffe.
- Page 31 Hold the iron over a sink. Tenez votre fer au dessus d’un évier. Colocar la plancha sobre un lavabo. Push the 2 buttons on the left & right side of the valve pin to relaese valve pin to the self clean position. Appuyez sur les 2 boutons situés à...
- Page 32 Replace the anti calc valve into position. CLICK Remettez la tige anti calcaire en place. Volver a colocar la válvula anticálcarea. Plug the iron. Branchez le fer. Enchufar la plancha. Let the iron heat up for 2 minutes to dry 2 min.
- Page 33 Una vez que la suela haya enfriado puede limpiarla con un trapo húmedo ó con un estropajo. Do not use detergent to clean the soleplate. We recommend the Rowenta soleplate cleaning kit. Do not use sharp or abrasive cleaning accessories to clean the soleplate.
- Page 34 Groupe SEB México, S.A. de C.V. Calle Goldsmith 38-401 Piso 4 - Polanco Ciudad de México C.P. 11560, México, R.F.C. GSM8211123P5 TEL. 52 83 93 00...
- Page 35 1103915305-03...