Advertisement
Quick Links
Advertisement

Related Manuals for Seiko GRAND SEIKO 9S51


Summary of Contents for Seiko GRAND SEIKO 9S51
- Page 1 All manuals and user guides at all-guides.com 9S51・9S55・9S56 INSTRUCTION...
- Page 2 All manuals and user guides at all-guides.com...
- Page 3 All manuals and user guides at all-guides.com 9S51・9S55・9S56 INSTRUCTION...
- Page 4 All manuals and user guides at all-guides.com You are now the proud owner of a GRAND SEIKO watch. GRAND SEIKO watches are designed and manufactured to realize close-to- perfect mechanism and product quality by taking advantage of SEIKO's more than 100 years of experience in watchmaking. To preserve the highest quality of your GRAND SEIKO watch, please read the instructions in this booklet carefully for its proper use and care, and keep this booklet for ready reference.
-
Page 5: Table Of Contents
All manuals and user guides at all-guides.com CONTENTS ■HOW TO USE ・・・・・・・・・・・・・・・・・・・・・・・・・・・・・・・・・・・・・・・・・・・・・・・4 ■TO PRESERVE THE QUALITY OF YOUR WATCH ・・・・・・・・・・・・・・22 ■TROUBLE SHOOTING ・・・・・・・・・・・・・・・・・・・・・・・・・・・・・・・・・・・・・・28 ■SPECIFICATIONS ・・・・・・・・・・・・・・・・・・・・・・・・・・・・・・・・・・・・・・・・・・29 ■REMARKS ON REPLACEMENT PARTS ・・・・・・・・・・・・・・・・・・・・・・・30... -
Page 6: How To Use ・・・・・・・・・・・・・・・・・・・・・・・・・・・・・・・・・・・・・・・・・・・・・・・4
All manuals and user guides at all-guides.com ■HOW TO USE ※How to use the automatic mechanical watch (9S51・9S55・9S56) This is an automatic mechanical watch with manual winding mechanism. ・If the watch is worn on the wrist, the mainspring will be wound automatically through normal wrist movement. It can also be wound up by turning the crown. ・To start the watch after it stops completely, wind it up either by turning the crown or swinging it from side to side until the second hand starts moving. Then, set the time and date before wearing the watch on the wrist. - Page 7 All manuals and user guides at all-guides.com ・To wind up the watch by turning the crown, turn it clockwise slowly. The watch cannot be wound by turning the crown counterclockwise. About 40 turns of the crown will wind up the watch fully. Please note that the crown can be turned even after the watch is wound up fully. ・Once the watch is wound up fully, it operates for about 50 hours. (If the watch is used without being wound up fully, gain or loss of time may result. To avoid this, wear the watch for more than 10 hours a day.) If the watch is used without wearing on the wrist ; if it is used on the desk, for example : be sure to wind it up fully every day at a fixed time.
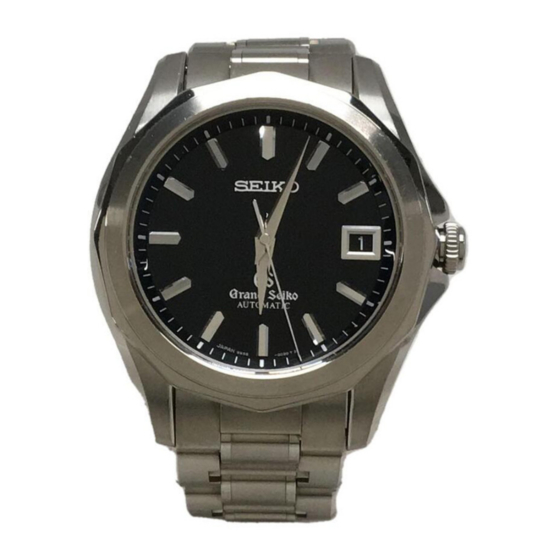
- Page 8 All manuals and user guides at all-guides.com 1. 3 HANDS WITHOUT DATE (cal. 9S51) <Parts of your Grand Seiko watch> <To set the time> Hour hand Minute hand Confirm the second hand is moving and pull out the crown when the second hand is at the 12 o'clock position. The second hand will stop on the spot. If the crown is of the screw lock type, Crown unscrew the crown by turning it counterclockwise, and then pull it out.
- Page 9 All manuals and user guides at all-guides.com Turn the crown to set the hour and Push the crown back in to the normal minute hands to the desired time. position in accordance with a time signal ※The mechanism of the mechanical watch is for "00" seconds. The second hand will different from that of the quartz one. To set start moving immediately. ...
- Page 10 All manuals and user guides at all-guides.com 2. 3 HANDS WITH DATE (cal. 9S55) <Parts of your Grand Seiko watch> <To set the time and date> Minute hand Hour hand Date Crown First, set the date. Pull out the crown to Second hand the first click. If the crown is of the screw lock type, The watch is provided with a date function unscrew the crown by turning it and ...
- Page 11 All manuals and user guides at all-guides.com Turn the crown until the previous date appears. For example, if today is the 6th of the month, first set the date to "5". ・Do not set the date between 10:00p.m. and 1:00a.m. Otherwise, the date may not change properly.
- Page 12 All manuals and user guides at all-guides.com Confirm the second hand is moving and pull out the crown to the second click when the second hand is at the 12 o'clock position. The second hand will stop on the spot. Advance the hour and minute hands until the desired date appears. The time is now set for the A.M. period. Keep advancing the hands until the correct time.
- Page 13 All manuals and user guides at all-guides.com <Date adjustment at the end of the month> It is necessary to adjust the date at the end of February and a 30-day month. EXAMPLE: To adjust the date in the A.M. period on the first day of a month following a 30- day month ①The watch displays "31" instead of "1". Pull out the crown to the first click. If the crown is of the screw lock type, unscrew the crown by turning it counterclockwise, and then pull it out.
- Page 14 All manuals and user guides at all-guides.com 3. 3 HANDS WITH 24-HOUR HAND (cal. 9S56) <Parts of your Grand Seiko watch> <To set the 24-hour hand to the current time of your area> Minute hand Hour hand 1 Pull out the crown to the second click when the second hand is at the 12 o'clock position. The Date second hand stops on the spot. 2 Turn the crown clockwise to set the 24-hour and minute hands to the current time of your area. Crown Check that AM/PM is correctly set. 〈Example〉...
- Page 15 All manuals and user guides at all-guides.com 3 Push the crown back in to the normal position in accordance with a time signal for "00" seconds. Adjustments of the 24-hour, minute and second hands have been completed. 4 Then,pull out the crown to the first click and turn it to set the hour hand to the current time. ■ The date can be adjusted at this step.(To do so, refer to P.20〜21 to set the date.) ※Check that AM/PM is correctly set by turning the hour hand past the 12 o'clock ...
- Page 16 All manuals and user guides at all-guides.com <To set the 24-hour hand to the time of an area in a different time zone> For example, set the 24-hour hand to Greenwich Mean Time and the hour hand to the current time of Japan 1 Pull out the crown to the second click when the second hand is at the 12 o'clock.The second hand stops on the spot. 2 Turn the crown clockwise to set the 24-hour and minute hands to the Greenwich Mean Time. Check that AM/PM is correctly set.
- Page 17 All manuals and user guides at all-guides.com 3 Push the crown back into the unscrewed position in accordance with a time signal for "00" seconds. Adjustments of the 24-hour, minute and second hands have been completed. 4 Then, pull out the crown to the first click and turn it to set the hour hand to the time in Japan. ■ The date can be adjusted at this step.(To set the date, refer to P.20 〜21.) ※Check that AM/PM is correctly set by turning the hour hand past the 12 o'clock marker. If the date changes to the next date, the time is set for the AM period.(ie : 12 o'clock=midnight.)...
- Page 18 All manuals and user guides at all-guides.com <Time difference adjustment> Time difference adjustment enables you to adjust the hour hand only in one-hour increments by easy operation without stopping the minute and second hands. It is convenient when adjusting the time based on a different time zone while you travel abroad. ■How to determine the time differences between two areas ●Before making the time difference adjustment, it is necessary to obtain the time differences between the two areas. 〈How to calculate the time differences〉 Assuming that you move from time zone "A" to time zone "B" and that the time difference from GMT for the two time zones are "a" and "b", respectively, the time difference between them can be obtained from the following formula:〔b〕―〔a〕 〈Example:If you move from Japan to New York〉 Time difference from GMT for Japan, time zone A:〔a〕=+9 Time difference from GMT for New York, time zone B:〔b〕=−5 ○Time difference between the two cities is: 〔b〕―〔a〕=(−5)−(+9)=(−14)hours ※Time difference from GMT is shown in P.18. ※If daylight saving time is in effect in an area, there will be a one hour to the time difference from GMT.
- Page 19 All manuals and user guides at all-guides.com ■Time difference adjustment ●Set the hour hand to the time of any area using the time difference obtained in "How to calculate the time differences" 1 Pull out the crown to the first click. 2 Turn the crown to set the hour hand to the time of any area. clockwise: ※When setting the hour hand, other hands may move the hour hand slightly. However, this is not a malfunction. turns clockwise ※If you need to set the date between 10 PM and 0 AM by turning the hour hand counterclockwise, turn the hour hand until it shows sometime between 9 PM and 10 PM once, then set the date. In case the hour hand ...
- Page 20 All manuals and user guides at all-guides.com Tokyo GMT +09:00 Paris GMT +01:00 Seoul GMT +09:00 Madrid GMT +01:00 Beijing GMT +08:00 London GMT 0:00 Hong Kong GMT +08:00 Dakar GMT 0:00 Bangkok GMT +07:00 Rio De Janeiro GMT -03:00 Tashkent GMT +06:00 La Paz ...
- Page 21 All manuals and user guides at all-guides.com...
- Page 22 All manuals and user guides at all-guides.com clockwise: <To set the date> The hour hand turns c l o c k w i s e , a n d t h e Minute hand date advances. Hour hand Date 1 Pull out the crown to the first click.
- Page 23 All manuals and user guides at all-guides.com 3 After setting the date, reset hour hand to the current hour, and then, push the crown back. ※Check that AM/PM is correctly set by turning the hour hand past the 12 o'clock marker. If the date changes to the next date, the time is set for the AM period. If the date does not change, the time is set for the PM period. ※If you set the date between 10 PM and 0 AM by turning the hour hand counterclockwise, turn the hour hand until it shows sometime between 9 PM and 10 PM once, then set the date. In the case the hour hand is turned counterclockwise, the date will be put back when the hour hand shows around 10 PM, however, it is not a malfunction...
-
Page 24: To Preserve The Quality Of Your Watch ・・・・・・・・・・・・・・22
All manuals and user guides at all-guides.com ■TO PRESERVE THE QUALITY OF YOUR WATCH CAUTION ●CARE OF YOUR WATCH ・The case and bracelet are direct constant touch with the skin. If they are left dirty, the edge of a sleeve may be stained or those who have a delicate skin may develop a rash. ・After removing the watch from your wrist, wipe off any perspiration or moisture ... - Page 25 All manuals and user guides at all-guides.com CAUTION ●RASH AND ALLERGY ・Adjust the bracelet and band so that there will be a little clearance between the bracelet or band and your wrist to avoid accumulation of perspiration. ・If you are constitutionally predisposed to rash, the band may cause you to develop a rash or an itch depending on your physical condition. ・The possible cause of a rash are as follows: 1. Allergy to metals or leathers 2. Rust, dust or perspiration on the watch or band ・If you develop any skin reactions, take off the watch and consult a doctor immediately.
- Page 26 All manuals and user guides at all-guides.com CAUTION ●WATER RESISTANCE ・Check the dial or case back of your watch for the water resistant quality, and then see the table below. ・Do not turn or pull out the crown when the watch is wet, as water may get inside the watch. Condition Indication for water of use resistance a: Indication on the dial Designed and Suitable for swimming, yachting Genuine Genuine diving Suitable for shallow Degree manufactured to withstand and other aquatic sports as wellas b: Indication on the diving without a heavy diving using using heliumgas. of water for works closely associated with accidental contact with case back water such as kitchen work, breathingapparatus. water such as splashes scuba. resistance watening and fishing. and rain.
- Page 27 All manuals and user guides at all-guides.com WARNING ・If your watch is 3 bar water resistant, do not use it in water. ・If your watch is 5 bar water resistant, do not use it in any type of diving including skin diving. ・If your watch is 10 or 20 bar water resistant, do not use it in saturation diving or scuba diving. ●PRECAUTIONS ON WEARING YOUR WATCH ・Take care in case you tumble and fall or bump into others when wearing the watch on your wrist, you may be injured due to the fact that you are wearing the watch. ・Should you collide with children, especially with infants, they may get injured or develop an allergic rash.
- Page 28 All manuals and user guides at all-guides.com ●PLACES TO KEEP YOUR WATCH ・If the watch is left in a temperature below −10℃ or above +60℃ for a long time it may function improperly or stop operating. ・Do not leave the watch in a place where it is subjected to strong magnetism or static electricity. ・Do not leave the watch where there is strong vibration. ・Do not leave the watch in a dusty place. ・Do not expose the watch to gases or chemicals. (Ex.: Organic solvents such as benzine and thinner, gasoline, nail polish, cosmetic spray, detergent, adhesives, mercury, and iodine antiseptic solution.) ・Do not leave the watch near a hot spring, and do not keep it in a drawer having insecticides inside.
- Page 29 All manuals and user guides at all-guides.com ●PERIODIC CHECK ・Checking and overhauling of the watch (cal. 9S51/9S55/9S56) should be performed by SEIKO. When you take the watch to the retailer from whom it was purchased, request that the watch will be checked and overhauled by SEIKO. ・We suggest that you have your watch checked by SEIKO every 2 or 3 years for lubrication or damage due to water or sweat. After checking the watch, adjustment and repair may be required.
-
Page 30: Trouble Shooting ・・・・・・・・・・・・・・・・・・・・・・・・・・・・・・・・・・・・・・28
All manuals and user guides at all-guides.com ■TROUBLE SHOOTING Trouble Cause Solution ・Wind up the watch or swing the ・The watch stops ・The watch is not wound up. watch. The watch will start. If the operating. watch does not start, contact the retailer from whom the watch was purchased. -
Page 31: Specifications ・・・・・・・・・・・・・・・・・・・・・・・・・・・・・・・・・・・・・・・・・・29
All manuals and user guides at all-guides.com ■SPECIFICATIONS Cal. number 9S51 9S55 9S56 3 hands 4 hands 3 hands 1. Time indi- (hour, minute and second) (24-hour, hour, minute and second) (hour, minute and cation with date with date second) 2. Vibrations 28,800/h 3. Driving system Self-winding type with manual winding mechanism 24 jewels 26 jewels 27 jewels 4. Jewels ... -
Page 32: Remarks On Replacement Parts ・・・・・・・・・・・・・・・・・・・・・・・30
All manuals and user guides at all-guides.com ■REMARKS ON REPLACEMENT PARTS ・SEIKO makes it a normal policy to keep a stock of spare parts for GRAND SEIKO watches for 10 years. In principle, your watch can be reconditioned within this period if used normally. (Replacement parts are those which are essential to maintain the functional integrity of the watch.) ・The number of years that a watch is considered reparable may vary greatly ...