
Related Manuals for ViewSonic VX2739wm-1


Summary of Contents for ViewSonic VX2739wm-1
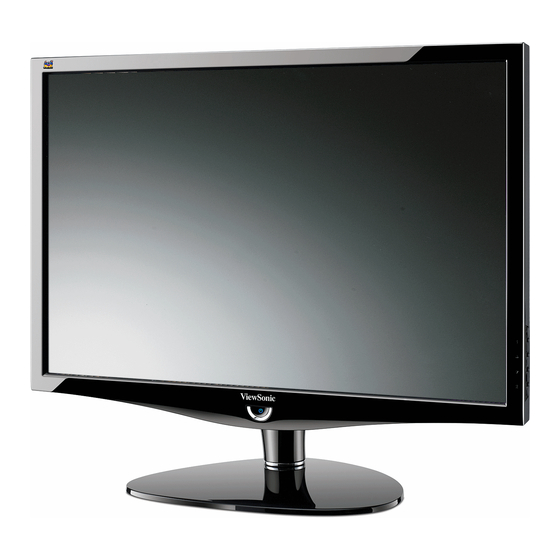
- Page 1 Service Manual ViewSonic VX2739wm-1 VX2739wm-CN Model No. VS12843 27” Color TFT LCD Display (VX2739wm-1_VX2739wm-CN_SM Rev. 1a May. 2010) ViewSonic 381 Brea Canyon Road, Walnut, California 91789 USA - (800) 888-8583...
- Page 2 Further, ViewSonic reserves the right to revise this publication and to make changes from time to time in the contents hereof without obligation of ViewSonic to notify any person of such revision or changes.
-
Page 3: Table Of Contents
7. Block Diagrams ......................74 8. Schematic Diagrams ...................... 75 9. PCB Layout Diagrams ....................78 10. Exploded Diagram And Spare Parts List ..............79 11. Recommended Spare Parts List ................. 80 VX2739wm-1 CONFIDENTIAL – DO NOT COPY ViewSonic Corporation VX2739wm-CN... -
Page 4: Precautions And Safety Notices
Safety Operate the Monitor on 100V and 120 V AC only. Use the AC power cord specified by ViewSonic and suitable for the voltage where you use it. The plug is designed, for safety purposes, to fit into the wall outlet only one way. - Page 5 When carrying the Monitor, do not subject it to shocks, vibration, or excessive force. When lifting or moving the Monitor, hold it securely from the bottom. Place your palm directly under the panel. Installed on the wall Installed with stand VX2739wm-1 CONFIDENTIAL – DO NOT COPY ViewSonic Corporation VX2739wm-CN...
- Page 6 The type of programming and signal provided by your cable service provider will affect the availability of digital cable television programming in your area. VX2739wm-1 CONFIDENTIAL – DO NOT COPY ViewSonic Corporation VX2739wm-CN...
- Page 7 2. Product Specification 2.1 Product definition Product Name ViewSonic VX2739WM Model Number VS12843 English French German Spanish Italian OSD Languages Finnish Russian Japanese Korean Traditional Chinese Simplified Chinese TFT LCD Panel and Model # source : CMO M270H1-L01 Scalar TSUMO88GDI-LF-1...
-
Page 8: Specification
Speaker Output 2W x 2 2.3 Front View and Rear View Name Photo Materials Piece Texture Color Scheme POLISH # Front Viewsonic black 8000 Mold-Tech MT-11020 Back Viewsonic black (Logo is POLISH # 8000) VX2739wm-1 CONFIDENTIAL – DO NOT COPY... - Page 9 Power electroplate silver button ring POLISH # Neck Viewsonic black 8000 Mold-Tech 5 Key button Viewsonic black MT-11010 POLISH # base Viewsonic black 8000 7 base_ring electroplate silver 1. Black by painting at core-side surface. Transluce Power POLISH # 2.Power icon by...
- Page 10 *CIE1976; Polish level = 1200; Follow the Equipment in ViewSonic Lab *1. The reference for the cabinet components is the color chip provided by ViewSonic. *2. The color difference between any two panel head cabinet components shall be ∆E <0.8, in the 1976 CIE L*a*b Colorspace.
- Page 11 (primary = 640x480@60Hz) 640 x 400 70 Hz, 31.5 KHz v For Separated、 SOG and Composite sync, switch 640x350@70,640x400@70, and720x400@70 by [1]+[2] short cut key ( primary = 720x400@70) VX2739wm-1 CONFIDENTIAL – DO NOT COPY ViewSonic Corporation VX2739wm-CN...
- Page 12 60 Hz, 48.4 KHz v 1024 x 768 @ 70 Hz, 56.5 KHz v 1024 x 768 @ 72 Hz, 58.1 KHz v 1024 x 768 @ 75 Hz, KHz v DMT; VX2739wm-1 CONFIDENTIAL – DO NOT COPY ViewSonic Corporation VX2739wm-CN...
- Page 13 [1]+[2] short cut key (primary = 1280x768@75Hz) 1280 x 800 @ 60 Hz, 49.7 KHz v 1280 x 800 @ 75 Hz, 62.8 KHz v 1280 x 960 @ 50 Hz, 49.4 KHz v VX2739wm-1 CONFIDENTIAL – DO NOT COPY ViewSonic Corporation VX2739wm-CN...
- Page 14 (primary = 1680x1050@60Hz) 1920x1080 @ 60 Hz 67.5 KHz v 480i 60 Hz 480p 60 Hz 576i 50 Hz 576p 50 Hz VX2739wm-1 CONFIDENTIAL – DO NOT COPY ViewSonic Corporation VX2739wm-CN...
- Page 15 *1. Tolerance ±2KHz. (if no over lapping issue) ≧ *2. Any timing not in the list, it should display as normal or show on “OUT OF RANGE” OSD message without blanking VX2739wm-1 CONFIDENTIAL – DO NOT COPY ViewSonic Corporation VX2739wm-CN...
-
Page 16: Front Panel Function Control Description
Brightness to default in its menu without OSD message. (Under Contrast or Brightness adjust sub-menu, recall Contrast or Brightness to its default without OSD message.) * While OSD menu off, recall CR/ BT/ Audio volume VX2739wm-1 CONFIDENTIAL – DO NOT COPY ViewSonic Corporation VX2739wm-CN... - Page 17 Power Lock / Unlock (refer to segment 4-6-5) [2] + [▼] Toggle DDC/CI and DDC/2B (DDC/CI enable/disable) and show following message for 3 seconds, When switch to DDC/CI When switch to DDC/2B VX2739wm-1 CONFIDENTIAL – DO NOT COPY ViewSonic Corporation VX2739wm-CN...
- Page 18 Default = DDC/CI Signal + [2] + [ ] Factory Mode Remark : All the short cuts function are only available while OSD off VX2739wm-1 CONFIDENTIAL – DO NOT COPY ViewSonic Corporation VX2739wm-CN...
-
Page 19: Circuit Description
The status for +5VD and +5V as below: +5V will provide: 1. via Q4、Q3:VLCD(for LCD panel) 2. via U9 transferred to +3.3V(for TSUMO88GDI、audio AMP and system related parts) 3. via U9 transferred to +1.8V(for TSUMO88GDI) VX2739wm-1 CONFIDENTIAL – DO NOT COPY ViewSonic Corporation VX2739wm-CN... - Page 20 TSUMO88GDI fordifferent voltage to control the right action by TSUMO88GDI. Controlled way for LED board is from GPIO, Power off:LED is dark, Power on: LED is blue light, standby mode:LED is orange light, which controlled by TSUMO88GDI. VX2739wm-1 CONFIDENTIAL – DO NOT COPY ViewSonic Corporation VX2739wm-CN...
-
Page 21: Adjusting Procedure
Level 3 Auto Image Adjust 1. Background = blanking 2. The message OSD position is at the center. 3. After auto tune, OSD shall be off 4. Only for analog mode VX2739wm-1 CONFIDENTIAL – DO NOT COPY ViewSonic Corporation VX2739wm-CN... - Page 22 3. Key button definition: [1] = Back to Main Menu or OSD off (depend on previous status) [Up]: Increase the OSD value setting [Dn]: Decrease the OSD value [Up]+[Dn]: Recall to default VX2739wm-1 CONFIDENTIAL – DO NOT COPY ViewSonic Corporation VX2739wm-CN...
- Page 23 3. If no signal detected from target port, keep existing input port. Step 3: Show on Input Message OSD at the right-top corner of screen for 1 second. VX2739wm-1 CONFIDENTIAL – DO NOT COPY ViewSonic Corporation VX2739wm-CN...
- Page 24 3. If no signal detected from target port, keep existing input port. Step 3: Show on Input Message OSD at the right-top corner of screen for 1 second. VX2739wm-1 CONFIDENTIAL – DO NOT COPY ViewSonic Corporation VX2739wm-CN...
- Page 25 Step 3: Show on Input Message OSD at the right-top corner of screen for 1 second. Note: HDMI input default setting is HDMI AV, and user can change to HDMI PC and saved. VX2739wm-1 CONFIDENTIAL – DO NOT COPY ViewSonic Corporation VX2739wm-CN...
- Page 26 [1]: Back to Audio Adjust OSD [2]: selected audio setting [Up]: Increase the volume [Up]: Move up the slider setting [Dn]: Move down the slider [Dn]: Decrease the volume setting 3. No signal, no output VX2739wm-1 CONFIDENTIAL – DO NOT COPY ViewSonic Corporation VX2739wm-CN...
- Page 27 [1]: Back to Audio Adjust OSD [2]: :Selected setting 3. When Mute function is selected, any change in Volume will disable to Mute. Audio Input HDMI Change audio source to HDMI VX2739wm-1 CONFIDENTIAL – DO NOT COPY ViewSonic Corporation VX2739wm-CN...
- Page 28 Color Adjust sRGB Change Color setting to sRGB 9300K Change Color setting to 9300K 7500K Change Color setting to 7500K 6500K Change Color setting to 6500K 5000K Change Color setting to 5000K VX2739wm-1 CONFIDENTIAL – DO NOT COPY ViewSonic Corporation VX2739wm-CN...
- Page 29 1. Adjust range = 0 to 2. Default = 100 3. Key button definition: [1]: Back to Color Adjust OSD [2]: selected setting. [Up]: Increase the OSD value setting [Dn]: decrease the OSD value setting VX2739wm-1 CONFIDENTIAL – DO NOT COPY ViewSonic Corporation VX2739wm-CN...
- Page 30 [1]: Back to Color Adjust OSD [2]: selected setting. [Up]: Increase the OSD value setting [Dn]: decrease the OSD value setting Information PC timing – Display Resolution Video timing – Display Video Format VX2739wm-1 CONFIDENTIAL – DO NOT COPY ViewSonic Corporation VX2739wm-CN...
- Page 31 [1]: Back to Manual Image Adjust [2]: selected setting. [Up]: Increase the 1. Key button definition: OSD value [1]: Back to previous OSD setting status [Dn]: Decrease the [2]: Execute the selected OSD value VX2739wm-1 CONFIDENTIAL – DO NOT COPY ViewSonic Corporation VX2739wm-CN...
- Page 32 And it should not be selected. 1. Adjust range = 0 to 100 2. Key button definition: [1]: Back to Manual Image Adjust OSD [Up]: Increase the OSD value setting [Dn]: Decrease the OSD value VX2739wm-1 CONFIDENTIAL – DO NOT COPY ViewSonic Corporation VX2739wm-CN...
- Page 33 Fine Tune 1. Adjust range = 0 to 100 2. Key button definition: [1]: Back to Manual Image Adjust OSD [Up]: Increase the OSD value setting [Dn]: Decrease the OSD value VX2739wm-1 CONFIDENTIAL – DO NOT COPY ViewSonic Corporation VX2739wm-CN...
- Page 34 1. Adjust range = {0 / 25 / 50 / 75 / 100} 2. Default = 50 3. Key button definition: [1]: Back to Manual Image Adjust OSD [Up]: Increase the OSD value setting [Dn]: Decrease the OSD value VX2739wm-1 CONFIDENTIAL – DO NOT COPY ViewSonic Corporation VX2739wm-CN...
- Page 35 * SRGB selection in Color Adjust * White balance hot key * DDC/CI BR/CT adjustment Response Time Standard Over Drive = off Advanced Over Drive = Level 1 ( best quality with over drive ) VX2739wm-1 CONFIDENTIAL – DO NOT COPY ViewSonic Corporation VX2739wm-CN...
- Page 36 [Dn]: Scroll down the slider (When push the button on the bottom position, the slider shall go up to the top item) 3. Default = Standard Aspect Ratio Change aspect ratio to VX2739wm-1 CONFIDENTIAL – DO NOT COPY ViewSonic Corporation VX2739wm-CN...
- Page 37 3. Default = full screen Note : 1.When input signals are wide format, this function is disable. 2.When input signals are non-wide format. this function is enable. VX2739wm-1 CONFIDENTIAL – DO NOT COPY ViewSonic Corporation VX2739wm-CN...
- Page 38 4. Save PC timing and DTV timing setting separately. 5. Default = RGB Mode ( DVI &VGA) , 6. HDMI is auto detected by Info Frame : , YPbPr -> YUV VX2739wm-1 CONFIDENTIAL – DO NOT COPY ViewSonic Corporation VX2739wm-CN...
- Page 39 100 slider shall go down to the bottom item) [Dn]: Scroll down the slider (When push the button on the bottom position, the slider shall go up to the top VX2739wm-1 CONFIDENTIAL – DO NOT COPY ViewSonic Corporation VX2739wm-CN...
- Page 40 7. While ECO or DCR setting changed, the lamp current shall be updated to new setting immediately. 8. Do not lock Contrast or Brightness OSD for ECO function 9. Following is the lamp current chart, VX2739wm-1 CONFIDENTIAL – DO NOT COPY ViewSonic Corporation VX2739wm-CN...
- Page 41 Language Select OSD top item Japanese Set OSD language to Japanese and keep in Language Select OSD Korean Set OSD language to Korean and keep in Language Select OSD VX2739wm-1 CONFIDENTIAL – DO NOT COPY ViewSonic Corporation VX2739wm-CN...
- Page 42 Simplified Chinese and keep in Language Select OSD Simplified Chinese Set OSD language to Traditional Chinese and keep in Language Select OSD Resolution Notice Swap on and off the Resolution Notice function VX2739wm-1 CONFIDENTIAL – DO NOT COPY ViewSonic Corporation VX2739wm-CN...
- Page 43 [1]: Back to Setup Menu OSD [2]: selected setting[Up]: Increase the OSD value setting (move OSD right) [Dn]: Decrease the OSD value setting (move OSD left) [Up]+[Dn]: Recall to default value VX2739wm-1 CONFIDENTIAL – DO NOT COPY ViewSonic Corporation VX2739wm-CN...
- Page 44 OSD down) [Up]+[Dn]: Recall to default value OSD Time Out Set OSD Time Out to 5 Seconds Set OSD Time Out to 15 Seconds Set OSD Time Out to 30 Seconds VX2739wm-1 CONFIDENTIAL – DO NOT COPY ViewSonic Corporation VX2739wm-CN...
- Page 45 [1]: Back to Setup Menu [Up]: Increase the OSD value setting [Dn]: Decrease the OSD value setting [Up]+[Dn]: Recall to default value OSD Background Swap on and off the OSD Background = Non-transparent = Transparent VX2739wm-1 CONFIDENTIAL – DO NOT COPY ViewSonic Corporation VX2739wm-CN...
- Page 46 Auto Power Off = On, the message OSD will show on for 3 seconds (Power Lock function is disabled), The function will be disabled when power button locked. VX2739wm-1 CONFIDENTIAL – DO NOT COPY ViewSonic Corporation VX2739wm-CN...
- Page 47 [Dn]: Rolling down the slider (When push the button on the bottom position, the slider shall go down to the top item Memory Recall VX2739wm-1 CONFIDENTIAL – DO NOT COPY ViewSonic Corporation VX2739wm-CN...
- Page 48 3 seconds. 5. Clean FIFO timing mode buffer 6. Execute Auto Image Adjust Note: Memory Recall should not effect on Language, Power Lock Settings or Input Priority VX2739wm-1 CONFIDENTIAL – DO NOT COPY ViewSonic Corporation VX2739wm-CN...
- Page 49 *5 Status bar indicating OSD Lock or Unlock is in progress and when complete will indicate “OSD Locked” or “OSD Unlocked” for 3 seconds as below, OSD Locked OSD Unlocked VX2739wm-1 CONFIDENTIAL – DO NOT COPY ViewSonic Corporation VX2739wm-CN...
- Page 50 *4 Status bar indicating Power Button Lock or Unlock is in progress and when complete it will indicate “Power Button Locked” or “Button Unlocked” for 3 seconds as below, Power Button Locked VX2739wm-1 CONFIDENTIAL – DO NOT COPY ViewSonic Corporation VX2739wm-CN...
- Page 51 2. The Input Signal Notice OSD position is on the right-top side of image. 3. The OSD message as below, 5.1.5 Resolution Notice Actions 1. Resolution Notice OSD should show on screen after changing to non-native mode for 30 sec. VX2739wm-1 CONFIDENTIAL – DO NOT COPY ViewSonic Corporation VX2739wm-CN...
- Page 52 The OSD shall save new settings when it is turned off by the user or when it times out. There shall not be a separate save 5.1.8 Out of range While non-defined timing is detected, following OSD message will keeps showing VX2739wm-1 CONFIDENTIAL – DO NOT COPY ViewSonic Corporation VX2739wm-CN...
- Page 53 2. If the timing is inspect but not defined, the image shall be non-blanking. 5.1.9 No signal While no signal is detected, the following OSD message shall shows on 3 seconds then go in to power saving. OSD Background = Non-transparent Image = Blanking VX2739wm-1 CONFIDENTIAL – DO NOT COPY ViewSonic Corporation VX2739wm-CN...
- Page 54 Step 4: Double click the ISP Tool with the CD as the following icon to open the ISP tool. Step 5: The outline of isp tool. Step 6: Click on the “Connect” icon. A pop menu will show up. Press the “OK” button. VX2739wm-1 CONFIDENTIAL – DO NOT COPY ViewSonic Corporation VX2739wm-CN...
- Page 55 Step 7: Click on the “Read” icon. Press the “Read” button and select the .bin file which is copied to the folder of the computer. Press the “open” button. VX2739wm-1 CONFIDENTIAL – DO NOT COPY ViewSonic Corporation VX2739wm-CN...
- Page 56 Step 8: Click on the “Auto” icon and press the “Run” button. Step 9: Flash is running. VX2739wm-1 CONFIDENTIAL – DO NOT COPY ViewSonic Corporation VX2739wm-CN...
- Page 57 The disassembly procedure consists of the following steps: Base Cover LED Board Front Cover Keypad PSU Board Main Board VX2739wm-1 CONFIDENTIAL – DO NOT COPY ViewSonic Corporation VX2739wm-CN...
- Page 58 Speakers Base & Cover 1. Remove 4 screws (M4*13L (X)) that fixing on the neck. 2. Push down the Base and remove it. VX2739wm-1 CONFIDENTIAL – DO NOT COPY ViewSonic Corporation VX2739wm-CN...
- Page 59 3. Remove the 1 screw to unplug the stand neck. 4. Remove the 4 screws to take off the Hinge. VX2739wm-1 CONFIDENTIAL – DO NOT COPY ViewSonic Corporation VX2739wm-CN...
- Page 60 5. Then remove the screws. 6. Take off the Rear Cover carefully. VX2739wm-1 CONFIDENTIAL – DO NOT COPY ViewSonic Corporation VX2739wm-CN...
- Page 61 LED Board 1. Take off the 4 tapes on the LVDS wire and Keypad wire. 2. Unplug the power wire and keypad wire. 3. Remove the 2 screws on the LED board. VX2739wm-1 CONFIDENTIAL – DO NOT COPY ViewSonic Corporation VX2739wm-CN...
- Page 62 4. Unplug the LED board wire and take off the LED board. Front Cover 1. Take off the Shielding from the Panel. 2. Take off the Front Cover from the Panel. VX2739wm-1 CONFIDENTIAL – DO NOT COPY ViewSonic Corporation VX2739wm-CN...
- Page 63 Keypad Take off the Keypad from the Front Cover. PSU Board 1. Remove 4 screws on the Shielding. VX2739wm-1 CONFIDENTIAL – DO NOT COPY ViewSonic Corporation VX2739wm-CN...
- Page 64 2. Unplug the power cable from the PSU board. 3. Remove the 4 screws and take off the PSU board. VX2739wm-1 CONFIDENTIAL – DO NOT COPY ViewSonic Corporation VX2739wm-CN...
- Page 65 MainBoard 1. Remove 4 screws that fixing on the MainBoard. 3. Disconnect the LVDS and Keypad Cable from MainBoard and remove the MainBoard. VX2739wm-1 CONFIDENTIAL – DO NOT COPY ViewSonic Corporation VX2739wm-CN...
- Page 66 Speaker 1. Remove the 4 screws of the Speaker. 2. Disconnect the Speaker cable on the shielding and remove the Speakers. VX2739wm-1 CONFIDENTIAL – DO NOT COPY ViewSonic Corporation VX2739wm-CN...
-
Page 67: Troubleshooting Flow Chart
The nondefective Replace the PSU and Test Replacement MB and Abnormal screen 1.Test after boot,the screen left bottom has the streaks 2. Purple screen after booting 3. White screen appears after booting VX2739wm-1 CONFIDENTIAL – DO NOT COPY ViewSonic Corporation VX2739wm-CN... - Page 68 & assembly machine to test machine to test FAIL PASS Test LVDS cable PASS FAIL Replace PSU &test PASS FAIL The nondefective Replace MB &test PASS FAIL Replace PANEL &test PASS VX2739wm-1 CONFIDENTIAL – DO NOT COPY ViewSonic Corporation VX2739wm-CN...
- Page 69 Abnormal sound 1. No sound 2. Abnormal sound; 3. TV mode with noise. 4. Intermittent sound VX2739wm-1 CONFIDENTIAL – DO NOT COPY ViewSonic Corporation VX2739wm-CN...
- Page 70 Reset abnormal machine Disassembles LCD cover &check speaker cable PASS Reassembly machine to test FAIL PASS Replace Speaker cable and test FAIL PASS Replace Speaker&test The nondefective FAIL PASS Replace MB &test VX2739wm-1 CONFIDENTIAL – DO NOT COPY ViewSonic Corporation VX2739wm-CN...
- Page 71 OSD is unstable or not working Is Key Pad Board Connect Key Pad Board connecting normally? Is Button Switch Replace Button Switch normally? Is Key Pad Board Replace Key Pad Board Normally? Check Main Board VX2739wm-1 CONFIDENTIAL – DO NOT COPY ViewSonic Corporation VX2739wm-CN...
- Page 72 Disassemble the LCD cover and check the IR cable The nondefective PASS Replace new IR cable and test FAIL PASS Replace IR board and test FAIL PASS Replace MB and test VX2739wm-1 CONFIDENTIAL – DO NOT COPY ViewSonic Corporation VX2739wm-CN...
-
Page 73: Block Diagrams
7. Block Diagrams VX2739wm-1 CONFIDENTIAL – DO NOT COPY ViewSonic Corporation VX2739wm-CN... -
Page 74: Schematic Diagrams
8. Schematic Diagrams VX2739wm-1 CONFIDENTIAL – DO NOT COPY ViewSonic Corporation VX2739wm-CN... - Page 75 VX2739wm-1 CONFIDENTIAL – DO NOT COPY ViewSonic Corporation VX2739wm-CN...
- Page 76 VX2739wm-1 CONFIDENTIAL – DO NOT COPY ViewSonic Corporation VX2739wm-CN...
-
Page 77: Pcb Layout Diagrams
9. PCB Layout Diagrams VX2739wm-1 CONFIDENTIAL – DO NOT COPY ViewSonic Corporation VX2739wm-CN... - Page 78 10. Exploded Diagram and Exploded Parts List VX2739wm-1 CONFIDENTIAL – DO NOT COPY ViewSonic Corporation VX2739wm-CN...
- Page 79 EXPLODED PARTS LIST (VX2739wm-1/VX2739wm-CN) ViewSonic Model Number: VS12843 Rev: 1a Item ViewSonic P/N Ref. P/N Description Q'ty 13EB-1CQ0201 EB1C VX2739 FRONT COVER 13EB-1CQ0501 EB1C VX2739 POWER KEY DECOR 13EB-1CQ0301 EB1C VX2739 POWER KEY HW-00009268 13EB-1CB0301 EB1C VX2739 SHIELDING ASSY HW-00009267 13EB-1CN0101 EB1C VX2739 HINGE...
- Page 80 PACKING PART LIST (VX2439wm-1/VX2439wm-CN) ViewSonic Model Number: VS12841 Rev: 1a Item ViewSonic P/N Ref. P/N Description Q'ty P-00010256 1505-016Q000 EPS CUSHION VX2739WM (TL) P-00010257 1505-016P000 EPS CUSHION VX2739WM (TR) P-00010258 1505-016S000 EPS CUSHION VX2739WM (BL) P-00010259 1505-016R000 EPS CUSHION VX2739WM (BR)
- Page 81 Above listed items are examples, supplier can expand the rows to add more necessary items. Remark 2: All revised RSPLs with newly added items or any change made should be highlighted and correlated with the ECN/ECR approved by ViewSonic Corporation. This is to eliminate repeated Notice: 1.
- Page 82 BOM LIST (VX2739wm-1/VX2739wm-CN) ViewSonic Model Number: VS12843 Rev: 1a Item ViewSonic P/N Ref. P/N Description Location Universal number# Q'ty Unit 69EB3GE10A01P VX2439WM/LED BD./VIEWSONIC 69EB3HB10A01P VX2739WM/EU/IO BD./VIEWSONIC 69EB3HM10A01P VX2739WM/MAIN BD./VIEWSONIC 69EB3HJ10A01P VX2739WM/USB BD/VIEWSONIC 69EB3GK10A01P VX2439WM/KEYPAD BD./VIEWSONIC 1414-03KT000 W.H CABLE 8P TO 4P TO 4P 1414-03KR000 W.H CABLE 5P TO 5P,L:800mm...
- Page 83 Item ViewSonic P/N Ref. P/N Description Location Universal number# Q'ty Unit DC-00010336 1510-0E9N000 SERIAL LABEL VIEWSONIC 1510-0E9K000 HI-POT PASS LABEL VX2439WM DC-00010338 1510-0EPM000 POP STICKER VX2739WM 1537-0016000 PALLET /US 1522-01M0000 FLYER SERVICE ML VX2439WM R1.0 1522-01M4000 BASE INSTALLATION ENG 1524-00L9000...
-
Page 84: Recommended Spare Parts List
Add: Tel: Fax: E-mail: After completing this form, please return it to ViewSonic Quality Assurance in the USA at facsimile 1-909-839-7943. You may also e-mail any suggestions to the Director, Quality Systems & Processes (marc.maupin@viewsonic.com) VX2739wm-1 CONFIDENTIAL – DO NOT COPY...