Frigidaire Affinity FAFS4473L Use And Care Manual
Frigidaire affinity fafs4473l: user guide
Hide thumbs
Also See for Affinity FAFS4473L:
- Specifications (3 pages) ,
- Installation manual (24 pages)
Table of Contents
Advertisement
All about the
Use
of your
Important Safety Instructions ..............................2-4
Features ...............................................................5
Operating Instructions ...................................... 6-20
Washer Settings Chart .................................... 21-23
Stain Removal Guide ...................................... 24-25
www.frigidaire.com USA 1-800-944-9044
&
Washer
TA B L E O F C O N T E N T S
www.frigidaire.ca Canada 1-800-265-8352
Care
Care and Cleaning .......................................... 26-29
Solutions to Common Problems ....................... 30-34
Warranty ............................................................ 35
Notes ................................................................. 36
Français ..............................................................37
Advertisement
Table of Contents

Related Manuals for Frigidaire Affinity FAFS4473L


Summary of Contents for Frigidaire Affinity FAFS4473L
-
Page 1: Table Of Contents
Features ...5 Operating Instructions ... 6-20 Washer Settings Chart ... 21-23 Stain Removal Guide ... 24-25 www.frigidaire.com USA 1-800-944-9044 & Care TA B L E O F C O N T E N T S Care and Cleaning ... 26-29 Solutions to Common Problems ... -
Page 2: Important Safety Instructions
Save these instructions for future reference. Record Your Model and Serial Numbers The model and serial numbers of your washer are found on the washer serial plate located on the inside of the door. Record and retain these numbers. WARNING For your safety the following information in this manual must be followed to minimize the risk of fi... - Page 3 WARNING To reduce the risk of fi re, electrical shock, or injury to persons when using this washer, comply with the basic warnings listed below. Failure to comply with these warnings could result in serious personal injuries. You can be killed or seriously injured if you don’t follow these Important Safety Instructions: PREVENT FIRE •...
-
Page 4: Important Safety Instructions
• Do not tamper with controls. • Do not install or store the washer where it will be ex- posed to the weather. • Do not install on carpet. Install washer on a solid fl oor. It may be necessary to reinforce the fl oor to prevent vibration or movement. -
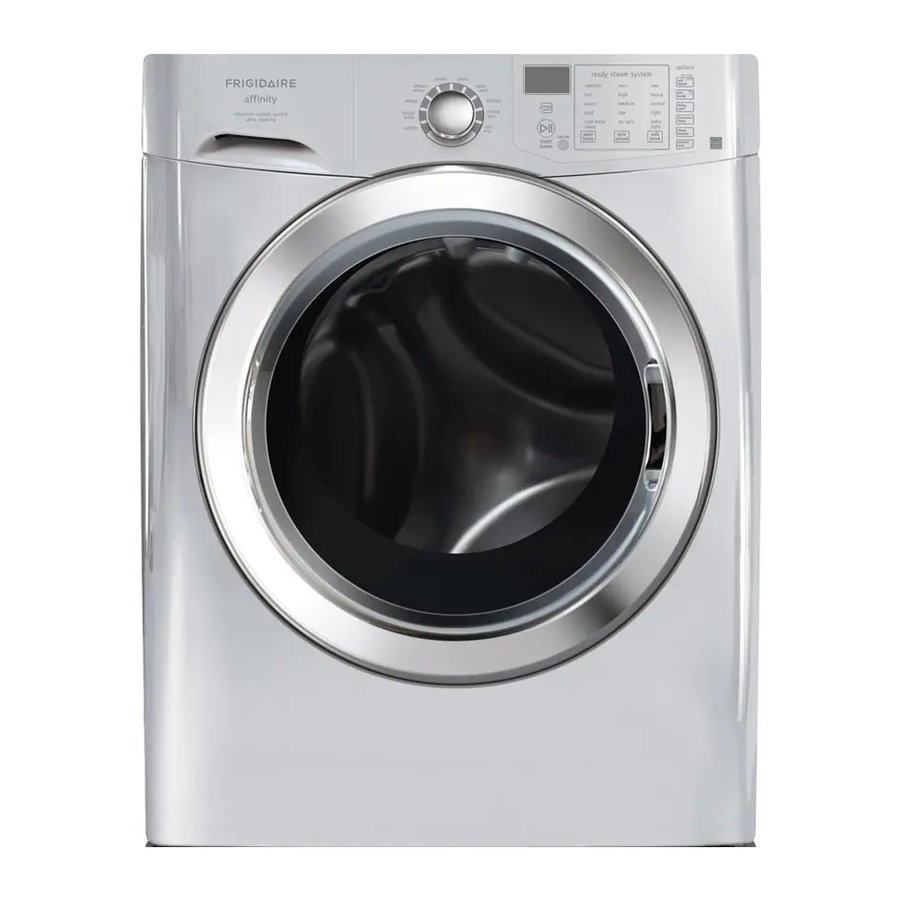
Page 5: Features
Cycle Selector Laundry Product Dispenser Drawer Door Striker Inner glass with small article redistribution ramp Stainless Steel Wash Drum As an ENERGY STAR Major Appliances has determined that this product meets the ENERGY STAR for energy effi ciency. LCD Display Adjustable Leveling Legs ®... -
Page 6: Operating Instructions
You may or may not hear the following sounds from your new washer: A. DRAIN HOSE The washer has a fl exible drain hose to carry water from the washer to the stand pipe of your home. You will hear water fl owing into your stand pipe. - Page 7 Add 1 or 2 similar items to help balance the load. • Wash a single heavy item such as a king-sized comforter, bedspread or sleeping bag separately. • The washer can be fully loaded, but the items should not be tightly packed. The door should close easily.
- Page 8 Wash” option. NOTE From time to time you may see water in the “Main Wash - liquid only” chamber. This is part of the normal operation of the washer. Powder Detergent • To use a high effi ciency powder detergent, remove the “Main Wash - liquid only”...
- Page 9 Operating Your Washer, continued Other Wash Products • Color-safe bleach, water conditioner, detergent booster and enzyme products may be added with the detergent. • Put liquid products with liquid detergent in the “ Wash - liquid only” chamber or powder products with powder detergent in the “Main Wash”...
- Page 10 • Excess wrinkling, color transfer or odors may de- sounds. velop in items left in the washer after the cycle has ended, if not removed promptly. CAUTION ENTRAPMENT and TIP-OVER HAZARD ” will...
-
Page 11: Cycle Selection
This manual covers many models and not all cycles, options, or features listed are available on every model. Consoles shown above for reference only. Your model may differ. Cycle Selection Turn the cycle selector in either direction to the cycle desired. - Page 12 fi nal temperature of the wash water may be lower and sanitation may be reduced. As a precaution, the washer door is locked once the water temperature reaches 130° F (55° C). If the cycle is cancelled during the wash phase and the water temperature is greater than 150°...
- Page 13 Spin Only (on select models) Use the Spin Only cycle anytime you want to drain water from the washer and spin out the load or as a follow-up to a No Spin selection. Select the spin speed appropriate to the load.
- Page 14 Not recommended for wool or fl eece fabrics. IMPORTANT Remove as much of pet hair as possible with vacuum, pet hair roller or brush to prevent clogging washer drain pump. Stuffed Toys Wash stuffed animals and soft toys with the Stuffed Toys cycle.
-
Page 15: Cycle Settings
The water heater setting and its distance from the washer, water usage in other parts of the home, and seasonally low ground water temperature in some geographic areas can affect water temperature. -
Page 16: Cycle Options
OPERATING INSTRUCTIONS Cycle Options To add options, press the corresponding options buttons to illuminate the selections desired. To delete options, press the options buttons again and the indicator lights will turn off. Some Options require a “Press & Hold” effort to activate or deactivate the secondary function. - Page 17 DO NOT force open - it will unlock upon cooling. • During a steam cycle you may notice steam exiting from the rear vent of the washer - this is normal and not cause for alarm. Drum Light ( Press & Hold on some models)
- Page 18 5 minutes. The water will drain and the load will automatically advance to the regular wash cycle. See step 5 in “Operating Your Washer” section in this guide for details on adding detergent to the dispenser. Chime (Press & Hold) A signal will sound at the end of the cycle if this option is selected.
-
Page 19: Other Features
4 extra rinses to attempt to clear the suds. Each extra rinse the washer performs to clear the suds will add 5 minutes to the cycle display time. If an excessive amount of detergent has been added and additional rinsing has not corrected the issue, “... -
Page 20: Operating Instructions
Clean Washer cycle. NOTE If the Clean Washer cycle is cancelled or paused during the cycle, the washer will go through 2 rinse cycles to clean the drum of any residual bleach before unlocking the door. Turn cycle selector to Rinse & Spin and then press Clean Washer button to enter Clean Washer cycle. -
Page 21: Washer Settings Chart
Options Energy Saver Add Steam Pre Wash Delay Start Freshwater Rinse Clean Washer Control Lock Press & Hold Chime Press & Hold Max Fill Available selections / Available on certain models only Shaded areas represent factory presets. WASHER SETTINGS CHART... - Page 22 WASHER SETTINGS CHART These Temperature, Spin Speeds, Soil Levels and Options are available with the following cycles: Auto Temp Sanitize Warm Cold Cold Water Clean Spin Speed High Medium No Spin Soil Level Heavy Normal Light Extra Light Options Energy Saver...
- Page 23 Energy Saver Add Steam Stain Pretreat Pre Wash Delay Start Freshwater Rinse Clean Washer Control Lock Press & Hold Light Press & Hold Chime Press & Hold Max Fill Available selections Shaded areas represent factory presets. WASHER SETTINGS CHART Specialty Cycles...
-
Page 24: Stain Removal Guide
STAIN REMOVAL GUIDE Safe Stain Removal Procedures To reduce the risk of fi re or serious injury to persons or property, comply with the basic warnings listed below: • Read and comply with all instructions on stain re- moval products. •... -
Page 25: Stain Removal Guide
Stain Removal Suggestions STAIN TREATMENT Adhesive tape, chewing Apply ice. Scrape off excess. Place stain face down on paper towels. Saturate with pre- gum, rubber cement wash stain remover or nonfl ammable dry cleaning fl uid. Baby formula, dairy Use product containing enzymes to pretreat or soak stains. Soak for 30 minutes or more. products, egg Wash. -
Page 26: Care And Cleaning
CARE AND CLEANING Inside Routine Cleaning (Preventative) To help prevent odors, mold or mildew, leave the door open for a few hours after use or whenever the washer is not in use. CAUTION ENTRAPMENT and TIP-OVER HAZARD Do not leave the door open if there are small children or pets present. - Page 27 • If there are no small children or pets present, you may leave the door ajar when the washer is not in use. • Leave the dispenser drawer open slightly at the end of the wash day.
- Page 28 CARE AND CLEANING Inside Cleaning (Aggressive) In cases where the Clean Washer cycle along with care and cleaning of rubber gasket folds isn’t done, and severe odor, mold, mildew, or residue buildup have developed, follow the below cleaning procedure to help alleviate the problem.
- Page 29 fl oor. Winterizing Instructions IMPORTANT If the washer is stored in an area where freezing can occur or moved in freezing temperatures, follow these winterizing instructions to prevent damage to the washer: 1 Turn off water supply faucets.
-
Page 30: Solutions To Common Problems
Reduce load size. Rewash • See Operating Your, steps 1 using correct water tem- and 2. perature, water level, and • Do not overload washer. amount of detergent. • Use correct temperature • Add nonprecipitating water and amount of detergent, conditioner to wash water to water and wash time. - Page 31 It may intensify discoloration. • • Use fabric softener in the washer to lubricate fi bers. When ironing, use spray starch or fabric fi nish on col- lars and cuffs. Turn items inside out to reduce abrasion.
- Page 32 Spray Gel Mildew Stain and fabric softener compart- Remover using brush to ments of dispenser. remove stains. • Dry the inside of washer • Use only HE (high effi ciency and gasket after every run. detergent) along with rec- ommended dosage.
- Page 33 Service Prevention Checklist Before calling for service, review this list. It may save both time and expense. The list includes common occurrences that are not the result of defective workmanship or materials in this washer. OCCURRENCE POSSIBLE CAUSE NOISE High pitch “jet engine”...
-
Page 34: Solutions To Common Problems
120°F (49°C). Adjust water heater as neces- sary. Avoid using hot water elsewhere before or during washer use. There may not be enough hot water avail- able for proper cleaning. If problem persists, your hot water system may be unable to support more than 1 use at a time. -
Page 35: Warranty
MAJOR APPLIANCE WARRANTY INFORMATION Your appliance is covered by a one year limited warranty. For one year from your original date of purchase, Electrolux will pay all costs for repairing or replacing any parts of this appliance that prove to be defective in materials or workmanship when such appliance is installed, used and maintained in accordance with the provided instructions. -
Page 36: Notes
NOTES...