Table of Contents
Advertisement
Available languages
Available languages
Quick Links
ATTACH YOUR RECEIPT HERE
Serial Number ________________________________ Purchase Date _________________________________
Questions, problems, missing parts? Before returning to your retailer, call our
customer service department at 1-877-447-4768, 8:30 a.m. – 4:30 p.m. CST,
Monday – Friday or log on to customerservice@ghpgroupinc.com.
70-10-585
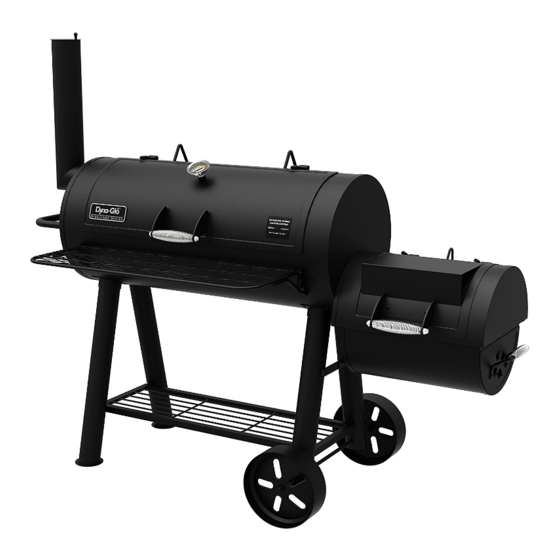
Charcoal Grill &
1
Heavy-Duty
Offset Smoker
MODEL #DGSS962CBO-D /
DGSS962CBO
Español p. 27
Français p. 53
Rev. 9/21/16
Advertisement
Chapters
Table of Contents

Related Manuals for Dyna-Glo DGSS962CBO


Summary of Contents for Dyna-Glo DGSS962CBO
- Page 1 Heavy-Duty Charcoal Grill & Offset Smoker MODEL #DGSS962CBO-D / DGSS962CBO Español p. 27 Français p. 53 ATTACH YOUR RECEIPT HERE Serial Number ________________________________ Purchase Date _________________________________ Questions, problems, missing parts? Before returning to your retailer, call our customer service department at 1-877-447-4768, 8:30 a.m. – 4:30 p.m. CST, Monday –...
-
Page 2: Table Of Contents
TABLE OF CONTENTS Safety Information ........................2 Package Contents ........................4 Hardware Contents ........................5 Preparation ..........................5 Assembly Instructions ........................ 6 Operation Instructions ......................... 18 Tips On Smoking ......................... 21 Care and Maintenance ........................ 23 Warranty ............................24 Replacement Parts List ......................25 SAFETY INFORMATION Please read and understand this entire manual before attempting to assemble, operate, or install the product. - Page 3 SAFETY INFORMATION • DO NOT use this product in a manner other than its intended purpose. It is NOT intended for commercial use. It is NOT intended to be installed or used in or on a recreational vehicle and/or boats. •...
-
Page 4: Package Contents
PACKAGE CONTENTS PART DESCRIPTION QUANTITY PART DESCRIPTION QUANTITY Cooking grate - offset Front shelf Charcoal grate - offset Left legs - front / rear Grill body Side handle - grill body Offset top section Smoke stack gasket Offset bottom section Temperature gauge Offset damper plate Smoke stack... -
Page 5: Hardware Contents
HARDWARE CONTENTS M6 x 12 M6 Nut M6 Flat M12 Nut M6 Lock Nut Bolt Washer Qty. 48 Qty. 33 Qty. 16 Qty. 2 Qty. 1 PREPARATION Before beginning assembly of product, make sure all parts are present. Compare parts with package contents list and hardware contents above. -
Page 6: Assembly Instructions
ASSEMBLY INSTRUCTIONS CAUTION: This unit is HEAVY! Do not attempt to handle this unit without assistance! Remove the pre-installed bolt and washer from Pre-installed the left lid hinge on the grill body (C) and slide the Hardware lid (A1) off the grill body hinges. Attach the left front leg (S) and right front leg (K) using four M6 x 12 bolts (AA), four M6 nuts (BB) and four M6 flat washers (CC) per leg. - Page 7 ASSEMBLY INSTRUCTIONS Before attaching the rear legs, insert the bottom shelf (Q) posts into the holes located on all four legs. WIth the bottom shelf (Q) securely in place, attach the left rear leg (S) and right rear leg (K) using four M6 x 12 bolts (AA), four M6 nuts (BB) and four M6 flat washers (CC), per leg.
- Page 8 ASSEMBLY INSTRUCTIONS Attach side handle (T) to the left side of the grill body (C) using four M6 x 12 bolts (AA) and four M6 nuts (BB). Hardware Used M6 x 12mm Bolt M6 Nut Place the smoke stack gasket (U) between the grill body (C) and the smoke stack (W) and attach using four M6 x 12 bolts (AA) and four M6 nuts (BB).
- Page 9 ASSEMBLY INSTRUCTIONS Attach the smoke stack damper (X) using the preinstalled spring and nut. Attach the offset support bracket (J) to the right front and rear legs (K) using two M6 x 12 bolts (AA). Hardware Used M6 x 12mm Bolt...
- Page 10 ASSEMBLY INSTRUCTIONS Insert the edge of the offset lid bracket (I) into the slotted opening on the offset top section (D). Attach using one M6 x 12 bolt (AA) and one M6 nut (BB). Hardware Used M6 x 12mm Bolt M6 Nut Attach the offset bottom section (E) to the top section (D) using six M6 x 12 bolts (AA).
- Page 11 ASSEMBLY INSTRUCTIONS Attach one M6 x 12 bolt (AA) into each side of the opening on the offset top section (D), as shown. Leave about 1/4" (6mm) of the bolt exposed. Hardware Used M6 x 12mm Bolt Insert each of the exposed bolts into the keyholes located on both sides of the smoker body (C) opening.
- Page 12 ASSEMBLY INSTRUCTIONS Use four M6 x 12 bolts (AA) to complete the smoker box attachment. Hardware Used M6 x 12mm Bolt Attach the offset support bracket (J) using two M6 x 12 bolts (AA) and two M6 nuts (BB). Hardware Used M6 x 12mm Bolt M6 Nut...
- Page 13 ASSEMBLY INSTRUCTIONS Insert the end of the grease cup support (M) into the hole located on the bottom of the smoker body (C). Thread the support through the hole until the support is hanging as shown. Note: This grill does not include a container for catching grease or liquids from inside the smoker body.
- Page 14 ASSEMBLY INSTRUCTIONS Attach the offset lid handle (B1) to the offset lid (C1) using the pre-installed bolts, washers and nuts. Attach the offset lid (C1) to the offset firebox using Preinstalled bolt the pre-installed bolt and washer. and washer...
- Page 15 ASSEMBLY INSTRUCTIONS Attach the side handle (H) to the access tray (G) using two M6 x 12 bolts (AA) and two M6 nuts (BB). Hardware Used M6 x 12mm Bolt M6 Nut Attach the offset damper plate (F) to the inside of the the access tray (G) using one M6 x 12 bolt (AA) and one M6 lock nut (EE).
- Page 16 ASSEMBLY INSTRUCTIONS Place the offset charcoal grate (B) inside the access tray (G) and slide the tray into the offset smoker box. Attach the lid assembly (A1) to the hinges on the grill body (C) using the pre-installed bolt and washer.
- Page 17 ASSEMBLY INSTRUCTIONS Attach the temperature gauge (V) by inserting the probe through the threaded opening on the lid (A1) and turning clockwise. Do not remove the pre-installed nut prior to attaching the gauge. NOTE: The alignment of the temperature gauge can be adjusted by turning the pre-installed nut clockwise (or counter-clockwise) prior to install- ing.
-
Page 18: Operation Instructions
OPERATING INSTRUCTIONS BEFORE FIRST USE Remove all hangings or plastic straps, if present. It is important to "season" your grill and smoker, prior to cooking food. Seasoning seals the paint and interior of your smoker to enhance flavoring, durability and overall performance. To season your grill and smoker, simply use it as you normally would without adding food. - Page 19 OPERATING INSTRUCTIONS Lighting Instructions (Continued) Step 3 After 20-25 minutes, charcoal should be ready for cooking and/or adding woodchips. Lighting Instructions for Grilling Start with at least 4 lbs. (1.8 kgs.) of charcoal (75 standard briquettes). Make adjustments as needed when cooking in colder climates or during high winds, and/or when fair amounts of precipitation are present.
- Page 20 OPERATING INSTRUCTIONS Dry Wood Chips Dry wood chips can be placed directly onto the pre-lit charcoal with or without aluminum foil. FOLLOW THE STEPS BELOW BEFORE ADDING DRY WOOD CHIPS. The amount and type of wood used is entirely dependent on the desired amount of flavor. Refer to the chart on the next page for tips on paring wood chips with various food types.
-
Page 21: Tips On Smoking
TIPS ON SMOKING Smoking foods is different from grilling foods. Smoking is typically done slowly and at a lower temperature than grilling. The smoke produced by the wood infuses itself into the meat giving it that great smoked flavor. Grilling is a much quicker cooking process using higher temperatures. •... - Page 22 SUGGESTED SMOKING AND MEAT TEMPERATURES Smoking Temperatures Accurate smoking temperatures are critical for safely cooking food when meat probes are not available. Please understand that using the factory installed temperature gauge is an acceptable tool for smoking food; but it’s not always the ideal means of measuring the most accurate smoking temperature because internal smoker temperatures can vary between the top and bottom cooking grates.
-
Page 23: Care And Maintenance
CARE AND MAINTENANCE AFTER USE SAFETY AND MAINTENANCE WARNING • Use caution when lifting and moving the unit to avoid strain injuries. Two people are recommended to lift or move the unit. • DO NOT store the unit near gasoline or other combustible liquids or where combustible vapors may be present. -
Page 24: Warranty
This warranty gives you specific legal rights, and you may have other rights that vary from state to state. GHP Group Inc. 6440 W. Howard Street Niles, IL, USA 60714-3302 Item name: Heavy-Duty Charcoal Grill and Offset Smoker Model #: DGSS962CBO / DGSS962CBO-D... -
Page 25: Replacement Parts List
REPLACEMENT PARTS LIST For replacement parts, call our customer service department at 1-877-447-4768, 8:30 a.m. - 4:30 p.m. CST, Monday - Friday or log on to customerservice@ghpgroupinc.com. PART DESCRIPTION PART # PART DESCRIPTION PART # Offset lid (without Offset support bracket 70-01-556 Offset lid bracket 70-01-528... - Page 26 REPLACEMENT PARTS LIST 70-10-585 Printed in China...
- Page 27 Parrilla a carbón de gran potencia y ahumador lateral MODELO N.° DGSS962CBO-D / DGSS962CBO ADJUNTE SU RECIBO AQUÍ Número de serie _______________________________ Fecha de compra ________________________________ ¿Dudas, problemas, piezas faltantes? Antes de volver a la tienda, llame a nuestro Departamento de Atención al Cliente al 1-877-447-4768, de lunes a viernes de 8:30 a 16:30 (hora central estándar), o escriba a customerservice@ghpgroupinc.com.
-
Page 28: Información De Seguridad
CONTENIDO Información de seguridad ..........................28 Contenido del paquete ..........................30 Herramientas y tornillería ..........................31 Preparación ...............................31 Instrucciones de ensamblaje ........................32 Instrucciones de funcionamiento .......................44 Consejos para ahumar ..........................47 Cuidado y mantenimiento ..........................49 Garantía ..............................50 Lista de piezas de repuesto ........................51 INFORMACIÓN DE SEGURIDAD Lea el manual entero atentamente antes de intentar ensamblar, poner en funcionamiento o instalar el producto. - Page 29 INFORMACIÓN DE SEGURIDAD • NO utilice este producto con una finalidad para la que no fue diseñado. NO está diseñado para uso comercial. NO está diseñado para ser instalado o utilizado en interiores ni sobre embarcaciones o casas rodantes. • NO guarde esta unidad cerca de gasolina u otros líquidos combustibles o donde podría haber otros vapores combustibles.
-
Page 30: Contenido Del Paquete
CONTENIDO DEL PAQUETE PIEZA DESCRIPCIÓN CANTIDAD PIEZA DESCRIPCIÓN CANTIDAD Rejilla para cocinar - conjunto lateral Estante frontal Rejilla para carbón - conjunto lateral Patas izquierdas: frontal/trasera Estructura de la parrilla Manija lateral - estructura de la parrilla Sección superior del conjunto lateral Junta de la chimenea Sección inferior del conjunto lateral Indicador de temperatura... -
Page 31: Herramientas Y Tornillería
HERRAMIENTAS Y TORNILLERÍA Perno Tuerca M6 Arandela Tuerca M12 Contratuerca M6 × 12 plana M6 Cant. 48 Cant. 33 Cant. 16 Cant. 2 Cant. 1 PREPARACIÓN Antes de comenzar a ensamblar el producto, asegúrese de tener todas las piezas. Compare las piezas con la lista del contenido del paquete, y con las herramientas y tornillería que figuran más arriba. -
Page 32: Instrucciones De Ensamblaje
INSTRUCCIONES DE ENSAMBLAJE PRECAUCIÓN: esta unidad es PESADA. No intente manipular la unidad sin ayuda. Quite el perno y la arandela preinstalados de la Tornillería bisagra izquierda de la tapa de la estructura de la preinstalada parrilla (C) y deslice la tapa (A1) hacia afuera de las bisagras de la estructura de la parrilla. - Page 33 INSTRUCCIONES DE ENSAMBLAJE Antes de colocar las patas traseras, inserte los pasantes del estante inferior (Q) en los orificios ubicados en las cuatro patas. Con el estante inferior (Q) colocado firmemente en su lugar, fije la pata trasera izquierda (S) y la pata trasera derecha (K) utilizando cuatro pernos M6 ×...
- Page 34 INSTRUCCIONES DE ENSAMBLAJE Instale la manija lateral (T) en el lado izquierdo de la estructura de la parrilla (C) utilizando cuatro pernos M6 × 12 (AA) y cuatro tuercas M6 (BB). Herramientas y tornillería utilizadas Perno × 4 M6 × 12 mm Tuerca M6 ×...
- Page 35 INSTRUCCIONES DE ENSAMBLAJE Coloque el regulador de tiro de la chimenea (X) utilizando el resorte y la tuerca preinstalados. Fije la abrazadera de soporte del conjunto lateral (J) a las patas derechas frontal y trasera (K) utilizando dos pernos M6 × 12 (AA). Herramientas y tornillería utilizadas Perno ×...
- Page 36 INSTRUCCIONES DE ENSAMBLAJE Inserte el borde de la abrazadera de la tapa del conjunto lateral (I) en la apertura ranurada de la sección superior del conjunto lateral (D). Fíjela utilizando un perno M6 × 12 (AA) y una tuerca M6 (BB). Herramientas y tornillería utilizadas Perno ×...
- Page 37 INSTRUCCIONES DE ENSAMBLAJE Coloque un perno M6 × 12 (AA) en cada lado de la apertura de la sección superior del conjunto lateral (D), como se muestra. Deje expuesto alrededor de 1/4" (6 mm) del perno. Herramientas y tornillería utilizadas Perno ×...
- Page 38 INSTRUCCIONES DE ENSAMBLAJE Utilice cuatro pernos M6 × 12 (AA) para terminar de fijar la estructura del ahumador. Herramientas y tornillería utilizadas Perno × 4 M6 × 12 mm Fije la abrazadera de soporte del conjunto lateral (J) utilizando dos pernos M6 × 12 (AA) y dos tuercas M6 (BB).
- Page 39 INSTRUCCIONES DE ENSAMBLAJE Inserte el extremo del soporte de la grasera (M) en el orificio ubicado en la parte inferior de la estructura del ahumador (C). Enrosque el soporte en el orificio hasta que cuelgue como se muestra. Nota: esta parrilla no incluye un contenedor para recolectar grasa o líquidos del interior de la estructura del ahumador.
- Page 40 INSTRUCCIONES DE ENSAMBLAJE Fije la manija de la tapa del conjunto lateral (B1) a la tapa del conjunto lateral (C1) utilizando los pernos, las arandelas y las tuercas preinstalados. Fije la tapa del conjunto lateral (C1) a la cámara de Perno y arandela combustión del conjunto lateral utilizando el perno y la preinstalados...
- Page 41 INSTRUCCIONES DE ENSAMBLAJE Fije la manija lateral (H) a la bandeja de acceso (G) utilizando dos pernos M6 × 12 (AA) y dos tuercas M6 (BB). Herramientas y tornillería utilizadas Perno × 2 M6 × 12 mm Tuerca M6 × 2 Fije el plato regulador de tiro del conjunto lateral (F) a la parte interior de la bandeja de acceso (G) utilizando un perno M6 ×...
- Page 42 INSTRUCCIONES DE ENSAMBLAJE Coloque la rejilla para carbón del conjunto lateral (B) dentro de la bandeja de acceso (G) y deslice la bandeja hacia el interior de la estructura del ahumador del conjunto lateral. Fije el conjunto de la tapa (A1) a las bisagras en la estructura de la parrilla (C) utilizando el perno y la arandela preinstalados.
- Page 43 INSTRUCCIONES DE ENSAMBLAJE Coloque el indicador de temperatura (V) insertando la sonda térmica en el orificio roscado de la tapa (A1) y girando en el sentido de las agujas del reloj. No quite la tuerca preinstalada antes de colocar el indicador de temperatura.
-
Page 44: Instrucciones De Funcionamiento
INSTRUCCIONES DE FUNCIONAMIENTO ANTES DE UTILIZAR LA UNIDAD POR PRIMERA VEZ Quite todas las presillas o las fajas de plástico, si están presentes. Es importante "curar" la parrilla y ahumador antes de cocinar alimentos. Este proceso sella la pintura y el interior del ahumador para mejorar el sabor, la durabilidad y el rendimiento en general. - Page 45 INSTRUCCIONES DE FUNCIONAMIENTO Instrucciones de encendido (continuación) Paso 3 Después de 20 a 25 minutos, el carbón estará listo para cocinar y/o agregarle viruta de madera. Instrucciones de encendido para asar Comience con al menos 4 lb (1,8 kg) de carbón (75 briquetas estándar). Realice los ajustes necesarios cuando cocina en climas fríos, cuando hay mucho viento y/o cuando hay una cantidad considerable de precipitaciones.
- Page 46 INSTRUCCIONES DE FUNCIONAMIENTO Viruta de madera seca La viruta de madera seca se puede colocar directamente en el carbón preencendido, con o sin la hoja de aluminio. SIGA LOS PASOS QUE FIGURAN A CONTINUACIÓN ANTES DE AGREGAR VIRUTA DE MADERA SECA. La cantidad y el tipo de madera utilizada dependen completamente de la intensidad de sabor que se desea lograr.
-
Page 47: Consejos Para Ahumar
CONSEJOS PARA AHUMAR El proceso para ahumar alimentos es distinto del proceso para asar alimentos. En general, el proceso para ahumar se realiza lentamente y a una temperatura más baja que el proceso para asar. El humo producido por la madera penetra en la carne dándole ese exquisito sabor ahumado. - Page 48 TEMPERATURAS SUGERIDAS PARA AHUMAR Y PARA LA CARNE Temperaturas para ahumar Una temperatura precisa para ahumar es fundamental para cocinar los alimentos de forma segura cuando no se dispone de una sonda térmica para carne. Tenga en cuenta que el indicador de temperatura instalado de fábrica es una herramienta aceptable para ahumar alimentos, pero no siempre es el medio ideal para medir la temperatura más precisa para ahumar ya que las temperaturas internas del ahumador pueden variar entre la rejilla para cocinar superior y la rejilla inferior.
-
Page 49: Cuidado Y Mantenimiento
CUIDADO Y MANTENIMIENTO SEGURIDAD Y MANTENIMIENTO DESPUÉS DEL USO ADVERTENCIA • Tenga precaución al levantar y mover la unidad para evitar lesiones por esfuerzo. Se recomienda levantar o mover la unidad entre dos personas. • NO guarde la unidad cerca de gasolina u otros líquidos combustibles o donde podría haber vapores combustibles. Asegúrese de que no haya materiales ni vapores combustibles en el área donde se encuentra el artefacto. -
Page 50: Garantía
Esta garantía otorga derechos legales específicos, y podría haber otros derechos aplicables según el estado. GHP Group Inc. 6440 W. Howard Street Niles, IL, EE. UU. 60714-3302 Nombre del artículo: Parrilla a carbón de gran potencia y ahumador lateral N.° de modelo: DGSS962CBO / DGSS962CBO-D... -
Page 51: Lista De Piezas De Repuesto
LISTA DE PIEZAS DE REPUESTO Para obtener piezas de repuesto, llame a nuestro Departamento de Atención al Cliente al 1-877-447-4768, de lunes a viernes de 8:30 a 16:30 (hora central estándar), o escriba a customerservice@ghpgroupinc.com. PIEZA DESCRIPCIÓN N.º DE PIEZA PIEZA DESCRIPCIÓN N.º... - Page 52 LISTA DE PIEZAS DE REPUESTO 70-10-585 Impreso en China...
- Page 53 Barbecue au charbon haute-capacité et fumoir décalé MODÈLE N° DGSS962CBO-D/ DGSS962CBO AGRAFEZ VOTRE FACTURE ICI Numéro de série ____________________________________ Date d’achat ________________________________________ Des questions, des problèmes, des pièces manquantes? Avant de retourner l’article au détaillant, appelez notre service à la clientèle au 1 877 447-4768, entre 8 h 30 et 16 h 30 (HNC), du lundi au vendredi, ou écrivez à...
-
Page 54: Informations Relatives À La Sécurité
TABLE DES MATIÈRES Informations relatives à la sécurité ......................54 Contenu de l’emballage ..........................56 Quincaillerie fournie ........................... 57 Préparation ..............................57 Instructions d’assemblage ......................... 58 Instructions de fonctionnement ........................70 Conseils sur le fumage ..........................73 Entretien et maintenance ........................... 75 Garantie .............................. - Page 55 INFORMATIONS RELATIVES À LA SÉCURITÉ • N’UTILISEZ PAS le produit de quelque manière autre que la fonction pour laquelle il a été prévu. Il n’est PAS destiné à un usage commercial. Il n’est pas conçu pour une installation ou un usage à bord d’un véhicule récréatif ou d’un bateau.
-
Page 56: Contenu De L'emballage
CONTENU DE L’EMBALLAGE PIÈCE DESCRIPTION QUANTITÉ PIÈCE DESCRIPTION QUANTITÉ Grille de cuisson – fumoir décalé Tablette avant Grille à charbon – fumoir décalé Pieds gauches – avant/arrière Bâti du barbecue Poignée latérale – bâti du barbecue Section supérieure du fumoir décalé Joint de la cheminée Section inférieure du fumoir décalé... -
Page 57: Quincaillerie Fournie
QUINCAILLERIE FOURNIE Boulon Écrou M6 Rondelle Écrou M12 Écrou de M6 x 12 mm plate M6 blocage M6 Qté 48 Qté 33 Qté 16 Qté 2 Qté 1 PRÉPARATION Avant de commencer l’assemblage du produit, assurez-vous que toutes les pièces sont présentes. Comparez les pièces à... -
Page 58: Instructions D'assemblage
INSTRUCTIONS D’ASSEMBLAGE MISE EN GARDE : Cet appareil est LOURD! N’essayez pas de le manipuler sans aide! Retirez le boulon et la rondelle préinstallés sur la Quincaillerie charnière gauche du couvercle du bâti du barbecue préinstallée (C) et glissez le couvercle (A1) hors des charnières du bâti du barbecue. - Page 59 INSTRUCTIONS D’ASSEMBLAGE Avant de fixer les pieds arrière, insérez les tenons de la tablette inférieure (Q) dans les trous situés sur les quatre (4) pieds. Une fois la tablette inférieure bien en place, fixez les pieds arrière gauche (S) et droit (K) à...
- Page 60 INSTRUCTIONS D’ASSEMBLAGE Fixez la poignée latérale (T) au côté gauche du bâti du barbecue (C) à l’aide de quatre (4) boulons M6 x 12 mm (AA) et de quatre (4) écrous M6 (BB). Matériel utilisé Boulon M6 x 12 mm Écrou M6 Placez le joint de la cheminée (U) entre le bâti du barbecue (C) et la cheminée (W) et fixez le tout à...
- Page 61 INSTRUCTIONS D’ASSEMBLAGE Fixez le clapet d’aération de la cheminée (X) à l’aide du ressort et de l’écrou préinstallés. Fixez le support de raccordement du fumoir décalé (J) aux pieds avant et arrière droits (K) à l’aide de deux (2) boulons M6 x 12 mm (AA). Matériel utilisé...
- Page 62 INSTRUCTIONS D’ASSEMBLAGE Insérez le côté du support du couvercle du fumoir décalé (I) dans l’ouverture sur la partie supérieure du fumoir décalé (D). Fixez le support à l’aide d’un (1) boulon M6 x 12 mm (AA) et d’un (1) écrou M6 (BB). Matériel utilisé...
- Page 63 INSTRUCTIONS D’ASSEMBLAGE Vissez un (1) boulon M6 x 12 mm (AA) dans chacune des ouvertures de la section supérieure du fumoir décalé (D), comme illustré. Laissez dépasser les boulons d’environ 6 mm (1/4 po). Matériel utilisé Boulon M6 x 12 mm Insérez chacun des boulons qui dépassent dans les encoches en trou de serrure situées de chaque côté...
- Page 64 INSTRUCTIONS D’ASSEMBLAGE Utilisez quatre (4) boulons M6 x 12 mm (AA) pour terminer de fixer la chambre de combustion du fumoir décalé. Matériel utilisé Boulon M6 x 12 mm Fixez le support du fumoir décalé (J) à l’aide de deux (2) boulons M6 x 12 mm (AA) et de deux (2) écrous M6 (BB).
- Page 65 INSTRUCTIONS D’ASSEMBLAGE Insérez l’extrémité du support du récupérateur de graisse (M) dans le trou situé au fond du bâti du barbecue (C). Faites glisser le support dans le trou jusqu’à ce qu’il soit suspendu comme illustré. Remarque : Ce barbecue ne comprend pas de contenant pour récupérer la graisse ou les liquides s’écoulant à...
- Page 66 INSTRUCTIONS D’ASSEMBLAGE Fixez la poignée du couvercle du fumoir décalé (B1) au couvercle du fumoir décalé (C1) à l’aide des boulons, des rondelles et des écrous préinstallés. Fixez le couvercle du fumoir décalé (C1) à la chambre Boulon et rondelle de combustion du fumoir décalé...
- Page 67 INSTRUCTIONS D’ASSEMBLAGE Fixez la poignée latérale (H) au tiroir d’accès (G) à l’aide de deux (2) boulons M6 x 12 mm (AA) et de deux (2) écrous M6 (BB). Matériel utilisé Boulon M6 x 12 mm Écrou M6 Fixez le registre du fumoir décalé (F) à l’intérieur du tiroir d’accès (G) à...
- Page 68 INSTRUCTIONS D’ASSEMBLAGE Placez la grille à charbon du fumoir décalé (B) dans le tiroir d’accès (G) et glissez ce dernier dans la chambre de combustion du fumoir décalé. Fixez l’assemblage du couvercle (A1) aux charnières du bâti du barbecue (C) à l’aide du boulon et de la rondelle préinstallés.
- Page 69 INSTRUCTIONS D’ASSEMBLAGE Fixez la jauge de température (V) en insérant la sonde par l’ouverture filetée du couvercle (A1) et en tournant dans le sens horaire. Ne retirez pas l’écrou préinstallé avant l’installation. REMARQUE : L’alignement de la jauge de température peut être réglé en tournant l’écrou préinstallé...
-
Page 70: Instructions De Fonctionnement
INSTRUCTIONS DE FONCTIONNEMENT AVANT LA PREMIÈRE UTILISATION Retirez tous les emballages et toutes les attaches de plastique, le cas échéant. Avant la cuisson des aliments, il est important de culotter le barbecue et le fumoir. Le culottage permet de sceller la peinture et l’intérieur de l’appareil pour en augmenter la durabilité et la performance globale, en plus d’améliorer le goût des aliments. - Page 71 INSTRUCTIONS DE FONCTIONNEMENT Instructions d’allumage (suite) Étape 3 Après 20 à 25 minutes, les charbons devraient être prêts pour la cuisson ou pour l’ajout de copeaux de bois. Instructions d’allumage pour cuisson Commencez avec au moins 1,8 kg (4 lb) de charbon (75 briquettes standards). Ajustez la quantité...
- Page 72 INSTRUCTIONS DE FONCTIONNEMENT Copeaux de bois secs Les copeaux de bois secs peuvent être placés directement sur le charbon allumé, qu’ils soient dans du papier d’aluminium ou non. SUIVEZ LES ÉTAPES CI-DESSOUS AVANT D’AJOUTER DES COPEAUX DE BOIS SECS. La quantité et l’essence de bois à utiliser dépendent entièrement de la concentration de saveur désirée. Veuillez vous reporter au tableau ci-dessous pour des conseils sur l’utilisation de copeaux de bois avec différents aliments.
-
Page 73: Conseils Sur Le Fumage
CONSEILS SUR LE FUMAGE Le fumage d’aliments est différent des grillades. Le fumage se fait généralement lentement et à des températures plus basses que la cuisson. La fumée produite par le bois s’infuse d’elle-même dans la viande, ce qui lui confère ce délicieux goût de fumée. - Page 74 SUGGESTIONS SUR LES TEMPÉRATURES DE FUMAGE ET DE CUISSON DE LA VIANDE Températures de fumage Des températures de fumage précises sont essentielles pour faire cuire les aliments de manière sécuritaire si vous ne disposez pas d’une sonde thermique. Veuillez noter que la jauge de température préinstallée est un outil acceptable pour le fumage des aliments, mais que ce n’est pas toujours le moyen idéal pour mesurer la température exacte de fumage, car il peut y avoir une différence de température à...
-
Page 75: Entretien Et Maintenance
ENTRETIEN ET MAINTENANCE SÉCURITÉ ET ENTRETIEN APRÈS USAGE AVERTISSEMENT • Soyez prudent lorsque vous soulevez et déplacez l’appareil afin d’éviter les douleurs et les blessures. Il est conseillé de s’y prendre à deux pour le soulever ou le déplacer. • NE RANGEZ PAS l’appareil près d’essence ou d’autres liquides combustibles, ni dans des endroits où des vapeurs combustibles peuvent être présentes. -
Page 76: Garantie
GHP Group, Inc. 6440 W. Howard St. Niles, IL, États-Unis 60714-3302 Nom de l’article : Barbecue au charbon haute-capacité et fumoir décalé N° de modèle : DGSS962CBO/DGSS962CBO-D... -
Page 77: Liste Des Pièces De Rechange
LISTE DES PIÈCES DE RECHANGE Pour obtenir des pièces de rechange, appelez notre service à la clientèle au 1 877 447-4768, entre 8 h 30 et 16 h 30 (HNC), du lundi au vendredi, ou écrivez à customerservice@ghpgroupinc.com. PIÈCE DESCRIPTION N°... - Page 78 LISTE DES PIÈCES DE RECHANGE 70-10-585 Imprimé en Chine...