Bosch DIVAR IP 7000 Installation Manual
Hide thumbs
Also See for DIVAR IP 7000:
- Installation manual (56 pages) ,
- Installation manual (52 pages)

Related Manuals for Bosch DIVAR IP 7000


Summary of Contents for Bosch DIVAR IP 7000
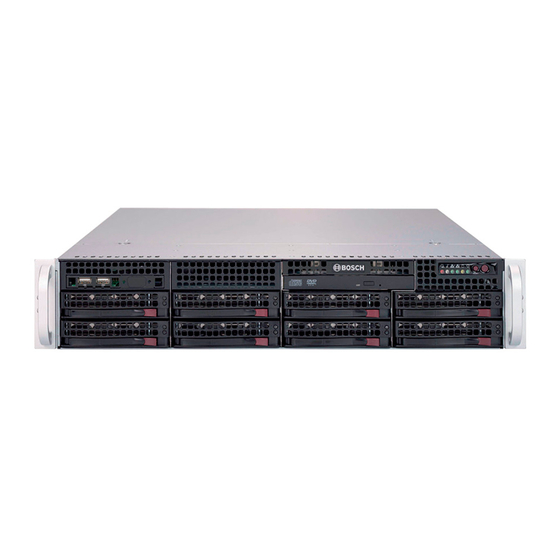
- Page 1 DIVAR IP 7000 (2U) DIP-7180-00N | DIP-7183-4HD | DIP-7183-8HD | DIP-7184-4HD | DIP-7184-8HD Installation Manual...
-
Page 3: Table Of Contents
DIVAR IP 7000 (2U) Table of contents | en Table of contents Safety information Safety message explanation Safety precautions Important safety instructions Electrical safety precautions ESD precautions Operating precautions Notices FCC and ICES compliance About this manual System overview Chassis features Chassis components 3.2.1... - Page 4 | Table of contents DIVAR IP 7000 (2U) Installing an Enterprise Management Server RAID setup Additional documentation and client software OSS licenses MIT - iniparser MS-PL - MSDN Library NTP License - NTP Project Appliance Finder Bosch VMS licenses Maintenance 10.1...
-
Page 5: Safety Information
DIVAR IP 7000 (2U) Safety information | en Safety information Observe the safety notes in this chapter. Safety message explanation Warning! Indicates a hazardous situation which, if not avoided, could result in death or serious injury. Caution! Indicates a hazardous situation which, if not avoided, could result in minor or moderate injury. -
Page 6: Important Safety Instructions
| Safety information DIVAR IP 7000 (2U) Warning! Interruption of mains supply: Voltage is applied as soon as the mains plug is inserted into the mains socket. However, for devices with a mains switch, the device is only ready for operation when the mains switch (ON/OFF) is in the ON position. - Page 7 DIVAR IP 7000 (2U) Safety information | en – Do not install device near any heat sources such as radiators, heaters, stoves, or other equipment (including amplifiers) that produce heat. – Never spill liquid of any kind on the device.
-
Page 8: Electrical Safety Precautions
SELV circuits. – If safe operation of the unit cannot be ensured, remove it from service and secure it to prevent unauthorized operation. In such cases, have the unit checked by Bosch Security Systems. –... -
Page 9: Esd Precautions
DIVAR IP 7000 (2U) Safety information | en Caution! DVD-ROM Laser: To prevent direct exposure to the laser beam and hazardous radiation exposure, do not open the enclosure or use the unit in any unconventional way. ESD precautions Notice! Electrostatic Discharge (ESD) can damage electronic components. To prevent damage to your system, it is important to handle the electronic components very carefully. -
Page 10: Fcc And Ices Compliance
DIVAR IP 7000 (2U) Notice! Video loss is inherent to digital video recording; therefore, Bosch Security Systems cannot be held liable for any damage that results from missing video information. To minimize the risk of losing information, we recommend multiple, redundant recording systems, and a procedure to back up all analog and digital information. - Page 11 DIVAR IP 7000 (2U) Safety information | en not installed and used in accordance with the manufacturer’s instruction manual, may cause harmful interference with radio communications. Operation of this equipment in a residential area is likely to cause harmful interference, in which case you will be required to correct the interference at your own expense.
-
Page 12: About This Manual
| About this manual DIVAR IP 7000 (2U) About this manual This manual is written for professional system integrators and PC technicians. It provides information for the installation and use of the chassis. Installation and maintenance should be performed by experienced and qualified technicians only. -
Page 13: System Overview
DIVAR IP 7000 features wizard based set-up and centralized configuration to reduce installation times. All components are pre-installed and pre-configured. Simply connect to the network and turn on the unit — DIVAR IP 7000 starts recording straight out of the box. –... -
Page 14: Fans
| System overview DIVAR IP 7000 (2U) For empty chassis, the hard drives must be purchased separately. For the latest shipping lists, see the datasheet in the online product catalog. 3.2.2 Fans The system fans provide cooling for the chassis. These fans circulate air through the chassis as a means of lowering the chassis internal temperature. -
Page 15: Control Panel Buttons
DIVAR IP 7000 (2U) System overview | en Rear view: 2x power supply modules 2x redundant SSD drives for operating system (RAID1 mirror) 1x serial port 1x network port for BMC (Baseboard Management Controller) connection and IPMI (Intelligent Platform Management Interface) monitoring 4 USB ports 2x network ports for data transmission... -
Page 16: Drive Carrier Leds
| System overview DIVAR IP 7000 (2U) – Power failure: A flashing LED indicates a power failure in the power supply. – Displays the system status. System status Description Continously on and red An overheat condition has occurred. (This may be caused by cable congestion.) - Page 17 DIVAR IP 7000 (2U) System overview | en – Red: The red LED indicates a SATA drive failure. If one of the SATA drives fail, you should be notified by your system management software. Bosch Sicherheitssysteme GmbH Installation Manual 2016.07 | V2 | DOC...
-
Page 18: Rack Installation
If the chassis itself shows damage, file a damage claim with the carrier who delivered it and notify the respective Bosch RMA desk. Due to the weight of the system: After opening the top of the shipping box, one person should stand at either end and lift the disk array out together. -
Page 19: General System Precautions
DIVAR IP 7000 (2U) Rack installation | en 4.2.3 General system precautions – Review the electrical and general safety precautions that came with the components you are adding to your chassis. – Determine the placement of each component in the rack before installing the rails. -
Page 20: Installing The Inner Rails On The Chassis
| Rack installation DIVAR IP 7000 (2U) – an inner fixed chassis rail that secures directly to the chassis – an outer fixed rack rail that secures directly to the rack itself. To separate the inner and outer rails: Locate the rail assembly in the chassis packaging. -
Page 21: Installing The Outer Rails To The Rack
DIVAR IP 7000 (2U) Rack installation | en To install the inner rails: Place the inner rail extensions on the side of the chassis aligning the hooks of the chassis with the rail extension holes. Make sure the extension faces "outward" just like the pre- attached inner rail. -
Page 22: Installing The Chassis In The Rack
| Rack installation DIVAR IP 7000 (2U) 4.3.4 Installing the chassis in the rack Warning! Stability hazard Before sliding the unit out for servicing make sure that the rack stabilizing mechanism is in place, or the rack is bolted to the floor. Failure to stabilize the rack can cause the rack to tip over. -
Page 23: Turning On The System
DIVAR IP 7000 (2U) Rack installation | en Warning! Stability hazard Before sliding the unit out for servicing make sure that the rack stabilizing mechanism is in place, or the rack is bolted to the floor. Failure to stabilize the rack can cause the rack to tip over. -
Page 24: System Setup - First Steps
This chapter is valid for DIVAR IP 7000 2U models that come with pre-installed hard drives. The operating system of empty units loaded with third party hard drives will start normally, but the added hard drives must be configured with the RAID utility prior to initial software setup. -
Page 25: Using Bosch Vms Config Wizard
The installation can take several minutes. Do not turn off the computer. The Bosch VMS default screen is displayed. 10. On the Bosch VMS default screen, double-click the Bosch VMS Wizard icon to start the Configuration Wizard. -
Page 26: Using Bosch Vms Operator Client
Configuration Wizard itself, refer to the Bosch VMS manual (see Additional Documentation and client software). Using Bosch VMS Operator Client Use Bosch VMS Operator Client to verify the live, recording and playback functionality of DIVAR IP. To verify live image functionality in the Operator Client On the Bosch VMS default screen, double-click the Operator Client icon... -
Page 27: Connecting To The Internet
Remote connection with Operator Client To make a remote connection with Bosch VMS Operator Client Download the Bosch VMS installer from the product page or use the installer software on the DVD delivered with the product. Copy the Bosch VMS installer to the remote workstation that will be used for remote viewing. -
Page 28: Installing An Enterprise Management Server
User name: admin Password: enter user password Notice! Only use Bosch VMS Operator Client or Video Security App in the version that matches DIVAR IP. Other clients or application software may work but are not supported. Installing an Enterprise Management Server For a central management of multiple systems you can install Bosch VMS Enterprise Management Server on a separate server. -
Page 29: Raid Setup
DIVAR IP 7000 (2U) RAID setup | en RAID setup If you have added third party hard drives to empty units, you must configure the hard drives using the RAID setup utility. Notice! The RAID setup process is not necessary for units with pre-installed hard drives. These units are delivered with a default configuration. -
Page 30: Additional Documentation And Client Software
DIVAR IP 7000 (2U) Additional documentation and client software Documentation and software for Bosch Security Systems products can be found in the online product catalogue as follows: Open any browser > enter www.boschsecurity.com > select your region and your country >... -
Page 31: Oss Licenses
DIVAR IP 7000 (2U) OSS licenses | en OSS licenses This chapter provides an overview on used Open Source Licenses in DIVAR IP 7000. The license packages are either used completely or only some parts within a package are used. MIT - iniparser... -
Page 32: Ms-Pl - Msdn Library
| OSS licenses DIVAR IP 7000 (2U) MS-PL - MSDN Library 2016.07 | V2 | DOC Installation Manual Bosch Sicherheitssysteme GmbH... -
Page 33: Ntp License - Ntp Project
DIVAR IP 7000 (2U) OSS licenses | en NTP License - NTP Project Appliance Finder This product may contain the following open source components: CodeProject MVVM # Episode 1-4: -http://www.codeproject.com/Articles/173618/MVVM-sharp-Episode-1 -http://www.codeproject.com/Articles/173630/MVVM-sharp-Episode-2 -http://www.codeproject.com/Articles/173661/MVVM-sharp-Episode-3 -http://www.codeproject.com/Articles/173673/MVVM-sharp-Episode-4 -Author _Maxxx_ (http://www.codeproject.com/script/Membership/ View.aspx?mid=4693125) --------------------------------------------------------------------------- CPOL 1.02 LICENSE... - Page 34 | OSS licenses DIVAR IP 7000 (2U) The Article accompanying the Work may not be distributed or republished without the Author's consent This License is entered between You, the individual or other entity reading or otherwise making use of the Work licensed pursuant to this License and the individual or other entity which offers the Work under the terms of this License ("Author").
- Page 35 DIVAR IP 7000 (2U) OSS licenses | en License Grant. Subject to the terms and conditions of this License, the Author hereby grants You a worldwide, royalty-free, non-exclusive, perpetual (for the duration of the applicable copyright) license to exercise the rights in the Work as stated below: You may use the standard version of the Source Code or Executable Files...
- Page 36 | OSS licenses DIVAR IP 7000 (2U) apply to such Executable Files and/or Source Code. You may not offer or impose any terms on the Work that alter or restrict the terms of this License or the recipients' exercise of the rights granted hereunder. You may not sublicense the Work.
-
Page 37: Bosch Vms Licenses
Author and You. Bosch VMS licenses Bosch VMS licenses used in DIVAR IP 7000 products are listed in the Bosch VMS Open Source Licenses manual. The manual is available from the Bosch online product catalog. -
Page 38: Maintenance
| Maintenance DIVAR IP 7000 (2U) Maintenance This chapter covers the steps required to install components and perform maintenance on the chassis. Notice! Installation should only be carried out by qualified customer service personnel in accordance with the applicable electrical regulations. -
Page 39: Installing A Sata Hard Drive
DIVAR IP 7000 (2U) Maintenance | en Fixing screws Release tabs Chassis cover To remove the chassis cover: Disconnect the power supply, lay the chassis on a flat surface. Remove the two screws on each side of the cover, which secure the cover to the chassis. -
Page 40: Installing A Hard Drive Into A Hard Drive Carrier
| Maintenance DIVAR IP 7000 (2U) Use the handle to pull the drive out of the chassis. Notice! Except for short periods of time (swapping hard drives), do not operate the unit with the hard drives removed from the bays. -
Page 41: Installing A Hard Drive Into A Front Drive Bay
Notice! We recommend using the respective Bosch hard disk drives. The hard disk drives as one of the critical component are carefully selected by Bosch based on available failure rates. HDD – not delivered from Bosch – are not supported. Information on supported HDDs can be found in the datasheet in the Bosch Online Product Catalog. -
Page 42: Installing A Ssd Hard Drive Into A Rear Drive Bay
| Maintenance DIVAR IP 7000 (2U) 10.6 Installing a SSD hard drive into a rear drive bay This chapter describes the removing and installing of SSD hard drives on the rear side of the chassis. 10.6.1 Removing a hard drive from the rear drive bay The unit features two hot-swappable hard drives on the rear side which can be removed without powering down the system. -
Page 43: Installing A Hard Drive Into A Rear Drive Bay
Notice! We recommend using the respective Bosch hard disk drives. The hard disk drives as one of the critical component are carefully selected by Bosch based on available failure rates. HDD – not delivered from Bosch – are not supported. Information on supported HDDs can be found in the datasheet in the Bosch Online Product Catalog. -
Page 44: Installing The Motherboard
| Maintenance DIVAR IP 7000 (2U) DVD-ROM Front port panel To replace the front port panel: Turn off and unplug the unit. Remove the chassis cover. Disconnect the power and data cables from the front port panel to other chassis components including the motherboard and backplane. -
Page 45: Replacing A System Fan
DIVAR IP 7000 (2U) Maintenance | en To check the air flow: Make sure there are no objects to obstruct airflow in and out of the chassis. In addition, if you are using a front bezel, make sure the bezel's filter is replaced periodically. -
Page 46: Replacing The Power Supply
| Maintenance DIVAR IP 7000 (2U) To replace a system fan: If necessary, open the chassis while the power is running to determine which fan has failed. Note: Never run the system for an extended period of time with the chassis open. -
Page 47: Replacing The Power Supply
The power supply can be replaced without turning off the system if a redundant power supply is available. Replacement units can be ordered directly from Bosch RMA desk. To replace the power supply: You can leave the unit running and remove only one power supply if your chassis includes a redundant power supply. -
Page 48: Monitoring The System
| Maintenance DIVAR IP 7000 (2U) To replace the power distributor: Turn off the unit and remove the plug from the wall socket or power strip. Remove all cable connections to the power supply from the motherboard, backplane, and other components. -
Page 49: Service And Repair
The storage equipment is shipped with an original manufacturer Service and Support agreement. Bosch RMA Desk is the Single Point of Contact in case of failure but the Service and Support obligations are fulfilled by the manufacturer or a partner. - Page 50 Fax: n.a. E-mail: repair@us.bosch.com Opening Hours: Monday to Friday, 06:00 – 16:30 – RMA Desk APR Robert Bosch (SEA) Pte Ltd, 11 Bishan Street 21, (level 5, from service lift), Singapore 573943 Phone: +65 6571 2872 Fax: n.a. Email: rmahelpdesk@sg.bosch.com Opening Hours: Monday to Friday, 08:30 –...
- Page 52 Bosch Sicherheitssysteme GmbH Robert-Bosch-Ring 5 85630 Grasbrunn Germany www.boschsecurity.com © Bosch Sicherheitssysteme GmbH, 2016...