Table of Contents
Advertisement
Quick Links
Advertisement
Chapters
Table of Contents

Related Manuals for Canon D-50P


Summary of Contents for Canon D-50P
- Page 1 ® 프로젝터 사용자 안내서 ® 본사용자 설명서는 사용자에게 중요합니다 . 프로젝터를 사용하시기 전에 반드시 읽어 주십시오.
- Page 4 K00022 의 A 급 장치의 범위내에 혼신을 억제시키기 K00022 의 A 급 장치의 범위내에 혼신을 억제시키기 위하여 부속되어 있는 RGB 케이블 RS-232C 케이블 위하여 부속되어 있는 RGB 케이블 RS-232C 케이블 및 실드 LAN 케이블을 사용하여 주십시오. 및 실드 LAN 케이블을 사용하여 주십시오. 급...
-
Page 5: Table Of Contents
구성 중요 안전 정보 ......................................4 프로젝터 준비하기 ....................................6 리모콘 사용하기 ....................................... 9 프로젝터 설치하기 ....................................10 컴퓨터 이미지 보기 ..................................... 13 비디오 이미지 보기 ..................................... 19 메뉴 동작 ........................................25 영사된는 이미지 조절하기 ................................33 향상된 기능 ....................................... 37 표시기... -
Page 6: 중요 안전 정보
중요 안전 정보 프로젝터에 대한 모든 사항을 읽고 나중의참조를 위해 11. 전원 코드 보호 잘 보관해 둡니다 . 프로젝터에있는 모든 경고 와 지시 전원 공급 장치 코드는 밟히거나 쪼이지 않게 배선 를 따릅니다 . 되어야 합니다 . 플러그에서 코드에 특히 주의합니 다... - Page 7 중요 안전 정보 ( 계속 ) 경고 : 공기 흡입 및 배출 그릴을 막지 않는다 . 공기 흡입 및 배출 그릴이 막혀있다면 열이 프로젝터 프로젝터에 문제가 있는 경우 즉시 플러그를 내부에 축적되어 프로젝터의 성능 저하와 화재를 일으 뽑는다 . 킬 수 있다 . 연기...
-
Page 8: 프로젝터 준비하기
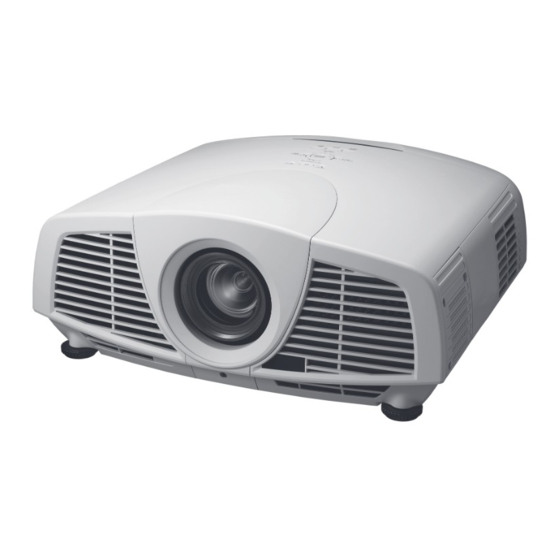
프로젝터 준비하기 부속 확인하기 다음의 부속이 이 프로젝터에 제공됩니다 . 모든 부속이 패키지에 포함되어 있는지 확인합니다 . 전원 공급 장치 부품 케이블 Mini D-SUB D-SUB 15핀 9핀 Mini D-SUB D-SUB 15핀 9핀 RS-232C 케이블 PC용 RGB 케이블 전원 코드 (J2552-0072-03) (J2552-0114-00)... - Page 9 프로젝터 준비하기 ( 계속 ) 제품 개요 1 제어 영역 2 스피커 3 공기 배출 그릴 4 렌즈 5 리모콘 센서 ( 전면 ) 6 공기 흡입 그릴 7 리모콘 센서 ( 후면 ) 8 램프 덮개 9 단자 판넬 10 공기...
- Page 10 프로젝터 준비하기 ( 계속 ) 바닥면 1 조절 다리 1 레이저 구멍 리모콘 2 전송 창 3 유선 리모콘 잭 4 표시기 5 HDMI 버튼 6 POWER 버튼 7 COMPUTER 1, 2 버튼 8 ZOOM/FOCUS 버튼 9 LENS SHIFT 버튼 10 Mouse 포인터...
-
Page 11: 리모콘 사용하기
리모콘 사용하기 리모콘의 동작 범위 30° 30° 30° 30° 프로젝터의 리모콘 사진 센 서 ( 전면이나 후면 ) 에서 IR 빔을 가리키며 , 프로젝 터에서 10m 의 거리 안에서 리모콘을 작동합니다 . • 직사광선이나 형광등 램프의 원격 제어 사진 센서를 리모콘을... -
Page 12: 프로젝터 설치하기
프로젝터 설치하기 스크린 설치하기 프로젝터에 수직으로 스크린을 설치합니다 . 스크린이 제대로 설치되지 않으면 , 프로젝터의 영사각도를 조절합니다 . (11 페이지를 참조합니다 .) 프로젝터의 렌즈가 스크린 중심과 동일한 높이와 수평 위치에 오도록 스크린과 프로젝터를 설치합니다 . • • 직사광선 등에 노출되는 곳에 스크린을 설치하지 않도록 합니다 . 스크린에 직접 램프를 반사하는 것은 영사된 이 미지를... - Page 13 프로젝터 설치하기 ( 계속 ) 영상위치의 조정 화면상의 영상 위치를 조정하기 위해서는 LENS SHIFT 버튼을 사용하여 주십시오 . 1. LENS SHIFT 버튼을 눌러 주십시오 . LENS • 스크린의 중앙에 LENS SHIFT 메뉴가 표시됩니다 . SHIFT FAST 2. ▲ , ▼ , ◀ 또는 ▶ 버튼을 눌러 화상의 위치를 움직여 주십시오 . SELECT:ENTER •...
- Page 14 프로젝터 설치하기 ( 계속 ) 전면 영사 , 천정 설치 후면 영사 천정 설치를 위해 , 이 프로젝터용으로 설계된 천정 설 설치를 위해 전문가에게 문의합니다 . 자세한 내용은 , 치 키트가 필요합니다 . 설치를 위해 전문가에게 문의합 판매처에 문의합니다 . 니다...
-
Page 15: 컴퓨터 이미지 보기
컴퓨터 이미지 보기 A. 컴퓨터에 프로젝터 연결하기 준비 : 프로젝터의 전원과 컴퓨터의 전원이 차단되어 있는지 확인합니다 . • • 데스크탑 컴퓨터에 프로젝터를 연결할 때 , 모니터에 연결된 RGB 케이블을 분리합니다 . 컴퓨터 아나로그 연결을 위해 : (COMPUTER/COMPONENT VIDEO IN-1 단말기 사용을 위해 ) 1. - Page 16 컴퓨터 이미지 보기 ( 계속 ) 모니터 연결을 위해 : 1. 모니터에서 프로젝터의 MONITOR OUT 단말기에 RGB 케이 모니터 블을 연결합니다 . 전력대기 상태에서는 MONITOR OUT 단자에서 영상신호가 • 출력되지 않습니다 . MONITOR OUT RGB 케이블 오디오 출력 연결을 위해 : 1.
- Page 17 컴퓨터 이미지 보기 ( 계속 ) C. 단말기 덮개 설치 이 프로젝터는 단말기 덮개를 포함합니다 . 필요하면 , 프로젝터에 단말기 덮개를 설치합니다 . 1. 프로젝터에 단말기 덮개의 2 개의 후크를 맞춥니다 . 2. 부착 나사 (a) 를 단단히 고정합니다 . 중요...
- Page 18 컴퓨터 이미지 보기 ( 계속 ) D. 이미지 영사하기 준비 : 렌즈 뚜껑을 제거합니다 . • Main 전원 스위치 POWER 버튼 POWER 표시기 POWER 버튼 STATUS 표시기 COMPUTER 1, 2 버튼 DVI-D(HDCP) ENTER 버튼 버튼 ZOOM/FOCUS 버튼 COMPUTER/DVI-D LENS SHIFT 버튼 버튼...
- Page 19 컴퓨터 이미지 보기 ( 계속 ) 9. ZOOM/FOCUS 버튼을 눌러 ZOOM/FOCUS 메뉴 메시지를 표시하여 주십시오 . 10. 근사값을 얻기 위해 ▲ 또는 ▼ 버튼으로 조절합니다 . ZOOM/FOCUS 메뉴 이 표시되어 있을 때 , ENTER 버튼을 누르면 조절모드를 FAST 과 STEP 사이에서 전환할 수 •...
- Page 20 컴퓨터 이미지 보기 ( 계속 ) AV mute 비디오와 오디오 신호는 AV MUTE 버튼을 누를 때 임시로 소리가 나지 않습니다 . 취소하려면 , 다시 AV MUTE 버튼을 누릅니다 . 완전히 취소하기 전에 몇 초 정도 걸립니다 . • INSTALLATION 메뉴에 있는 AV MUTE MODE 가 IMAGE 로 설정되면 , AV MUTE 버튼을 누를 때 splash 화면이 나타납 •...
-
Page 21: 비디오 이미지 보기
비디오 이미지 보기 A. 비디오 기기에 프로젝터 연결하기 준비 : • 프로젝터의 전원과 비디오 기기의 전원이 차단되어 있는지 확인합니다 . 비디오 플레이어에 연결하기 비디오 덱류 1. 시판중인 비디오 케이블의 한쪽 끝을 프로젝터의 VIDEO IN 단자에 끼워 주십시오 . 2. 비디오 케이블의 또 다른 한쪽 끝을 비디오 장치의 영상출 비디오... - Page 22 비디오 이미지 보기 ( 계속 ) 프로젝터 + DVD 플레이어 또는 HDTV 디코더 어떤 DVD 플레이어는 3- 라인 (Y, C ) 을 위한 출력 커넥터를 갖습니다 . 이 프로젝터로 DVD 플레이어를 연결할 때 , COMPUTER/COMPONENT VIDEO IN-2 단말기를 사용합니다 . BNC 케이블...
- Page 23 비디오 이미지 보기 ( 계속 ) 연결 (DVI-D 터미널이 있는 비디오 시설 ) 오디오 출력 단자에 연결 COMPUTER/COMPONENT AUDIO DVI-D VIDEO DVI-D IN (HDCP) DVI-D 단말기에 연결하기 위해 , 상업적으로 이용 가능한 DVI 케이블을 사용합니다 . • • 오디오 입력을 위해 AUDIO DVI-D 단말기를 사용합니다 . 커넥터의...
- Page 24 비디오 이미지 보기 ( 계속 ) D. 이미지 영사하기 준비 : • 렌즈 뚜껑을 제거합니다 . Main 전원 스위치 POWER 버튼 HDMI 버튼 POWER 표시기 POWER 버튼 STATUS 표시기 VIDEO 버튼 COMPUTER 1, 2 버튼 S-VIDEO 버튼 ENTER 버튼 ZOOM/FOCUS 버튼 COMPUTER/ DVI-D(HDCP) DVI-D 버튼...
- Page 25 비디오 이미지 보기 ( 계속 ) 9. ZOOM/FOCUS 버튼을 눌러 ZOOM/FOCUS 메뉴 메시지를 표시하여 주십시오 . 10. 근사값을 얻기 위해 ▲ 또는 ▼ 버튼으로 조절합니다 . ZOOM/FOCUS 메뉴 이 표시되어 있을 때 , ENTER 버튼을 누르면 조절모드를 FAST 과 STEP 사이에서 전환할 수 •...
- Page 26 비디오 이미지 보기 ( 계속 ) 스피커에서 음량 조절 VOLUME + 나 – 버튼을 눌러 스피커에서 음량을 변경합니다 . 음량 제어바가 화면에 나타납니다 . VOLUME 음량 제어 바는 VOLUME 버튼을 해제하고 나서 약 10 초 후에 사라집니다 . • • 메뉴...
-
Page 27: 메뉴 동작
메뉴 동작 표시된 메뉴를 사용하여 각종 설정을 할 수 있습니다 . 메뉴 표시모드 및 메뉴의 종류 메뉴 표시모드는 2 종류 :QUICK MENU 모드 및 DETAIL MENU 모드 모드마다 아래의 메뉴가 설치되어 있습니다 . QUICK MENU 모드에서 표시되는 메뉴 QUICK MENU 에는 자주 사용하는 설정 항목이 포함되며 , INFORMATION 메뉴에는 프로젝터의 상태가 표시됩니다 . QUICK MENU (27페이지) INFORMATION 메뉴... - Page 28 메뉴 동작 ( 계속 ) 메뉴 설정 기본순서 QUICK MENU 모드에서 DETAIL MENU 모드로 변경 1. MENU 버튼을 누릅니다 . QUICK MENU 모드에서 메뉴 선택바가 표시됩니 • 1. 왼쪽의 1 에서 3 을 따라 QUICK MENU 를 표시합니다 . 다 . 선택...
- Page 29 메뉴 동작 ( 계속 ) 메뉴 항목별 설정 QUICK MENU 모드에서 표시되는 메뉴 QUICK MENU QUICK MENU COLOR AUTO ENHANCER CONTRAST BRIGHTNESS COLOR TEMP. STANDARD SHARPNESS LAMP MODE STANDARD ASPECT NORMAL COLOR SELECT COLOR USER MENU DETAIL MENU 항목 설정 기능...
- Page 30 메뉴 동작 ( 계속 ) QUICK MENU 모드 및 DETAIL MENU 모드로 표시되는 메뉴 INFORMATION 메뉴 INFORMATION LAMP TIME (LOW) INPUT COMPUTER2 RESOLUTION 1024 x 768 VERTICAL 75.04 Hz FREQUENCY HORIZONTAL 60.02 KHz FREQUENCY SYNC. TYPE 5WIRE 항목 설명 LAMP TIME (LOW) 이...
- Page 31 메뉴 동작 ( 계속 ) DETAIL MENU 모드에서 표시되는 메뉴 IMAGE 메뉴 opt. opt. IMAGE IMAGE COLOR ADVANCED MENU AUTO ENHANCER NOISE REDUCTION CONTRAST BRIGHTNESS INPUT LEVEL COLOR TEMP. STANDARD COLOR TINT SHARPNESS ADVANCED MENU 항목 설정 기능 COLOR ENHANCER AUTO 입력...
- Page 32 메뉴 동작 ( 계속 ) INSTALLATION 메뉴 opt. opt. INSTALLATION INSTALLATION LENS LOCK LAMP MODE STANDARD ZOOM/FOCUS STANDBY MODE STANDARD LOCK AUTO POWER LENS SHIFT LOCK AUTO POWER LENS SHIFT RESET IMAGE CAPTURE SPLASH SCREEN BACK COLOR BLUE AV MUTE MODE BLACK IMAGE REVERSE LENS LOCK...
- Page 33 메뉴 동작 ( 계속 ) FEATURE 메뉴 opt. FEATURE ASPECT NORMAL PASSWORD DISPLAY INPUT FUNCTION MENU POSITION AUTO CINEMA MODE VIDEO SIGNAL AUTO SETUP AUTO SCART INPUT LANGUAGE English Ë RESET ALL 항목 설정 기능 ASPECT NORMAL 입력 신호에 따라 자동으로 비율을 변경합니다 . ( 정상 사용을 위해 이 옵 션을 선택합니다...
- Page 34 메뉴 동작 ( 계속 ) SIGNAL 메뉴 opt. opt. opt. SIGNAL SIGNAL SIGNAL RESOLUTION (MEMORIZE) USER MEMORY CALL AUTO RESOLUTION VERTICAL CLAMP POSITION 1024 x 768 75.04 Hz (MEMORIZE FREQUENCY HORIZONTAL 60.02 KHz CLAMP WIDTH HORIZ. POSITION FREQUENCY VERT. POSITION HORIZ.
-
Page 35: 영사된는 이미지 조절하기
영사되는 이미지 조절하기 밝기 조절을 위해 (CONTRAST 와 BRIGHTNESS): 메뉴를 사용하여 영사된 이미지의 밝기 조절을 할 수 있습니다 . ( 메뉴 설정에 대해 26 페이지를 참조합니다 .) 1. QUICK MENU 또는 IMAGE 메뉴를 디스플레이합니다 . 2. ▲ 또는 ▼ 버튼을 눌러 CONTRAST 나 BRIGHTNESS 를 선택합니다 . 3. - Page 36 영사되는 이미지 조절하기 ( 계속 ) 흰색 조절하기 ( 색상 온도 만들기 ): 선호하는 색상 온도를 만들기 위해 , 다음의 과정을 실행합니다 . ( 메뉴 설정에 대해 26 페이지를 참조합니다 .) 1. IMAGE 메뉴에서 COLOR TEMP. 를 선택합니다 . 2. ◀ 또는 ▶ 버튼을 눌러 USER 를...
- Page 37 영사되는 이미지 조절하기 ( 계속 ) 컴퓨터 화상 조정방법 본 투영 장치는 컴퓨터에서 제공되는 영상신호의 종류에 따라서 적절한 신호 포맷을 자동적으로 선택합니다 . 단 , 컴 퓨터의 종류 및 투영되는 화상의 종류에 따라서는 컴퓨터로부터의 영상이 정확하게 투영되지 않을 수도 있습니다 . 이 러한...
- Page 38 영사되는 이미지 조절하기 ( 계속 ) 메뉴를 사용하여 컴퓨터에서 제공되는 이미지 조절 방법: 증상에 따라 다음의 과정을 실행합니다 . 넓은 줄무늬가 나타납니다 ............... SIGNAL 메뉴에서 TRACKING 을 조절합니다 . 영사된 이미지가 깜빡입니다 . 영사된 이미지가 흐립니다 ............... SIGNAL 메뉴에서 FINE SYNC. 을 조절합니다 . 영사된...
-
Page 39: 향상된 기능
향상된 기능 소음모드 또는 신호의 입력이 없을 경우 , 전송된 화 시작하거나 무음인 동안 디스플레이되 • 상을 표시하는 것은 통상시보다 긴 시간이 소요됩니 는이미지의 설정 다 . 시작 화면 ( 또는 splash 화면 ) 으로 원하는 이미지를 디 FEATURE 메뉴에 있는 PASSWORD FUNCTION 이 •... - Page 40 향상된 기능 ( 계속 ) 패스워드 기능을 취소하기 위해: 패스워드 기능 1. FEATURE 메뉴를 디스플레이합니다 . 이 프로젝터는 특정 사용자 이외의 제한과 어린이에 의 2. ▲ 또는 ▼ 버튼을 눌러 PASSWORD FUNCTION 을 한 오작동을 막도록 설계되어 있는 패스워드 기능이 장 선택합니다...
- Page 41 향상된 기능 ( 계속 ) Picture in Picture (PinP) 표시 화상 확대 이 프로젝터의 특정 기능의 하나는 PinP 모드입니다 . 리모콘에서 MAGNIFY 버튼을 눌러 자세히 보기 위한 이 Pin 모드는 동시에 다른 소스에서 이미지 보기를 허가 미지를 확대할 수 있습니다 . 합니다...
- Page 42 향상된 기능 ( 계속 ) 마우스 리모콘 USB 포트를 통해 컴퓨터에 연결하여 , 프로젝터 리모콘으로 컴퓨터를 작동할 수 있습니다 . 프로젝터 + USB 커넥터가 있는 컴퓨터 USB 케이블 USB 포트에 ( 추가 ) USB 4 핀 USB 4 핀 (type A) (type B) •...
- Page 43 향상된 기능 ( 계속 ) 컴퓨터에 의한 관리와 제어 LAN 네트워크를 통해 컴퓨터를 사용하여 프로젝터의 동작을 관리하고 제어할 수 있습니다 . • 프로젝터를 관리하고 제어하기 위해 부착된 CD-ROM 에 포함된“Projector-Control Device Installer*”소프트웨어를 설 치합니다 . 소프트웨어에 대한 설치 과정과 사용에 대해서는 , 부착된 CD-ROM 에 포함된“LAN 컨트롤 ・ 유틸리티 사용자...
-
Page 44: 표시기
표시기 이 프로젝터는 2 개의 표시기가 있으며 , 각각은 프로젝터의 동작 상태를 보여줍니다 . 다음은 가능한 문제에 대한 해결책을 제공합니다 . 문제가 지속되면 , 프로젝터 전원을 차단하고 판매처에 문의합니다 . POWER 표시기 STATUS 표시기 정상 상태 전원 상태 조건 주의 대기... -
Page 45: 램프 교체하기
램프 교체하기 이 프로젝터는 이미지를 영사하기 위해 램프가 장착되어 있다 . 램프는 소모품이다 . 사용하는 동안 , 타버리거나 밝기가 감소한다 . 이러한 경우 가능하면 새것으로 교체한다 . 이 프로젝터는 전용으로 판매되는 새로운 램프로 교체해야 한다 . 램프 구입에 대해서는 판매처에 문의한다 . 교체용... - Page 46 램프 교체하기 ( 계속 ) 램프 교체를 위해: 8. 플러스 드라이버 (+) 를 사용하여 나사 (c) 를 조여 주 십시오 . 1. 주전원을 끄고 전원 코드를 빼 주십시오 . 2. 플러스 드라이버 (+) 를 사용하여 나사 (a) 를 풀고램 프 커버 (b) 를 떼어 내 주십시오 . 9.
- Page 47 램프 교체하기 ( 계속 ) 천장에 설치된 프로젝터에서 램프를 떼어 낼 경우 천장에 설치된 프로젝터에서 램프를 떼어 낼 경우에는 프로젝터 또는 옵션의 램프에 함께 포장되어 있는 램프 교환용 트레이를 사용하여 유리파편의 흩날림을 방지하여 주십시오 . • 교환용 트레이에 기재되어 있는 순서에 따라서 램프 교환용 트레이를 설치하여 주십시오 . 1.
-
Page 48: 문제해결
문제 해결 다음에서는 사용자가 만날 수 있는 일반적인 문제에 대한 해결책입니다 . 판매처에 문의하기 전에 다음 표를 참조합니 다 . 이미지가 화면에 영사되지 않습니다 . 문제 원인과 해결책 전원이 들어오지 않는 표시기가 on 인지 off 인지 확인하고 불이 들어오는 방법을 확인한다 . •... - Page 49 문제 해결 ( 계속 ) 이미지가 화면에 영사되지 않습니다 .( 계속 ) 문제 원인과 해결책 • 연결된 장치에 전원을 넣거나 , 연결된 장치에 문제가 있는지 확인합니다 . “NO SIGNAL” 이 디스 외부 장치가 신호를 출력하는지 확인합니다 . ( 외부 장치가 노트북 컴퓨터일 때 주의합 •...
- Page 50 문제 해결 ( 계속 ) 이미지가 제대로 영사되지 않습니다 .( 계속 ) 문제 원인과 해결책 컴퓨터에서 제공되는 이것은 사용되는 컴퓨터에 의해 야기됩니다 . 컴퓨터 제조회사에 문의합니다 . • 이미지에 있는 동작 영 역이 디스플레이되지 않습니다 . 영사된 이미지가 흐립 프로젝터 해상도로 컴퓨터의 출력 해상도를 일치시킵니다 . 컴퓨터의 출력 해상도 변경 •...
- Page 51 문제 해결 ( 계속 ) 램프를 교체하고 나서 아래 문제가 발생하면 , 다음을 확인합니다 . 문제 원인과 해결책 전원이 들어오지 않습 • 바닥에 램프 덮개를 제대로 부착합니다 . (43 과 44 페이지를 참조합니다 .) 니다 . 램프 동작 시간을 리셋합니다 . (44 페이지를 참조합니다 .) •...
- Page 52 사양 프로젝터의 사양과 외관은 사전 경고없이 변경될 수 있습니다 . ® 프로젝터 타입 D-50P 모델 디스플레이 기술 0.7 -인치 Single chip DMD 픽셀: 1024 x 768 = 786432픽셀 F=2.0-2.4, f=24.5-33.1mm 영사 렌즈 330W 소스 램프 40"~300" (영사 거리 1.4~10.6m) 이미지 크기(영사 거리) 최대...
- Page 53 사양 ( 계속 ) 프로젝터의 각 컴퓨터 모드에서 RGB 신호의 사양 신호설정 모드 해상도 수평 주파수 수직 주파수 Normal 모드 (H x V) (kHz) (Hz) (H x V) TV60, 480i (525i) 720 x 480 15.73 59.94 1024 x 768 TV50, 576i (625i) 720 x 576 15.63 50.00...
- Page 54 사양 ( 계속 ) 프로젝터의 각 컴퓨터 모드에서 RGB 신호의 사양 ( 계속 ) • TV60 과 TV50 이 480i 와 576i 와 각각 동일합니다 . 이 신 호가 VIDEO IN 이나 S-VIDEO IN 단말기에 제공될 때 , 신 중요 : 호...
- Page 57 This User Manual is important to you. Please read it before using your projector.
- Page 58 CAUTION RISK OF ELECTRIC SHOCK DO NOT OPEN CAUTION : TO REDUCE THE RISK OF ELECTRIC SHOCK, DO NOT REMOVE COVER (OR BACK) NO USER-SERVICEABLE PARTS INSIDE REFER SERVICING TO QUALIFIED SERVICE PERSONNEL. The lightning fl ash with arrowhead symbol within an equilateral triangle is intended to alert the user to the presence of uninsulated “dangerous voltage”...
- Page 59 Contents Important safeguards ........................4 Preparing your projector ........................6 Using the remote control ........................9 Setting up your projector .........................10 Viewing computer images .......................13 Viewing video images ........................19 Menu operation ..........................25 Adjusting projected images ......................33 Advanced features ..........................37 Indicators ............................42 Replacing the lamp .........................43 Maintenance ............................45 Troubleshooting ..........................46 Specifi...
-
Page 60: Important Safeguards
Important safeguards Please read all these instructions regarding your 10. Power sources projector and retain them for future reference. Follow This projector should be operated only from the all warnings and instructions marked on the projector. type of power source indicated on the marking label. - Page 61 Important safeguards (continued) WARNING: Do not block the air inlet and outlet grilles. If they are blocked, heat may be generated inside the Unplug immediately if there is something projector, causing deterioration in the projector quality wrong with your projector. and fi...
-
Page 62: Preparing Your Projector
Preparing your projector Checking accessories The following accessories are provided with this projector. Check to be sure that all of the accessories are packed in the package. Cables Power supply part Mini D-SUB D-SUB 15-pin 9-pin Mini D-SUB D-SUB 15-pin 9-pin RS-232C cable RGB cable for PC... - Page 63 Preparing your projector (continued) Overview 1 Control area 2 Speaker 3 Air outlet grille 4 Lens 5 Remote control sensor (front) 6 Air inlet grille 7 Remote control sensor (rear) 8 Lamp cover 9 Terminal panel 10 Air outlet grille Caution: Do not replace the lamp immediately after using the projector because the lamp would...
- Page 64 Preparing your projector (continued) Bottom side 1 Adjustment feet Remote control 1 Laser aperture 2 Transmission window 3 Wired remote control jack 4 Indicator 5 HDMI button 6 POWER button 7 COMPUTER 1, 2 buttons 8 ZOOM/FOCUS button 9 LENS SHIFT button 10 Mouse pointer KEYSTONE AUTO POSITION 11 PAGE UP and PAGE DOWN buttons...
-
Page 65: Using The Remote Control
Using the remote control Operational range of the remote control Rear of projector Front of projector 30° 30° 30° 30° Operate the remote control within a distance of 10 m (30 feet) from the projector, pointing the light beam at the remote control photo-sensor (front or rear) of the projector. -
Page 66: Setting Up Your Projector
Setting up your projector Setting up the screen Install the screen perpendicularly to the projector. If the screen can not be installed in such a way, adjust the projection angle of the projector. (See page 11.) • Install the screen and projector so that the projector’s lens is placed at the same height and horizontal position of the screen center. - Page 67 Setting up your projector (continued) Adjusting the position of the projected image To adjust the positions of the projector and the screen, use LENS SHIFT button. 1. Press the LENS SHIFT button. LENS • The LENS SHIFT menu appears at the center of the screen. SHIFT 2.
- Page 68 Setting up your projector (continued) Front projection, ceiling mounting Rear projection For ceiling mounting, you need the ceiling mount Ask a specialist for installation. For details, consult kit designed for this projector. Ask a specialist for your dealer. installation. For details, consult your dealer. •...
-
Page 69: Viewing Computer Images
Viewing computer images A. Connecting the projector to a computer Preparation: • Make sure that the power of the projector and that of the computer are turned off. • When connecting the projector to a desktop computer, disconnect the RGB cable that is connected to the monitor. Computer For analog connection: (For using the COMPUTER/COMPONENT VIDEO IN-1... - Page 70 Viewing computer images (continued) For monitor connection: 1. Connect the RGB cable from the monitor to the MONITOR Monitor OUT terminal of the projector. • No video signal is output from the MONITOR OUT terminal during power standby. MONITOR OUT RGB cable For audio output connection: 1.
- Page 71 Viewing computer images (continued) C. Installing the terminal cover This projector includes a terminal cover. If necessary, install the terminal cover to the projector. 1. Fit two hooks of the terminal cover into the projector. 2. Tighten the attachment screws (a) fi rmly. Important: •...
- Page 72 Viewing computer images (continued) D. Projecting images Preparation: • Remove the lens cap. Main power switch POWER button POWER indicator POWER button STATUS indicator COMPUTER 1, 2 buttons DVI-D(HDCP) ENTER button button ZOOM/FOCUS button COMPUTER/ LENS SHIFT button DVI-D button , , , ...
- Page 73 Viewing computer images (continued) 9. Press the ZOOM/FOCUS button to display the ZOOM/FOCUS menu. 10. Adjust with the or button to get an approximate size. • When the ENTER button is pressed while the ZOOM/FOCUS menu is displayed, the adjustment mode is switched between FAST and STEP.
- Page 74 Viewing computer images (continued) AV mute The video and audio signals are temporarily muted when the AV MUTE button is pressed. To cancel muting, press the AV MUTE button again. • It takes several seconds before muting is completely canceled. •...
-
Page 75: Viewing Video Images
Viewing video images A. Connecting the projector to video equipment Preparation: • Make sure that the power of the projector and that of the video equipment are turned off. Connecting to a video player, etc. Video player, or the like 1. - Page 76 Viewing video images (continued) Projector + DVD player or HDTV decoder Some DVD players have an output connector for 3-line fi tting (Y, C ). When connecting such DVD player with this projector, use the COMPUTER/COMPONENT VIDEO IN-2 terminals. BNC cable (option) COMPUTER/COMPONENT VIDEO IN-2 BNC-RCA connector (option)
- Page 77 Viewing video images (continued) Connection (for video equipment having a DVI-D terminal) Equipment having a DVI-D terminal To audio output To DVI-D terminal terminals COMPUTER/COMPONENT AUDIO DVI-D VIDEO DVI-D IN (HDCP) DVI cable (option) Audio cable (option) • For connection to the DVI-D terminal, use a commercially available DVI cable. •...
- Page 78 Viewing video images (continued) D. Projecting images Preparation: • Remove the lens cap. Main power switch POWER button HDMI button POWER indicator POWER button STATUS indicator COMPUTER 1, 2 buttons VIDEO button S-VIDEO button ENTER button ZOOM/FOCUS button COMPUTER/ DVI-D(HDCP) button LENS SHIFT button DVI-D button VIDEO/HDMI button...
- Page 79 Viewing video images (continued) 7. Adjust the position of the projector to keep an appropriate projection distance with which images are projected in their specifi ed sizes. 8. Adjust the position of the projector so that the projector and the screen are perpendicular to each other. (See page 10.) •...
- Page 80 Viewing video images (continued) Volume from the speaker Press the VOLUME + or - button to change the volume from the speaker. The volume control bar will appear on the screen. VOLUME • The volume control bar will disappear about 10 seconds after the VOLUME button is released. •...
-
Page 81: Menu Operation
Menu operation You can make various settings using the displayed menus. Menu display mode and menu type There are two menu display modes: QUICK MENU mode and DETAIL MENU mode. Each mode has the following menus. Menus displayed in the QUICK MENU mode The QUICK MENU contains frequently used setting items and the INFOMATION menu shows the projector condition. - Page 82 Menu operation (continued) Basic procedure for setting the menus Changing from the QUICK MENU mode to the DETAIL MENU mode 1. Press the MENU button. • The menu selection bar is displayed in the 1. Display the QUICK MENU according to steps 1 to 3 QUICK MENU mode.
- Page 83 Menu operation (continued) Settings of each menu item Menus displayed in the QUICK MENU mode QUICK MENU QUICK MENU COLOR AUTO ENHANCER CONTRAST BRIGHTNESS STANDARD COLOR TEMP. SHARPNESS LAMP MODE STANDARD ASPECT NORMAL COLOR SELECT COLOR USER MENU DETAIL MENU ITEM SETTING FUNCTION...
- Page 84 Menu operation (continued) Menus displayed in the QUICK MENU mode and the DETAIL MENU mode INFORMATION menu INFORMATION LAMP TIME (LOW) INPUT COMPUTER2 RESOLUTION 1024 x 768 VERTICAL 75.04 Hz FREQUENCY HORIZONTAL 60.02 KHz FREQUENCY SYNC. TYPE 5WIRE ITEM DESCRIPTION LAMP TIME (LOW) This item shows a lamp operating time (hour) calculated based on that LAMP MODE is LOW.
- Page 85 Menu operation (continued) Menus displayed in the DETAIL MENU mode IMAGE menu opt. opt. IMAGE IMAGE COLOR ADVANCED MENU AUTO ENHANCER NOISE REDUCTION CONTRAST BRIGHTNESS INPUT LEVEL COLOR TEMP. STANDARD COLOR TINT SHARPNESS ADVANCED MENU ITEM SETTING FUNCTION COLOR ENHANCER AUTO Select to optimize the settings automatically depending on the input signal.
- Page 86 Menu operation (continued) INSTALLATION menu opt. opt. INSTALLATION INSTALLATION LENS LOCK LAMP MODE STANDARD ZOOM/FOCUS STANDBY MODE STANDARD LOCK AUTO POWER LENS SHIFT LOCK AUTO POWER LENS SHIFT RESET IMAGE CAPTURE SPLASH SCREEN BACK COLOR BLUE AV MUTE MODE BLACK IMAGE REVERSE LENS LOCK ITEM...
- Page 87 Menu operation (continued) FEATURE menu opt. FEATURE ASPECT NORMAL PASSWORD DISPLAY INPUT FUNCTION MENU POSITION AUTO CINEMA MODE VIDEO SIGNAL AUTO SETUP AUTO SCART INPUT LANGUAGE English Ë RESET ALL ITEM SETTING FUNCTION ASPECT NORMAL Select to change the aspect ratio automatically depending on the input signal.
- Page 88 Menu operation (continued) SIGNAL menu opt. opt. opt. SIGNAL SIGNAL SIGNAL RESOLUTION (MEMORIZE) USER MEMORY CALL AUTO RESOLUTION VERTICAL 1024 x 768 75.04 Hz CLAMP POSITION (MEMORIZE FREQUENCY HORIZONTAL HORIZ. POSITION 60.02 KHz CLAMP WIDTH FREQUENCY HORIZ. PIXELS VERT. POSITION 1024 VERT.
-
Page 89: Adjusting Projected Images
Adjusting projected images To adjust the brightness (CONTRAST and BRIGHTNESS): You can make adjustments for the brightness of the projected image using the menu. (See page 26 for menu setting.) 1. Display the QUICK MENU or IMAGE menu. 2. Select CONTRAST or BRIGHTNESS by pressing the or button. 3. - Page 90 Adjusting projected images (continued) To cancel the menu: 7. Press the MENU button. To enable the stored color temperature: 1. Set COLOR TEMP. to USER in the QUICK MENU or set it to USER in the IMAGE menu. About color temperature There are different kinds of white color.
- Page 91 Adjusting projected images (continued) How to adjust the computer image This projector automatically selects a proper signal format according to the type of video signal supplied from the computer. However, video signals from the computer may not be projected correctly depending on the types of the computer and images to be projected.
- Page 92 Adjusting projected images (continued) How to adjust the image supplied from the computer using the menu: Carry out the following procedures according to the symptoms. Wide strips appear. ……………………………………… Adjust TRACKING in the SIGNAL menu. The projected image fl ickers. The projected image is blurred.
-
Page 93: Advanced Features
Advanced features Setting of the image displayed • You can’t set IMAGE CAPTURE when PASSWORD FUNCTION in the FEATURE menu has been set to during startup or muting SPLASH ID SCREEN to enable the password lock. You can display your desired image as the startup screen (or splash screen). - Page 94 Advanced features (continued) Password function 8. Enter the password again for confi rmation using the same steps. This projector is equipped with the password function 9. Press the ENTER button. that is designed for prevention of wrong operation by children and restriction on operation by other than •...
- Page 95 Advanced features (continued) Picture in Picture (PinP) Magnifying the displayed image One of the special features of this projector is the By pressing the MAGNIFY button on the remote picture-in-picture (PinP) mode. The PinP mode allows control, you can magnify the image to view the details. you to view the images from different sources at the •...
- Page 96 Advanced features (continued) Mouse remote control By connecting to personal computer through the USB port, you can operate your computer with the projector remote control. Projector + computer with USB connector To USB port USB cable (option) USB 4-pin USB 4-pin (type B) (type A) •...
- Page 97 Advanced features (continued) Supervising and controlling by computer You can supervise and control the projector’s operation using a personal computer via a LAN network. • To supervise and control the projector, install the software “Projector-Control Device Installer *” contained in the attached CD-ROM.
-
Page 98: Indicators
Indicators This projector has 2 indicators, each of which shows the operation condition of the projector. The following offer solutions to possible problems. If these problems persist, turn the projector off and consult your dealer. POWER indicator STATUS indicator Normal condition POWER STATUS CONDITION... -
Page 99: Replacing The Lamp
Replacing the lamp This projector is equipped with a lamp to project images. This lamp is a consumable. It may burn out or its brightness may decrease during use. In such cases, replace the lamp with a new one as soon as possible. Be sure to replace the lamp with a new lamp separately sold that is exclusive to this projector. - Page 100 Replacing the lamp (continued) To replace the lamp: 8. Tighten up the screws (c) using a Phillips screwdriver (+). 1. Turn off the main power switch and unplug the power cord. 2. Loosen the screw (a) using a Phillips screwdriver (+), and remove the lamp cover (b).
-
Page 101: Maintenance
Replacing the lamp (continued) When removing the lamp from the ceiling-mounted projector When removing the lamp from the ceiling-mounted projector, use the lamp replacement tray packed with the projector or option lamp to prevent glass fragments from scattering. • Assemble the lamp replacement tray according to the procedure shown on it. 1. -
Page 102: Troubleshooting
Troubleshooting Before asking for repair of the projector, check the following. If the symptom persists, stop using the projector, be sure to unplug the power plug, and then contact your dealer. No image appears on the screen. Problem Solution Power can not be •... - Page 103 Troubleshooting (continued) No image appears on the screen. (continued) Problem Solution “NO SIGNAL” is • Turn on the power of the connected device, or check whether there is something displayed. wrong with the connected device. • Check whether the external device output signals. (Check this especially when the external device is a notebook computer.) •...
- Page 104 Troubleshooting (continued) Images are not displayed correctly. (continued) Problem Solution Different color tint. • When comparing images projected by two projectors, tints in the displayed images may be different because of variation between their optical components. This is not a malfunction.
- Page 105 Troubleshooting (continued) If the following problem occurs after the lamp is replaced, check the following fi rst. Problem Solution The projector does not • Fit the lamp cover securely. (See pages 43 and 44.) turn on. • Reset the lamp operating time. (See page 44.) The STATUS indicator •...
-
Page 106: Specifi Cations
The specifi cations and outside appearance of the projector are subject to change without prior notice. Type projector ® Model D-50P Display technology 0.7-inch Single chip DMD Pixel 1024 x 768 = 786432 pixels Projection lens F 2.0 - 2.4 f= 24.5 - 33.1 mm... - Page 107 Specifi cations (continued) Specifi cation of RGB signals in each computer mode of the projector Signal mode Resolution Horizontal frequency Vertical frequency (Hz) Normal mode (H x V) (kHz) (H x V) TV60, 480i (525i) 720 x 480 15.73 59.94 1024 x 768 TV50, 576i (625i) 720 x 576...
- Page 108 Specifi cations (continued) Specifi cation of RGB signals in each computer • TV60 and TV50 are equivalent to 480i and 576i mode of the projector (continued) respectively. When these signals are supplied to the VIDEO IN or S-VIDEO IN terminal, the signal Important: mode is indicated as TV60 or TV50.
- Page 110 Troubleshooting Problem Solution Power can not be turned • Check whether the indicators are on or off and how they are lightning. POWER STATUS Solution • Connect the power cord to the projector. • Plug the power cord into a wall outlet. •...
- Page 111 ENGLISH PROJECTOR MODEL D-50P ® Quick Start up To VIDEO Video cable IN terminal (option) Audio cable To audio (option) input terminals To COMPUTER/ To monitor port To audio output COMPONENT Video player, or the like terminals VIDEO IN-1 terminal...
- Page 112 POWER STATUS 해결 방법 • 프로젝터에 전원 코드를 연결합니다. • 콘센트에 전원 코드를 꼽습니다. 꺼짐 꺼짐 • 주전원 스위치를 켜 주십시오. • 램프 커버를 장착해 주십시오. • 공기 흡입 또는 배출 그릴를 차단하고 있는 물건이 있으면 제거하고 다음을 수행 합니다. 1.
- Page 113 한국아 ® 프로젝터 보델 D-50P 퀵 스타트 엄 VIDEO IN 오디오 케이블 단자에 연결 (추가) 비디오 케이블 오디오 입력 (추가) 단자에 연결 COMPUTER / 오디오 출력 COMPONENT VIDEO IN-1 단자에 연결 비디오 덱류 비디오 출력 단자에 연결 Main 전원 스위치 (I : ON) ▲,▼,...