Table of Contents
Advertisement
SERVICE
DISHWASHER
Refer to the service manual in the GSPN (see the rear cover) for the more information.
All manuals and user guides at all-guides.com
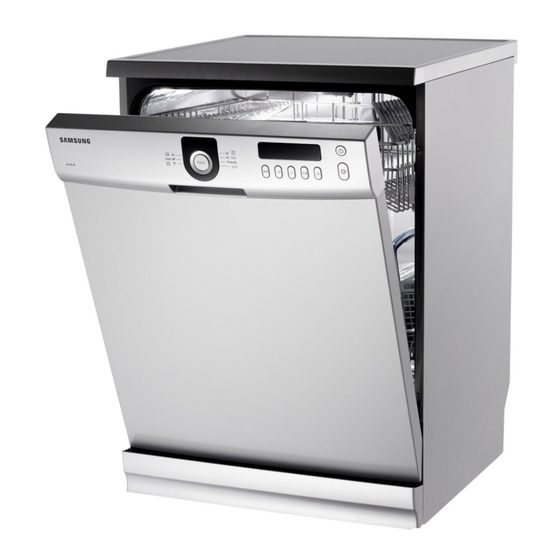
DMS300,301,400,500 Series
DMS500TR*
DMS400TR*
DMS300TR*
DMS301TR*
Manual
CONTENTS
1.
Safety Instructions
2.
3.
Disassembly and
Reassembly
4.
Troubleshooting
5.
Exploded Views and
Parts List
6.
PCB Diagram
7.
Wiring Diagram
8.
Schematic Diagram
9.
Reference
Advertisement
Table of Contents

Related Manuals for Samsung DMS500TR Series


Summary of Contents for Samsung DMS500TR Series
- Page 1 All manuals and user guides at all-guides.com DMS300,301,400,500 Series DMS500TR* DMS400TR* DMS300TR* DMS301TR* SERVICE Manual DISHWASHER CONTENTS Safety Instructions Disassembly and Reassembly Troubleshooting Exploded Views and Parts List PCB Diagram Wiring Diagram Schematic Diagram Reference Refer to the service manual in the GSPN (see the rear cover) for the more information.
-
Page 2: Table Of Contents
All manuals and user guides at all-guides.com Contents 1. Safety Instructions .........................1-1 1-1. Safety Instructions for Service Engineers.......................1-1 ....................2-1 2-1. Features .................................2-1 ..............................2-2 2-3. Model Variation ..............................2-3 3. Disassembly and Reassembly ....................3-1 3-1. Tools for Removal and Reassembly .......................3-1 3-2. Standard Disassembly Drawings........................3-2 3-3. -
Page 3: Safety Instructions
All manuals and user guides at all-guides.com 1. Safety Instructions 1. Safety Instructions 1-1. Safety Instructions for Service Engineers Make sure to observe the following instructions to operate the product correctly and safely and prevent possible accidents and hazards while servicing. Two types of safety symbols, Warning and Caution, are used in the safety instructions. - Page 4 All manuals and user guides at all-guides.com 1. Safety Instructions While Servicing If faulty, replace it immediately. Completely remove any dust or foreign material from the housing, wiring and connection parts. When connecting wires, make sure to connect them using the relevant connectors and check that they are completely connected.
- Page 5 All manuals and user guides at all-guides.com 1. Safety Instructions Caution Before Servicing Do not sprinkle water onto the dishwasher directly when cleaning it. Do not place any containers with water on the dishwasher. product lifetime. Do not press a control button using a sharp tool or object. This may result in electric shock or damage to the product.
- Page 6 All manuals and user guides at all-guides.com 1. Safety Instructions After Servicing Check the assembled status of the parts. They must be the same as before servicing. Check the insulation resistance. Disconnect the circuit breaker or power cable from the power outlet and measure the insulation resistance between the power wires and the grounding wire of the Megger.
-
Page 7: Features
1. 6-way intensi e p wer jet with 3 spray arms - Samsung uses 3 wash arms, t p, upper and l wer. - E ery arms jets upper and l wer side. - Especially water spraying arm in the t p is r t r type like upper and l wer's. - Page 8 All manuals and user guides at all-guides.com...
-
Page 9: Model Variation
All manuals and user guides at all-guides.com 2-3. Model variation MODEL CODE DMS500TRW DMS500TRS DMS400TRW DMS400TRS DMS300TRW DMS300TRS DMS301TRW DMS301TRS Color White Silver White Silver White Silver White Silver Places 12 places 12 places 12 places 12 places 12 places 12 places 12 places 12 places... - Page 10 All manuals and user guides at all-guides.com 2-3. Model variation MODEL CODE DMS500TRW DMS500TRS DMS400TRW DMS400TRS DMS300TRW DMS300TRS DMS301TRW DMS301TRS Water Filtration System(soft water) Half Rack Wash Audible End-of-Cycle Signal Condensing Dry Delay Start yes(24 h) yes(24 h) yes(24 h) yes(24 h) yes(24 h) yes(24 h)
-
Page 11: Disassembly And Reassembly
All manuals and user guides at all-guides.com 3. Disassembly and Reassembly 3. Disassembly and Reassembly 3-1. Tools for Removal and Reassembly Tool image Tool Type Remarks Adjustable Wrench Open-end Wrench 1-7/16” Vice pliers Others Common tools for servicing (screwdriver, nipper, long nose pliers) * Preparation for parts replacement 1. -
Page 12: Standard Disassembly Drawings
All manuals and user guides at all-guides.com 3. Disassembly and Reassembly 3-2. Standard Disassembly Drawings Part Photo Description 1. Outer door ass’y 1) Open the door completely. 2) Remove the six (6) screws holding the outer door in place. Caution Before removing the screws, place a cushioned mat OUT DOOR ASS’Y from being scratched. - Page 13 All manuals and user guides at all-guides.com 3. Disassembly and Reassembly Part Photo Description 3. Latch ass'y Separate outdoor ass'y Separate control pannel ass'y 1) Remove connector of door lock switch 2) Remove the three (3) screws holding the control panel.
- Page 14 All manuals and user guides at all-guides.com 3. Disassembly and Reassembly Part Photo Description 5. Fan ass'y Separate outdoor ass'y Separate control pannel ass'y 1) Remove the connectors of fan motor. 2) Remove the two (2) screws holding the ‘DOOR BRACKET’...
- Page 15 All manuals and user guides at all-guides.com 3. Disassembly and Reassembly Part Photo Description 6. Dispenser Separate outdoor ass'y 1) Remove the four (4) connectors on both sides of the dispenser. Caution The connectors are of the locking type and are hard to remove.
- Page 16 All manuals and user guides at all-guides.com 3. Disassembly and Reassembly Part Photo Description 7. Main P.C.B ass'y 1) Place the dishwasher on its back so that you can see the base. Remove the two (2) screws that hold the PLINTH FACIA in place. Be careful to avoid breaking them, because they are connected with a hook.
- Page 17 All manuals and user guides at all-guides.com 3. Disassembly and Reassembly Part Photo Description 8. Housing R,L 1) Remove the two (2) screws holding TOP TABLE ASS’Y 2) Remove the TOP TABLE ASS’Y - Slide the TOP TABLE ASS’Y backward and lift up it. 3) Remove the ten (10) screws holding the BACKCOVER and HOUSING L/R.
- Page 18 All manuals and user guides at all-guides.com 3. Disassembly and Reassembly Part Photo Description 9. Inner door ass'y Separate outdoor ass'y Separate all connection wire. Separate housing L,R 1) Remove the HINGE SPRING, ROPE DOOR DAMPER, SPRING CONNECTOR on both side of the TUB ASS’Y.
- Page 19 All manuals and user guides at all-guides.com 3. Disassembly and Reassembly Part Photo Description 11. Top rotor ass'y 1) Widen top rotor holder like the figure Be careful to avoid breaking them, because they are connected with a hook. 2) Remove TOP ROTOR ASS’Y. TOP ROTOR ASS’Y 12.
- Page 20 All manuals and user guides at all-guides.com 3. Disassembly and Reassembly Part Photo Description 14. Manifold elbow Ass’y Separate upper/lower rack ass’y Separate lower rotor ass’y Separate filter ass’y 1) Remove the two (2) screw holding DISTRIBUTOR COVER. 2) Widen MANIFOLD ELBOW HOLDER using screw driver.
- Page 21 All manuals and user guides at all-guides.com 3. Disassembly and Reassembly Part Photo Description 16. Tub ass'y (2) Separate top table ass'y Separate housing L, R Separate out door Separate control panel ass'y Separate Inner door sub ass’y Separate filter ass'y, Manifold elbow ass’y 1) Remove WATER SOFTNER CAP by rotating it counterclockwise.
- Page 22 All manuals and user guides at all-guides.com 3. Disassembly and Reassembly 17. Air Break ass'y Separate top table ass’y Separate housing L Separate air break cap turn to anti clock wise 1) Separate the AIR BREAK ASS’Y connector. 2) Remove the four (4) clamps and hose. AIR BREAK ASS’Y Caution Take care when holding and removing the clamp...
- Page 23 All manuals and user guides at all-guides.com 3. Disassembly and Reassembly Part Photo Description 19. Power cord ass’y & Noise filter ass’y Separate top table ass’y Separate housing R 1) Remove the all NOISE FILTER connectors. 2) Remove the two (2) screws holding POWER CORD ASS’Y in place.
- Page 24 All manuals and user guides at all-guides.com 3. Disassembly and Reassembly Part Photo Description 20. Water Softener ass’y Separate top table ass’y Separate housing L/R Separate tub ass'y Separate air break ass'y 1) Remove the all connectors on both sides of the WATER SOFTENER ASS’Y.
- Page 25 All manuals and user guides at all-guides.com 3. Disassembly and Reassembly Part Photo Description 22.Capacitor Separate top table ass’y Separate housing R 1) Remove the two (2) CAPACITOR connectors. 2) Push the hooks fixing CAPACITOR and remove it. Be careful to avoid breaking them, because they are CAPACITOR connected with a hook.
- Page 26 All manuals and user guides at all-guides.com 3. Disassembly and Reassembly Part Photo Description 24. Drain pump ass'y Separate top table ass’y Separate housing L/R Separate main pcb ass'y Separate tub ass'y Separate sump ass'y 1) Remove the two (2) DRAIN PUMP connectors. 2) Remove the five (5) screws holding DRAIN PUMP ASS’Y in place.
- Page 27 All manuals and user guides at all-guides.com 3. Disassembly and Reassembly Part Photo Description 26.Sychronous motor & Distributor Separate top table ass’y Separate housing L/R Separate main pcb ass'y Separate tub ass'y Separate sump ass'y SYCHRONOUS MOROR 1) Remove the two (2)SYCHRONOUS MOTOR &...
- Page 28 All manuals and user guides at all-guides.com 3. Disassembly and Reassembly Part Photo Description 28.Heater housing ass'y (2) * You can remove HEATER HOUSING ASS’Y that don’y separate TUB ASS’Y. 1) Place the dishwasher on its back so that you can see the base.
-
Page 29: Checkpoints After Finishing A Service
All manuals and user guides at all-guides.com 3. Disassembly and Reassembly 3-3. Checkpoints after Finishing a Service 1 Check the safety device Check the operation of the door lock switch. Make sure that it is locked while the dishwasher is running and that it is unlocked when the dishwasher stops. -
Page 30: Troubleshooting
All manuals and user guides at all-guides.com Troubleshooting 4. Troubleshooting 4-1. Self test program and error check list - Press the Start key for three seconds (buzzer ring one time), and press the POWER key to enter Self test program started - Self test program flow LED check KEY check... - Page 31 All manuals and user guides at all-guides.com Mode Related parts Note [Ht] DISPLAY : Heater operation [st] DISPLAY : water softener v/v operation [CP] DISPLAY : c/pump operation [ds] DISPLAY : dispensor operation LOADcheck [Co] DISPLAY : inlet valve operation [Fn] DISPLAY : dry fan operation [dP] DISPLAY : Eco LED, d/pump operation [st]...
-
Page 32: Error Check List
All manuals and user guides at all-guides.com 4. Troubleshooting 4-2. ERROR CHECK LIST... - Page 33 All manuals and user guides at all-guides.com...
- Page 34 All manuals and user guides at all-guides.com...
- Page 35 All manuals and user guides at all-guides.com...
- Page 36 All manuals and user guides at all-guides.com...
- Page 37 All manuals and user guides at all-guides.com...
- Page 38 All manuals and user guides at all-guides.com...
- Page 39 All manuals and user guides at all-guides.com 4-10...
- Page 40 All manuals and user guides at all-guides.com 4-11...
- Page 41 All manuals and user guides at all-guides.com 4-12...
- Page 42 All manuals and user guides at all-guides.com 4-13...
- Page 43 All manuals and user guides at all-guides.com 4-14...
- Page 44 All manuals and user guides at all-guides.com 4-15...
-
Page 45: Exploded Views And Parts List
All manuals and user guides at all-guides.com 5. Exploded Views and Parts List 5. Exploded Views and Parts List [Material Code Standards] Material codes and names and their respective naming rules are managed in accordance with the prescribed standards. Please refer to these standards when requesting a material. Material Code Type Type 1: ex) 51224-10000 CONTROL PANEL (F/S) -
Page 46: Door Ass'y (Dms***Tr*)
All manuals and user guides at all-guides.com 5. Exploded Views and Parts List 5-2. DOOR ASS’Y (DMS500,400,300,301TR*) F233 F001 C005 (F235) (234) (F273) F283 F243 F236 C068 F266 F202 (F204) F206 F214... - Page 47 All manuals and user guides at all-guides.com 5. Exploded Views and Parts List DMS500,400,300,301TR* LOCATION TY- PART NO. SS-PART NO PART NAME SPEC Q'TY Status REMARK CODE 5121718401 INNER DOOR (SS-FS) STS304 'SNA' F228 2220009700 DD81-01229A DISPENSER (Aweco) A/S-DISPENSER;DMS400TRW/XFA,DMS400TUB/XE 'SA' 3200074010 SCREW TAPPING 2 종...
- Page 48 All manuals and user guides at all-guides.com 5. Exploded Views and Parts List 5-3. TUB ASS’Y (DMS500,400,300,301TR*)
-
Page 49: Tub Ass'y (Dms***Tr*)
All manuals and user guides at all-guides.com 5. Exploded Views and Parts List DMS500,400,300,301TR* LOCATION TY- PART NO. SS-PART NO PART NAME SPEC Q'TY Status REMARK CODE 5121801501 TUB ASS'Y(SS) ASS'Y 'SNA' F264 5122178001 DD81-01193A LATCH PLATE LATCH-PLATE;DMS400TRW/XFA,DMS400TUB/XEO, 'SA' 3220005012 SCREW TAPPING 2 (FLT 5*12) ROHS 'SNA'... -
Page 50: Base Ass'y (Dms***Tr*)
All manuals and user guides at all-guides.com 5. Exploded Views and Parts List 5-4. BASE ASS’Y (DMS500,400,300,301TR*) - Page 51 All manuals and user guides at all-guides.com 5. Exploded Views and Parts List DMS500,400,300,301TR* LOCATION TY- PART NO. SS-PART NO PART NAME SPEC Q'TY Status REMARK CODE 5121811101 BASE PANEL PP(LGGP3300A-E0156) 'SNA' 5121818001 LEVELLER HOLDER PP(S-1353-530,GRAY) 'SNA' 5121817003 LEVELLER PP(S-1353-530,GRAY) 'SNA' 5121812000 BASE COVER...
-
Page 52: Sump Ass'y (Dms***Tr*)
All manuals and user guides at all-guides.com 5. Exploded Views and Parts List 5-5. SUMP ASS’Y (DMS500,400,300,301TR*) - Page 53 All manuals and user guides at all-guides.com 5. Exploded Views and Parts List DMS500,400,300,301TR* LOCATION TY- PART NO. SS-PART NO PART NAME SPEC Q'TY Status REMARK CODE 5121820201 PP(S-1353-530,GRAY) 'SNA' SUMP( /LGPP) 5121821000 C-PUMP COVER PP(S-1353-530,GRAY) 'SNA' 5121822000 D-PUMP COVER PP(S-1353-530,GRAY) 'SNA' 3250004012...
- Page 54 All manuals and user guides at all-guides.com 5. Exploded Views and Parts List 5-6. ASSY-RACK (DMS500,400,300,301TR*) (DMS500,400,301TR*) (DMS300TR*) (DMS*TR*) 5-10...
- Page 55 All manuals and user guides at all-guides.com 5. Exploded Views and Parts List DMS500,400,300,301TR* LOCATION TY- PART NO. SS-PART NO PART NAME SPEC Q'TY Status REMARK CODE 5122435000 DD82-01020A LOWER RACK ASS'Y(SS) 'SA' F215 A/S ASSY-LOWER RACK;DMS400TRW/XFA,DMS400 5122507000 LOWER RACK INSERT-1 MSWR6 'SNA' 5122508000...
-
Page 56: Pcb Diagram
All manuals and user guides at all-guides.com 6. PCB Diagram 6. PCB Diagram 6-1. Main PCB Location Description Location Description Location Description 5V, GND, TX ,RX ,Wake up_TXD, Wake up_RXD, 12V, Relay Sychronous motor, Fan motor, Electrical Safety Hose relay source 12V Electrical Safety Hose Drain Pump relay... - Page 57 All manuals and user guides at all-guides.com 6. PCB Diagram 1. 5V 2. GND 1. GND 2. NC 3. Thermistor 1. GND 3. TX 4. RX 4. Float S/W 5. Water Softener S/W 6. Distributor S/W 2. GND 5. Wake up_TXD 6.
- Page 58 All manuals and user guides at all-guides.com 6. PCB Diagram Power S/W Select S/W Start S/W CN1(Micom Writer) 1. GND 2. Mode Delay Start S/W 3. 5V 4. IO 4 in 1 S/W 5. CK Sterilization S/W 1/2 S/W 1. 5V 2.
-
Page 59: Wiring Diagram
All manuals and user guides at all-guides.com 7. Wiring Diagram 7. Wiring Diagram 7-1. Old Wiring Diagram (DMS500TR*) Reference Information Abbreviated word Meaning GRAY DC Part ORANGE AC Part VIOLET Main Relay Main Relay Heater Relay Heater Relay PINK YELLOW BROWN WHITE BLACK... -
Page 60: Schematic Diagram
All manuals and user guides at all-guides.com 8. Schematic Diagram 8. Schematic Diagram 8-1. MAIN CONTROL (DMS500TR*) This Document can not be used without Samsung’s authorization. -
Page 61: Reference
All manuals and user guides at all-guides.com 9. Reference 9. Reference 9-1. Model Number Naming Rules R: FREE STANDING 0: BASIC F: BUILT-UNDER (FRONT) U: BUILT-IN (FULLY) 2: 2012 S:24” STANDARD S:24” STANDARD S : SILVER R: R-PROJECT 1: 2011 W : WHITE T: TY OUT SOURCING 0: 2010... -
Page 62: Terminology
All manuals and user guides at all-guides.com 9. Reference 9-2. Terminology 1. Circulation Motor 3. Heater 4. Vent Fan 5. Flow Meter 14. Case Brake 15. Door Lock Switch... - Page 63 All manuals and user guides at all-guides.com Europe China © 2008 Samsung Electronics Co.,Ltd. All rights reserved. Printed in Korea...