Table of Contents
Advertisement
Quick Links
Advertisement
Table of Contents

Related Manuals for Russell Hobbs RHUV5501


Summary of Contents for Russell Hobbs RHUV5501
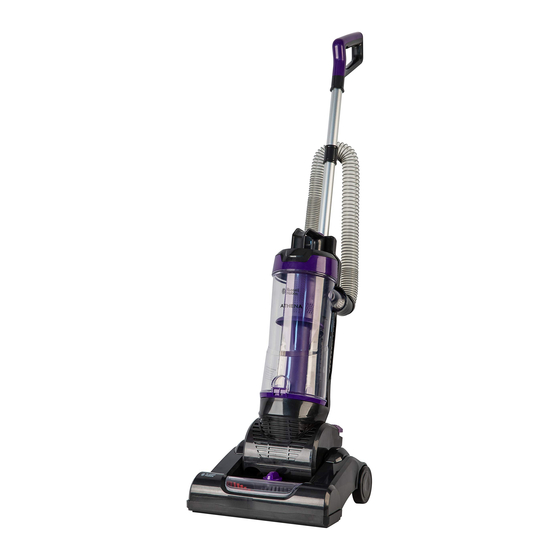
- Page 1 Athena Pet Upright Vacuum Model Number: RHUV5501 220-240V~, 50-60Hz, 700W For Customer Services & Spare Parts please call 0345 209 7461 Opening times: Monday - Friday 8am – 8pm & Saturday 9am – 1pm Or visit us at www.productcare.co.uk PLEASE RETAIN...
-
Page 2: Table Of Contents
Spare parts Connection to the mains supply Disposal information Thank you for purchasing your Russell Hobbs Athena Pet Upright Vacuum Cleaner. To get the best from your new cleaner, take a few moments to read these instructions and keep them in a safe place for future reference. -
Page 3: Safety Instructions
SAFETY INSTRUCTIONS IMPORTANT SAFETY INSTRUCTIONS READ CAREFULLY AND KEEP FOR FUTURE REFERENCE WARNING: • It is hazardous for anyone other than a competent person to carry out any service or repair operation that involves the removal of a cover which gives protection against exposure to electrical parts. - Page 4 SAFETY INSTRUCTIONS IMPORTANT SAFETY INSTRUCTIONS READ CAREFULLY AND KEEP FOR FUTURE REFERENCE • Do not direct at people, animals, electrical outlets, or equipment containing electrical components. • Unplug from outlet when not in use. Do not leave the cleaner unattended while plugged in. •...
- Page 5 SAFETY INSTRUCTIONS IMPORTANT SAFETY INSTRUCTIONS READ CAREFULLY AND KEEP FOR FUTURE REFERENCE WARNING: • Do not let the cord hang over the edge of the worktop, or touch hot surfaces. • Do not use this vacuum to pick up water or any other liquids, combustible substances or hot/burning objects.
- Page 6 SAFETY INSTRUCTIONS IMPORTANT SAFETY INSTRUCTIONS READ CAREFULLY AND KEEP FOR FUTURE REFERENCE • When cleaning stairs to prevent the vacuum cleaner falling always place the vacuum cleaner at the bottom of stairs on the floor. Do not place the vacuum cleaner on stairs or furniture.
-
Page 7: Energy Performance Label
ENERGY PERFORMANCE LABEL The purpose of the energy label is to help you understand a vacuum cleaner’s energy efficiency performance. 1. Energy rating – based primarily on energy consumption and pick-up. 2. Annual energy usage – the amount of energy used over a year. -
Page 8: Technical Data
TECHNICAL DATA (PRODUCT FICHE) Trade mark Russell Hobbs Model RHUV5501 Energy efficiency class Indicative annual energy consumption (kWh per year), based on 50 cleaning tasks. Actual 25.7 annual energy consumption will depend on how the appliance is used. Carpet cleaning performance class... -
Page 9: Vacuum Feature Diagram
VACUUM FEATURE DIAGRAM 1. Handle 7. Cord Clip 2. Metal Handle 8. Hose hook 3. Dust container release button 9. Cord quick release 4. 2 in 1 Crevice Tool 10. Filters (not shown) 5. Dust container bin release clip 11. Power button 6. -
Page 10: Vacuum Cleaner Assembly
VACUUM CLEANER ASSEMBLY Before using your vacuum cleaner Remove all packaging and lay out the separate components. Check the unit after unpacking for any visual damage such as: • Misaligned or damaged parts • Damage to the main body and separate components •... - Page 11 VACUUM CLEANER ASSEMBLY Ensure the unit is unplugged before assembling. Locate the screw that comes in the box with your product. 1. Lower the handle onto the main body of the vacuum and press down. 2. Place the screw in the hole and tighten with a Philips screw driver.
- Page 12 VACUUM CLEANER ASSEMBLY 5. The combination crevice tool is stored on the vacuum cleaner, located above the brush hose inlet. The base of the tool slides onto the stand as per the diagram. 6. When using the hose to clean areas other than the floor, lift the hose from the brush hose inlet.
-
Page 13: Using Your Vacuum Cleaner
USING YOUR VACUUM CLEANER Once the vacuum cleaner is assembled and ready for use: 1. Twist the quick cord release. 2. Plug the cable into a wall socket and press the switch on. 3. Rest your foot on the vacuum head and pull the handle back towards yourself. - Page 14 USING YOUR VACUUM CLEANER When using on different carpets: Your vacuum has a height adjustable base for use on different carpets. Twist the dial clockwise to raise the base on high pile carpets, or for low pile or hard floors twist the dial anti-clockwise . It is not recommended to use this vacuum on a shag pile carpet or rug, as the threads may become caught in the beater bar causing damage to the rug or carpet.
- Page 15 USING YOUR VACUUM CLEANER Turbo Brush Your vacuum comes with an air driven turbo brush for upholstery, stairs and pet fur. To attach your turbo brush, twist and release the hose from the vacuum in an upright position, and push into the brush attachment. NB: Ensure that the vacuum is upright.
-
Page 16: Cleaning And Care
CLEANING AND CARE: EMPTYING THE DUST CONTAINER When the dust container reaches the ‘MAX’ line fill, it will need to be emptied. 1. To remove the dust container, press the release button on the handle of the dust container and pull away/upwards from the unit 2. - Page 17 CLEANING AND CARE: CLEANING THE FILTERS Your vacuum has several filters to collect dust. With frequent use you need to clean the filters in order to maintain peak performance and lengthen product life span. To remove the dust container, press the release button on the lid handle and pull away/upwards from the unit.
- Page 18 CLEANING AND CARE: CLEANING THE FILTERS Repeat steps 1 and 2 on the previous page. 4. There is an additional HEPA filter on the appliance behind the dust container that can be unclipped and washed as above. Cleaning the exhaust filter There is a foam exhaust filter underneath the dust container that will need to be cleaned regularly.
- Page 19 CLEANING AND CARE Before you clean the appliance, disconnect the mains plug from the wall socket. To clean the exterior of the device, use a damp, soft cloth and mild detergent. NEVER IMMERSE THE VACUUM IN WATER. Wash non-electrical removable accessories in warm soapy water and allow to dry thoroughly before next use.
-
Page 20: Problem Solving
PROBLEM SOLVING PROBLEM POSSIBLE PROBLEM POSSIBLE SOLUTION Power cord/plug damage Check the power cord and plug for signs of damage. The vacuum cleaner is plugged in but does not work Fuse is damaged Check and replace the fuse in the plug. Dust container Check if the dust container is full, if so, empty it. -
Page 21: Guarantee And Customer Services
GUARANTEE AND CUSTOMER SERVICES At Russell Hobbs, we take all our customer feedback seriously. Feel free to contact our Product Care Team, on 0345 209 7461 Monday – Friday: 8am-8pm & Saturday: 9am – 1pm, who will be more than happy to assist you. -
Page 22: Spare Parts
SPARE PARTS To check the availability of the following spare parts, simply contact our friendly Customer Services team using the details provided at the bottom of this page. Main HEPA Filter Secondary HEPA Filter Exhaust Filter 2 in 1 Crevice Tool Turbo Brush For Customer Services &... -
Page 23: Connection To The Mains Supply
CONNECTION TO THE MAINS SUPPLY This appliance is designed to operate from a mains supply of 220-240V~ 50-60Hz. Check that the voltage marked on the product corresponds with your supply voltage. How to change the fuse 1. Slot the end of a screwdriver into the recess in the fuse holder of the plug. - Page 24 Revision 2.5 Model: RHUV5501 Made by G2S Ltd under license. G2S Limited, Wigan, WN2 4AY Russell Hobbs is the registered trademark of Spectrum Brands (UK) Ltd. This symbol is known as the 'Crossed-out wheelie bin Symbol'. When this symbol is marked on a product/batteries, it means that the product/batteries should not be disposed of with your general household waste.