LG LB65 Series Owner's Manual
Hide thumbs
Also See for LB65 Series:
- Owner's manual (588 pages) ,
- Owner's manual (62 pages) ,
- Owner's manual (364 pages)
Table of Contents
Advertisement
Available languages
Available languages
Quick Links
OWNER'S MANUAL
LED TV
* LG LED TV applies LCD
screen with LED backlights.
Please read this manual carefully before operating your set and retain
it for future reference.
LB63** LB69** LB87**
LB65** LB72**
LB67** LB73**
LB68** LB86**
*MFL68027020*
P/NO : MFL68027020(1403-REV00)
Printed in Korea
*
Click! User Guide
www.lg.com
Advertisement
Table of Contents

Related Manuals for LG LB65 Series


Summary of Contents for LG LB65 Series
- Page 1 OWNER’S MANUAL LED TV * LG LED TV applies LCD screen with LED backlights. Click! User Guide Please read this manual carefully before operating your set and retain it for future reference. LB63** LB69** LB87** LB65** LB72** LB67** LB73** LB68** LB86** *MFL68027020* www.lg.com...
-
Page 2: Table Of Contents
TABLE OF CONTENTS TABLE OF CONTENTS A-3 SETTING UP THE TV Attaching the stand Attaching the Sound Bar Supporter Tidying cables A-11 MAKING CONNECTIONS A-11 Antenna connection A-11 Satellite dish connection A-12 HDMI connection A-13 - ARC (Audio Return Channel) A-13 DVI to HDMI connection A-15... -
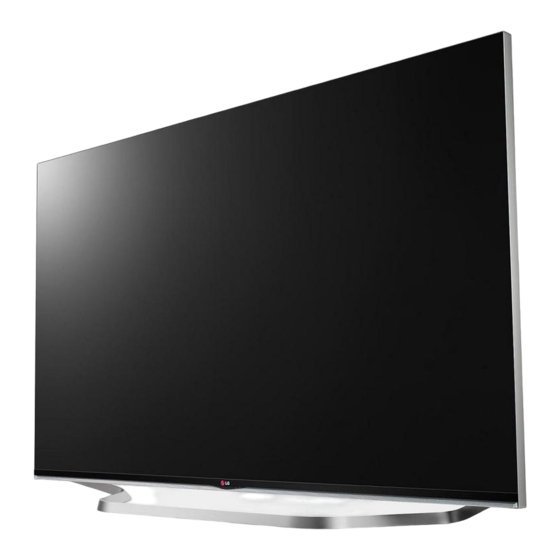
Page 3: Setting Up The Tv
SETTING UP THE TV SETTING UP THE TV 70LB65**-ZA, LB67**, LB68**, LB69**, LB72**, LB73**-ZA Image shown may differ from your TV. Stand Body Attaching the stand LB63**-ZA, 32/39/42/47/50/55LB65**-ZA A stand base B stand base Stand Base A stand Assy B stand Assy 1 Attach the stand to the TV using the upper mounting hole on the back of the TV. - Page 4 SETTING UP THE TV M4 x L14 M4 x L20 M4 x L14 (Only 32LB65**- LB63**-ZL, LB65**-ZK 32/39LB65**-ZE/ZN A stand base B stand base M4 x L20 1 Attach the stand to the TV using the upper mounting hole on the back of the TV. 2 Attach the stand to the TV using the lower connection on the back of the TV.
- Page 5 SETTING UP THE TV 42/47/50/55/60LB65**-ZE/ZN M4 x L20 Stand Body Stand Base M4 x L20...
- Page 6 SETTING UP THE TV M4 x L14 1 Attach the stand to the TV using the upper mounting hole on the back of the TV. 2 Attach the stand to the TV using the lower LB73**-ZD/ZE connection on the back of the TV. Stand Front B Stand A Stand...
- Page 7 SETTING UP THE TV LB86**, LB87** Sound Bar Stand Assy Right Stand Assy Left M4 x L14 M4 x L14 Screw Cover...
-
Page 8: Attaching The Sound Bar Supporter
SETTING UP THE TV Attaching the Sound Bar CAUTION Supporter y When attaching the stand to the TV set, place the screen facing down on a (In case of mounting on a wall) cushioned table or flat surface to protect LB86**, LB87** the screen from scratches. -
Page 9: Tidying Cables
SETTING UP THE TV CAUTION y When attaching the sound bar supporter to the TV set, place the screen facing down on a cushioned table or flat surface to protect the screen from scratches. y Make sure that the screws are inserted correctly and fastened securely. - Page 10 A-10 SETTING UP THE TV (Only LB63**-ZA, 39/42/47/50/55/60LB65**-ZA, (Only 70LB65**) LB67**, LB68**, LB69**, LB72**, LB73**-ZA) Cable Holder Cable Holder Cable Management Cable Management (Only LB73**-ZD/ZE) (Only 32LB65**-ZK) Cable Holder Cable Management Cable Management (Only LB86**, LB87**) (Only LB63**-ZL, 39/42/47/50/55/60/70LB65**- ZK/ZL) Cable Holder Cable Holder Cable Management...
-
Page 11: Making Connections
A-11 MAKING CONNECTIONS MAKING CONNECTIONS Italiano Collegare il televisore all’antenna centralizzata con un cavo RF (75 Ω). This section on MAKING CONNECTIONS mainly uses diagrams for the LB67** models. Antenna connection NOTA y Utilizzare uno sdoppiatore del segnale per usare più di 2 televisori. y Se la qualità... -
Page 12: Hdmi Connection
A-12 MAKING CONNECTIONS HDMI connection (Only LB63**, LB65**, LB67**, LB68**, LB69**, LB72**, LB73**) (Only LB86**, LB87**) DVD/ Blu-Ray / HD Cable Box / HD STB / PC (*Not Provided) (*Not Provided) HDMI English Transmits the digital video and audio signals from an external device to the TV. -
Page 13: Arc (Audio Return Channel)
A-13 MAKING CONNECTIONS DVI to HDMI connection Italiano Il segnale digitale audio e video viene trasmesso da un dispositivo esterno al televisore. Collegare (Only LB86**, LB87**) il dispositivo esterno e il televisore mediante il cavo HDMI come mostrato nell’illustrazione di seguito. - Page 14 A-14 MAKING CONNECTIONS (Only LB63**, LB65**, LB67**, LB68**, LB69**, Italiano LB72**, LB73**) Il segnale digitale video viene trasmesso da un dispositivo esterno al televisore. Collegare il dispositivo esterno e il televisore mediante il cavo DVI-HDMI come mostrato nell’illustrazione di seguito. Per trasmettere un segnale audio, collegare un cavo audio.
-
Page 15: Component Connection
A-15 MAKING CONNECTIONS Component connection (Only LB63**, LB65**, LB67**, LB68**, LB69**, LB72**, LB73**) (Only LB86**, LB87**) COMPONENT VIDEO AUDIO (*Not Provided) GREEN YELLOW (Use the (Use the composite component gender gender cable cable provided.) provided.) VIDEO AUDIO (*Not Provided) DVD / Blu-Ray / HD Cable Box English Transmits analog video and audio signals from an external device to the TV. -
Page 16: Composite Connection
A-16 MAKING CONNECTIONS Composite connection Italiano Il segnale audio e video analogico viene trasmesso da un dispositivo esterno al televisore. (Only LB86**, LB87**) Collegare il dispositivo esterno al televisore usando un cavo component come mostrato nella figura di seguito. NOTA y L’errato collegamento dei cavi può... -
Page 17: Mhl Connection
A-17 MAKING CONNECTIONS (Only LB63**, LB65**, LB67**, LB68**, LB69**, MHL connection LB72**, LB73**) MHL passive cable (*Not Provided) (*Not Provided) Mobile phone English Mobile High-definition Link (MHL) is an interface VIDEO AUDIO MONO for transmitting digital audiovisual signals from mobile phones to television sets. NOTE y Connect the mobile phone to the HDMI IN DVD / Blu-Ray / HD Cable Box / VCR... -
Page 18: Audio Connection
A-18 MAKING CONNECTIONS Audio connection Italiano Mobile High-definition Link (MHL) è un’interfaccia per la trasmissione di segnali audiovisivi digitali dai cellulari ai TV. NOTA y Collegare il telefono cellulare alla porta HDMI IN 3 (MHL) o HDMI/DVI IN 4 (MHL) per visualizzare lo schermo del telefono sul TV. -
Page 19: Usb Connection
A-19 MAKING CONNECTIONS USB connection Italiano È possibile utilizzare un sistema audio esterno opzionale al posto dell’altoparlante integrato. Collegamento audio ottico digitale Il segnale audio digitale viene trasmesso dal televisore su un dispositivo esterno. Collegare il dispositivo esterno e il televisore con il cavo audio ottico come mostrato nell’illustrazione di seguito. -
Page 20: Ci Module Connection
A-20 MAKING CONNECTIONS CI module connection Italiano Collegare una periferica di archiviazione USB, ad esempio una memoria flash USB, un hard disk esterno, o un lettore di schede di memoria USB al televisore e accedere al menu Smart Share per utilizzare diversi file multimediali. -
Page 21: Headphone Connection
A-21 MAKING CONNECTIONS Headphone connection Italiano Consente la visione dei servizi codificati (a pagamento) in modalità TV digitale. Questa funzione non è disponibile in tutti i paesi. NOTA y Verificare che il modulo CI sia inserito nello slot della scheda PCMCIA nel verso corretto. -
Page 22: Euro Scart Connection Common
A-22 MAKING CONNECTIONS Euro Scart connection Italiano Consente la trasmissione del segnale delle cuffie dalla TV a un dispositivo esterno. Collegare il (Only LB86**, LB87**) dispositivo esterno e la TV con le cuffie come mostrato nell’illustrazione di seguito. NOTA y Le voci del menu AUDIO sono disabilitate se sono collegate le cuffie. -
Page 23: English
A-23 MAKING CONNECTIONS (Only LB63**, LB65**, LB67**, LB68**, LB69**, Italiano LB72**, LB73**) Consente la trasmissione dei segnali audio e video da un dispositivo esterno al televisore. Collegare il dispositivo esterno e il televisore con il cavo Euro Scart come mostrato nell’illustrazione di seguito. - Page 24 A-24 MAKING CONNECTIONS English Italiano Connect various external devices to the TV Collegare diversi dispositivi esterni al televisore e and switch input modes to select an external modificare la modalità di ingresso per selezionare device. For more information of external device’s un dispositivo esterno.
- Page 25 OWNER’S MANUAL LED TV * LG LED TV applies LCD screen with LED backlights. Click! User Guide Please read this manual carefully before operating your set and retain it for future reference. www.lg.com...
-
Page 26: Specifications
TABLE OF CONTENTS TABLE OF CONTENTS USING THE USER GUIDE LICENSES MAINTENANCE OPEN SOURCE SOFTWARE Cleaning your TV NOTICE - Screen, frame, cabinet and stand - Power cord EXTERNAL CONTROL DEVICE TROUBLESHOOTING SETUP SPECIFICATIONS SAFETY INSTRUCTIONS - Viewing 3D Imaging (Only 3D models) INSTALLATION PROCEDURE ASSEMBLING AND PREPARING Unpacking... -
Page 27: Licenses
In addition to the source code, all referred license terms, warranty disclaimers and copyright notices are available for download. LG Electronics will also provide open source code to you on CD-ROM for a charge covering the cost of performing such distribution (such as the cost of media, shipping and handling) upon email request to opensource@lge.com. -
Page 28: Safety Instructions
SAFETY INSTRUCTIONS SAFETY INSTRUCTIONS Please read these safety precautions carefully before using the product. WARNING y Do not place the TV and/or remote control in the following environments: - A location exposed to direct sunlight - An area with high humidity such as a bathroom - Near any heat source such as stoves and other devices that produce heat - Near kitchen counters or humidifiers where they can easily be exposed... - Page 29 SAFETY INSTRUCTIONS y Bend antenna cable between inside and outside building to prevent rain from flowing in. This may cause water damaged inside the Product and could give an electric shock. y When mounting TV onto wall make sure to neatly install and isolate cabling from rear of TV as to not create possibility of electric shock /fire hazard.
- Page 30 SAFETY INSTRUCTIONS y Do not allow any impact, shock or any objects to fall into the unit, and do not drop anything onto the screen. You may be injured or the product can be damaged. y Never touch this product or antenna during a thunder or lighting storm. You may be electrocuted.
- Page 31 SAFETY INSTRUCTIONS y Do not install the product on places such as unstable shelves or inclined surfaces. Also avoid places where there is vibration or where the product cannot be fully supported. Otherwise, the product may fall or flip over, which may cause injury or damage to the product.
- Page 32 SAFETY INSTRUCTIONS y Please follow the installation instructions below to prevent the product from overheating. - The distance between the product and the wall should be more than 10 cm. - Do not install the product in a place with no ventilation (e.g., on a bookshelf or in a cupboard).
- Page 33 SAFETY INSTRUCTIONS y When moving or unpacking the product, work in pairs because the product is heavy. Otherwise, this may result in injury. y Contact the service centre once a year to clean the internal parts of the product. Accumulated dust can cause mechanical failure. y Refer all servicing to qualified service personnel.
-
Page 34: Viewing 3D Imaging (Only 3D Models)
SAFETY INSTRUCTIONS Viewing 3D Imaging (Only 3D models) WARNING Viewing Environment y Viewing Time - When watching 3D contents, take 5 - 15 minute breaks every hour. Viewing 3D contents for a long period of time may cause headache, dizziness, fatigue or eye strain. Those that have a photosensitive seizure or chronic illness y Some users may experience a seizure or other abnormal symptoms when they are exposed to a flashing light or particular pattern from 3D contents. - Page 35 Cautions when using the 3D glasses y Make sure to use LG 3D glasses. Otherwise, you may not be able to view 3D videos properly. y Do not use 3D glasses instead of your normal glasses, sunglasses or protective goggles.
-
Page 36: Installation Procedure
INSTALLATION PROCEDURE / ASSEMBLING AND PREPARING NOTE y Image shown may differ from your TV. y Your TV’s OSD (On Screen Display) may differ slightly from that shown in this manual. y The available menus and options may differ from the input source or product model that you are using. - Page 37 ASSEMBLING AND PREPARING ENERGY AV MODE INPUT SAVING ENERGY AV MODE INPUT SAVING FLASHBK LIST MARK FLASHBK LIST MARK MUTE MENU INFO Q.MENU MUTE MENU INFO Q.MENU ENTER ENTER BACK EXIT L/R SELECT BACK EXIT FREEZE L/R SELECT FREEZE RATIO RATIO Remote Control, Batteries Magic Remote, Batteries...
- Page 38 ASSEMBLING AND PREPARING Power Cord Stand Screws Stand Screws 2EA, M4 x L20 4EA, M4 x L14 (Only 32/39LB65**-ZE/ZN) (Only LB63**, 39LB65**-ZA/ 4EA, M4 x L20 ZK, 42/47/50/55/60/70LB65**, (Only 32LB65**-ZA/ZK) LB67**, LB68**, LB69**, (See p. A-3, A-4, A-5) LB72**, LB73**) 8EA, M4 x L14 (Only LB86**, LB87**) (See p.
- Page 39 ASSEMBLING AND PREPARING Stand Assys Stand Front Stand Supporters (Stand Body/Stand Base) (Only LB73**-ZD/ZE) (Only LB73**-ZD/ZE) (Only 70LB65**-ZA, LB67**, (See p. A-6) (See p. A-6) LB68**, LB69**, LB72**, LB73**-ZA) (See p. A-3) Stand Assys Sound Bar Sound Bar Supporters (Only LB86**, LB87**) (Only LB86**, LB87**) (Only LB86**, LB87**) (See p.
-
Page 40: Separate Purchase
Contact your dealer to buy these items. These devices only work with certain models. AG-F***DP AG-F*** AN-MR500 Dual Play Glasses Cinema 3D Glasses Magic Remote AN-VC5** Video Call Camera LG Audio Device Tag on LB67**, LB68**, Compatibility LB63** LB65** LB69**, LB72**, LB87** LB73**, LB86** AG-F***DP •... -
Page 41: Parts And Buttons
ASSEMBLING AND PREPARING Parts and buttons A type : LB63**-ZA, LB65**-ZA B type : LB63**-ZL, LB65**-ZK Screen Screen Speakers Speakers Remote control and Remote control and Intelligent sensors Intelligent sensors Power Indicator Power Indicator Joystick Button Joystick Button C type : LB65**-ZE/ZN D type : LB67**, LB68**, LB69**, LB72**,... - Page 42 1 Intelligent sensor - Adjusts the image quality and brightness based on the surrounding environment. 2 Joystick Button - This button is located below the TV screen. NOTE y You can set the LG Logo Light or Power Indicator Light to on or off by selecting OPTION in the main menus. (Depending on model)
-
Page 43: Using The Joystick Button
ASSEMBLING AND PREPARING Using the Joystick button You can simply operate the TV functions, pressing or moving the joystick button up, down, left or right. Basic Functions When the TV is turned off, place your finger on the joystick button Power On and press it once and release it. -
Page 44: Lifting And Moving The Tv
ASSEMBLING AND PREPARING Lifting and moving the TV y When transporting a large TV, there should be at least 2 people. y When transporting the TV by hand, hold the Please note the following advice to prevent the TV as shown in the following illustration. TV from being scratched or damaged and for safe transportation regardless of its type and size. -
Page 45: Mounting On A Table
ASSEMBLING AND PREPARING Mounting on a table Securing the TV to a wall (This feature is not available for all models.) 1 Lift and tilt the TV into its upright position on a table. - Leave a 10 cm (minimum) space from the wall for proper ventilation. -
Page 46: Mounting On A Wall
When you attach the TV to other building Separate purchase(Wall Mounting Bracket) materials, please contact qualified personnel. Model 32/39LB65** 42/47/55LB63** LG recommends that wall mounting be performed 42/47/50/55LB65** by a qualified professional installer. 49/55LB86** 49/55LB87** VESA (A x B) -
Page 47: Using Built-In Camera
If you install the TV on a ceiling or slanted camera of the TV. wall, it may fall and result in severe injury. This TV does not support the use of an external Use an authorised LG wall mount and camera. contact the local dealer or qualified personnel. -
Page 48: Preparing Built-In Camera
ASSEMBLING AND PREPARING Preparing Built-in Camera 3 Push down the built-in camera when you are 1 Pull up the slide at the back of the TV. not using it. Angle Adjustment Lever Slide Name of Parts of Built-in Camera NOTE y Remove the protective film before using Camera Lens the built-in camera. -
Page 49: Remote Control
REMOTE CONTROL REMOTE CONTROL The descriptions in this manual are based on the buttons on the remote control. Please read this manual carefully and use the TV correctly. To replace batteries, open the battery cover, replace batteries (1.5 V AAA) matching ends to the label inside the compartment, and close the battery cover. - Page 50 REMOTE CONTROL (Depending on model) INPUT Changes the input source. SETTINGS Accesses the main menus. Q. MENU Accesses the quick menus. RATIO Resizes an image. (Depending on model) INPUT Q.MENU INFO Views the information of the current programme and screen. SETTINGS (Depending on model) (User Guide) Sees user-guide.
-
Page 51: Magic Remote Functions
MAGIC REMOTE FUNCTIONS MAGIC REMOTE FUNCTIONS This item is not included for all models. When the message “Magic Remote battery is low. Change the battery.” is displayed, replace the battery. To replace batteries, open the battery cover, replace batteries (1.5 V AA) matching ends to the label inside the compartment, and close the battery cover. -
Page 52: Registering Magic Remote
MAGIC REMOTE FUNCTIONS How to deregister the Magic Remote Voice recognition(Depending on model) Press the (BACK) and (Smarthome) buttons at the Network connection is required to use the (BACK) same time, for five seconds, to voice recognition function. unpair the Magic Remote with (Smart your TV. -
Page 53: Precautions To Take When Using The Magic Remote
MAGIC REMOTE FUNCTIONS / USING THE USER GUIDE USING THE USER Precautions to Take when Using the Magic Remote GUIDE y Use the remote control within the specified range (within 10 m). You may experience communication User Guide allows you to more easily access the failures when using the device outside the detailed TV information. -
Page 54: Maintenance
MAINTENANCE / TROUBLESHOOTING MAINTENANCE Cleaning your TV Clean your TV regularly to keep the best performance and to extend the product lifespan. CAUTION y Make sure to turn the power off and disconnect the power cord and all other cables first. y When the TV is left unattended and unused for a long time, disconnect the power cord from the wall outlet to prevent possible damage from lightning or power surges. -
Page 55: Specifications
SPECIFICATIONS SPECIFICATIONS Wireless module(LGSBW41) Specifications Wireless LAN Bluetooth Standard IEEE 802.11a/b/g/n Standard Bluetooth Version 3.0 2400 to 2483.5MHz Frequency 5150 to 5250 MHz Frequency 2400 to 2483.5MHz Range 5725 to 5850 MHz(for Non Range 802.11a: 13 dBm Output 802.11b: 15 dBm Output Power 802.11g: 14 dBm... - Page 57 MANUALE UTENTE TV LED* * TV LED LG include uno schermo LCD con retroilluminazione LED. Selezionare! Manuale d’uso Leggere attentamente il presente manuale prima di utilizzare l'apparecchio e conservarlo come riferimento futuro. www.lg.com...
- Page 58 (a titolo meramente esemplificativo: congiuntivite, infestazioni del capo ecc…) fino alla completa scomparsa dell’infezione stessa. Le presenti indicazioni sono da intendersi quale aggiornamento dei manuali d’uso dei prodotti “LG” a tecnologia 3D fruibile tramite occhiali, come applicabile, e ne costituiscono parte integrante e...
- Page 59 INDICE INDICE LICENZE UTILIZZO DELLA GUIDA UTENTE AVVISO PER IL SOFTWARE MANUTENZIONE OPEN SOURCE Pulizia del televisore - Schermo, cornice, telaio e supporto - Cavo di alimentazione IMPOSTAZIONE DI UN DISPOSITIVO DI CONTROLLO RISOLUZIONE DEI PROBLEMI ESTERNO SPECIFICHE TECNICHE ISTRUZIONI DI SICUREZZA - Visione di immagini 3D (solo modelli DIAGRAMMI A BLOCCHI PROCEDURA DI INSTALLAZIONE...
- Page 60 LG Electronics fornisce anche il codice Open Source su CD-ROM a fronte del pagamento di una cifra a copertura dei costi che tale distribuzione comporta (come il costo del supporto, di spedizione e gestione) in seguito a richiesta inviata via e-mail a: opensource@lge.com.
- Page 61 ISTRUZIONI DI SICUREZZA ISTRUZIONI DI SICUREZZA Leggere attentamente queste istruzioni di sicurezza prima di utilizzare il prodotto. AVVISO y Non collocare il televisore e il telecomando nei seguenti ambienti: - In un luogo esposto alla luce diretta del sole - In un luogo dove è presente un elevato livello di umidità, ad esempio in bagno - Vicino a fonti di calore, ad esempio stufe o altri dispositivi che producono calore...
- Page 62 ISTRUZIONI DI SICUREZZA y Piegare il cavo dell'antenna tra l'interno e l'esterno dell'edificio per impedire l'ingresso di gocce di pioggia. L'acqua può danneggiare il prodotto e provocare scosse elettriche. y Quando si monta il televisore sulla parete, assicurarsi di non far passare il cavo di alimentazione e quello dell'antenna dietro al televisore.
- Page 63 ISTRUZIONI DI SICUREZZA y Evitare impatti d'urto sul prodotto o di far cadere oggetti all'interno del prodotto e sullo schermo. Vi è il rischio di lesioni alle persone o danneggiamenti al prodotto stesso. y Non toccare mai il prodotto o l'antenna durante un temporale. Si potrebbero subire scosse elettriche.
- Page 64 ISTRUZIONI DI SICUREZZA y Non installare il prodotto in luoghi quali mensole instabili o superfici inclinate. Evitare inoltre luoghi soggetti a vibrazione o in cui il prodotto non sia sostenuto appieno. In caso contrario il prodotto potrebbe cadere o capovolgersi, con il rischio di lesioni gravi o danneggiamento del prodotto stesso.
- Page 65 ISTRUZIONI DI SICUREZZA y Seguire le istruzioni di installazione riportate di seguito per evitare il surriscaldamento del prodotto. - Collocare il prodotto a una distanza minima di 10 cm dalla parete. - Non installare il prodotto in luoghi privi di ventilazione (ad esempio su una mensola o all'interno di un mobile).
- Page 66 ISTRUZIONI DI SICUREZZA y A causa del peso dell'apparecchio, si raccomanda di spostarlo o rimuoverlo dal suo imballaggio in due persone. In caso contrario, si possono subire lesioni. y Contattare il centro servizi una volta l'anno per pulire le parti interne del prodotto.
- Page 67 ISTRUZIONI DI SICUREZZA Visione di immagini 3D (solo modelli 3D) AVVISO Ambiente di visione y Tempo di visione - Quando si guardano contenuti 3D, fare una pausa di 5-15 minuti ogni ora. La visione prolungata di contenuti 3D può causare mal di testa, vertigini, senso di stanchezza o affaticamento degli occhi.
- Page 68 Precauzioni nell'uso degli occhiali 3D y Usare solo occhiali 3D LG. In caso contrario, potrebbe non essere possibile vedere i video 3D correttamente. y Non usare occhiali 3D in sostituzione di occhiali comuni, da sole o protettivi.
- Page 69 PROCEDURA DI INSTALLAZIONE / MONTAGGIO E PREPARAZIONE NOTA y Il televisore raffigurato nell'immagine può essere diverso da quello in uso. y Il menu OSD (On Screen Display) del TV potrebbe risultare leggermente diverso da quello mostrato in questo manuale. y I menu e le opzioni disponibili possono essere diversi a seconda della sorgente in ingresso o del modello del prodotto utilizzati.
- Page 70 MONTAGGIO E PREPARAZIONE ENERGY AV MODE INPUT SAVING ENERGY AV MODE INPUT SAVING FLASHBK LIST MARK FLASHBK LIST MARK MUTE MENU INFO Q.MENU MUTE MENU INFO Q.MENU ENTER ENTER BACK EXIT L/R SELECT BACK EXIT FREEZE L/R SELECT FREEZE RATIO RATIO Telecomando e batterie Telcomando Magic Remote,...
- Page 71 MONTAGGIO E PREPARAZIONE Cavo di alimentazione Viti del supporto Viti del supporto 2EA, M4 x L20 4EA, M4 x L14 (Solo 32/39LB65**-ZE/ZN) (Solo LB63**, 39LB65**-ZA/ 4EA, M4 x L20 ZK, 42/47/50/55/60/70LB65**, (Solo 32LB65**-ZA/ZK) LB67**, LB68**, LB69**, (Vedere pag. A-3, A-4, A-5) LB72**, LB73**) 8EA, M4 x L14 (Solo LB86**, LB87**)
- Page 72 MONTAGGIO E PREPARAZIONE Gruppo supporto Vista anteriore supporto Sostegno del supporto (Corpo del supporto / Base (Solo LB73**-ZD/ZE) (Solo LB73**-ZD/ZE) del supporto) (Vedere pag. A-6) (Vedere pag. A-6) (Solo 70LB65**-ZA, LB67**, LB68**, LB69**, LB72**, LB73**-ZA) (Vedere pag. A-3) Gruppo supporto Soundbar Piedini da parete (Solo LB86**, LB87**)
- Page 73 I dispositivi funzionano solo con alcuni modelli. AG-F***DP AG-F*** AN-MR500 Occhiali Dual play Occhiali 3D Cinema Telcomando Magic Remote AN-VC5** Tag on Telecamera per Dispositivo audio LG videochiamate LB67**, LB68**, Compatibilità LB63** LB65** LB69**, LB72**, LB87** LB73**, LB86** AG-F***DP •...
- Page 74 MONTAGGIO E PREPARAZIONE Componenti e pulsanti Tipo A : LB63**-ZA, LB65**-ZA Tipo B : LB63**-ZL, LB65**-ZK Schermo Schermo Altoparlanti Altoparlanti Telecomando e Telecomando e sensori intelligenti sensori intelligenti Indicatore Alimentazione Indicatore Alimentazione Pulsante joystick Pulsante joystick Tipo C : LB65**-ZE/ZN Tipo D : LB67**, LB68**, LB69**, LB72**, LB73**-ZA...
- Page 75 1 Sensore intelligente - Consente di regolare la qualità dell’immagine in base all’ambiente circostante. 2 Pulsante joystick - Questo pulsante si trova sotto lo schermo del TV. NOTA y È possibile impostare la spia del logo LG o la spia dell’indicatore di alimentazione selezionando OPZIONE nei menu principali. (in base al modello)
- Page 76 MONTAGGIO E PREPARAZIONE Uso del pulsante joystick È possibile attivare le funzioni del TV, premendo o spostando il pulsante joystick verso l’alto, verso il basso, a destra o sinistra. Funzioni di base Quando il TV è spento, posizionare il dito sul pulsante joystick, Accensione premere una volta, quindi rilasciare il pulsante.
- Page 77 MONTAGGIO E PREPARAZIONE Sollevamento e spostamento y Per trasportare un televisore di grandi dimensioni occorrono 2 o 3 persone. del TV y Durante il trasporto, tenere il televisore come mostrato nell'illustrazione di seguito. Prima di sollevare o spostare il televisore, leggere le seguenti indicazioni per evitare di graffiare o danneggiare l'apparecchio e per un trasporto sicuro a prescindere dal tipo e dalle dimensioni.
- Page 78 MONTAGGIO E PREPARAZIONE Montaggio su un tavolo Fissaggio della TV alla parete (Funzione non disponibile su tutti i modelli.) 1 Sollevare ed inclinare il televisore in posizione verticale su un tavolo. - Lasciare uno spazio (minimo) di 10 cm dalla parete per assicurare una ventilazione adeguata.
- Page 79 42/47/55LB63** materiali da costruzione, contattare il personale 42/47/50/55LB65** 49/55LB86** qualificato. 49/55LB87** LG consiglia di far eseguire il montaggio a parete VESA (A x B) 200 x 200 400 x 400 da un installatore qualificato esperto. Vite standard Numero di viti...
- Page 80 Utilizzare un supporto per montaggio a del televisore. Questo TV non supporta l’uso di una telecamera esterna. parete autorizzato da LG e contattare il rivenditore locale o il personale qualificato. y Non serrare eccessivamente le viti per NOTA evitare danni al televisore e rendere nulla la garanzia.
- Page 81 MONTAGGIO E PREPARAZIONE Preparazione della videocamera integrata 3 Abbassare la videocamera integrata quando non viene utilizzata. 1 Abbassare la videocamera integrata quando non viene utilizzata. Leva di regolazione dell’angolazione Guida Nome delle parti della videocamera integrata NOTA y Rimuovere la pellicola di protezione prima Obiettivo della videocamera di utilizzare la videocamera integrata.
- Page 82 TELECOMANDO TELECOMANDO Le descrizioni nel presente manuale si basano sui pulsanti del telecomando. Leggere attentamente il presente manuale e utilizzare correttamente il televisore. oppure Per sostituire le batterie, aprire il coperchio del vano batterie, inserire le batterie (AAA da 1,5 V) rispettando le polarità come indicato dall’etichetta all’interno del vano e chiudere il coperchio.
- Page 83 TELECOMANDO (In base al modello) INPUT Consente di modificare la sorgente in ingresso. SETTINGS Consente di accedere ai menu principali. Q. MENU Consente di accedere ai menu rapidi. RATIO Consente di ridimensionare un’immagine. (in base al modello) INFO Consente di visualizzare le informazioni del programma e INPUT Q.MENU della schermata correnti.
- Page 84 FUNZIONI DEL TELCOMANDO MAGIC REMOTE FUNZIONI DEL TELCOMANDO MAGIC REMOTE Articolo non incluso in tutti i modelli. Quando viene visualizzato il messaggio “Batteria telcomando Magic Remote quasi scarica. Sostituire batteria.”, sostituire la batteria. Per sostituire le batterie, aprire il coperchio del vano batterie, sostituire le batterie (AA da 1,5 V) facendo corrispondere le estremità...
- Page 85 FUNZIONI DEL TELCOMANDO MAGIC REMOTE Annullamento della registrazione del telecomando magico Riconoscimento vocale (in base al modello) Premere contemporaneamente Per utilizzare la funzione di riconoscimento per cinque secondi i tasti vocale è necessaria una connessione di (Indi- Indi- (Indietro) e (Smarthome) rete.
- Page 86 FUNZIONI DEL TELCOMANDO MAGIC REMOTE / UTILIZZO DELLA GUIDA UTENTE UTILIZZO DELLA GUIDA Precauzioni nell’uso del telcomando Magic Remote UTENTE y Utilizzare il telecomando entro il raggio La guida utente consente di accedere più specificato (10 metri). Si potrebbero facilmente a informazioni dettagliate sul riscontrare errori di comunicazione nel televisore.
- Page 87 MANUTENZIONE / RISOLUZIONE DEI PROBLEMI MANUTENZIONE Pulizia del televisore Pulire regolarmente il televisore per mantenerne le prestazioni ottimali e per estenderne la durata nel tempo. ATTENZIONE y Innanzitutto, accertarsi di spegnere e discollegare il cavo di alimentazione e tutti gli altri cavi. y Quando il televisore viene lasciato incustodito e non in uso per un lungo periodo, scollegare il cavo di alimentazione dalla presa a muro per evitare possibili danni derivanti da fulmini e sovratensioni elettriche.
- Page 88 SPECIFICHE TECNICHE SPECIFICHE TECNICHE Wireless module(LGSBW41) Specifications LAN wireless Bluetooth Standard IEEE 802.11a/b/g/n Standard Bluetooth Versione 3.0 Da 2400 a 2483.5 MHz Gamma di fre- Da 5150 a 5250 MHz Gamma di fre- 2400 ~ 2483.5 MHz quenza quenza Da 5725 a 5850 MHz (Fuori dall’UE) 802.11a: 13 dBm 802.11b: 15 dBm...
- Page 89 SPECIFICHE TECNICHE Le specifiche del prodotto precedentemente indicate possono subire modifiche senza preavviso in seguito all’aggiornamento delle funzioni del prodotto. 42LB63** MODELLI 42LB630V-ZA 42LB631V-ZL 960 x 610 x 218 960 x 612 x 193 Dimensioni Con supporto (mm) (L x A x P) 960 x 567 x 54,5 960 x 567 x 54,5 Senza supporto (mm)
- Page 90 SPECIFICHE TECNICHE 32LB65** MODELLI 32LB650V-ZA 32LB650V-ZE 32LB653V-ZK 32LB652V-ZA 32LB650V-ZN 731 x 484 x 207 731 x 475 x 207 731 x 474 x 239 Dimensioni Con supporto (mm) (L x A x P) 731 x 437 x 54,5 731 x 437 x 54,5 731 x 437 x 54,5 Senza supporto (mm) Peso...
- Page 91 SPECIFICHE TECNICHE 47LB65** MODELLI 47LB650V-ZA 47LB650V-ZE 47LB653V-ZK 47LB652V-ZA 47LB650V-ZN 1072 x 677 x 247 1072 x 675 x 230 1072 x 669 x 267 Dimensioni Con supporto (mm) (L x A x P) 1072 x 629 x 54,5 1072 x 629 x 54,5 1072 x 629 x 54,5 Senza supporto (mm) 13,4...
- Page 92 SPECIFICHE TECNICHE 60LB65** 70LB65** MODELLI 70LB650V-ZA 60LB650V-ZN 70LB650V-ZB 1351 x 828 x 293 1574 x 964 x 344 Dimensioni Con supporto (mm) (L x A x P) 1351 x 785 x 57,5 1574 x 916 x 60,2 Senza supporto (mm) 26,0 31,6 Peso...
- Page 93 SPECIFICHE TECNICHE 55LB68** 60LB68** 65LB68** MODELLI 55LB680V-ZA 60LB680V-ZA 65LB680V-ZA 55LB680V-ZD 60LB680V-ZD 65LB680V-ZD 1231 x 769 x 247 1338,4 x 834,7 x 288,9 1449,5 x 883,7 x 313,9 Dimensioni Con supporto (mm) (L x A x P) 1231 x 718 x 55,1 1338,4 x 778,8 x 58,1 1449,5 x 840,8 x 58,1 Senza supporto (mm) 22,2...
- Page 94 SPECIFICHE TECNICHE 60LB72** 65LB72** 60LB720V-ZA 65LB720V-ZA MODELLI 60LB720V-ZB 65LB720V-ZB 60LB720V-ZG 65LB720V-ZG 1338,4 x 834,7 x 288,9 1449,5 x 883,7 x 313,9 Dimensioni Con supporto (mm) (L x A x P) 1338,4 x 778,8 x 58,1 1449,5 x 840,8 x 58,1 Senza supporto (mm) 22,2 27,9...
- Page 95 SPECIFICHE TECNICHE 55LB73** MODELLI 55LB730V-ZD 55LB730V-ZA 55LB731V-ZE 1231 x 769 x 247 1231 x 766 x 237 Dimensioni Con supporto (mm) (L x A x P) 1231 x 718 x 55,1 1231 x 718 x 55,1 Senza supporto (mm) 19,6 Peso Con supporto (kg) 18,5...
- Page 96 SPECIFICHE TECNICHE 49LB86** 55LB86** 60LB86** MODELLI 55LB860V-ZA 60LB860V-ZA 49LB860V-ZA 49LB860V-ZB 55LB860V-ZB 60LB860V-ZB 1091 x 690 x 229 1227 x 769 x 229 1335 x 830 x 261 Dimensioni Con supporto (mm) (L x A x P) 1091 x 632 x 34,7 1227 x 709 x 34,7 1335 x 770 x 35,7 Senza supporto (mm)
- Page 97 SPECIFICHE TECNICHE Dichiarazione di conformità La società LG Electronics Italia S.p.A. dichiara che il televisore a colori LG 32LB650V-ZA / 32LB650V-ZE / 32LB650V-ZN / 32LB652V-ZA / 32LB653V-ZK / 39LB650V-ZA / 39LB650V-ZE / 39LB650V-ZN / 39LB652V-ZA / 39LB653V-ZK / 42LB630V-ZA / 42LB631V-ZL / 42LB650V-ZA / 42LB650V-ZE /...
- Page 98 DIAGRAMMI A BLOCCHI DIAGRAMMI A BLOCCHI (Solo LB63**, LB65**, LB67**, LB68**, LB69**, LB72**, LB73**)
- Page 99 DIAGRAMMI A BLOCCHI (Solo LB86**, LB87**)
- Page 101 SPECIFICATIONS SPECIFICATIONS Product specifications may be changed without prior notice due to upgrade of product functions. 42LB63** MODELS 42LB630V-ZA 42LB631V-ZL 960 x 610 x 218 960 x 612 x 193 Dimensions With stand (mm) (W x H x D) Without stand(mm) 960 x 567 x 54.5 960 x 567 x 54.5 Weight With stand (kg)
- Page 102 SPECIFICATIONS 32LB65** MODELS 32LB650V-ZA 32LB650V-ZE 32LB653V-ZK 32LB652V-ZA 32LB650V-ZN 731 x 484 x 207 731 x 475 x 207 731 x 474 x 239 Dimensions With stand (mm) (W x H x D) Without stand(mm) 731 x 437 x 54.5 731 x 437 x 54.5 731 x 437 x 54.5 Weight With stand (kg)
- Page 103 SPECIFICATIONS 47LB65** MODELS 47LB650V-ZA 47LB650V-ZE 47LB653V-ZK 47LB652V-ZA 47LB650V-ZN 1072 x 677 x 247 1072 x 675 x 230 1072 x 669 x 267 Dimensions With stand (mm) (W x H x D) Without stand(mm) 1072 x 629 x 54.5 1072 x 629 x 54.5 1072 x 629 x 54.5 13.4 13.3...
- Page 104 SPECIFICATIONS 60LB65** 70LB65** MODELS 70LB650V-ZA 60LB650V-ZN 70LB650V-ZB 1351 x 828 x 293 1574 x 964 x 344 Dimensions With stand (mm) (W x H x D) Without stand(mm) 1351 x 785 x 57.5 1574 x 916 x 60.2 26.0 31.6 Weight With stand (kg) 21.8...
- Page 105 SPECIFICATIONS 55LB68** 60LB68** 65LB68** MODELS 55LB680V-ZA 60LB680V-ZA 65LB680V-ZA 55LB680V-ZD 60LB680V-ZD 65LB680V-ZD 1231 x 769 x 247 1338.4 x 834.7 x 288.9 1449.5 x 883.7 x 313.9 Dimensions With stand (mm) (W x H x D) Without stand(mm) 1231 x 718 x 55.1 1338.4 x 778.8 x 58.1 1449.5 x 840.8 x 58.1 22.2 27.9...
- Page 106 SPECIFICATIONS 60LB72** 65LB72** 60LB720V-ZA 65LB720V-ZA MODELS 60LB720V-ZB 65LB720V-ZB 60LB720V-ZG 65LB720V-ZG 1338.4 x 834.7 x 288.9 1449.5 x 883.7 x 313.9 Dimensions With stand (mm) (W x H x D) Without stand(mm) 1338.4 x 778.8 x 58.1 1449.5 x 840.8 x 58.1 22.2 27.9 Weight...
- Page 107 SPECIFICATIONS 55LB73** MODELS 55LB730V-ZD 55LB730V-ZA 55LB731V-ZE 1231 x 769 x 247 1231 x 766 x 237 Dimensions With stand (mm) (W x H x D) Without stand(mm) 1231 x 718 x 55.1 1231 x 718 x 55.1 19.6 Weight With stand (kg) 18.5 18.5 Without stand (kg)
- Page 108 SPECIFICATIONS 49LB86** 55LB86** 60LB86** MODELS 55LB860V-ZA 60LB860V-ZA 49LB860V-ZA 49LB860V-ZB 55LB860V-ZB 60LB860V-ZB 1091 x 690 x 229 1227 x 769 x 229 1335 x 830 x 261 Dimensions With stand (mm) (W x H x D) Without stand(mm) 1091 x 632 x 34.7 1227 x 709 x 34.7 1335 x 770 x 35.7 1091 x 688 x 34.7...
- Page 112 Please contact LG First. If you have any inquiries or comments, please contact LG customer information centre. LG Customer Information Centre Country Country Service Service 0 810 144 131 0900 543 5454 015 200 255 800 187 40 0032 15 200255...