LG WM0532HW Owner's Manual
Hide thumbs
Also See for WM0532HW:
- Service manual (48 pages) ,
- Service manual (43 pages) ,
- Service manual (44 pages)
Table of Contents
Advertisement
Available languages
Available languages
Owner's Manual
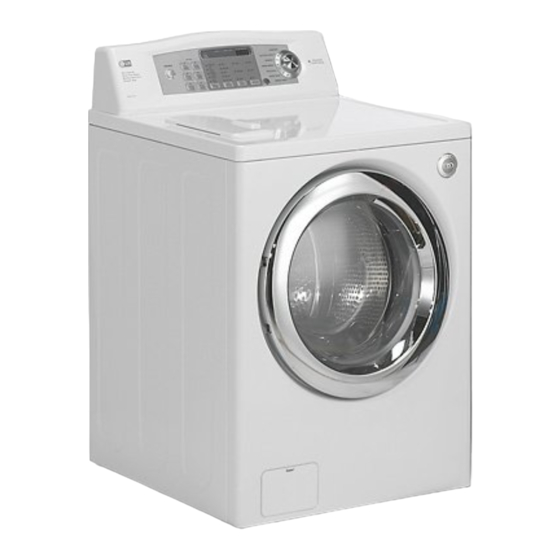
Washing Machine
WM0532HW
Please read this manual carefully. It provides
instructions on safe installation, use, and maintenance.
Retain it for future reference.
Record the model and serial numbers of your machine
and report this information to your dealer if your machine
requires service.
Advertisement
Table of Contents

Related Manuals for LG WM0532HW


Summary of Contents for LG WM0532HW
-
Page 1: Washing Machine
Owner's Manual Washing Machine WM0532HW Please read this manual carefully. It provides instructions on safe installation, use, and maintenance. Retain it for future reference. Record the model and serial numbers of your machine and report this information to your dealer if your machine... -
Page 2: Product Features
PRODUCT FEATURES CONTENTS ■ Direct Drive System ■ Tilted Drum and Extra Large Door Opening ■ Water Circulation ■ RollerJets ■ Built-in Heater ■ Child Lock... -
Page 3: Important Safety Information
IMPORTANT SAFETY INFORMATION READ ALL INSTRUCTIONS BEFORE USE WARNING! For your safety, the information in this manual must be followed to minimize the risk of fire or explosion, electric shock, or to prevent property damage, personal injury, or loss of life. I I M M P P O O R R T T A A N N T T S S A A F F E E T T Y Y I I N N S S T T R R U U C C T T I I O O N N S S WARNING •... -
Page 4: Specifications
SPECIFICATIONS ■ ■ ■ ■ ■ ■ ■ Accessories ■ ” ” ” Water Circulation Nozzle ”... -
Page 5: Installation Instructions
INSTALLATION INSTRUCTIONS Install or store unit where it will not be exposed to temperatures below freezing or exposed to outside weather conditions. Properly ground washer to conform with all governing codes and ordinances. To reduce the risk of electric shock, do not install the washer in humid spaces. The base opening must not be obstructed by carpeting when the washing machine is installed on a carpeted floor. -
Page 6: Minimum Installation Spacing For Recessed Area Installation
INSTALLATION INSTRUCTIONS ■ Installation clearances ■ Washer dimensions Minimum installation spacing for ■ recessed area installation. [Side view] [Front view] ■ Level floor • To minimize noise and vibration, the washer MUST be installed on a solidly constructed floor. NOTE: A firm, solid floor is even more critical to a front-loading washer than to a top-loader. -
Page 7: Electrical Connection
INSTALLATION INSTRUCTIONS ■ Electrical connection ■ Connecting water supply hose NOTE: Washing Machine is to be connected to the water mains using new hoses. Old hoses should not be used. Repairs to the washing machine must only be carried out by qualified personnel. Repairs carried out by inexperienced persons may cause injury or serious malfunctioning. -
Page 8: Installation Of Drain Hose
INSTALLATION INSTRUCTIONS ■ Installation of drain hose This equipment is not designed for maritime use or for mobile installations such as in RV’s, aircraft, etc. Turn off the faucet if the machine is to be left for an extended period of time (e.g. holiday). When disposing of the appliance, cut off the power cable, and destroy the plug. -
Page 9: Level Adjustment
INSTALLATION INSTRUCTIONS ■ Level adjustment NOTE: Extend the feet no more than necessary to level the washer. The more the feet are extended, the more the washer will vibrate. NOTE: If there are vibration and noise during the spin cycle, re-check the leveling of the washer, adjust the feet as required, and tighten the lock nuts securely to prevent changes in adjustment. -
Page 10: Preparation Before Washing
PREPARATION BEFORE WASHING To reduce the risk of fire, electric shock, or injury to persons, read the IMPORTANT SAFETY INSTRUCTIONS before operating this appliance. 1. Fabric Care Labels 2. Sorting Soil (Heavy, Normal, Light) Color (White, Lights, Darks) Lint (Lint Producers, Collectors) 3. - Page 11 USING THE DISPENSER The automatic dispenser consists of four compartments which hold 1) liquid chlorine bleach, 2) liquid fabric softener, 3) liquid or powdered detergent for prewash and 4) liquid or powdered detergent and color safe bleach for main wash. All laundry products can be added at once in their respective dispenser compartments.
-
Page 12: Using The Dispenser
USING THE DISPENSER 2. Main Wash Detergent Compartment NOTE: If you are using the Prewash option, powdered detergent must be used in the main wash compartment. Liquid detergent will drain into the washer drum as it is added. 3. Liquid Bleach Compartment 4. - Page 13 CYCLES ■ Select cycles designed for different types of fabric and soil levels.
-
Page 14: How To Use The Washer
HOW TO USE THE WASHER 1. Cycles • Rotate the Cycle selector knob to select cycle designed for different types of fabric and soil levels. • Each cycle has a preset Water Temperature, Spin Speed, Soil Level, and Option (See page 13). •... -
Page 15: Wash/Rinse Temperature
HOW TO USE THE WASHER 3. Beeper 4. Wash/Rinse Temperature Suggested Wash Temp. Garment 5. Spin speed Power Spin Speed Start/Pause 6. Soil Level Spin Speed Soil Level... -
Page 16: Door Locked
HOW TO USE THE WASHER OPTION 1. Prewash - When using Prewash option, do not use liquid detergent in the Main Wash Compartment. Use powdered for the main wash. 2. Stain cycle 3. Quick Cycle 4. Extra Rinse 5. Rinse+Spin 6. -
Page 17: Maintenance
MAINTENANCE Before cleaning the washer interior, unplug the electrical power cord to avoid electrical shock hazards. When disposing of the appliance, cut off the power cable, destroy the plug, and disable the door lock to prevent young children from being trapped inside. ■... -
Page 18: Cleaning The Dispenser
MAINTENANCE ■ Cleaning the Dispenser • • NOTE: Do not use any cleaning substance on the main dispenser other than water because it will drain into the tub. If this should happen, set the washer for a rinse and spin cycle to remove any cleaning substance from the washer before doing a load of laundry. - Page 19 MAINTENANCE ■ The water circulation nozzle ■ Cleaning your washer 1. Exterior 2. Interior NOTE: Remove hard water deposits using only cleaners labeled as safe for washing machines. ■ Winterizing instructions Do not add laundry...
-
Page 20: Troubleshooting Guide
TROUBLESHOOTING GUIDE This washing machine is equipped with automatic safety functions which detect and diagnose problems at an early stage and react appropriately. When the machine does not function properly or does not function at all, check the following points before you call the Service Department. Problem Possible Cause Solution... - Page 21 TROUBLESHOOTING GUIDE Problem Possible Cause Solution...
- Page 22 TROUBLESHOOTING GUIDE Problem Possible Cause Solution...
- Page 23 LG WASHING MACHINE LIMITED WARRANTY-USA...
- Page 24 NOTES...
-
Page 25: Manual Del Propietario
MANUAL DEL PROPIETARIO Lavadora WM0532HW Lea este manual cuidadosamente. Le proveerá instrucciones para una instalación, uso y mantenimiento seguros. Consérvelo para futuras referencias. Cite esta información a su proveedor si requiere de servicio. -
Page 26: Características Del Producto
CARACTERÍSTICAS DEL PRODUCTO CONTENIDO ■ Sistema DD Invertidor. ■ Cilindro Inclinado y Abertura Extra Grande. ■ Circulación de Agua. ■ Bola de Lavado. ■ Calentador Integrado. ■ Seguro de Niños. - Page 27 INFORMACIÓN IMPORTANTE DE SEGURIDAD LEA TODAS LAS INSTRUCCIONES ANTES DE USARLA. ADVERTENCIA! Para su seguridad, la información en este manual debe ser seguida para minimizar el riesgo de incendio ó explosión, descarga eléctrica, ó para prevenir daños a su propiedad, a su persona ó pérdida de la vida. I I n n f f o o r r m m a a c c i i ó...
-
Page 28: Especificaciones
ESPECIFICACIONES Panel de Control Distribuidor Manguera de Desagüe Puerta Cilindro Tapa Inferior de Cubierta Filtro de Bomba de Desagüe Conexión de Desagüe ■ ■ ■ ■ ■ ■ ■ ACCESORIOS ■ Patas Ajustables ” ” ” Perno para Transportación Clavija de Energía El lnyector de la Circulación del Agua Atrás de la Lavadora Ventilación por Seguridad... -
Page 29: Instrucciones De Instalación
INSTRUCCIONES DE INSTALACIÓN Instale ó almacene en un lugar donde no esté expuesta a temperaturas inferiores a la congelación ni expuesta a la intemperie. Conecte a tierra correctamente y cumpliendo con todos los códigos y ordenanzas gubernamentales. Para reducir los riesgos de electrocución, no instale la lavadora en lugares húmedos. La abertura de la base no debe ser obstruida por alfombra cuando esté... -
Page 30: Toma De Corriente
INSTRUCCIONES DE INSTALACIÓN ■ Espacios Libres de instalación ■ Dimensiones de la lavadora ■ Espacio mínimo de instalación para área reducida instalación. [Vista lateral] [Vista frontal] ■ Nivele el Piso • • Pare reducir ruido y vibración, la lavadora debe ser instalada en un piso construido sólidamente. - Page 31 INSTRUCCIONES DE INSTALACIÓN ■ Conexión Eléctrica ■ Conectando la manguera de suministro de agua. NOTA: La Lavadora será conectada a las líneas principales del agua usando mangueras nuevas. No se deben usar mangueras usadas. Las reparaciones a la lavadora deberán ser llevadas a cabo únicamente por personal calificado. Las reparaciones llevadas a cabo por personas sin experiencia pueden causarle heridas ó...
- Page 32 INSTRUCCIONES DE INSTALACIÓN ■ Instalación de la Manguera de Desagüe Este equipo no está diseñado para uso marítimo ni para su uso en instalaciones móviles tales como campers, aeronaves, etc. Cierre el grifo de la máquina si se va a dejar por un periodo largo de tiempo (ej. Vacaciones). Al desechar el aparato, corte el cable de energía y destruya la clavija.
- Page 33 INSTRUCCIONES DE INSTALACIÓN ■ Nivelar NOTA: No extienda las patas niveladoras más de lo necesario. Mientras más extendidas estén, más vibración puede haber. NOTA: Si existe una vibración o ruido durante el centrifugado, vuelva a revisar el nivel de balance de la lavadora.
-
Page 34: Preparación Antes De Lavar
PREPARACIÓN ANTES DE LAVAR Para reducir el riesgo de incendio, descarga eléctrica ó daño a personas, lea las Instrucciones Importantes de Seguridad antes de operar este aparato. 1. Etiquetas de Cuidado 2. Clasificando Suciedad (Pesada, Normal, Poca) Color (Blancos, Pálidos, Oscuros) Pelusa (Productores de Pelusa, Recolectores) 3. -
Page 35: Usando El Distribuidor
USANDO EL DISTRIBUIDOR El distribuidor automático consiste de cuatro compartimentos que retienen 1) cloro líquido blanqueador, 2) suavizante de telas líquido, 3) detergente líquido ó en polvo para el prelavado y 4) detergente en polvo ó líquido y blanqueador seguro para los colores para el lavado principal. Todos los productos de lavandería pueden ser añadidos al mismo tiempo en su compartimiento distribuidor. - Page 36 USANDO EL DISTRIBUIDOR 2. Compartimiento de Detergente del Lavado Principal NOTA: Si está usando la opción de Prelavado con el lavado Principal, deberá usar detergente en polvo para el compartimiento de lavado Principal, ya que el detergente líquido será drenado inmediatamente al cilindro al ser añadido.
- Page 37 CICLOS ■ Usted puede seleccionar ciclos diseñados para diferentes tipos de telas y niveles de suciedad. Ciclo Tipo de Tela Lavado/Enjuague Sanitario Algodón/ Toallas Normal Planchado Permanente Delicados Lavado a Mano Lavado Rápido Temperatura de Velocidad Nivel de Suciedada de Giro Prela Ciclo Ciclo de...
-
Page 38: Como Usar La Lavadora
COMO USAR LA LAVADORA 1. Ciclos • Gire la perilla selectora de ciclos para seleccionar el ciclo diseñado para los diferentes tipos de telas y niveles de suciedad. • Cada ciclo tiene una temperatura, velocidad de giros, nivel de suciedad y Opciones predeterminadas (Véase página 37). -
Page 39: Temperatura De Lavado/Enjuague
COMO USAR LA LAVADORA 2. Programación Personalizada Temperatura de Lavado/Enjuague, Velocidad de Giro, Nivel de Suciedad Iniciar/Pausa 3. Beeper 4. Temperatura de Lavado/Enjuague Temperatura del Agua Sugerida 5. Velocidad de Giro Velocidad de Giro 6. Nivel de Suciedad Nivel de Suciedad Prenda... - Page 40 COMO USAR LA LAVADORA OPCIONES (OPTION) 1. Prelavado - Cuando use la opción de Prelavado, no use detergente líquido en el compartimiento de Lavado Principal. Use detergente en polvo. 2. Ciclo de Manchas 3. Ciclo Rápido 4. Enjuague Extra 5. Enjuague+Giro 6.
-
Page 41: Mantenimiento
MANTENIMIENTO Antes de limpiar el interior de la lavadora, desconéctela del suministro eléctrico para evitar recibir una descarga eléctrica. Cuando deseche el aparato, corte el cable de corriente y destruya la clavija. Deshabilite el seguro de la puerta para evitar que algún niño pequeño quede atrapado dentro. ■... - Page 42 MANTENIMIENTO ■ Limpiando el Distribuidor • NOTA: No use sustancias limpiadoras en el distribuidor principal sino agua. Es posible que la sustancia fuera drenada dentro de la tina. Si esto sucediera, ponga la lavadora a realizar un ciclo de enjuague y giro para remover cualquier residuo de la sustancia antes de lavar ropa.
- Page 43 MANTENIMIENTO ■ El inyector de la circulación del agua ■ Limpiando su Lavadora 1. Exterior 2. Interior NOTA: Remueva depósitos de agua dura usando únicamente productos que en la etiqueta digan que es seguro su uso en lavadoras. ■ Instrucciones de Invierno No añada ropa...
-
Page 44: Guía Para La Localización De Problemas
GUÍA PARA LA LOCALIZACIÓN DE PROBLEMAS Esta lavadora está equipada con funciones de seguridad automáticas que detectan y diagnostican fallas tempranamente y reaccionan apropiadamente. Cuando la máquina no funcione apropiadamente ó no funcione para nada, verifique los puntos siguientes antes de llamar al Departamento de Servicio. Problema Posible Causa Solución... - Page 45 GUÍA PARA LA LOCALIZACIÓN DE PROBLEMAS Problema Posible Causa Solución...
- Page 46 GUÍA PARA LA LOCALIZACIÓN DE PROBLEMAS Problema Posible Causa Solución...
- Page 47 GARANTÍA Su lavadora LG será reparada o reemplazada, a consideración de LG, si prueba ser defectuosa en material o en ejecución dentro de un uso normal, dentro del periodo de garantía ("periodo de garantía") descrito en la parte inferior, efectivo desde la fecha ("fecha de compra") de la compra del producto por el consumidor.