Table of Contents
Advertisement
Quick Links
Advertisement
Table of Contents

Related Manuals for Camtraptions PIR

Summary of Contents for Camtraptions PIR
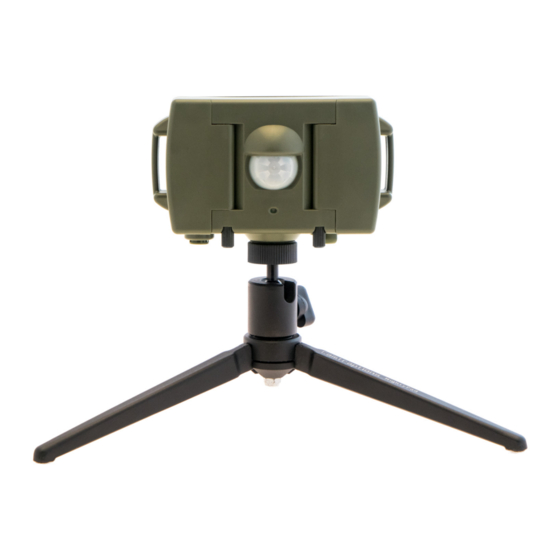
- Page 1 Camtraptions PIR Motion Sensor Manual Firmware Version 2.1...
-
Page 2: Table Of Contents
Programs 13 to 24: Video ..................18 Program 13 & 14: Fixed Duration with No Luminosity Cut-off ..........19 Program 14 & 15: Minimum Duration with No Luminosity Cut-off ......... 19 Program 16 & 17: Fixed Duration, Night ................. 20 Program 18 & 19: Minimum Duration, Night ................20 Program 20 & 21: Fixed Duration, Day ..................21 Program 22 & 23: Minimum Duration, Day ................21 Programs 25 to 28: Bulb ..................22 Programs 29 to 31: Wake ..................22 Program 29 & 30: Wake then Shoot ..................23 Program 31: Wake Only ......................23 Program 32: Shutter Hold Mode ................24 Wireless Switch ....................25 Quick Start PIR & Camera Settings ............... 26 Support ........................ 27 Camtraptions PIR Motion Sensor Manual Page 2... -
Page 3: What Is A Pir Motion Sensor
The term “passive” refers to the fact that the sensor does not emit radiation; instead it just detects infrared radiation landing on it. As a result, PIR sensors are extremely energy-efficient. Camtraptions PIR Motion Sensor Manual... -
Page 4: Controls
Controls The PIR is configured via three dials and a bank of six switches on the front. There is also an On-off switch on the bottom of the device. Dials The dials control the following functions: Sensitivity – See Page 6 Time Variable –... -
Page 5: On-Off Switch
8 second delay while the sensor calibrates. Thereafter, the LED will flash three times and the sensor will commence normal operation. See Page 3 for further details. Camtraptions PIR Motion Sensor Manual Page 5... -
Page 6: Inserting Batteries
9.6 volts. When the sensor is first turned on, the red LED on the front indicates the battery voltage. Camtraptions PIR Motion Sensor Manual Page 6... -
Page 7: Red Led Indicator
Red LED Indicator The red LED on the front of the PIR serves two functions: 1) Indicates the battery voltage on power-up 2) Helps sensor alignment and sensitivity testing during the first 5 minutes Power-up Sequence When the sensor is turned on, the LED will flash up to 5 times. There is then an 8 second delay before the sensor will flash quickly 3 times and start operating. -
Page 8: Alignment & Sensitivity Indicator
After 5 minutes the LED will be disabled in order to conserve battery power and avoid drawing attention to the PIR sensor. If you want to reactive the LED then you will need to turn the sensor off and then on again. -
Page 9: Connecting Camera
Plug the camera connecting cable in to the socket on the bottom of the sensor. Connect the other end of the cable to your camera’s shutter release socket. To connect the sensor to your camera wirelessly, see the “Wireless Switch” section on Page 17. Camtraptions PIR Motion Sensor Manual Page 9... -
Page 10: Controlling The Field Of View
To do this, open out the flaps on either side of the sensor to limit the sensor’s field of view. Tighten the knurled thumbscrews on the bottom of the device to secure the flaps in position. Camtraptions PIR Motion Sensor Manual Page 10... -
Page 11: Mounting The Sensor
However, it is possible for water to trickle inside via the camera connecting cable socket if the sensor is not mounted with this socket facing downwards. Therefore, it is important to mount the sensor the correct way up. Camtraptions PIR Motion Sensor Manual Page 11... -
Page 12: Sensitivity Dial
In general, you should try to position the sensor so that the subject will be much closer than anything that could cause false detections. Camtraptions PIR Motion Sensor Manual Page 12... -
Page 13: Time Dial
Programs 1 to 12, the video length in Programs 13 to 24 and the long exposure time or the wake time in Programs 25 to 31. Refer to the Program documentation below for further details. Camtraptions PIR Motion Sensor Manual Page 13... -
Page 14: Luminosity Threshold Dial
Turn the dial clockwise to increase the luminosity threshold. Turn the dial anticlockwise to decrease the luminosity threshold. The PIR sensor can vary its behaviour depending on the ambient light level. For example, the PIR can be configured to work only during daylight (Day Programs), only during darkness (Night Programs) or all of the time. -
Page 15: Program Selection
Use the diagram below as a reference for the switch positions. For example, if all of the switches were to be in the OFF position, the PIR would run Program 1. If only switches 2 and 3 were in the ON position, the PIR would run Program 13. -
Page 16: Program Quick Reference
Program Quick Reference The tables below provide a quick reference for each program. Refer to in- depth program documentation for further details. Camtraptions PIR Motion Sensor Manual Page 16... -
Page 17: Programs 1 To 12: Interval
0.5s (fully anticlockwise) to one shot every 8s (fully clockwise). Use the Luminosity dial to select the light cut-off threshold; when fully clockwise the camera will fire all of the time, otherwise the PIR will only operate when the luminosity is lower than the threshold set. If the dial were to be turned fully anticlockwise, the camera would only work in complete darkness. -
Page 18: Program 10 To 12: Interval, Day
0.5s (fully anticlockwise) to one shot every 8s (fully clockwise). Use the Luminosity dial to select the light cut-off threshold; when fully anticlockwise the camera will fire all of the time, otherwise the PIR will only operate when the luminosity is greater than the threshold set. If the dial were to be turned fully clockwise, the camera would only work in very bright light. -
Page 19: Program 13 & 14: Fixed Duration With No Luminosity Cut-Off
In general, the shortest possible press length should be used as some cameras only commence recording when the press is released. The other video programs all use an initial press length of 3.5 seconds. Camtraptions PIR Motion Sensor Manual Page 19... -
Page 20: Program 16 & 17: Fixed Duration, Night
Use the Luminosity dial to select the light cut-off threshold; when fully clockwise the camera will fire all of the time, otherwise the PIR will only operate when the luminosity is lower than the threshold set. If the dial were to be turned fully anticlockwise, the camera would only work in complete darkness. -
Page 21: Program 20 & 21: Fixed Duration, Day
Use the Luminosity dial to select the light cut-off threshold; when fully anticlockwise the camera will fire all of the time, otherwise the PIR will only operate when the luminosity is greater than the threshold set. If the dial were to be turned fully clockwise, the camera would only work in very bright light. -
Page 22: Programs 25 To 28: Bulb
Programs 25 to 28: Bulb These experimental programs allow the PIR sensor to control the shutter speed of the camera. To facilitate these programs, the camera must be set to “Bulb” mode. In automatic shooting modes, the camera will usually be limited to a maximum exposure time of 30 seconds. -
Page 23: Program 29 & 30: Wake Then Shoot
8s (fully clockwise). Use the Luminosity dial to select the light cut-off threshold; when fully clockwise the camera will fire all of the time, otherwise the PIR will only operate when the luminosity is lower than the threshold set. If the dial were to be turned fully anticlockwise, the camera would only work in complete darkness. -
Page 24: Program 32: Shutter Hold Mode
Program 32 sends a single full-press signal to the camera. The press length is extended if additional motion is detected during the press. This program replicates the behaviour of the Version 1 Camtraptions PIR Sensor. Use the Time dial to set the minimum press duration. The minimum duration can be varied from a few seconds (fully anticlockwise) to just over 3 minutes (fully clockwise). -
Page 25: Wireless Switch
OFF position if you are not using it. Camtraptions wireless triggers can be used to create a wireless link between the PIR and your camera. Follow these steps to set-up a wireless link: 1) Set Switch 6 to the ON position. -
Page 26: Quick Start Pir & Camera Settings
• Shoot in RAW to give yourself more flexibility to adjust the image brightness afterwards. • Make sure you have a memory card inside the camera and that it has plenty of free space! Camtraptions PIR Motion Sensor Manual Page 26... -
Page 27: Support
Support For technical support, please email support@camtraptions.com. To share photographs and discuss camera trap techniques, please join our https://www.facebook.com/groups/camtraptions/ group on Facebook: Camtraptions PIR Motion Sensor Manual Page 27...