Table of Contents
Advertisement
Quick Links
Advertisement
Table of Contents

Related Manuals for AEG L7FBG842BI


Summary of Contents for AEG L7FBG842BI
- Page 1 L7FBG842BI User Manual Washing Machine USER MANUAL...
-
Page 2: Table Of Contents
16. ENVIRONMENTAL CONCERNS..............46 FOR PERFECT RESULTS Thank you for choosing this AEG product. We have created it to give you impeccable performance for many years, with innovative technologies that help make life simpler – features you might not find on ordinary appliances. Please spend a few minutes reading to get the very best from it. -
Page 3: Safety Information
ENGLISH SAFETY INFORMATION Before the installation and use of the appliance, carefully read the supplied instructions. The manufacturer is not responsible for any injuries or damage that are the result of incorrect installation or usage. Always keep the instructions in a safe and accessible location for future reference. -
Page 4: Safety Instructions
This appliance is intended to be used in household • and similar applications such as: staff kitchen areas in shops, offices and other – working environments; by clients in hotels, motels, bed & breakfast and – other residential type environments;... - Page 5 ENGLISH future they must be reattached to lock electrical ratings of the mains power the drum to prevent an internal supply. damage. • Do not use multi-plug adapters and • Always take care when moving the extension cables. appliance as it is heavy. Always use •...
- Page 6 2.4 Use valves, filters and aquastops, printed circuit boards, electronic displays, WARNING! pressure switches, thermostats and Risk of injury, electric shock, sensors, software and firmware fire, burns or damage to the including reset software, door, door appliance. hinge and seals, other seals, door locking assembly, plastic peripherals •...
-
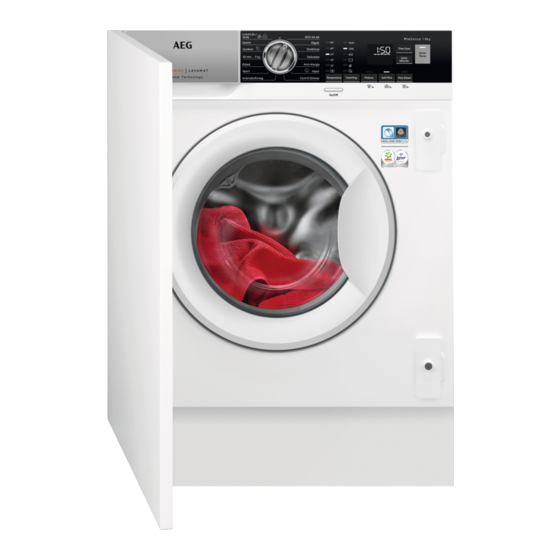
Page 7: Product Description
ENGLISH 3. PRODUCT DESCRIPTION 3.1 Appliance overview 10 11 12 Hinge supports Drain pump filter Detergent dispenser Front feet for levelling the appliance Control panel Drain hose Magnetic plate Mains cable Door handle Inlet hose connection Rating plate Back feet for levelling the appliance Plate with rubber beater The rating plate reports the model name (A), product number (B), electrical ratings... -
Page 8: Installation
Level of protection against ingress of solid particles and IPX4 moisture ensured by the protective cover, except where the low voltage equipment has no protection against mois‐ ture Water supply pressure Minimum 0.5 bar (0.05 MPa) Maximum 8 bar (0.8 MPa) - Page 9 ENGLISH 1. Put two polystyrene packaging elements on the floor under the appliance. WARNING! It is strongly recommended that this action is carries out by two persons. 2. Carefully put the appliance down on its rear side. Make sure not to damage the hoses.
- Page 10 6. Remove the three bolts, the hose holders and plastic spacers by using the spanner supplied with the appliance. 7. Close the holes with the plastic caps you find in the user manual bag. Put the smallest cap F in upper hole and the two bigger caps G in lower holes.
- Page 11 ENGLISH The appliance must be level and stable. CAUTION! Do not put cardboard, wood or equivalent materials below the appliance feet to adjust the level. 5.5 Hose and cable connection 1100 mm 1450 mm 1230 mm 960 mm 1360 mm 900 mm The inlet hose 1.
- Page 12 3. Connect the hose to the back of the appliance. Do not turn the inlet hose downwards, but turn it left or right depending on the position of your water tap. 4. Loosen the ring nut to fix it in the correct position.
- Page 13 ENGLISH To a sink spigot Put the drain hose in the spigot and tighten it with the supplied cable tie L. Make sure that the drain hose makes a loop to prevent particles going into the appliance from the sink. To a wall-pipe Directly to a built-in drain pipe in the room wall and tighten it with the supplied cable tie...
- Page 14 The appliance is also equipped with an adhesive sponge pad H that you can find inside the drum. Attach it on the top of the appliance where indicated in the drawing. When levelling the appliance under the furniture, DO NOT squeeze the sponge pad.
- Page 15 ENGLISH Reversibility of the cupboard door Carry out the cupboard door reversibility before the appliance is built in completely. If the cupboard door has to be opened from left to right, invert the position of the hinge supports M with the magnetic plate N and lower plate O.
- Page 16 Set the position of the lower hole respecting dimensions and distances shown in the 16-22 mm drawing (449 mm). Countersink the holes. Ø 35 mm 12,5 - 14 mm 22±1,5 mm 595-598 mm Hinges To mount the hinges it is necessary to drill two holes (dia.
- Page 17 ENGLISH Counter-magnet The appliance is pre set for a magnetic closure. For a correct closure: 1. Position the screw C and the counter- magnet D on the magnetic plate N. Lean the cupboard door against the screw until it leaves a mark. 2.
-
Page 18: Control Panel
6. CONTROL PANEL 6.1 Control panel description 90° 1400 Eco 40-60 60° 1200 40° 30° 20° The permanent options are Soft Plus touch button and set by holding pressed the permanent Extra Rinse option relative button for at least 3 seconds. -
Page 19: Dial And Buttons
ENGLISH Delay start indicator. The digital indicator can show: • Reset position ( • Programme duration (e. g. • Delay time (e. g. • Cycle end ( • Warning code (e.g. • Error indicator ( Time Manager indicator. Anti-stain indicator. Extra Rinse indicator. - Page 20 As the programme is very quiet, it is was selected. suitable for use at night time when cheaper electricity tariffs are 7.4 Temperatura available. In some programmes the rinses are performed with more water.
- Page 21 ENGLISH Recommended when you use fabric To interrupt the anti-crease phase, you softener. can also: • Press the On/Off button for a few This option increases the seconds to activate or the deactivate programme duration. the appliance. • Turning the programme dial in The corresponding indicator above the another position.
-
Page 22: Programmes
The display shows the new programme duration and a number of indicator dashes will decrease accordingly: suitable for a full load of normally soiled garments. a quick cycle for a full load of lightly soiled garments. ■ ■... - Page 23 ENGLISH Programme Reference Maxi‐ Programme description Default tem‐ spin speed (Type of load and level of soiling) perature load Temperature range 1400 rpm 8 kg White cotton and coloured cotton. Normally, heavily and lightly soiled items. Algod. 40 °C 90 °C - 1200 rpm 3 kg Synthetic items or mixed fabric items.
- Page 24 Programme Reference Maxi‐ Programme description Default tem‐ spin speed (Type of load and level of soiling) perature load Temperature range 1 kg Cottons, Synthetics, Delicates. Short and gen‐ tle steam programme to refresh even your very Vapor delicate garments, including very delicate gar‐...
- Page 25 ENGLISH Programme Reference Maxi‐ Programme description Default tem‐ spin speed (Type of load and level of soiling) perature load Temperature range 1200 rpm 3 kg Cotton and synthetic items lightly soiled or once worn. 20 min. - 3kg 30 °C 40 °C - 1200 rpm 2 kg...
- Page 26 Programme Reference Maxi‐ Programme description Default tem‐ spin speed (Type of load and level of soiling) perature load Temperature range 1200 rpm 1.5 kg Machine washable wool, hand washable wool and other fabrics with «hand washing» care Lana\Lãs/Seda symbol 40 °C...
- Page 27 ENGLISH Programme spin ■ ■ Vapor ■ ■ ■ Centrif./Drenar ■ ■ ■ ■ ■ Aclarado/Enxag. ■ ■ ■ ■ ■ ■ Sport ■ ■ ■ Edred. ■ ■ ■ 20 min. - 3kg ■ ■ ■ ■ ■ Outdoor ■...
-
Page 28: Settings
Programme Universal Liquid Uni‐ Liquid for Delicates Special versal coloureds woollens powder Sport ▲ ▲ ▲ Edred. ▲ ▲ 20 min. - 3kg ▲ ▲ Outdoor ▲ ▲ Denim ▲ ▲ ▲ Lana\Lãs/ ▲ ▲ Seda 1) At temperature higher than 60 °C the use of powder detergent is recommended. -
Page 29: Before First Use
ENGLISH 10. BEFORE FIRST USE 1. Make sure that the electrical power is 4. Set and start a programme for cotton available and the water tap is open. at the highest temperature without 2. Pour 2 litres of water into the any laundry in the drum. - Page 30 - Flap for powder or liquid deter‐ gent. Always follow the instructions that you find on the packaging of the detergent products, but we recommend that you do not exceed the maximum indicated level ( ). This With the flap in the position DOWN: quantity will however •...
- Page 31 ENGLISH Changing the delay start after display and the given information changes accordingly. the countdown has started If a selection is not possible To change the delay start: an acoustic signal sounds 1. Touch the Inicio/Pausa button to and the display shows pause the appliance.
- Page 32 11.10 Cancelling a running The indicator of the Inicio/Pausa button goes off. programme The door unlocks and the indicator 1. Press the button On/Off to cancel the goes off. programme and to deactivate the appliance. 1. Press button On/Off to deactivate the 2.
-
Page 33: Hints And Tips
ENGLISH Press the button On/Off to activate If you have set Silent the appliance again. the spin speed is not • 5 minutes after the end of the washing changed, when you press programme. the Inicio/Pausa button, the Press the On/Off button to activate appliance only drains the the appliance again. - Page 34 • The choice and quantity of detergent will depend on: type of fabric (delicates, woollens, cottons, etc), the colour of clothes, size of the load, degree of soiling, wash temperature and hardness of the water used. • Follow the instructions that you find...
-
Page 35: Care And Cleaning
ENGLISH • Set the maximum possible spin use a water softener for washing speed for the selected washing machines. In areas where the water programme before drying your hardness is soft it is not necessary to use laundry in a tumble dryer. This will a water softener. - Page 36 13.4 Descaling Clean it when needed, using ammonia cream cleanser agent without scratching If the water hardness in your the seal surface. area is high or moderate, we Always obey the instructions recommend that you use a that you find on the water descaling product for packaging of the product.
- Page 37 ENGLISH picture and pull it out. 4. Insert the detergent drawer into the guide rails and close it. Run the rinsing programme without any clothes in the drum. 2. Remove the top part of the additive compartment to aid cleaning and flush it out under running warm water, to remove any traces of 13.9 Cleaning the drain pump...
- Page 38 1. Open the pump cover. 2. Place a suitable bowl below the drain pump access to collect the water that flows out. Always keep a rag nearby to dry up any water spillages when removing the filter. 180˚ 3. Turn the filter 180 degrees in anti-clockwise direction to open it, without removing.
- Page 39 ENGLISH 7. If it is necessary, remove fluff and objects from the filter recess. Make sure that the impeller of the pump can rotate. If it does not rotate, contact the Authorised Service Centre. 8. Clean the filter under the water tap. 9.
-
Page 40: Troubleshooting
13.10 Cleaning the inlet hose and the valve filter 45° 20° 13.11 Emergency drain 1. Disconnect the mains plug from the mains socket. If the appliance cannot drain the water, 2. Close the water tap. carry out the same procedure, described 3. - Page 41 ENGLISH 14.1 Alarm Codes and Possible failures The appliance does not start or it stops during operation. First try to find a solution to the problem (refer to the tables). WARNING! Deactivate the appliance before carrying out any check. With some problems, the display shows an alarm code and the Inicio/Pausa button may flash continuously: If the appliance is overloaded, remove some items from the drum and/or keep pressed the door while...
- Page 42 • Make sure that the door is properly closed. The appliance door is open or not closed correctly. • The programme was not finished properly or the appliance stopped too early. Switch the appliance off and on again. Internal fail. No com‐...
- Page 43 ENGLISH Problem Possible solution • Make sure that the couplings of the water hoses are tight and there is not water leakages. There is water on the • Make sure that the water inlet hose and the drain hose have floor.
-
Page 44: Consumption Values
14.2 Emergency door To open the door, proceed as follows: opening 1. Press the On/Off button to switch the appliance off. In case of power failure or functioning 2. Disconnect the mains plug from the failure the appliance door remains mains socket. - Page 45 ENGLISH The QR code on the energy label supplied with the appliance provides a web link to the information related to the performance of the appliance in the EU EPREL database. Keep the energy label for reference together with the user manual and all other documents provided with this appliance.
-
Page 46: Environmental Concerns
15.4 Common programmes These values are indicative only. Programme Litres h:mm °C Algod. 2.20 3:55 1400 90°C Algod. 1.50 3:20 1400 60°C Algod. 0.35 2:35 1400 20°C Sintéticos 0.75 2:10 1200 40°C Delicados 0.30 0:50 1200 30°C Lana 0.25... - Page 48 www.aeg.com/shop...