LG RH266 Owner's Manual
Hdd/dvd recorder
Hide thumbs
Also See for RH266:
- Service manual (57 pages) ,
- Owner's manual (56 pages) ,
- Owner's manual (55 pages)
Table of Contents
Advertisement
Advertisement
Table of Contents

Related Manuals for LG RH266


Summary of Contents for LG RH266
- Page 1 RH266-P1M_NA4ULLB_ENG_MFL36926574 HDD/DVD RECORDER OWNER’S MANUAL MODEL: RH265 RH266 Before connecting, operating or adjusting this product, please read this instruction booklet carefully and completely. FOR THE GUARANTEE TERMS & CONDITIONS, PLEASE REFER TO BACK COVER OF THIS MANUAL.
- Page 2 CAUTION RISK OF ELECTRIC SHOCK DO NOT OPEN CAUTION: TO REDUCE THE RISK OF ELECTRIC SHOCK DO NOT REMOVE COVER (OR BACK) NO USER-SERVICEABLE PARTS INSIDE REFER SERVICING TO QUALIFIED SERVICE PERSONNEL. This lightning flash with arrowhead symbol within an equilateral triangle is intended to alert the user to the presence of uninsulated dangerous voltage within the product’s enclosure that may be of sufficient magnitude to constitute a risk of electric...
-
Page 3: Table Of Contents
Contents Introduction ......4-9 About the symbol display ....4 Symbol Used in this Manual . -
Page 4: Introduction
Introduction To ensure proper use of this product, please read this owner’s manual carefully and retain for future reference. This manual provides information on the operation and maintenance of your recorder. Should the unit require service, contact an authorized service location. About the Symbol Display “... -
Page 5: Recordable And Playable Discs
Recordable and Playable Discs DVD-RW (Digital Video Disc - ReWritable): DVD-RW discs can be formatted for VR mode recording or Video mode recording. These Discs can be recorded on repeatedly. Recordings can be erased, then you can record again on the same Disc. [VR mode] Recordings can be extensively edited Playable only on VR mode compatible players (after finalization) -
Page 6: Playable Discs
Playable Discs DVD (8 cm / 12 cm disc) Discs such as movies that can be purchased or rented Video CD (VCD) (8 cm / 12 cm disc) VIDEO CDs or CD-Rs/CD-RWs in VIDEO CD/Super VIDEO CD format Audio CD (8 cm / 12 cm disc) Music CDs or CD-Rs/CD-RWs in music CD format that can be purchased CD-R/CD-RW (8 cm / 12 cm disc) CD-R/CD-RW discs that contain audio titles, DivX, MP3, WMA, or JPEG files. -
Page 7: About The Internal Hard Disk Drive
About the internal Hard Disk Drive The internal hard disk drive (HDD) is a fragile piece of equipment. Please use the recorder following the guidelines below to protect against possible HDD failure. We recommend that you back up your important recordings onto DVD discs in order to protect against accidental loss. -
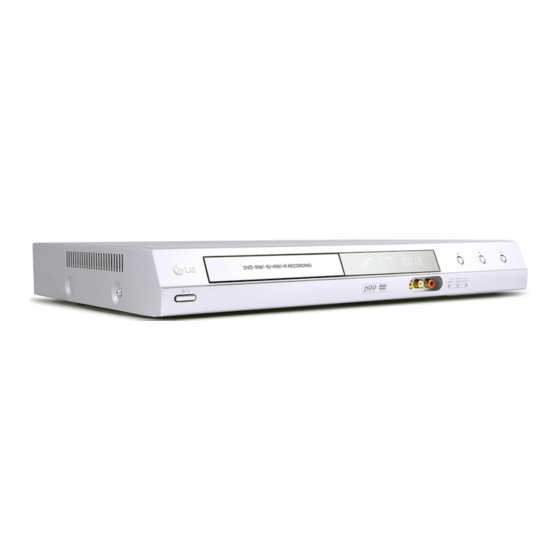
Page 8: Front Panel
Front Panel a 1 1 / I (POWER button) Switches the recorder ON or OFF. b Disc Tray Insert a disc here. c Display window Shows the current status of the recorder. T/S: Indicates the timeshifting mode. REC: The recorder is recording. HDD: The recorder is HDD mode. -
Page 9: Remote Control
Remote Control AV/INPUT: Changes the input to use for recording (Tuner, AV1-3). 0-9 numerical buttons: Selects numbered options in a menu. DUBBING: Copies DVD to HDD (or HDD to DVD). TV Control Buttons: See page SCAN (m / M): Search backward or forward. -
Page 10: Hookup And Settings
Hookup and Settings Rear Panel a ANTENNA IN Connect the antenna to this terminal. b COMPONENT OUTPUT (Y P Connect to a TV with Y P inputs. c AV 2 DECODER SCART jack Connect the audio/video output of an external source (Pay-TV decoder, Set Top Box, VCR, etc.). -
Page 11: Connections To Your Tv
Connections to Your TV Make one of the following connections, depending on the capabilities of your existing equipment. When using the COMPONENT OUTPUT jacks, set the Video Output Format option in the setup menu to YP . When using the SCART jack, set the Video Output Format option in the setup menu to RGB. -
Page 12: Connecting To An Amplifier
Connecting to an Amplifier Connecting to an amplifier equipped with two channel analog stereo or Dolby Pro Logic ll/ Pro Logic Connect the Left and Right AUDIO OUTPUT jacks on the recorder to the audio left and right in jacks on your amplifier, receiver, or stereo system, using the audio cables (A). -
Page 13: Accessory Audio/Video (A/V) Connections
Accessory Audio/Video (A/V) Connections Connecting a PAY-TV/Canal Plus Decoder You can watch or record PAY-TV/Canal Plus programmes if you connect a decoder (not supplied) to the recorder. Disconnect the recorder’s mains lead from the mains when connecting the decoder. To watch or record PAY-TV/Canal Plus programmes, set [AV2 Connection] option to [Decoder] (see page 17) and set the program’s [Decoder On/Off] option to [On] on the Setup menu (page 16). -
Page 14: Auto Setup
Connecting to the AV IN 3 Jacks Connect the input jacks (AV IN 3) on the recorder to the audio/video out jacks on your accessory component, using audio/video cables. Jack panel of Accessory Component (VCR, Camcorder, etc.) AUDIO OUTPUT VIDEO OUTPUT Auto Setup After the POWER is pressed for the first time to turn... -
Page 15: Using The Home Menu
Using the Home Menu From the Home Menu screen you can access all the Media for playback and recording of the recorder. 1. Press HOME to display the Home Menu screen. 2. Use the b / B buttons to select a main option you want. - Page 16 General Settings (Continued) Program Edit You can edit a channel manually (add, delete, name, move, etc.). 1. Select [Program Edit] option then press B. 2. Press ENTER while [Edit] is selected. The Program List menu appears. 3. Use v / V to select a PR number then press ENTER.
- Page 17 General Settings (Continued) Clock Set 1. Select [Clock Set] option then press B. 2. Enter the necessary information for date and time. b / B (left/right): Moves the cursor to the previous or next column. v / V (up/down): Changes the setting at the current cursor position.
-
Page 18: General Settings
General Settings (Continued) Initialization You can reset the recorder to its original factory settings and initialize the HDD. [Factory Set] If you need to, you can reset the recorder to all its factory settings. Some options cannot be reset. (Rating, Password, and Area Code) [HDD format] Initializes the HDD (Hard Disk Drive): everything recorded on the HDD will be erased. -
Page 19: Lock (Parental Control) Settings
Lock (Parental Control) Settings Rating Blocks playback of rated DVDs based on their content. Not all discs are rated. 1. Select [Rating] option then press B. 2. To access the Rating, Set Password and Area Code features, you must input the 4-digit security code you created. -
Page 20: Recording Settings
Recording Settings Record Mode Set You can set the picture quality for recording; XP (Excellent Play), SP (Standard Play), LP (Long Play), EP (Extended Play), MLP (Maximum Long Play) XP – Highest quality setting, gives about 1 hour of recording time on a DVD (4.7GB). SP –... - Page 21 Disc Settings (Continued) Finalize Finalizing ‘fixes’ the recordings in place so that the disc can be played on a regular DVD player or computer equipped with a suitable DVD-ROM drive. Finalizing a disc creates a menu screen for navigating the disc. This is accessed by pressing MENU/LIST or TITLE.
-
Page 22: General Explanation Of On-Screen Display
General Explanation of On-Screen Display This manual gives basic instructions for operating the recorder. Some DVDs require specific operation or allow only limited operation during playback. When this occurs, the symbol appears on the TV screen, indicating that the operation is not permitted by the recorder or is not available on the disc. -
Page 23: Playback
Playback General Playback Features 1. Load your chosen disc in the tray, with the playback side down. 2. Starts playback using HOME menu (see page 15). 3. To stop the playback, press STOP (x). The unit records the stopped point, depending on the disc. “Xx” appears on the screen briefly. Press PLAY (N) to resume playback (from the scene point). - Page 24 General Playback Features (Continued) Buttons Operations REPEAT During playback, press REPEAT repeatedly to select a desired repeat mode. HDD, DVD, Video mode DVD-R/RW, DVD+R/RW (Chapter/Title/Off) VR mode DVD-RW (Chapter/Title/All/Off) Video CD, Audio CD (Track/All/Off) MP3/WMA (Track/Folder/Off) Notes: On a Video CD with PBC, you must set PBC to [OFF] in the Setup menu to use the Repeat function.
- Page 25 If a menu screen is displayed The menu screen may be displayed first after loading a DVD or Video CD which contains a menu. Use the b / B / v / V buttons to select the title/chapter you want to view, then press ENTER to start playback.
- Page 26 3D Surround DVD ALL This unit can produce a 3D Surround effect, which simulates multi-channel audio playback from two conventional stereo speakers, instead of the five or more speakers normally required to listen to multi- channel audio from a home theater system. 1.
-
Page 27: Playing A Divx Movie File
Playing a DivX Movie File The recorder can play DivX files. Before playing DivX files, read “DivX file requirement” on right. 1. Press HOME then select [MOVIE] option. 2. Select a media that contains DivX file(s) then press ENTER. The [Movie List] menu appears on the TV screen. 3. -
Page 28: Playing An Audio Cd Or Mp3/Wma File
Playing an Audio CD or MP3/WMA file The recorder can play audio CDs and MP3/WMA files. Before playing MP3/WMA files, read “MP3/WMA audio file requirement” on right. 1. Press HOME. The HOME menu appears. 2. Select [MUSIC] option. 3. Select a media that contains MP3/WMA or audio title then press ENTER. -
Page 29: Viewing A Jpeg File
Viewing a JPEG File The recorder can play JPEG files. Before playing JPEG recordings, read “Photo file requirement” on right. 1. Press HOME. The HOME menu appears. 2. Select [PHOTO] option. 3. Select a media that contains JPEG file then press ENTER. - Page 30 Skip Images While viewing a picture, press SKIP (.or >) once to advance to the next file or return to the previous file. Rotate Images Use v / V while viewing a picture to flip the picture clockwise or counterclockwise. View Slide Shows 1.
-
Page 31: Editing A Mp3/Wma, Jpeg, Divx File
Editing a MP3/WMA, JPEG, DivX file These descriptions are MP3 file’s operation for example, other kind’s files are operated same way. Erasing a file(s)/folder(s) from the HDD You can erase MP3/WMA, JPEG or DivX file(s)/ folder(s) on the HDD. 1. Select a file you wish to erase on the menu. You can select all files and folders on the menu by pressing CLEAR button. - Page 32 Copying a file(s) to the HDD You can copy a file(s)/folder(s) to the HDD. 1. Select a file you wish to copy on the menu. You can select all files and folders on the menu by pressing CLEAR button. To cancel the selections, press CLEAR again.
-
Page 33: Recording
Recording About DVD recording Notes: This recorder cannot make recordings on CD-R or CD-RW discs. Our company takes no responsibility for recording failure due to power outages, defective discs, or damage to the Recorder. Fingerprints and small scratches on a disc can affect playback and/or recording performance. -
Page 34: Timeshift
Timeshift Do not miss a scene from a live broadcast. If the telephone rings while you are watching your favorite live broadcast, just press “TIMESHIFT” and “PAUSE” before answering the phone. The timeshift function will be activated and the broadcast is then recorded for later viewing. -
Page 35: Basic Recording From A Tv
Basic Recording from a TV Follow the instructions below to record a TV program. Recording starts immediately and continues until the disc is full or you stop the recording. Note: This unit can record only a mono audio content from the built-in tuner system. -
Page 36: Timer Recording
Timer Recording This recorder can be programmed to record up to 16 programs within a period of 1 month. For unattended recording, the timer needs to know the channels to be recorded, the starting and ending time. 1. Select [Timer Record] option in the [HOME] menu. The [Timer Record List] menu will appear. -
Page 37: Recording From An External Input
Stopping a Timer Recording in Progress After a timer recording has started, you can still cancel the program. You can stop a timer recording in progress. Press STOP and the confirm message will appear. Press ENTER to stop the recording or press RETURN (O) to continue the recording. -
Page 38: Editing
Editing Title List and Chapter List Menu Overview Using the Title List menu you can edit video content. The editing features available in the Title List menu depend on whether you are editing video on DVD, or the HDD, and whether you’re editing Original content, or a Playlist. -
Page 39: Hdd, Vr Mode: Original And Playlist Editing
HDD, VR Mode: Original and Playlist Editing Titles, Chapters and Parts Titles in the disc’s original content contain one or more chapters. When you insert a disc’s title into the Playlist, all the chapters within that title also appear. In other words, chapters in the Playlist behave exactly as chapters on a DVD-Video disc do. -
Page 40: Making A New Playlist
Making a New Playlist Use this function to add an Original title or chapter to the Playlist. When you do this, the whole title or chapter are put into the Playlist (you can delete bits you don’t need later — see Deleting an Original or Playlist title/chapter on page 41). -
Page 41: Deleting An Original Or Playlist Title/Chapter
Deleting an Original or Playlist Title/Chapter When you erase a title or chapter from the Playlist menu, you only remove it from the Playlist; the title/chapter remains in the Original menu. If you choose to delete a title or chapter from the Original (title/chapter) menu, the title or chapter is actually deleted from the disc and the remaining time available for recording increases. -
Page 42: Naming A Title
Naming a Title You can name the titles. The names can be up to 32 characters long. 1. Choose the title you want to name on the Title List menu, then press ENTER. The menu options appears on the left side of the menu. -
Page 43: Sorting The Title List
Sorting the Title List This function allows you to access show listings organized by Date, Title, or Category on the Title List- HDD menu. So you can find title you want to watch easily. 1. Choose any title on the Title List-HDD menu, then press ENTER. -
Page 44: Combining Two Chapters Into One
Combining Two Chapters Into Use this function to combine two adjacent chapters into one. 1. On the Chapter List menu, select the second chapter of the two chapters you want to combine then press ENTER. The menu options appears on the left side of the screen. -
Page 45: Moving A Playlist Chapter
Moving a Playlist Chapter Use this function to re-arrange the playing order of Playlist chapters on the Title List-Playlist menu. Note: This function is not available if there is only one chapter. 1. Select a chapter on the Chapter List-Playlist menu. 2. -
Page 46: Dubbing
Dubbing Before Dubbing Use the copying features of this recorder to: Back up important recordings stored on the HDD to a DVD. Make a DVD copy of a recording on the HDD to play in another player. Transfer video from a DVD to the HDD for editing. Transfer edited video from the HDD to DVD. -
Page 47: Dubbing From Hdd To Dvd
Dubbing from HDD to DVD 1. On the Title List-HDD menu, select a title you want to dub then press ENTER. Selecting multiple titles on HDD 1. Press MARKER. A check mark appears on the title. Press MARKER again to cancel the marked title. -
Page 48: Dubbing
One Touch Copy (HDD to DVD) The One Touch Copy feature copies the currently playing title from the HDD to DVD. The whole title is copied, regardless of where in the title you start copying. The copy will be made in the recording mode (XP, SP, LP, EP or MLP) that is currently set. -
Page 49: Reference
Reference Additional Information Viewing Title List menu displayed on other DVD Recorders or Players You can view the Title List menu displayed on the other DVD player that is capable of playing DVD+RW or DVD+R discs. 1. Insert DVD+R or DVD+RW disc recorded already. 2. -
Page 50: Language Codes
Language Codes Use this list to input your desired language for the following initial settings: Disc Audio, Disc Subtitle, Disc Menu. Language Code Language Abkhazian 6566 Fiji Afar 6565 Finnish Afrikaans 6570 French Albanian 8381 Frisian Ameharic 6577 Galician Arabic 6582 Georgian Armenian... -
Page 51: Controlling Your Tv With The Supplied Remote Control
Adjust the volume of the TV. Controlling other TVs with the remote You can control the sound level, input source, and power switch of non-LG TVs as well. If your TV is listed in the table below, set the appropriate manufacturer code. -
Page 52: Troubleshooting
Troubleshooting Check the following guide for the possible cause of a problem before contacting service. Symptom The power cord is disconnected. No power. No picture. TV/DVD mode for the recorder is set to TV. The TV is not set to receive recorder signal output. - Page 53 Symptom The disc was recorded in Video mode. Cannot play a disc recorded using this Some players will not play even a recorder on another finalized disc recorded in Video mode. player. The disc was recorded in VR mode, Discs recorded with copy-once material cannot be played on other players.
-
Page 54: Specifications
DVD (4.7GB): Approx. 1 hour (XP mode), 2 hours (SP mode), 4 hours (LP mode), 6 hours (EP mode), 11 hours (MLP mode) HDD (RH265: 80GB, RH266: 160GB, MPEG2 Recording): Approx. 18/37 hours (XP mode), 37/75 hours (SP mode), 75/149 hours (LP mode),... - Page 55 2. The dealer (or his service agent) who sold the product will be reimbursed for any labour provided in the repair of this LG equipment, for a period of 12 months from the original date of purchase. These claims must be made in accordance with the published scale of service charges and relevant claims procedure.