Advertisement
Quick Links
200 South Front Street • Montezuma, IA 50171 • 800-717-8211
260-482-3670 • www.sinclairintl.com • support@sinclairintl.com
Installation Of Shell Holder
1. Remove the knurled head (Item #1 Figure Y) from priming tool body by turning clockwise.
2. Insert the Lee shell holder into knurled head, with number up. This can be accomplished easily by inserting
a case into the shell holder and using the case to pull the shell holder through the knurled head until stopped
by the shoulder of the knurled head. Center the opening of the shell holder with the opening of the knurled
head. Lock the shell holder in place using two of the set screws provided in the small parts bag. The other
two set screws are spares.
NOTE: Shell holders, as received from Lee, may have machining burrs on the inside of the hole and on the
opening of the slot where the case head is inserted. These burrs can be removed with a Dremel tool or stone.
All shell holders purchased from Sinclair will have had such burrs removed.
Switching From Large Primers To Small Primers
Select the desired primer punch housing, small primer or large primer.
NOTE: The large primer punch/punch housing is already installed, with spring and shims, on the tool.
1. If small primers are to be used, remove the large punch housing by loosening the punch housing lock screw
(Item #4 Figure Y) a quarter turn or until the punch housing is free (you'll know when it's free).
2. Remove the shims (Item #3 Figure Y - Note: There should be four shims 0.005, 0.010, 0.015, and 0.020) from
the large primer punch housing and place them on the small primer punch housing.
3. Remove the punches from both housings and place a small amount of grease on the large diameter and bottom
of the small punch. Remove the spring form the large punch and place it on the small punch. Reinstall the
punch in the punch housing. Holding the tool and punch housing upside down, slide the housing into the tool
body.
4. Tighten the housing lock screw. It need only be snug to hold the housing securely.
NOTE: DO NOT over-tighten the housing lock screw, it is nylon tipped and over-tightening may cause
damage to both the lock screw and the housing.
Indexing The Shell Holder
1. Screw the knurled head, with shell holder installed, back onto the tool body. Insert a case into the shell holder.
(If the knurled head is locked into position before you insert the case you will need to back off the knurled
head until you can slip a case into the holder.) Screw the knurled head clockwise until he case is locked into
place.
2. If the position of the knurled head is not indexed as shown in Figure X (which it probably is not) you may wish
to adjust the tool until it is. If you are comfortable with the position of the shell holder it does not need to be
adjusted.
3. To adjust the locked position of the shell holder, simply remove the punch housing as described above (B-1)
and remove shims (one or a few at a time) from the housing, reinstall the housing into the tool and repeat step
C-1. This is a trial and error process, you may need to repeat this step a couple of times before the shell holder
is in a comfortable position for you. A combination of any number of the shims provided will allow you to
position the shell holder to your liking. If you are going to prime multiple cartridges it is a good idea to make
note of which shims you use for each different cartridge.
TM
#749-007-603
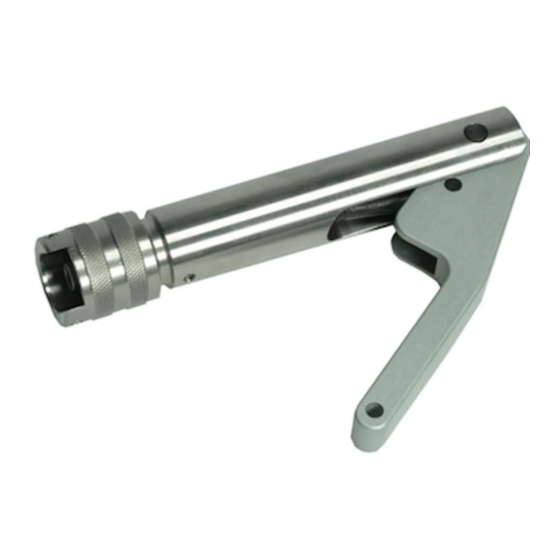
Sinclair Phase II
Priming Tool
Advertisement

Summary of Contents for Sinclair 749-007-603
- Page 1 These burrs can be removed with a Dremel tool or stone. All shell holders purchased from Sinclair will have had such burrs removed. Switching From Large Primers To Small Primers Select the desired primer punch housing, small primer or large primer.
- Page 2 .010" (ten thousandths of an inch) from it’s housing before attempting to prime a case. Priming tools, as received from Sinclair, generally have between .010" and .020" of punch protrusion. 2. If the punch does not protrude the push rod will need to be adjusted. With the total in an upside down position remove the handle pin set screw and push out the handle pin.