Advertisement
Quick Links
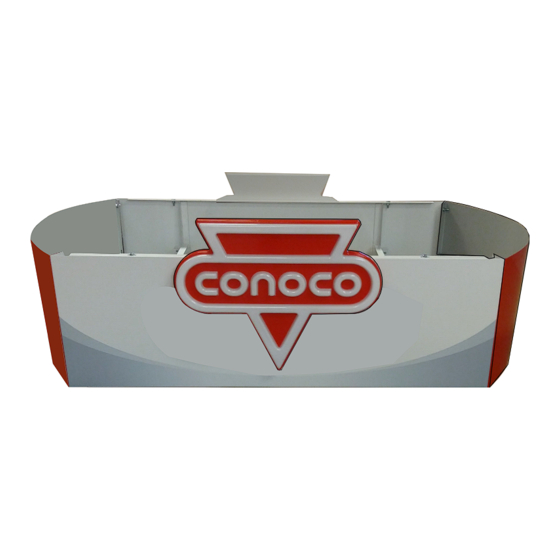
This product is designed to fit the Conoco Apex Valance Pumps. Please verify that your site is in
this size before beginning. Otherwise, contact LSI Graphic Solutions Customer Service 1-(800)
231-0129.
Read through all of the instructions prior to beginning installation and verify (using the packing list)
that all parts have been received and are in good condition.
INSTRUCTIONS: 5100557 - CONOCO APEX PUMP VALANCE
Installation Instructions for
Conoco Apex Pump Valance
Installation Guide PN 725179
Thomas Thompson, Field Service
Phone No. : 713-744-4135
Email:
Thomas.Thompson@lsi-industries.com
Sheet 1 of 10
REV 10/1/2019
Advertisement

Summary of Contents for CONOCO Apex
- Page 1 Installation Instructions for Conoco Apex Pump Valance Installation Guide PN 725179 This product is designed to fit the Conoco Apex Valance Pumps. Please verify that your site is in this size before beginning. Otherwise, contact LSI Graphic Solutions Customer Service 1-(800) 231-0129.
-
Page 2: Parts List
D: 1/4” Washer (56 per valance) PN: 240961 E: Side panel bracket (4 per valance) PN: 681916 F: K-Lathe screws #8 white/red painted (for Apex logo) G: Apex logo (2 per valance) PN 713998 J: Apex logo mounting bracket (2 per valance) PN 721896 H: End Panel... - Page 3 (Part E) on each side panel using the 1/4” x 1” bolts (Part B) provided. Repeat this process on the other side, attaching the two side panels together. Sheet 3 of 10 INSTRUCTIONS: 5100557 - CONOCO APEX PUMP VALANCE REV 10/1/2019...
- Page 4 FIGURE A FIGURE B Fastening end panel to a side Bending end panel into a panel curve FIGURE C Result after fastening end panel to side pan- els. Sheet 4 of 10 REV 10/1/2019 INSTRUCTIONS: 5100557 - CONOCO APEX PUMP VALANCE...
- Page 5 Step 4: Assemble logo/bracket as follows: - Bend three flanges on logo bracket up 90 degrees. - Place aluminum white backer in Conoco Apex logo. (Friction fit backer. Suggest placing bottom “point” first. May require flexing portion of logo to fit bracket tightly inside logo.) - Place logo on flat surface, assuring backer is flush to back edge of logo.
- Page 6 Assembly Instructions Step 5: Align the three pre-drilled holes in the Apex logo mounting bracket and the valance side panel. Put a screw in each hole to attach the bracket/logo as shown. Repeat this to attach second bracket/logo to other side panel.
- Page 7 Note: In case of obstructions, a radius end panel can be replaced with the flat end panel PN 688501 as shown below. This must be ordered separately, but is installed in the same way. Flat end panel Sheet 7 of 10 INSTRUCTIONS: 5100557 - CONOCO APEX PUMP VALANCE REV 10/1/2019...
- Page 8 Step 4. Tighten screws, nuts holding Z-bracket to valance. Z-bracket (Part No. 681917) Bracket (Part No. 382850) Z-bracket Views of brackets Bracket PN 382850 at both ends of valance Z-bracket Bracket PN 382850 (under Z-bracket) Sheet 8 of 10 REV 10/1/2019 INSTRUCTIONS: 5100557 - CONOCO APEX PUMP VALANCE...
- Page 9 Z-bracket (Part No. 681917) Bracket (Part No. 632548) Z-bracket Views of brackets at both ends of Bracket PN 632548 valance Z-bracket Z-bracket Bracket PN 632548 (under Z-bracket) Sheet 9 of 10 INSTRUCTIONS: 5100557 - CONOCO APEX PUMP VALANCE REV 10/1/2019...
- Page 10 Appendix 10/1/2019 - Created. Sheet 10 of 10 REV 10/1/2019 INSTRUCTIONS: 5100557 - CONOCO APEX PUMP VALANCE...