Chapters
Table of Contents

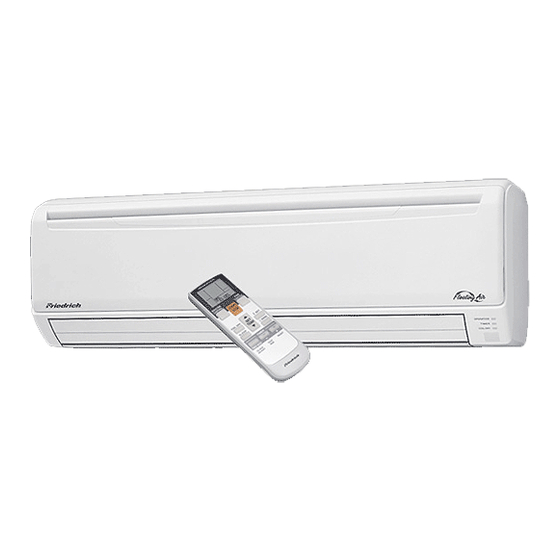
Related Manuals for Friedrich M18YH


Summary of Contents for Friedrich M18YH
- Page 1 MODE D’EMPLOI MW18Y3H MW24Y3H MR18Y3H MR24Y3H CONSERVEZ CE MODE D'EMPLOI POUR RÉFÉRENCE ULTÉRIEUR 9315345288_OM.indb 1 9315345288_OM.indb 1 MANUAL 9315345288 2/24/2010 1:35:59 PM 2/24/2010 1:35:59 PM...
-
Page 2: Table Of Contents
● Do not insert fi ngers or objects into the outlet port or open panel. ● Do not start and stop air conditioner operation by disconnecting the power supply cord and so on. ● Take care not to damage the power supply cord. -
Page 3: Features And Functions
OFF timer, within a twenty-four hour period. SLEEP TIMER When the SLEEP button is pressed during Heating mode, the air conditioner’s thermostat setting is gradually lowered during the period of operation; during cooling mode, the thermostat setting is gradually raised during the period of operation. When the set time is reached, the unit automatically turns off. - Page 4 Fig. 1 a12 a13 Fig. 5 Fig. 6 En-3 9315345288_OM.indb 3 9315345288_OM.indb 3 Fig. 2 Fig. 3 Fig. 4 Fig. 7 To facilitate explanation, the accompanying illustration has been drawn to show all possible indicators; in actu- al operation, however, the display will only show those indicators appropriate to the current operation.
-
Page 5: Name Of Parts
NAME OF PARTS Fig. 1 Indoor Unit a1 Operating Control Panel (Fig. 2) a2 MANUAL AUTO button ● When kept on pressing the MANUAL AUTO button for more than 10 seconds, the forced cooling operation will start. ● The forced cooling operation is used at the time of installation. -
Page 6: Preparation
● The Remote Controller must be pointed at signal receiver (Fig.3 a4) to operate correctly. ● Operating Range: About 23ft (7 meters). ● When a signal is properly received by the air conditioner, a beeping sound will be heard. ● If no beep is heard, press the Remote Controller button again. -
Page 7: Operation
AUTO mode operation.) ● During Super Quiet operation, Heating and Cooling performance will be reduced somewhat. If the room does not warm up/ cool down when using SUPER QUIET Operation, please adjust the air conditioner’s Fan Speed. 9315345288_OM.indb 6 9315345288_OM.indb 6 QUIET Example: When set to COOL. - Page 8 About Mode Operation Heating: ● Use to warm your room. ● When Heating mode is selected, the air conditioner will operate at very low fan speed for about 3 to 5 minutes, after which it will switch to the se- lected fan setting.
-
Page 9: Timer Operation
ON, or OFF ON). ● One example of Program timer use might be to have the air conditioner automati- cally stop (OFF timer) after you go to sleep, then start (ON timer) automatically in the morning before you arise. 9315345288_OM.indb 8 9315345288_OM.indb 8... -
Page 10: Sleep Timer Operation
SLEEP TIMER OPERATION Unlike other timer functions, the SLEEP timer is used to set the length of time until air conditioner operate is stopped. To Use the SLEEP Timer While the air conditioner is operating or stopped, press the SLEEP button (Fig. 6 b5). -
Page 11: Adjusting The Direction Of Air Circulation
During the Cooling and Dry modes, if the Air Flow Direction Louvers are left in the heating range for more than 30 minutes, they will auto- matically return to position 3. -
Page 12: Swing Operation
● If the room is not cooled (or heated) well during economy operation, select normal operation. ● During the monitor period in the AUTO mode, the air conditioner operation will not change to ECONOMY operation even if ECON- OMY operation is selected by pressing the ECONOMY operation button. -
Page 13: Minimum Heat Operation
While MINIMUM HEAT OPERATION is in progress, only Airflow Direction Set can be used. ● When the air conditioner is operated with the controls on the Main Unit, it will operate under the same mode as the AUTO mode selected on the Remote Controller (see page 7). -
Page 14: Cleaning And Care
CLEANING AND CARE ● Before cleaning the air conditioner, be sure to turn it off and disconnect the Power Supply Cord. CAUTION! ● Be sure the Intake Grille (Fig. 1 a8) is installed securely. ● When removing and replacing the air fi lters, be sure not to touch the heat exchanger, as personal injury may result. -
Page 15: Troubleshooting
● During operation and immediately after stopping the unit, the sound of water fl owing in the air conditioner’s piping may be heard. Also, noise may be particularly noticeable for about 2 to 3 minutes after starting operation (sound of coolant fl... -
Page 16: Operating Tips
● Heat-pump air conditioners heat your entire room by recir- culating air throughout the room, with the result that some time may be required after fi rst starting the air conditioner until the room is heated. AUTO Restart In Event of Power Interruption ●... -
Page 17: Specification
18/24Y ● If the air conditioner is used under higher temperature conditioner than those listed, the built-in protection circuit may operate to prevent internal circuit damage. Also, during Cooling and Dry modes, if the unit is used under conditions of lower temperature than those listed above, the heat-exchanger may freeze, leading to water leakage and other damage. -
Page 18: Précautions De Sécurité
SOMMAIRE PRÉCAUTIONS DE SÉCURITÉ ...Fr-1 CARACTÉRISTIQUES ET FONCTIONS ...Fr-2 NOMENCLATURE DES ORGANES ...Fr-4 PRÉPARATIFS ...Fr-5 FONCTIONNEMENT...Fr-6 FONCTIONNEMENT PAR MINUTERIE DE PROGRAMMATION ...Fr-8 FONCTIONNEMENT TEMPORISÉ...Fr-9 RÉGLAGE DE LA DIRECTION DU FLUX D’AIR ...Fr-10 PRÉCAUTIONS DE SÉCURITÉ ● Avant d’utiliser l’appareil, lisez attentivement ces “PRÉCAUTIONS” et utilisez-le de la bonne façon. ●... -
Page 19: Caractéristiques Et Fonctions
CARACTÉRISTIQUES ET FONCTIONS INVERSEUR Lors de la mise en fonctionnement, une grande quantité de courant est nécessaire pour amener rapidement la températu- re de la pièce à la température souhaitée. Pour des raisons de confort et d’économie d’énergie, la consommation de l’appareil diminue ensuite automatiquement. - Page 20 Fig. 1 a12 a13 Fig. 5 Fig. 6 Fr-3 9315345288_OM.indb 3 9315345288_OM.indb 3 Fig. 2 Fig. 3 Fig. 4 Fig. 7 Pour faciliter les explications, l'illustration jointe a été conçue pour montrer tous les voyants possibles. Toute- fois, en fonctionnement réel, l'affi chage n'indiquera que les voyants correspondant au fonctionnement en cours.
-
Page 21: Nomenclature Des Organes
NOMENCLATURE DES ORGANES Fig. 1 Unité intérieur a1 Panneau de contrôle de fonctionnement (Fig. 2) a2 Bouton manuel-automatique (MANUAL AUTO) ● Si vous maintenez le bouton manuel-auto- matique (MANUAL AUTO) enfoncé pendant plus de 10 secondes, le système de refroi- dissement forcé... -
Page 22: Préparatifs
PRÉPARATIFS Mettez l’appareil sous tension Mettez le disjoncteur sous tension Mise en place des Piles (AAA/R03/LR03 Appuyez sur le couvercle du logement des Piles à l’arrière et faites le glisser pour l’ouvrir. Faites glisser dans le sens de la fl èche en appuyant sur le repère ( Installez les Piles. -
Page 23: Fonctionnement
FONCTIONNEMENT Sélection du mode de Fonctionnement Appuyez sur la touche START/STOP (Fig. 6 b8). Le voyant de fonctionnement (OPERATION) (vert) de l’appareil intérieur (Fig. 3 a5) s’allume. Le climatiseur se met en marche. Appuyez sur la touche MODE (Fig. 6 b2) pour choisir le mode souhaité. - Page 24 FONCTIONNEMENT Arrêt du climatiseur Appuyez sur la touche START/STOP (Fig. 6 b8). Le voyant de fonctionnement (OPERATION) (vert) (Fig.3 a5) s’éteint. A propos du mode de fonctionnement AUTO CHANGEOVER (changement automatique) ● Lorsque le mode AUTO CHANGEOVER (changement automatique) est AUTO: sélectionné, le ventilateur fonctionne dans un premier temps à...
-
Page 25: Fonctionnement Par Minuterie De Programmation
FONCTIONNEMENT PAR MINUTERIE DE PROGRAMMATION Avant d’utiliser la minuterie, vérifi ez que la télécommande est réglée sur l’heure exacte (icône P.5). Emploi des fonctions de déclenchement ou d’arrêt différé Appuyez sur la touche START/STOP (marche/arrêt) (Fig. 6 b8). (Si le climatiseur fonctionne déjà, passez à l’étape 2.) Le voyant vert de fonctionnement (OPERATION) (vert) de l'appareil intérieur (Fig. -
Page 26: Fonctionnement Temporisé
FONCTIONNEMENT TEMPORISÉ A la différence des autres fonctions de la minuterie, le fonctionnement temporisé permet de programmer une durée pendant laquelle fonctionnera le climatiseur. Utilisation de la Minuterie de Temporisation Pendant que le climatiseur fonctionne ou est arrêté, appuyez sur la touche SLEEP. (Fig. 6 b5) Le voyant vert de fonctionnement (OPERATION) (vert) de l'appareil intérieur (Fig. -
Page 27: Réglage De La Direction Du Flux D'air
RÉGLAGE DE LA DIRECTION DU FLUX D’AIR ● Réglez le fl ux d’air vertical (haut/bas) et horizontal (droite/gauche) à l’aide des touches de direction du fl ux d’air (AIR DIRECTION) de la télécommande. ● Utilisez les touches de direction du fl ux d’air (AIR DIRECTION) après la mise en marche de l’appareil intérieur et l’arrêt des volets de direction du fl... -
Page 28: Fonctionnement Oscillant
FONCTIONNEMENT OSCILLANT Mettez le climatiseur en marche avant de procéder aux démarches suivantes. Sélection du fonctionnement oscillant (SWING) Appuyez sur la touche d’oscillation (SWING) (Fig. 6 b11). L’affi chage d’oscillation (Fig. 7 c7) s’allume. Chaque fois que vous appuyez sur la touche d’oscillation (SWING), l’oscillation change comme suit. Oscillation horizontale (haut/bas) Arrêt de l’oscillation Arrêt du fonctionnement oscillant (SWING) -
Page 29: Chauffage Minimum
CHAUFFAGE MINIMUM • Vous pouvez maintenir la température de la pièce à 50°F en appuyant sur la touche MIN. HEAT (Fig. 6 b3), de façon à éviter une chute de température trop importante. Pour utiliser le MODE DE CHAUFFAGE MINIMUM Appuyez sur la touche MIN. -
Page 30: Nettoyage Et Entretien
NETTOYAGE ET ENTRETIEN ● Avant de nettoyer le climatiseur, prenez soin de le mettre hors tension et de déconnecter l’alimentation. ATTENTION! ● Vérifi ez que la grille d’admission (Fig. 1 a8) est fermement installée. ● Lors du retrait et du remplacement des fi ltres d’air, ne touchez pas l’échangeur thermique. Nettoyage de la grille d’admission 1. -
Page 31: Guide De Dépannage
GUIDE DE DÉPANNAGE En cas de dysfonctionnement (odeur de brûlé, etc.), mettez immédiatement l’appareil hors tension, AVERTISSEMENT! coupez l’alimentation électrique via le disjoncteur ou le cordon d’alimentation et contactez un centre de réparation agréé. Il ne suffi t pas d’éteindre l’appareil. Assurez-vous toujours de couper le disjoncteur ou de débrancher le cordon d’alimentation secteur pour couper l’alimentation de l’appareil. -
Page 32: Conseils D'utilisation
GUIDE DE DÉPANNAGE Symptôme VÉRIFIEZ À L’appareil ne fonctionne pas NOUVEAU du tout: Mauvaises performances de refroidissement (ou chauffage) : L’appareil n’exécute pas les fonctionnement réglé par la télécommande: Si le problème persiste après ces vérifi cations, ou si vous remarquez des odeurs de combustion, ou si le voyant de fonctionnement (ORERATION) (Fig. -
Page 33: Fiche Technique
CONSEILS D’UTILISATION Plage de température et d’humidité MODÈLE Température extérieure 18/24Y Température intérieure ● Si le climatiseur doit fonctionner par une température plus haute que celles indiquées ci-dessus, il se peut que le circuit de protec- tion incorporé entre en service pour protéger les circuits internes. En revanche, en mode Refroidissement et Déshumidifi cation, si le climatiseur doit fonctionner par une température inférieure à... -
Page 34: Precauciones De Seguridad
ÍNDICE PRECAUCIONES DE SEGURIDAD ...Sp-1 CARACTERÍSTICAS Y FUNCIONES ...Sp-2 DENOMINACIÓN DE LOS COMPONENTES ...Sp-4 PREPARATIVOS...Sp-5 FUNCIONAMIENTO ...Sp-6 FUNCIONAMIENTO CON TEMPORIZADOR ...Sp-8 FUNCIONAMIENTO DEL TEMPORIZADOR (SLEEP) DE DESCONEXIÓN AUTOMÁTICA ...Sp-9 AJUSTE DE LA DIRECCIÓN DE CIRCULACIÓN DEL AIRE ...Sp-10 FUNCIONAMIENTO DE VAIVÉN ...Sp-11 PRECAUCIONES DE SEGURIDAD ●... -
Page 35: Características Y Funciones
CARACTERÍSTICAS Y FUNCIONES INVERSOR Al inicio del funcionamiento, la potencia utilizada es elevada para que la sala adquiera rápidamente la temperatura desea- da. Luego, la unidad pasa automáticamente al ajuste de baja potencia para que el funcionamiento resulte adecuado cómo- do y económico. - Page 36 Fig. 1 a12 a13 Fig. 5 Fig. 6 Sp-3 9315345288_OM.indb 3 9315345288_OM.indb 3 Fig. 2 Fig. 3 Fig. 4 Fig. 7 Para facilitar la explicación, la ilustración adjunta se ha diseñado para mostrar todos los indicadores posibles durante el funcionamiento real, sin embargo, la pan- talla solamente mostrará...
-
Page 37: Denominación De Los Componentes
DENOMINACIÓN DE LOS COMPONENTES Fig. 1 Unidad interior a1 Panel de control del funcionamiento (Fig. 2) a2 Botón de funcionamiento manual/auto- mático (MANUAL AUTO) ● Si mantiene pulsado el botón de funcio-na- miento manual / automático (MANUALAUTO) durante más de 10 segundos, seactivará la refrigeración forzada. -
Page 38: Preparativos
PREPARATIVOS Encendido del suministro Encendido del disyuntor Cargue las pilas (AAA/R03/LR03 Presione y deslice la tapa del compartimiento de las pilas del lado opuesto para abrirla. Deslice en la dirección de la fl echa mientras presiona la marca Inserte las pilas. Asegúrese de hacer corresponder bien las polaridades ) de las pilas. -
Page 39: Funcionamiento
FUNCIONAMIENTO Para seleccionar el modo de funcionamiento Presione el botón de marcha/paro (START/STOP) (Fig. 6 b8). Se encenderá el indicador de funcionamiento (OPERATION) de la unidad interior (verde) (Fig. 3 a5). El acondicionador de aire se pondrá en funcionamiento. Pulse el botón de modo (MODE) (Fig.6 b2) para selec- cionar el modo deseado. - Page 40 FUNCIONAMIENTO Para detener el funcionamiento Presione el botón de marcha/paro (START/STOP) (Fig.6 b8). Se apagará la lámpara de funcionamiento (OPERATION) (verde) (Fig. 3 a5). Notas sobre el funcionamiento de cambio automático (AUTO CHANGEOVER) ● Cuando se inicia el funcionamiento de cambio automático (AUTO CHAN- AUTO: GEOVER), el ventilador funciona a velocidad muy lenta durante un minuto más o menos y durante este tiempo el aparato detecta las condiciones de...
-
Page 41: Funcionamiento Con Temporizador
FUNCIONAMIENTO CON TEMPORIZADOR Antes de utilizar la función del temporizador, asegúrese de que la unidad del telemando esté ajustado a la hora correcta (vea la página 5). Para emplear el temporizador de conexión (ON) y de desconexión (OFF) Presione el botón de marcha/paro (START/STOP) (Fig. 6 b8) (Si el aparato ya está... -
Page 42: Funcionamiento Del Temporizador (Sleep) De Desconexión Automática
FUNCIONAMIENTO DEL TEMPORIZADOR (SLEEP) DE DESCONEXIÓN AUTOMÁTICA A diferencia de otras funciones del temporizador, el temporizador de desconexión automática (SLEEP) se usa para ajustar la dura- ción del tiempo hasta que se para el funcionamiento del acondicionador de aire. Empleo del temporizador (SLEEP) de desconexión automática Mientras el acondicionador de aire está... -
Page 43: Ajuste De La Dirección De Circulación Del Aire
AJUSTE DE LA DIRECCIÓN DE CIRCULACIÓN DEL AIRE ● Ajuste del dirección del aire en los sentidos arriba, abajo e izquierda y derecha con los botones AIR DIRECTION (DIRECCIÓN DEL AIRE) del telemando. ● Utilice los botones AIR DIRECTION (DIRECCIÓN DEL AIRE) después de que la unidad interior haya empezado a funcionar y las lamas defl... -
Page 44: Funcionamiento De Vaivén
FUNCIONAMIENTO DE VAIVÉN Inicie el funcionamiento del acondicionador de aire antes de efectuar este procedimiento. Para seleccionar el funcionamiento de vaivén (SWING) Pulse el botón SWING (VAIVÉN) (Fig. 6 b11). Aparecerá en pantalla la indicación SWING (Fig. 7 c7). Cada vez que pulse el botón SWING (VAIVÉN), el funcionamiento de vaivén irá cam- biando en el orden siguiente: Arriba/abajo Parada... -
Page 45: Funcionamiento De Calor Mínimo
FUNCIONAMIENTO DE CALOR MÍNIMO (MINIMUM HEAT) • La temperatura de la sala se puede mantener a 50°F pulsando el botón MIN. HEAT (Fig.6 b3) para impedir que la temperatura de la sala baje mucho. Para usar el funcionamiento de calor mínimo (MINIMUM HEAT OPERATION) Pulse el botón de calor mínimo (MIN. -
Page 46: Limpieza Y Mantenimiento
LIMPIEZA Y MANTENIMIENTO ● Antes de limpiar la unidad, asegúrese de parar el funcionamiento del acondicionador de aire y de ¡PRECAUCIÓN! desconectar la alimentación. ● Asegúrese de que la rejilla de entrada (Fig. 1 a8) esté bien instalada. ● Cuando extraiga y reemplace los fi ltros de aire, asegúrese de no tocar el intercambiador de calor, porque podrían producirse daños personales. -
Page 47: Localización De Averías
LOCALIZACIÓN DE AVERÍAS ¡ADVERTENCIA! En caso de producirse un mal funcionamiento (por ejemplo, olor a quemado), detenga inmediatamente el funcionamiento, desenchufe la clavija de alimentación o desconecte el enchufe de la fuente de ali- mentación y póngase en contacto con el personal de servicio autorizado. Si sólo desconecta el interruptor de alimentación del aparato, no se desconectará... -
Page 48: Consejos Para El Funcionamiento
LOCALIZACIÓN DE AVERÍAS Síntoma COMPRUEBE No funciona: OTRA VEZ Refrigeración (o calefac- ción) insufi ciente: La unidad funciona de for- ma diferente del ajuste del ajuste del telemando: Si el problema persiste después de efectuar estas comprobaciones, si nota olor a quemado o parpadea el indicador de funciona- miento (OPERATION) (Fig. -
Page 49: Especificación
CONSEJOS PARA EL FUNCIONAMIENTO Margen de temperatura y humedad MODEL Temperatura exterior Temperatura interior 18/24Y ● Si se hace funcionar el aparato con temperaturas más altas que las indicadas, el circuito automático de protección puede acti- varse para evitar daños del circuito interno. Además, en el modo de refrigeración y deshumectación, si el aparato se utiliza con temperaturas más bajas que las indicadas, el intercambiador de calor térmico puede congelarse causando fugas de agua u otros problemas en el funcionamiento. - Page 50 9315345288_OM.indb 17 9315345288_OM.indb 17 2/24/2010 1:36:46 PM 2/24/2010 1:36:46 PM...
- Page 51 9315345288_OM.indb 18 9315345288_OM.indb 18 2/24/2010 1:36:46 PM 2/24/2010 1:36:46 PM...
- Page 52 Tel. (210) 357-4400 Fax (210) 357-4490 9315345288_OM.indb 2 9315345288_OM.indb 2 Friedrich Air Conditioning Co. 4200 N. Pan Am San Antonio, Texas 78218 USA Visit us at www. friedrich. com 2/24/2010 1:36:16 PM 2/24/2010 1:36:16 PM...