
Related Manuals for Graco MODES NEST


Summary of Contents for Graco MODES NEST
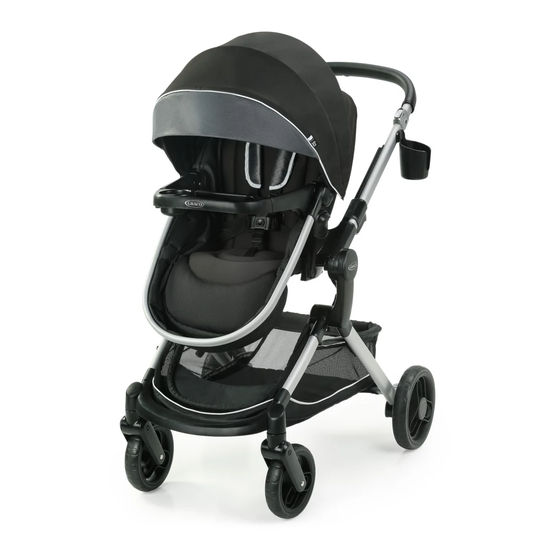
- Page 1 MODES NEST ™ MODES NEST DLX ™ Stroller Cochecito • Owner’s Manual Manual del propietario • www.gracobaby.com ©2019 Graco NWL0000984017A 7/19 ® PD346910C 12/15...
- Page 2 1 WARNING Pages • Páginas • ADVERTENCIA 2 Features • Características Page • Páginas MODES™ NEST Use Positions • Posiciones del uso del MODES™ NEST Parts List • Lista de piezas 3 Assembly 10-15 • Ensamblaje Pages • Páginas To Open Stroller •...
- Page 3 • Para usar el asiento para niño pequeño en la posición de moisés To Attach Graco® Infant Car Seat to Toddler Seat • Para instalar el asiento de automóvil para bebé Graco® al asiento para niño pequeño To Attach Graco® Infant Car Seat to Stroller Frame •...
- Page 4 Always keep child in view while in parcels or accessory items (other stroller. than approved Graco stroller bags) AVOID SERIOUS INJURY from on the handle. Never place anything falling or sliding out. Always use on the canopy.
- Page 5 CLICK stroller, and do not remove, CONNECT™. reverse, or carry the bassinet while child is in it. Only use with Graco® infant car seats that have the Click ALWAYS release the webbing Connect™ logo. strap buckle to lower the foot...
- Page 6 NUNCA DEJE al niño sin supervisión. en la manija (si no son las bolsas para Mantenga al niño siempre a la vista cochecito aprobadas por Graco). No cuando esté en el cochecito. ponga nunca nada sobre la capota. EVITE SERIAS LESIONES de caídas o PARA PREVENIR UNA SITUACIÓN...
- Page 7 Úselo solamente con niño en él. los asientos de USE SOLAMENTE el moisés en el automóvil para bebé de Graco® que cochecito y no saque, invierta ni tienen el logotipo Click Connect™. transporte el asiento para niño El so inadecuado de este cochecito con pequeño con el niño en él.
- Page 8 2-A MODES™ NEST Use Positions •Posiciones del uso del MODES™ NEST...
- Page 9 2-B Parts List • Lista de piezas Check that you have all the parts for Verifique que tiene todas las piezas this model BEFORE assembling your de este modelo ANTES de armar su product. If any parts are missing, call producto.
- Page 10 3-A To Open Stroller • Para abrir el cochecito Before assembly, be sure to place stroller on top of a piece of cardboard or other protective cover to prevent damage to floor surface. Antes de armarlo, tenga la seguridad de poner el cochecito arriba de un pedazo de cartón u otro tipo de protección para prevenir el daño a la superficie del piso.
- Page 11 3-B Brake Mounts • Montantes de los frenos 1. Push brake mounts onto the stroller frame. Brake pedal point toward rear of stroller. 1. Empuje los montantes de los frenos para sujetarlo al armazón del cochecito. Las palancas del freno deben apuntar hacia la parte trasera del cochecito.
- Page 12 3-C Rear Wheels • Ruedas traseras 1. Attach wheel as shown. 1. Sujete la rueda como se indica. 2. Place washer on axle. Ponga la arandela en el eje. 3. Push straight side of pin through axle hole. Pin will separate around the axle.
- Page 13 3-D Front Wheels • Ruedas delanteras 1. Attach front wheels to stroller as shown. Push down on button while pushing the wheel into place. 1. Sujete las ruedas delanteras al cochecito como se indica. Oprima el botón mientras empuja la rueda hasta encajar en su posición.
- Page 14 3-E Toddler Seat • El asiento para niño pequeño 1. Attach lower seat frame tubes as shown. 1. Sujete el tubo inferior del armazón del asiento como se indica. CLICK! ¡CLIC! 2. On the back of the seat, secure flap around seat wire with 3 snaps.
- Page 15 3-E Parent Cup Holder • Apoyavaso para padres 1. Attach the parent cup holder as shown. 1. Sujete el apoyavaso para padres como se indica. SNAP! ¡CLIC!
- Page 16 4-A To Use Toddler Seat • Para usar el asiento para niños pequeños WARNING • ONLY USE toddler seat on the stroller, and do not remove, reverse, or carry the toddler seat while child is in it. See warnings for additional information. ADVERTENCIA •...
- Page 17 To Remove Toddler Seat •Para sacar el asiento para niño pequeño 1. Squeeze buttons on both sides of the seat, and pull up as shown. 1. Oprima los botones de ambos costados del asiento, y tire hacia arriba como se indica.
- Page 18 4-B Child’s Tray • Bandeja para niños WARNING Always secure your child with the seat belt. The tray is not a restraint device. DO NOT lift the stroller by the child’s tray. Use care when snapping the tray on the stroller with a child in the stroller.
- Page 19 3. To open, press button on bottom of tray, and rotate child’s tray up. 3. Para abrirla, oprima el botón de abajo, y gire la bandeja para niños hacia arriba. 4. To remove child’s tray, press buttons on bottom of both ends, and lift off.
- Page 20 5. To remove armrests, push button and pull them out as shown. 5. Para retirar los apoyabrazos, oprima el botón y tírelos hacia afuera como se indica.
- Page 21 4-C Canopy • Capota 1. To open canopy. 1. Para abrir la capota. 2. To close canopy. 2. Para cerrar la capota. 3. To open canopy window. 3. Para abrir la ventana de la capota. 4. To close canopy window. 4.
- Page 22 4-D To Secure Child • Para sujetar al niño WARNING Falling Hazard: Always use the seat belt. ADVERTENCIA Peligro de caídas: Use siempre el cinturón de seguridad. 5 Point Harness •Arnés de 5 puntos 1. To open, press button on buckle to release the waist straps.
- Page 23 3. Use slide adjuster at shoulder and Use slide adjuster at sh waist for tighter adjustment. To waist for further adjust change shoulder harness slots, Repeat on other side. see page 26. Utilisez le régulateur co à l'épaule et à la taille p 3.
- Page 24 3 Point Buckle •Hebilla de 3 puntos 1. To open, press button on buckle to release the waist straps. 1. Para abrirlo, oprima el botón de la hebilla para liberar las correas de la cintura. 2. Slide shoulder strap connectors off of waist straps.
- Page 25 4. Attach waist straps to harness buckle as shown. 4. Sujete las correas para la cintura a la hebilla del arnés como se indica. 5. Use slide adjuster at waist for tighter adjustment. 5. Use el ajustador deslizable de la cintura para ajustarlo más apretadamente.
- Page 26 Adjusting Shoulder Harness position • Ajustar la posición del arnés para los hombros Shoulder harness anchor Anclaje del arnés del hombro Slide adjuster Ajustador deslizable Push harness anchor through the front of the seat then re-insert through desired slots at the same height level. Use slide adjuster for further adjustment.
- Page 27 4-E • Harness Covers • Fundas del arnés 1. To attach harness covers, slide onto harness straps. 1. Para sujetar las fundas del arnés, deslícelas sobre las correas del arnés.
- Page 28 4-F To Recline Seat • Para reclinar el asiento WARNING When making adjustments to the stroller seat, make sure child’s head, arms, and legs are clear of moving seat parts and stroller frame. Fabric caught in the latches may prevent them from locking. When returning seat to upright position, do not allow fabric to be pinched in the latch.
- Page 29 4-G Brakes • Frenos WARNING CHECK that brakes are on by trying to push stroller. ADVERTENCIA VERIFIQUE que los frenos estén activados tratando de empujar el cochecito. 1. Push down on brake to lock brakes. 1. Empuje los frenos hacia abajo para trabarlos.
- Page 30 4-H To Use Height Adjustment Latch • Para usar la traba de ajustar la altura WARNING CHECK that the height adjustment latch is set at the same height on both sides. When making adjustments to the stroller seat, make sure child’s head, arms, and legs are clear of moving seat parts and stroller frame ADVERTENCIA VERIFIQUE que la traba de ajustar la altura esté...
- Page 31 Adjust the Basket • Para ajustar la canasta WARNING DO NOT ALLOW child to stand on basket. It may collapse and cause injury. ADVERTENCIA NO DEJE que el niño se pare sobre la canasta. Podría desarmarse y causar lesiones. 1. To adjust the basket height,pull up on the front of the basket.
- Page 32 To Use Toddler Seat in Bassinet Position • Para usar el asiento para niño pequeño en la posición de moisés WARNING • Child may slip into leg openings and strangle. • NEVER use in full recline position unless footrest is in the bassinet position. •...
- Page 33 2. Recline the seat back by pushing button down, and pull down the seat. 2. Para reclinarlo, empuje el botón, y tire el asiento hacia abajo. 3. Rotate toddler seat up. DO NOT adjust with child in seat. CLICK! ¡CLIC! 3.
- Page 34 5. Push the foot end down. 5. Empuje el extremo de los pies hacia abajo. 6. CHECK seat is secured in bassinet position as shown. 6. VERIFIQUE que el asiento esté sujetado en la posición del moisés como se indica. 7.
- Page 35 Graco’s customer service number: 1-800-345-4109. Improper use of this stroller with other manufacturers’ car seats may result in serious injury or death. Read the manual provided with your Graco car seat before using it with your stroller. • Always secure your child with the car seat harness when using the car seat in the stroller.
- Page 36 DO NOT INSTALL the SnugRide ® 35 Platinum featuring TrueShield Technology forward-facing. Only install the car seat facing the back of the stroller. NO INSTALE el SnugRide ® Platinum con tecnología TrueShield orientado hacia adelante. Solo instale el asiento de automóvil orientado hacia la parte trasera del cochecito.
- Page 37 3. Find mounts in toddler seat. 3. Busque los montantes en el asiento para niño pequeño. 4. Insert infant car seat into stroller and push down on infant car seat until the latches snap into the Click Connect™ mounts. 4. Inserte el asiento de automóvil para bebé...
- Page 38 6. To remove infant car seat: (a) squeeze release handle at back of infant car seat, and (b) lift infant car seat out of the stroller. 6. Para sacar el asiento de automóvil para bebé: (a) apriete la manija de liberación en la parte posterior del asiento de automóvil para bebé, y (b) levante el asiento de automóvil...
- Page 39 4-L To Attach Graco Infant Car Seat to Stroller Frame ® • Para instalar el asiento de automóvil para bebé Graco al armazón del cochecito ® 1. To remove toddler seat, squeeze buttons on both sides of the seat and pull up as shown.
- Page 40 2. Infant car seat can be attached to stroller frame rear and forward facing. 2. El asiento de automóvil para bebé se puede sujetar al armazón del cochecito orientado hacia atrás y hacia adelante.
- Page 41 3. Insert car seat into stroller, and push down on car seat until the latches snap into the seat attachment mounts. 3. Inserte el asiento de automóvil en el cochecito, y empuje hacia abajo hacia el asiento de automóvil hasta que se trabe en los montantes de sujeción del asiento.
- Page 42 4-M To Fold Stroller with Toddler Seat • Para plegar el cochecito con el asiento para niño pequeño WARNING ADVERTENCIA NO deje que el niño juegue con la DO NOT allow child to play with the manija de plegar. fold handle. 1.
- Page 43 3. Push handle down. 3. Empuje la manija hacia abajo. 4. Storage latch will engage, and stroller will rest on the rear wheels and handle. 4. La traba de almacenamiento CLICK! ¡CLIC! se activará, y el cochecito se apoyará en las ruedas traseras y la manija.
- Page 44 4-N To Fold Stroller without Toddler Seat • Para plegar el cochecito sin el asiento para niño pequeño WARNING ADVERTENCIA DO NOT allow child to play with the NO deje que el niño juegue con la fold handle. manija de plegar. 1.
- Page 45 3. Storage latch will engage when folded. CLICK! ¡CLIC! 3. La traba de almacenamiento se activará cuando está plegado.
- Page 46 DE VEZ EN CUANDO, INSPECCIONE EL COCHECITO para verificar si hay tornillos flojos, piezas rotas, material o puntos rotos. Reemplace o repare las piezas según sea necesario. Use solamente piezas de repuesto Graco. EL CONTACTO EXCESIVO CON EL SOL O EL CALOR podría causar descoloramiento o torcedura de las piezas.
- Page 47 Notes • Notas...
- Page 48 1-800-345-4109 5-C Product Registration (USA) • Registro del producto (EE.UU.) To register your Graco product from within the U.S.A. visit us online at www.gracobaby.com/productregistration. We currently do not accept product registrations from those living outside the United States of America.