Table of Contents
Advertisement
Quick Links
Advertisement
Table of Contents

Related Manuals for Steinberg UR44C


Summary of Contents for Steinberg UR44C
- Page 1 USB AUDIO INTERFACE Operation Manual...
-
Page 2: Table Of Contents
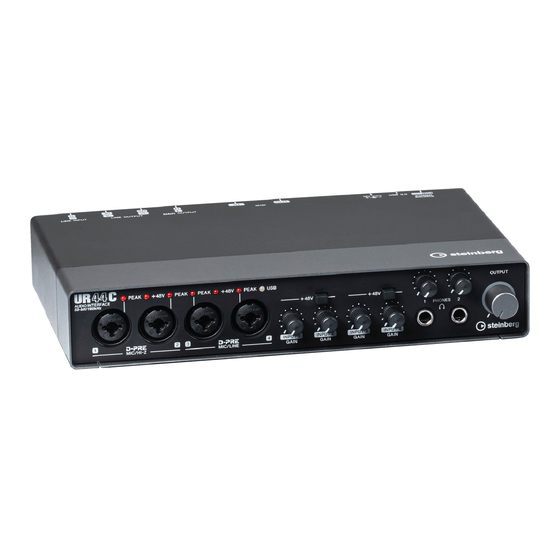
6 x 4 USB 3.0 Audio Interface with 4 x D-PRE and 32-bit/192 kHz support Panel Controls and Terminals ....3 The UR44C is a 6-in and 4-out USB 3.0 audio Front Panel ............3 interface, featuring four world-renowned D-PRE Rear Panel ............5... -
Page 3: Panel Controls And Terminals
HI-Z Guitar and bass with passive pickups (not battery When using phantom power, observe the following to prevent powered) noise and possible damage to UR44C or connected equipment. LINE • Do not connect or disconnect any devices while the • Effect device, preamp, direct box phantom power switch is turned to ON. - Page 4 Adjusts the output signal level of the [MAIN OUTPUT] jacks. @ POWER indicator Lights up when the power is turned on. The indicator flashes continuously If the power supply is not insufficient. In this case, use the included AC adaptor. UR44C Operation Manual...
-
Page 5: Rear Panel
[12V DC] side. Even if you set outputs the MIX 1 signal and the [LINE OUTPUT 2L/2R] the power supply to [12V DC], the power to the UR44C jack outputs the MIX 2 signal. -
Page 6: Software
Driver] [Control Panel]. become narrower, but this will not affect the functionality of the • From the Cubase series menu, select [Studio] [Studio UR44C. Other performance values such as latency will not Setup] [Yamaha Steinberg USB ASIO] [Control change. - Page 7 ASIO buffer size, the lower the value From the Cubase series menu, select [Studio] [Studio of audio latency. Setup], then click [Control Panel] in [Steinberg UR44C] or [Steinberg UR44C (High Precision)] in the menu on Sample Rate Range the left side of the window.
-
Page 8: Dspmixfx Ur-C
How to Open the Window Select the destination for importing on the right side of the window. Click [OK] Windows to import it. [All Programs] or [All apps] [Steinberg UR44C] Initialize All Scenes Initialize all the saved scenes. [dspMixFx UR-C] 4 Scene Indicates the scene name. - Page 9 When this is on, two mono channels value by double clicking the number. will become one stereo channel. $ Mute 2 Level Meter Turns the mute function on (lit) and off (unlit). Indicates the signal level. UR44C Operation Manual...
- Page 10 Adjusts the signal level. Range: -∞ dB − +6.00 dB 7 REV-X Return Fader Adjusts the return level of REV-X. 7 Fader Value Displays and adjusts the Fader value. Enable editing of the value by double clicking the number. UR44C Operation Manual...
- Page 11 Internet. It mixes the input audio signals (such as microphone and guitar) with the audio signals playing back in the software in the computer into two channels in the UR44C, and sends them back to the computer. Refer to the section “Signal Flow” (page 34).
- Page 12 8 About Indicates the version of the firmware and software. 1 Device Selects the device when simultaneously connecting one or more devices that are capable with dspMixFx. 2 Device Settings Opens the Control Panel. UR44C Operation Manual...
-
Page 13: Dedicated Windows For Cubase Series
Opens the Hardware Setup Window. 3 Editor Active Opens dspMixFx UR-C. Hardware Inputs Settings area This area is used to set parameters related to the UR44C inputs. Hardware Setup Window 1 Port name Displays the name of the port which is being used for input to the track of the device. - Page 14 This area is used to set parameters related to hardware when stereo is selected. outputs. Effect Settings area This area is used to set parameters related to the UR44C input/output port effects. 1 Mix Bus name Displays the Mix Bus name of the hardware output. The output bus of the track must be connected to this Mix bus.
- Page 15 Selects the input signal level of [LINE INPUT 5/6]. Options: +4 dBu, -10 dBV 4 Scene Automatically applies scene information to the UR44C device when loading a Cubase project file containing UR44C scene data. Data saved to the device will be overwritten.
-
Page 16: Sweet Spot Morphing Channel Strip
(page 14). From dspMixFx UR-C Select the “Channel Strip” from the “Effect Type”, then click “Channel Strip Edit” in the section “Channel Area” (page 1 ATTACK Adjusts the attack time of the compressor. Range: 0.092 msec − 80.00 msec UR44C Operation Manual... - Page 17 Adjusts the center frequency of the high band. Range: 500.0 Hz − 20.0 kHz 8 HIGH G Adjusts the gain of the high band. Range: -18.0 dB − +18.0 dB 9 EQUALIZER On/Off Turns the equalizer on (lit) and off (unlit). UR44C Operation Manual...
-
Page 18: Rev-X
Click “REV-X Edit” (page 10) in the section “Master Area.” 5 Diffusion Adjusts the spread of the reverberation. Range: 0 − 10 6 HPF Adjusts the cutoff frequency of the high pass filter. Range: 20 Hz − 8.0 kHz UR44C Operation Manual... - Page 19 [Ctrl]/[command] key while you click on the appropriate knobs, sliders, and faders. • You can adjust the parameters more finely by holding the [SHIFT] key while you drag on the appropriate knobs, sliders, and faders. UR44C Operation Manual...
-
Page 20: Guitar Amp Classics
Select the “Guitar Amp Classics” from the “Effect Type”, then click “Effect Edit” in the section “Input Settings Window” (page 14). From dspMixFx UR-C Select the “Guitar Amp Classics” from the “Effect Type”, then click “Effect Edit” in the section “Channel Area” (page UR44C Operation Manual... - Page 21 4 TREBLE/MIDDLE/BASS These three controls adjust the amplifier’s tonal response in the high, middle, and low frequency ranges. 5 PRESENCE Can be adjusted to emphasize the high frequencies and overtones. 6 OUTPUT Adjusts the final output level. UR44C Operation Manual...
- Page 22 The OUTPUT control adjusts the final output level from the amp model without affecting the distortion or tone, and is useful for adjusting the guitar’s volume without changing any other aspects of the sound. UR44C Operation Manual...
-
Page 23: Using With A Computer
• For bus-powered supply, you will need to connect the USB Type-C jack on a computer to the [USB 3.0] jack with a USB3.1 Type-C to Type-C cable (optional). • For the connector type of the computer to be connected to the device, refer to “Connector type of a computer” (page 33). UR44C Operation Manual... -
Page 24: Configuring Audio Driver Settings On The Daw Software
Cubase series program is launching, confirm that the device is selected, then click [OK]. When [Steinberg UR44C (High Precision)] is selected on Mac, Cubase will exclusively uses the driver. In this condition, [Steinberg UR44C] cannot be used by other applications. -
Page 25: Recording/Playback
Turn on Direct Monitoring as follows. [Studio] [Studio Setup] [Yamaha Steinberg USB ASIO] (Windows) or [Steinberg UR44C] (Mac) enter checkmark to [Direct Monitoring] [OK] Click the Ruler to move the project cursor to the desired point for starting playback. - Page 26 UR-C. Start recording on your DAW software. After finishing recording, stop it. Playback the newly recorded sound to check it. For more detailed instructions on using the DAW software, refer to your particular DAW’s software manual. UR44C Operation Manual...
-
Page 27: Using With An Ios Device
• Apple accessories may be required when connecting the UR44C with iOS devices. For details, refer to the UR44C Startup Guide. • iOS devices cannot be used by bus-powered supply. • For the latest information on compatible iOS devices, refer to the Steinberg website below. -
Page 28: Recording/Playback
The explanation uses Cubasis (DAW app) as an example. • iOS app may not be supported in your area. Please check with your Yamaha dealer. • For the latest Cubasis information, see the Steinberg web site below. https://www.steinberg.net/ Open Cubasis. - Page 29 (for iOS devices) From your iOS devices, you can conveniently control built-in DSP mixer functions and DSP effects by using dspMixFx for iOS devices. For details on this app, see the Steinberg web site below. https:///www.steinberg.net/ UR44C Operation Manual...
-
Page 30: Troubleshooting
Refer to the section “Connection Examples” (pages 23, 27) to confirm the connection. Are the audio driver settings on DAW software set properly? Refer to the section “Configuring the Audio Driver Settings on DAW Software” (page 24) to set it. UR44C Operation Manual... - Page 31 From the Cubase series menu, open the [Studio] [Studio Setup] [VST Audio System], then confirm that the [Yamaha Steinberg USB ASIO] (Windows) or [Steinberg UR44C] or [Steinberg UR44C (High Precision)] (Mac) is selected on the [ASIO Driver]. Windows...
- Page 32 Depending on the USB host controller in your computer, audio dropout might occur when SuperSpeed (USB 3.1 Gen1) mode is used. In such a case, please try switching to High-Speed (USB 2.0) mode in the Yamaha Steinberg USB Driver Control Panel.
-
Page 33: Appendix
Limitations on the use of effects Computer connector types Six Channel strips and two Guitar Amp Classics are provided in the UR44C. USB 3.0 Type A Simultaneous use of the Channel Strips and Guitar Amp Classics on the same channel is possible since two slots are provided for inserting effects in to each input channel. -
Page 34: Signal Flows
• Set FX REC ON when recording the DSP effect processed signal with the DAW. • Set FX REC OFF when recording a signal without DSP effect processing with the DAW. *2 You can turn this on for either MIX 1 or MIX 2. UR44C Operation Manual... -
Page 35: Block Diagrams
Appendix Block Diagrams 44.1kHz, 48kHz, 88.2kHz, 96kHz UR44C Operation Manual... - Page 36 Appendix 176.4kHz, 192kHz UR44C Operation Manual...
-
Page 37: Technical Specifications
+16 dBu Output Impedance 75 Ω PHONES 1/2 Maximum Output Level 100 mW+100 mW, 40 Ω Specification USB 3.0, 32-bit, 44.1 kHz/48 kHz/88.2 kHz/96 kHz/176.4 kHz/192 kHz XLR INPUT Polarity 1: Ground 2: Hot (+) 3: Cold (-) UR44C Operation Manual... -
Page 38: General Specifications
• CUBASE AI DOWNLOAD INFORMATION • ESSENTIAL PRODUCT LICENCE INFORMATION The contents of this manual apply to the latest specifications as of the publishing date. To obtain the latest manual, access the Steinberg website then download the manual file. UR44C Operation Manual... -
Page 39: Uninstalling Tools For Ur-C
Double-click the following file in the Start the computer and log on to the extracted folder. Administrator account. • Uninstall Yamaha Steinberg USB Driver Exit any open applications and close all open • Uninstall Steinberg UR-C Applications windows. • Uninstall Basic FX Suite Open the window for the uninstall operation Click [Run] when the “Welcome to the...