Miele DA 6296 W Operating And Installation Instructions
Hide thumbs
Also See for DA 6296 W:
- Operating and installation instructions (48 pages) ,
- Operating and installation instructions (52 pages) ,
- Operating and installation instructions (52 pages)
Table of Contents

Related Manuals for Miele DA 6296 W


Summary of Contents for Miele DA 6296 W
- Page 1 Operating and Installation Instructions Ventilation hood To prevent accidents and damage to the appliance, you must read these instructions before installing the appliance and using it for the first time. en-US M.-Nr. 09 968 440...
-
Page 2: Table Of Contents
Contents IMPORTANT SAFETY INSTRUCTIONS..............4 Caring for the environment ................. 13 Description of functions ..................14 Con@ctivity 2.0 function ..................15 Guide to the appliance..................16 Operation (Automatic mode)................18 Cooking with Con@ctivity 2.0 (Automatic mode)........... 18 Temporarily exiting Automatic mode ..............20 Resuming Automatic mode ................... - Page 3 Contents Installation Instructions ..................31 Disassembly......................31 Installation parts..................... 32 Appliance dimensions.................... 34 Distance between cooktop and ventilation hood (S) ..........35 Installation recommendations................37 Drilling diagram for wall mounting ................. 37 Plywood backing ....................38 To install a plywood backing ................. 38 Exhaust duct......................
-
Page 4: Important Safety Instructions
IMPORTANT SAFETY INSTRUCTIONS READ AND SAVE THESE INSTRUCTIONS This appliance complies with current safety requirements. Improper use of the appliance can lead to personal injury and material damage. Read all instructions before installing or using the appliance for the first time. Only use the appliance for its intended purpose. Keep these operating instructions in a safe place and pass them on to any future user. - Page 5 Installation, repair and maintenance work should be performed by a Miele authorized service technician in accordance with national and local safety regulations and the provided installation instructions. Contact Miele’s Technical Service Department for examination, repair or adjustment.
- Page 6 IMPORTANT SAFETY INSTRUCTIONS Be certain your appliance is properly installed and grounded by a qualified technician. To guarantee the electrical safety of this appliance, continuity must exist between the appliance and an effective grounding system. It is imperative that this basic safety requirement be met.
- Page 7 IMPORTANT SAFETY INSTRUCTIONS Defective components should be replaced by Miele original parts only. Only with these parts can the manufacturer guarantee the safety of the appliance. If the power cord is damaged, it must only be replaced by a qualified service technician.
- Page 8 IMPORTANT SAFETY INSTRUCTIONS WARNING: TO REDUCE THE RISK OF INJURY TO PERSONS IN THE EVENT OF A COOKTOP GREASE FIRE, OBSERVE THE FOLLOWING*: – a) SMOTHER FLAMES with a close fitting lid, cookie sheet, or metal tray then turn off the burner. BE CAREFUL TO PREVENT BURNS.
- Page 9 IMPORTANT SAFETY INSTRUCTIONS Overheated oils and fats can ignite and set the ventilation hood on fire. When cooking with oils or fats, do not leave pots, pans or fryers unattended. Never leave an electric grill unattended when grilling. Fat and debris deposits impair the proper functioning of the ventilation hood.
- Page 10 IMPORTANT SAFETY INSTRUCTIONS Proper installation WARNING: TO REDUCE THE RISK OF FIRE, ELECTRIC SHOCK, OR INJURY TO PERSONS, OBSERVE THE FOLLOWING: – a) Installation work and electrical wiring must be done by qualified person(s) in accordance with all applicable codes and standards, including fire-rated construction.
- Page 11 When installing the exhaust duct, only use pipes or tubes made of non-flammable material. These can be obtained from your Miele dealer or from Miele Technical Service. Exhaust air should not be vented into a chimney or vent flue which is otherwise in use and should not be channeled into ducting which ventilates rooms with fuel-burning installations.
- Page 12 The steam can reach the electrical components and cause a short circuit. Accessories Use only genuine original Miele parts. If parts or accessories from other manufacturers are used, the warranty will become void. FCC Declaration of Conformity These devices comply with FCC Rules Part 15. This equipment...
-
Page 13: Caring For The Environment
Caring for the environment Disposal of the packing Disposal of your old appliance material Do not dispose of this appliance with your household waste. The cardboard box and packing materials protect the appliance during Old appliances may contain materials shipping. They have been designed to that can be recycled. -
Page 14: Description Of Functions
Description of functions The following functions are available on Recirculation mode your ventilation hood, depending on the The recirculation mode requires a model: recirculation kit and OdorFree Charcoal Filter (available as optional accessories, Vented mode see "Technical Data" for more information) The air is drawn in and cleaned by the grease filters and directed outside. -
Page 15: Con@Ctivity 2.0 Function
After a brief delay, operational status of a Miele cooktop. the ventilation hood fan also comes – During cooking, the hood automatically selects the fan level based on the number of burners in operation and their power levels. -
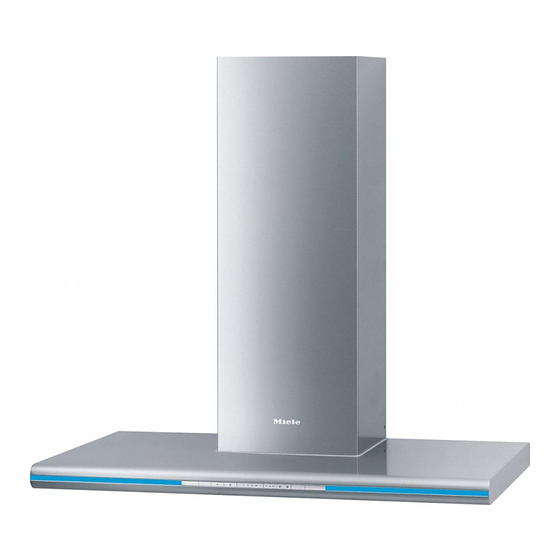
Page 16: Guide To The Appliance
Guide to the appliance... - Page 17 Guide to the appliance a Chimney extension b Chimney c Canopy d Control panel e Grease filters f Recirculation vent (only for recirculation mode) g Glass edge lighting h LED cooktop lighting i OdorFree Charcoal Filter optional accessory for recirculation mode j On/Off button for glass edge lighting k Button for cooktop lighting l On/Off button for fan...
-
Page 18: Operation (Automatic Mode)
Operation (Automatic mode) When Con@ctivity 2.0 is active, the Reaction time hood always operates in Automatic Changing the power setting on the mode (see "Activating Con@ctivity cooktop does not lead to an immediate 2.0"). increase or decrease in cooking vapors. See "Cooking without Con@ctivity 2.0"... - Page 19 Operation (Automatic mode) Cooking process Turning off If, for example, you switch on a Turn off all burners. burner at the highest power setting to Over the next few minutes, the heat cookware in preparation for ventilation hood fan setting will searing and then reduce the power decrease one level at a time until the level after approx.
-
Page 20: Temporarily Exiting Automatic Mode
Operation (Automatic mode) Temporarily exiting Automatic Resuming Automatic mode mode The ventilation hood resumes Automatic mode: To temporarily exit the Automatic mode when cooking: If the ventilation hood has not been used for a period of approx. 5 Manually select a different fan level, minutes after the manual selection of a fan level, or ... -
Page 21: Operation (Manual Mode)
Operation (Manual mode) Cooking without Con@ctivity Selecting the Delayed shut 2.0 (Manual mode) down time The hood can be operated manually if: It is a good idea to let the fan run for a few more minutes after cooking in order –... -
Page 22: Turning Cooktop Lighting On/Off
Operation (Manual mode) Turning cooktop lighting If power management is switched on, the 1 and IS indicators will be On/Off continuously lit. The cooktop lighting can be turned on If it is turned off, 1 and IS will flash. and off separately from the fan. ... -
Page 23: Operation (Automatic And Manual Modes)
Operation (Automatic and Manual modes) Glass edge lighting 6. Slow color change Similar to 5, but the lighting cycles Turning on the glass edge lighting through the colors in 15-minute The glass edge lighting can be turned intervals. Initially, the Color change on and off separately from the fan and button flashes slowly. -
Page 24: Filter Saturation Indicator
Operation (Automatic and Manual modes) Filter saturation indicator Fan power level indicators 1 to IS show the current time setting: The number of hours the hood has Indicator 1........ 20 hours been in operation is stored in appliance memory. Indicator 2........ 30 hours The filter saturation indicators show Indicator 3........ -
Page 25: Activating/Changing The Grease Filter Saturation Counter
Operation (Automatic and Manual modes) Activating/changing the grease filter Checking the elapsed operating time saturation counter Before the set operating time interval The OdorFree Charcoal Filter is required has been reached, you can check what for recirculation mode. percentage of the time has elapsed. The filter saturation counter for the ... -
Page 26: Cleaning And Care
Stainless steel surfaces can also be cleaned using a non-abrasive Before cleaning or servicing the stainless steel cleaner, available from hood, disconnect it from the power Miele. supply, see "IMPORTANT SAFETY INSTRUCTIONS". To prevent the surfaces from quickly becoming dirty again, we... -
Page 27: Special Instructions For The Glass Edge
Cleaning and care Special instructions for control Grease filters buttons The reusable metal grease filters in the appliance remove the solid particles Do not leave dirt and debris on the contained in kitchen vapors (fat, dust, buttons for any length of time. etc.), thereby preventing the ventilation Otherwise they may become hood from becoming dirty. - Page 28 Use a common household dishwasher detergent. Select a program with a wash temperature between 122°F (50°C) and 149°F (65°C). In a Miele To remove a grease filter, release the dishwasher use the "Normal" locking clip. Then, open the filter to a program.
-
Page 29: Odorfree Charcoal Filter
OdorFree Charcoal Filters are available from your Miele dealer or from Miele. See "Technical data" for the type and reference number. If the filters have been installed... -
Page 30: Resetting The Filter Saturation Counter For The Filter
Cleaning and care When to change the OdorFree Charcoal Filter Always replace the OdorFree Charcoal Filter whenever it no longer absorbs kitchen odors effectively. Replace the filter at least once every 6 months. The OdorFree Charcoal Filter saturation counter will light up to remind you to change the charcoal filter regularly. -
Page 31: Installation
Installation Before installation Disassembly If the device ever needs to be Before installing the appliance, disassembled, follow the installation read all of the information contained sheet instructions in reverse order. A in this chapter and also in the lever is provided to assist with the "IMPORTANT SAFETY removal of the chimney. -
Page 32: Installation Parts
Installation Installation parts... - Page 33 Installation a 3 protective installation sheets for use when installing the chimney b 1 exhaust connector 6 screws 1/2" x 2 3/8" (5 x 60 mm) for an exhaust duct 6" (150 mm). 6 plugs 5/16" x 2" (8 x 50 mm) c 1 reducer for attaching to the wall.
-
Page 34: Appliance Dimensions
Installation Appliance dimensions The drawing is not to scale. -
Page 35: Distance Between Cooktop And Ventilation Hood (S)
Installation a Extraction b Recirculation c Air vent positioned at top for recirculation de Mounting area (only d is required for recirculation ventilation hoods). Wall and ceiling area for exhaust duct opening and for wall socket installation. Only the wall socket installation is required for recirculation hoods. Vent collar ... - Page 36 Installation Minimum distance S Cooking appliance Miele Non-Miele appliance appliance Electric/Induction cooktop 24" (610 mm) Electric grill, deep fat fryer (electric) 26" (660 mm) Multi-burner gas cooktop 26" (660 mm) 30" (760 mm) ≤ 43,000 BTU/hr (12.6 W), no burner > 15,000 BTU/hr (4.5 kW).
-
Page 37: Installation Recommendations
Installation Installation recommendations Drilling diagram for wall mounting – We also recommend a distance of at least 25 1/2" (650 mm) above electric When drilling, please follow the cooktops to provide more workspace directions contained on the and easier cooking under the hood. accompanying installation sheet. -
Page 38: Plywood Backing
Installation Plywood backing Make a cutting line 3" (76 mm) above and 3" (76 mm) below the outline of The majority of the weight of the the retaining plate. installed ventilation system will be Find the studs to the left and right supported by the lower retaining of the mounting location by tapping plate. -
Page 39: Exhaust Duct
Exhaust duct – Make sure that all connections are WARNING: Danger of toxic fumes. secure and airtight. Gas cooking appliances release carbon monoxide that can be Remember that any constriction of harmful or fatal if inhaled. the airflow will reduce extraction To reduce the risk of fire and to performance and increase operating properly exhaust air, the exhaust... -
Page 40: Condensate Trap
Exhaust duct Condensate trap Reducing Collar (optional accessory) If you would like to reduce the In addition to insulating the exhaust environmental impact of your ventilation duct, we recommend installing a system by limiting the CFM output the condensate trap to collect and Reducing Collar can be installed. -
Page 41: Electrical Connection
CSA C22.1-12, or call Miele’s Technical Service Canadian Electrical Code, Part I. Department. WARNING: THIS APPLIANCE MUST BE GROUNDED... -
Page 42: Activating Con@Ctivity 2.0
Activating Con@ctivity 2.0 Activating Con@ctivity 2.0 The hood begins searching for a radio connection. Indicator 2 is continuously To use the Con@ctivity 2.0 function, the lit, and the indicator 3 flashes. radio link between the cooktop and the As this is happening, begin activation hood must be activated. -
Page 43: Deactivating Con@Ctivity 2.0
Activating Con@ctivity 2.0 If Con@ctivity 2.0 has been activated, the indicators for levels 2 and 3 will be constantly lit. If Con@ctivity 2.0 has not been activated, the indicators for levels 2 and 3 will flash simultaneously. To exit the check, press the Delayed shut down button 515. -
Page 44: Service And Warranty
Service and warranty For faults that you cannot resolve on your own, please contact your Miele dealer or Miele Technical Service. The telephone number for the Technical Service Department is listed at the back of these instructions. When contacting Miele, please state the model and serial number of your ventilation hood. -
Page 45: Technical Data
Technical data Fan motor 350 W LED cooktop lighting 3 x 3 W Glass edge lighting 10 W Total connected load 369 W Voltage, frequency 120 V AC, 60 Hz Fuse rating 15 A Power cord length 6.5 ft (2 m) Weight 59 lbs (27 kg) Optional accessories for recirculation mode:... - Page 47 Technical Service. U.S.A. Canada Miele, Inc. Importer Miele Limited National Headquarters 9 Independence Way Headquarters and Miele Centre Princeton, NJ 08540 161 Four Valley Drive 800-843-7231 Phone: Vaughan, ON L4K 4V8 609-419-9898 www.miele.ca 609-419-4298...
- Page 48 DA 6296 W en-US M.-Nr. 09 968 440 / 00...