Samsung WAM750 User Manual
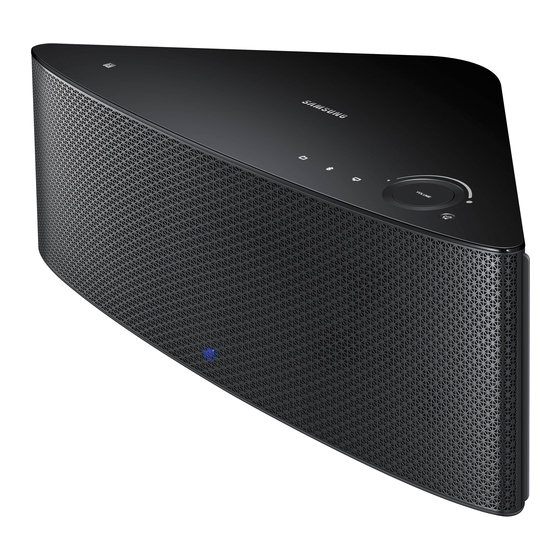
Multiroom m7
Hide thumbs
Also See for WAM750:
- User manual (85 pages) ,
- Brochure & specs (3 pages) ,
- Getting started (2 pages)

Related Manuals for Samsung WAM750


Summary of Contents for Samsung WAM750
- Page 1 WAM750/WAM751 Wireless Audio - Multiroom User Manual imagine the possibilities Thank you for purchasing this Samsung product. To receive more complete service, please register your product at www.samsung.com/register...
-
Page 2: Table Of Contents
Contents UnderstAnding YoUr M7 Before you begin ..................7 Communication Basics ....................7 Basic Connection ..................7 How you can enjoy your M7 ................ 8 getting stArted Top Panel ....................9 Rear Panel ....................10 Accessories ....................11 Available Accessories (Not Included) ............11 Connecting the Power Cable .............. - Page 3 ConneCtions Connecting M7 following the App guide ............ 18 Connecting with a HUB (Not Included) ............18 Connecting the M7(s) to Your Network with a HUB (Not Included) ......18 Connecting without a HUB (Not Included) ..........21 Connecting the M7 to Your Network with a LAN Cable (For a Single M7) ....21 Connecting the M7 to Your Network via the WPS Method (For a Single M7) .....23 Connecting the M7 to Your Network via the Wi-Fi Setup Method (For a Single M7) - For Android ......................25...
- Page 4 FUnCtions Installing the Samsung Multiroom App ............48 Accessing the Samsung Multiroom App ............ 48 Using the Samsung Multiroom App ............49 Renaming a connected M7 ..................49 Switching the input source ..................49 Changing the sort order of listed M7s ................50 Grouping M7s ......................51...
- Page 5 Using the Settings menu ................65 Guide ........................65 Service ........................66 Speaker Settings ......................67 Clock ........................70 Support ........................71 Open source licenses ....................72 App Version......................72 Reset your product ..................73 Resetting the M7 ......................73 Resetting the HUB (Not Included) ................73 Appendix Compatibility ....................74 Multiroom Music Experience (Group Play) ..........
- Page 6 sAFetY inForMAtion Regulatory Compliance Statements ............80 Warning ........................80 CAUTION .........................80 CAUTION .........................80 Wiring the Main Power Supply Plug (UK Only) ............81 Important Safety Instructions ..................81 Safety precautions ..................82 Power Supply Precautions ..................82 Installation Precautions .....................83 Usage Precautions ....................83 Cleaning Precautions ....................84 Additional Information ................
-
Page 7: Understanding Your M7
Before you begin Communication Basics ❚ Internet Wireless Router Samsung Link Requirements: Wireless Router, Smart Device The wireless router should be connected to the Internet. The smart device should be connected to the router via a Wi-Fi connection. Basic Connection... -
Page 8: How You Can Enjoy Your M7
• Play music from your phone, PC, or smart devices via Bluetooth. • Use the TV SoundConnect function to play sound from your Samsung TV. • You can configure multiple M7s in a Multi-room set-up with Internet radio, music services, and Device. -
Page 9: Getting Started
Getting Started top panel Connect your NFC compatible device via Bluetooth to the M7 using the simple NFC NFC Tag tagging procedure. (Android only) Press this button to listen to an Internet radio station. Each time you press this Internet Radio button, the M7 switches to the next default station, cycling through the 3 default Preset button stations. -
Page 10: Rear Panel
rear panel SPK ADD SPK ADD WPS / Wi-Fi SETUP AUX IN WPS / SERVICE Wi-Fi SETUP ETHERNET POWER AUX IN SERVICE SPK ADD WPS / Wi-Fi SETUP AUX IN SERVICE ETHERNET ETHERNET POWER POWER SPK ADD button Press this button to add an M7 to your network. (Speaker Add) WPS/Wi-Fi SETUP Press this button to connect your M7 to your network using WPS or Wi-Fi setup. -
Page 11: Accessories
Wall Mount notes 9 Information on available accessories and their release dates can be found on the Samsung website. 9 When purchasing an accessory, check whether it is compatible with the M7. 9 Use authentic Samsung accessories. Damage and problems caused by unauthorized accessories can void your warranty. -
Page 12: Connecting The Power Cable
Connecting the power Cable Remove the rear cover. SPK ADD WPS / Wi-Fi SETUP AUX IN SERVICE ETHERNET POWER SPK ADD WPS / Wi-Fi SETUP AUX IN Insert the power cable through the rear cover hole SERVICE into the M7 power port. ETHERNET POWER Close the rear cover. -
Page 13: Connecting The Cover-Stand
Connecting the Cover-stand Before attaching the Cover-Stand, remove the rear cover. Insert the power cable through the Cover-Stand hole into the M7 power port. The inside of the Cover-Stand has two sides. One side (A) has four tabs - two large tabs and two small tabs. -
Page 14: Separating The Cover-Stand
separating the cover-stand ❚ Locate the Cover-Stand's handle. See the diagram on the right. Push the Cover-Stand's handle while applying force to the Cover-Stand in the direction of the arrow. Important : Push the Cover-Stand straight ahead, parallel to the surface of the M7. You may need to use some force. -
Page 15: Installing On A Wall
9 Check the strength of the wall before you install the Wall Mount Bracket. If the strength is insufficient, make sure to reinforce the wall before installing the Wall Mount Bracket and the M7 on the wall. 9 Samsung Electronics is not liable for any damage to the product due to the product being installed inappropriately. -
Page 16: Attaching The Toroidal Ferrite Core To The Power Cord Of The M7
SPK ADD WPS / Wi-Fi SETUP Attaching the toroidal ferrite core to the power cord of the M7 AUX IN SERVICE Attaching the Toroidal ferrite core to the power cord of the M7 helps prevent RF interference from radio signals. ETHERNET POWER Pull the fixing tab of the Toroidal ferrite core to open it. -
Page 17: Sleep Mode
sleep Mode in Wi-Fi / Bluetooth / tV soundConnect mode - The M7 switches to the sleep mode if there is no music playback or no button operation (either from the top panel or from the app) for 15 minutes. in AUx mode - The M7 switches to the sleep mode if there is no button operation (either from the top panel or from the app) for 8 hours. -
Page 18: Connecting M7 Following The App Guide
Connecting M7 following the App guide Connect your smart device to your Wi-Fi network. Download the samsung Multiroom app from Google Play or the App Store. On your Smart device, select the samsung Multiroom app. Setup starts. Follow the directions on your smart device’s screen. - Page 19 Attach the HUB's power cord to the power port on the rear of the HUB, and then plug the power cord into an electrical outlet. The power ( ) and the HUB ( ) indicators on the HUB's front turn on. When the pairing indicator ( ) begins to flash, plug the M7(s) into an outlet.
- Page 20 Connect your smart device to your Wi-Fi network. (The HUB and the smart device should be connected to the same router.) Download the samsung Multiroom app from Google Play or the App Store. On your smart device, select the samsung Multiroom app. Setup starts.
-
Page 21: Connecting Without A Hub (Not Included)
Plug the M7 into an electrical outlet. The LED pairing indicator starts to blink. Connect your smart device to your Wi-Fi network. Download the samsung Multiroom app from Google Play or the App Store. On your Smart device, select the samsung Multiroom app. Setup starts. - Page 22 In the app, select "i don't have a Hub", and then press next. On the next screen, select M3/M5/M7, and then press next. On the next screen, select Wired, and then press next. Unplug the M7's power cable, and then plug it in again. note 9 After pairing is complete, the M7 naming screen appears.
-
Page 23: Connecting The M7 To Your Network Via The Wps Method (For A Single M7)
Plug the M7 into an electrical outlet. The LED pairing indicator starts to blink. Connect your smart device to your Wi-Fi network. Download the samsung Multiroom app from Google Play or the App Store. On your smart device, select the samsung Multiroom app. Setup starts. - Page 24 In the app, select "i don't have a Hub", and then press next. On the next screen, select M3/M5/M7, and then press next. On the next screen, select Wps, and then press next. Wps/Wi-Fi setUp Press the button on your wireless router, and then press the button on the back of the M7.
-
Page 25: Connecting The M7 To Your Network Via The Wi-Fi Setup Method (For A Single M7) - For Android
Connect your smart device to your Wi-Fi network. Download the samsung Multiroom app from Google Play. On your smart device, select the samsung Multiroom app. Setup starts. In the app, select "i don't have a Hub", and then press next. On the next screen, select M3/M5/M7, and then press next. - Page 26 The indicator LED stops blinking and turns solid blue. You should also hear a notification sound. Press next. The smart device lists available networks and devices. Select [samsung] M7. This is the default M7 name. The M7 connects to your smart device. (The default security PIN is 1234567890.) Press next.
- Page 27 If you have a password for your network, the Security screen appears on your smart device. Use the keyboard that appears to enter your password. When done, press done. notes 9 The AP selection screen may appear again depending on the mobile phone you are using. If this occurs, select the AP you are using again.
-
Page 28: Connecting The M7 To Your Network Via The Wi-Fi Setup Method (For A Single M7) - For Ios
Connect your smart device to your Wi-Fi network. Download the samsung Multiroom app from the App Store. On your smart device, select the samsung Multiroom app. Setup starts. In the app, select "i don't have a Hub", and then press next. On the next screen, select M3/M5/M7, and then press next. - Page 29 Wps/Wi-Fi setUp Press and hold the button on the back of your M7 for 5 seconds. The indicator LED stops blinking and turns solid blue. You should also hear a notification sound. Press next. 4444...
- Page 30 Press the smart device's Home button to leave app and select settings. Choose the M7's Wi-Fi point. Select [samsung] M7. This is the default M7's name. The M7 connects to your smart device. (The default security PIN is 1234567890.) Use the keyboard that appears to enter your password.
- Page 31 Press the next on the app screen. The smart device lists available networks. Select your network from the list. If you have a password for your network, the Security screen appears on your smart device. Use the keyboard that appears to enter your password. When done, press Connect.
- Page 32 Press the smart device's Home button to leave the app, and then select settings. Choose the M7's Wi-Fi point. On your smart device, select the samsung Multiroom app. notes 9 Connecting to a secure wireless network requires the correct password.
-
Page 33: Connecting With Tv Soundconnect Function
Connecting with tV soundConnect function This section explains how to connect the M7 to Bluetooth compatible SAMSUNG TVs. Connect tV soundConnect Plug the M7 into an outlet, and then press the button on its top panel. Set Add new device to on in the TV's tV soundConnect Settings menu. (Refer to the TV's user manual for details.) -
Page 34: Disconnecting Tv Soundconnect
9 Before activating this function, be sure to activate the Samsung TV's SoundConnect or SoundShare mode. 9 The SoundConnect feature is available on some Samsung TVs released since 2012. Check whether your TV supports the SoundShare or SoundConnect function. (For further details, refer to the TV's user's manual.) 9 Instability in the network environment may cause connection to be lost or sound to stutter. -
Page 35: Connecting The M7 To Bluetooth Devices
Plug the M7 into an electrical outlet, and then press the button on its top panel. Enable your smart device's Bluetooth function, and then select scan. Select the [samsung]AllConnect Select the desired track to play from your smart device's music list. The M7 plays the track you selected. notes... -
Page 36: Disconnecting Bluetooth
(For more information, please refer to the smart device's user manual.) You can also disconnect the Bluetooth connection in the App. On your smart device, select the samsung Multiroom app. Press the source button. Switch to another mode and the Bluetooth connection will terminate. -
Page 37: Connecting With Nfc Function - For Android
Connecting with nFC function - For Android You can connect the M7 to Bluetooth devices easily by gently touch the smart device to the mark on the top panel of the M7. Connect your NFC compatible device to enjoy music with high quality stereo sound, all without wires. -
Page 38: Connecting To The Aux In
Connecting to the AUx in AUx in This section explains how to connect the M7 to an audio device using the terminal. SPK ADD WPS / Wi-Fi SETUP SPK ADD WPS / Wi-Fi SETUP AUX IN AUX IN SERVICE SERVICE ETHERNET POWER ETHERNET... -
Page 39: Disconnecting Aux Connection
To terminate the AUX connection, disconnect the audio cable from the smart device. You can also disconnect the AUX connection in the App. On your Smart device, select the samsung Multiroom app. Press the source button. Switch to another mode and the AUX connection terminates. -
Page 40: Adding An M7
Adding an M7 • Before adding an M7, unplug all M7s that are connected to the samsung Multiroom app. • If you add a new HUB and an extra M7 and connect them to the same wireless router that an existing M7 is connected to, the existing M7 will disappear from the samsung Multiroom app. - Page 41 Disconnect the speaker’s power cable, and then connect it again. With Hub - existing speaker Press the button. 4444...
- Page 42 Select the existing speaker, and then press M3/M5/M7. spK Add Press the button on the back of the M7. 4444...
- Page 43 Without Hub Press the button. Select the single speaker setup, and then press M3/M5/M7. Select the desired connection method. 4444...
-
Page 44: Adding An Extra M7 To A Hub That Is Connected To An M7
When the M7 connects to the HUB, the M7 beeps or sounds, and the M7's LED indicator stops flashing. On your smart device, select the samsung Multiroom app. Setup starts. note 9 After pairing is complete, the M7 naming screen appears. Edit the name or enter a name of your own choosing. -
Page 45: Adding Another M7 And Hub To A Single M7 In Use
M7. The M7's blue LED pairing indicator starts to flash. Wait until the pairing indicator on the M7 stops flashing. When the indicator stops flashing, pairing is complete. The M7 may also beep. On your smart device, select the samsung Multiroom app. Setup starts. 4444... - Page 46 M7. The old M7's blue LED pairing indicator starts to flash. Wait until the pairing indicator on the M7 stops flashing. When the indicator stops flashing, pairing is complete. The M7 may also beep. On your smart device, select the samsung Multiroom app. Setup starts. 4444...
-
Page 47: Adding A Hub
9 If your smart device is not connected to the wireless router with a Wi-Fi connection, the M7 will not appear on the Samsung Multiroom app. 9 Place the HUB that is in Repeater mode in an appropriate location between the M7 and the HUB that is connected to the wireless router. -
Page 48: Installing The Samsung Multiroom App
Functions installing the samsung Multiroom App To use the M7, you must download and then install the samsung Multiroom App by accessing the app through Google play or App Store. With the samsung Multiroom App installed, you can play music stored in your smart device, from connected devices and other content providers, and from Internet radio stations through the M7. -
Page 49: Using The Samsung Multiroom App
Using the samsung Multiroom App renaming a connected M7 ❚ You can rename M7s connected to your network. Tap the and then enter the name you want using the keyboard. When finished, select done or save. switching the input source ❚... -
Page 50: Changing The Sort Order Of Listed M7S
Changing the sort order of listed M7s ❚ If you have added multiple M7s, this function is available. (See pages 40~46.) Press here Drag the of the M7 you want to re-order up or down. 4444... -
Page 51: Grouping M7S
grouping M7s ❚ You can group multiple M7s linked to the App and play the same music on all connected M7s in the same group. This function is available only If you have added multiple M7s. (See pages 40~46.) Press here notes 9 This function is available only when M7s are connected to a HUB. -
Page 52: Listening To Surround Sound Using Several Audio Devices
Listening to surround sound Using several Audio devices ❚ Press the surround button. Press and hold any speaker and then drag it to your desired location. 4444... - Page 53 Test and adjust speaker volume and press done. notes 9 The Surround Sound mode will be updated soon. 9 If the audio source is in 2-channel format, sound will be produced only through the speakers that correspond to Front Left and Front Right. 9 If the network connection is not stable, Surround Sound Mode may be cancelled automatically.
-
Page 54: Playing A Song
playing a song ❚ Press the Select My phone. Select the desired song from the list that appears. The song plays. 4444... -
Page 55: Sorting Songs
Customize your own personal sound preferences using the equalizer settings. • Bass : Adjusts lower-pitched sounds. • treble : Adjusts higher-pitched sounds. • Balance : Emphasizes sound from the left or right speaker. • drC (Dynamic Range Compressor) : Set to on to activate noise reduction for optimized clean sound. -
Page 56: Creating A Playlist
Creating a playlist ❚ Press the button. Select the desired tracks. When done, select Add to playlists, and then select Create playlist. 4444... - Page 57 Enter a name for the playlist, and then select done or save. The track is added to the Playlist folder. Select the desired Playlist. Select the desired song from the list that appears. The song plays. 4444...
-
Page 58: Listening To A Radio Station
Listening to a radio station ❚ Select tunein. The tunein screen appears with the following tabs: • Favorites : Lists 3 default radio stations. • Browse : Lists all supported Internet radio stations. • search : Lets your search for a desired Internet radio station using keypad input. Select the desired radio station from the displayed list. - Page 59 Select a station from the radio play list to display the selected radio station's front page. Touch ♥ , and then select save. The selected radio station is added to the presets list. 4444...
-
Page 60: Setting The Default Radio Stations In Speaker Preset
setting the default radio stations in speaker preset ❚ internet radio preset Each time you press the on the M7's top panel, the M7 switches to the next default station, cycling through the 3 default stations. To replace the randomly selected default Internet radio stations with your own Internet radio stations, follow these steps: Press the edit button to open the edit box. -
Page 61: Playing Music From Content Providers
playing music from content providers ❚ Select services. You can play music from content providers. notes 9 Depending on your region or manufacturer, supported content services may differ. 9 You may not subscribe to a service using your smart device. To use a for-pay service, first subscribe to the service through your computer. -
Page 62: Playing Media Content Saved In A Pc
Media Content saved in a pC samsung Link ❚ Install the samsung Link program for easier playback of music stored in your PC through M7. Visit http://link.samsung.com and download the samsung Link application and finish installing it. Visit http://link.samsung.com and login with your Samsung account. -
Page 63: Wireless Audio - Multiroom For Desktop
❚ To play iTunes system and shared PC music files through M7, install the Wireless Audio - Multiroom for desktop program. Visit www.samsung.com to download the Wireless Audio - Multiroom for desktop program and install it. notes 9 Note that the PC containing the shared folders and your M7 must be connected to the same wireless router. - Page 64 Press here notes 9 After adding or changing contents of shared folders, make sure to press the button. button, the files shared by a computer device may not displayed in the Samsung If you don't press the Multiroom app. 4444...
-
Page 65: Using The Settings Menu
Using the settings menu Press the button. guide ❚ App tutorial Select App tutorial to learn how to use the app. 4444... -
Page 66: Service
tips • disable : The Help text is not displayed as you navigate through the screens. • enable : The app displays Help text as you navigate through the screens. service ❚ Displays a list of available services. notes 9 Depending on your region or manufacturer, supported content services may differ. 9 You may not subscribe to a service using your smart device. -
Page 67: Speaker Settings
tunein radio Gives you access to tunein radio. speaker settings ❚ Add speaker Lets you can add one or more M7s to the App and enjoy the music stored in your smart device from one or more connected M7s. 4444... - Page 68 Front Led • off : Turns off the M7's Front Led indicators. • on : Turns on the M7's Front Led indicators. sound Feedback • off : Turns off the sound Feedback. • on : Turns on the sound Feedback. 4444...
- Page 69 software Auto Update Shows the M7's current software version, and lets you turn auto update on or off. • on : When on, automatically updates the software when new firmware is released. • off : Turns off the auto update function. Software version of M7 notes...
-
Page 70: Clock
Clock ❚ Alarm Lets you set the Alarm. sleep timer Lets you set the sleep timer. 4444... -
Page 71: Support
❚ device id Lets you check the device id. Contact samsung Provides a link to the Samsung website. 4444... -
Page 72: Open Source Licenses
open source licenses ❚ Lets you view the open source licenses. App Version ❚ Lets you view the App Version. 4444... -
Page 73: Reset Your Product
reset your product resetting the M7 ❚ internet radio preset Mute Press and hold both the buttons for more than 5 seconds to reset the M7. The Touch button on the M7 will blink twice. internet radio preset Press and hold the button for more than 5 seconds to reboot the M7. -
Page 74: Appendix
Appendix Compatibility M7 / M5 / M3 Link Mate Soundbar Samsung Multiroom Smart Devices (Android or iOS) Home Entertainment System Blu-ray Disc Player Multiroom Music experience (group play) M7 / M5 / M3 (Bed Room 2) M7 / M5 / M3... -
Page 75: Troubleshooting
• Update your TV with the latest firmware. • Contact the Samsung Call Center. • Press and hold the TV SoundConnect button for more than 5 seconds to reset TV SoundConnect and connect a new TV. - Page 76 Symptom Check Remedy • Is the HUB plugged in? • Plug in the HUB. HUB doesn't work properly • Is the LAN cable connected to • Connect the LAN cable to the ETHERNET SWITCH the wireless router and the HUB on the back properly? of the HUB and to your wireless...
-
Page 77: Open Source License Notice
9 If the problem persists, consult the service center for troubleshooting. open source License notice • For further information on Open Sources used in this product, please visit the website: http:// opensource.samsung.com Licences • The Spotify Software is subject to third party licenses found here : www.spotify.com/connect/third-party-licenses. -
Page 78: Specifications
specifications Weight 3.9 Kg Dimensions 402 (W) X 194 (D) X 137 (H) mm General Operating Temperature Range +5°C to +35°C Operating Humidity Range 10 % to 75 % Input sensitivity / Impedance 450mV / KOHM (AUX) Amplifier S/N ratio (analog input) 65dB Separation(1KHz) 65dB... - Page 79 Directive 1999/5/EC. The original Declaration of Conformity may be found at http://www.samsung.com, go to Support > Search Product Support and enter the model name. This equipment may be operated in all EU countries. This equipment may only be used indoors.
-
Page 80: Safety Information
Safety Information regulatory Compliance statements CAUTION RISK OF ELECTRIC SHOCK DO NOT OPEN CAUTION: TO REDUCE THE RISK OF The lighting flash and arrowhead The explanation point within the within the triangle is a warning sign ELECTRIC SHOCK, DO NOT REMOVE triangle is a warning sign alerting alerting you to dangerous voltage THE COVER (OR BACK). -
Page 81: Wiring The Main Power Supply Plug (Uk Only)
Wiring the Main power supply plug (UK only) ❚ iMportAnt notiCe The mains lead on this equipment is supplied with a moulded plug incorporating a fuse. The value of the fuse is indicated on the pin face of the plug and if it requires replacing, a fuse approved to BS1362 of the same rating must be used. -
Page 82: Safety Precautions
Do not install near any heat sources such as radiators, heat registers, stoves, or other apparatus (including AV receivers) that produce heat. Do not defeat the safety purpose of the polarized or grounding-type plug. A polarized plug has two blades with one wider than the other. A grounding type plug has two blades and a third grounding prong. -
Page 83: Installation Precautions
• Installing the product in environments with high heat or humidity, dust, or extreme cold, can lead to quality problems or cause the product to malfunction. Before you install the product in an environment that is outside the norm, please contact a Samsung service center for additional information. -
Page 84: Cleaning Precautions
• If the product emits an abnormal sound or a burnt smell or smokes, unplug the power-cord immediately and contact a Samsung service center. • If you smell gas, ventilate the room immediately. Do not touch the power plug of the product. -
Page 85: Compatible Products
© 2014 Samsung Electronics Co.,Ltd. All rights reserved; No part or whole of this user's manual may be reproduced or copied without the prior written permission of Samsung Electronics Co.,Ltd. • An administration fee may be charged if either a. an engineer is called out at your request and there is no defect in the product (i.e. where you have failed to read this user manual) b. - Page 86 UNITED KINGDOM EIRE This Samsung product is warranted for the period of 4. This product is not considered to be defective in twelve (12) months from the original date of materials nor workmanship by reason that it purchase, against defective materials and requires adaptation in order to conform to workmanship.
- Page 87 Contact sAMsUng WorLd Wide If you have any questions or comments relating to Samsung products, please contact the SAMSUNG customer care center. Area Contact Center Web Site www.samsung.com/ca/support (English) CANADA 1-800-SAMSUNG(726-7864) www.samsung.com/ca_fr/support (French) North America U.S.A - Consumer 1-800-SAMSUNG(726-7864) www.samsung.com/us/support...
- Page 88 (*0,20 €/Anruf aus dem dt. Festnetz, aus dem Mobilfunk max. 0,60 €/Anruf) CYPRUS 8009 4000 only from landline, toll free 80111-SAMSUNG (80111 726 7864) only from www.samsung.com/gr/support GREECE land line (+30) 210 6897691 from mobile and land line 0680SAMSUNG (0680-726-786) HUNGARY http://www.samsung.com/hu/support...
- Page 89 Area Contact Center Web Site AUSTRALIA 1300 362 603 www.samsung.com/au/support NEW ZEALAND 0800 SAMSUNG (0800 726 786) www.samsung.com/nz/support CHINA 400-810-5858 www.samsung.com/cn/support www.samsung.com/hk/support (Chinese) HONG KONG (852) 3698 4698 www.samsung.com/hk_en/support (English) 1800 3000 8282 - Toll Free INDIA 1800 266 8282 - Toll Free www.samsung.com/in/support...
- Page 90 Correct disposal of this product (Waste electrical & electronic equipment) (Applicable in the European Union and other European countries with separate collection systems) This marking on the product, accessories or literature indicates that the product and its electronic accessories (e.g. charger, headset, USB cable) should not be disposed of with other household waste at the end of their working life.