Table of Contents
Advertisement
Quick Links
• Initial Setup and Connection Procedures are on pages 11 to 17.
As an ENERGY STAR Partner, Panasonic has determined that this product or
product model meets the ENERGY STAR guidelines for energy efficiency.
Please read these instructions carefully before attempting to connect,
operate, or adjust this product. Please save this manual.
DM2792-K(P01).p65
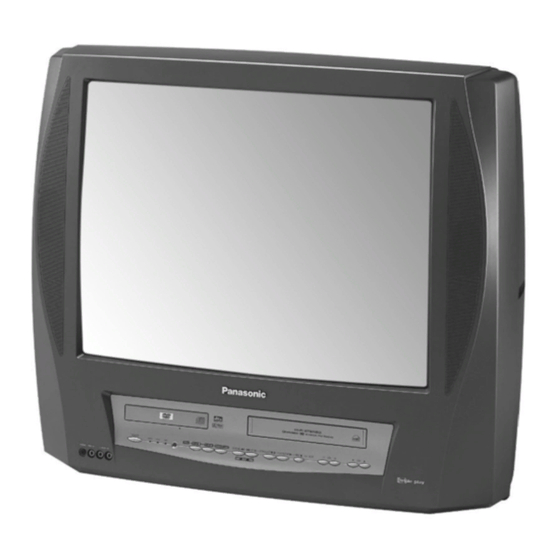
TV / DVD / VCR Combination
Operating Instructions
PV-DM2792-K
Model No.
1
2002/03/08, 16:20
Advertisement
Table of Contents

Related Manuals for Panasonic PV-DM2792-K


Summary of Contents for Panasonic PV-DM2792-K
- Page 1 Model No. • Initial Setup and Connection Procedures are on pages 11 to 17. As an ENERGY STAR Partner, Panasonic has determined that this product or product model meets the ENERGY STAR guidelines for energy efficiency. Please read these instructions carefully before attempting to connect, operate, or adjust this product.
-
Page 2: Tv / Vcr Important Safeguards And Precautions / Safety Precautions
Important Safeguards and Precautions READ AND RETAIN ALL SAFETY AND OUTDOOR ANTENNA INSTALLATION OPERATING INSTRUCTIONS. HEED ALL 1 SAFE ANTENNA AND CABLE CONNECTION WARNINGS IN THE MANUAL AND ON UNIT An outside antenna or cable system must be properly grounded to provide some protection INSTALLATION against built up static charges ANTENNA... - Page 3 Safety Precautions WARNING To prevent fire or shock hazard, do not expose this equipment to rain or moisture. CAUTION To prevent electric shock, match wide blade of plug to wide slot, fully insert. This video recorder, equipped with the HQ (High Quality) System, is compatible with existing VHS equipment.
-
Page 4: Before Using
Date of Purchase marked. Dealer Purchased From Dealer Address 3) Close the cover. Dealer Phone No. PV-DM2792-K Model No. Serial No. Battery replacement caution • Do not mix old and new batteries. • Do not mix alkaline with manganese batteries. -
Page 5: Table Of Contents
Table of Contents Initial Setup Important Safeguards and Precautions / Safety Precautions ..2 - 3 TV / VCR Before Using ..................4 Information (Unit, Cassette, Disc) ..........6 - 7 Location of Controls ..............8 - 11 Connections ................11 - 13 Initial Setup .................. -
Page 6: Information (Unit, Cassette, Disc)
Information (Unit, Cassette, Disc) Head Cleaning Specifications Display Playing older or damaged tapes may eventually Picture Tube: 27 inch measured cause video heads to become clogged. diagonal 100° deflection Head Clog Sensor Picture Tube During playback this V I DEO HEADS MAY NEED CLEAN I NG Video Recording System:4 rotary heads helical screen appears if clogging... - Page 7 Disc formats supported by this unit Disc Handling The unit can play back discs bearing any of the following marks: Handling precautions • Only hold disc by edges as shown. Fingerprints, dirt, and scratches 3” (8 cm) disc / 5” (12 cm) disc can cause skipping and distortion.
-
Page 8: Location Of Controls
Location of Controls Remote Control Buttons EJECT/OPEN/CLOSE See next page. Sets to DVD mode. POWER LIGHT Turn the unit on or off. See next page. TV/VCR DSS/CABLE Sets to TV/VCR mode. Sets the remote to control some basic DDS or Cable box functions. MUTE Mutes the sound instantly. - Page 9 Universal Light Tower ® Illuminated Remote Control LIGHT button: When LIGHT is pressed, (DVD, , DSS/CABLE, CH UP/DOWN, VOL UP/DOWN) buttons will light for 5 seconds for easy button location. If no button is pressed in 5 seconds, the light goes out to conserve the battery. EJECT/OPEN/CLOSE button: When this button is pressed in TV-VCR mode, the tape is ejected.
- Page 10 Location of Controls (continued) Front View of the unit If the disc cannot be removed... First, unplug unit. Then, prepare a rigid wire (e.g. an extended paper clip) and, applying moderate force, insert it straight into the hole at the base of the tray. The tray will eject a little.
-
Page 11: Connections
Rear View of the unit Audio Output Connector (L/R) Pg. 12 VHF/UHF Antenna Input Terminal See below. Optical digital audio output connector VHF/UHF Pg. 13 AUDIO OUT DIGITAL AUDIO OUT AC Power Plug (PCM/BITSTREAM) OPTICAL When plugged into an AC outlet, this unit consumes 3.5 W of electric power in OFF condition. - Page 12 DVD movies that provide full 5.1 channel Dolby Digital soundtracks, as well as from titles with the Dolby © 1992-1997 Dolby Laboratories, Inc. All rights Surround mark. For information on Panasonic or reserved. Technics Dolby Pro Logic Surround Sound Decoders please contact your local dealer.
- Page 13 Unit ➛ ➛ ➛ ➛ ➛ Dolby Digital Decoder ➛ ➛ ➛ ➛ ➛ Amplifier ➛ ➛ ➛ ➛ ➛ Speaker Unit ➛ ➛ ➛ ➛ ➛ Decoder ➛ ➛ ➛ ➛ ➛ Amplifier ➛ ➛ ➛ ➛ ➛ Speaker (digital theatre systems) When DVDs recorded in Dolby Digital or dts are played, Dolby Digital bitstream or dts bitstream is output from the unit Optical digital audio output connector.
-
Page 14: Initial Setup
Initial Setup (Ready to Play) Please make all cable or antenna connections before powering on. Initial Setup (Ready to Play) Press on the remote for TV-VCR mode. Plug the unit power cord into an AC wall outlet. Press POWER* on the remote or unit. The unit comes on and auto channel and clock set starts. - Page 15 * Important: If a remote control button does not work when pressed, press the button on the remote and try the button again. Manual Clock Set Reset all unit Memory Functions If AUTO CLOCK SET was incomplete, manually When moving unit to a new location, or if a set the clock as follows.
-
Page 16: Reset Language, Channels, Clock, Time Zone Adjust
Reset Language, Channels, Clock, Time Z Press ACTION* M A I N MENU to display MAIN MENU. LOCK LANGUAGE CLOCK SELECT : SET : SET : ACT I ON Channels Clock Language 1) Press 1) Press 1) Press select “CH.” select “CLOCK.”... - Page 17 * Important: If a remote control button does not work Time Zone Adjust when pressed, press the button on the remote and try the button again. Time Zone Adjust 4)Press (Only when Auto Clock is set.) press SET to select NUMBER 1) Press keys...
-
Page 18: Playback A Tape
Record On a Tape Playback a Tape Insert a tape with record tab. Ready Checklist • The unit power comes on automatically. All connections are made. Your unit is plugged in. Press CH or number keys to Insert a tape. Select Channel. -
Page 19: Copy Your Tapes (Dubbing)
* Important: If a remote control button does not work Copy Your Tapes (Dubbing) when pressed, press the button on the remote and try the button again. Connections you’ll need to make Recording (Editing) unit Playing (Source) VCR R-AUDIO-L VIDEO IN FROM ANT. -
Page 20: Dvd Basic Dvd Operation
Basic DVD Operation Press POWER* on the remote or unit. Ready Checklist All connections are made. (See pages 11-13.) Your unit is plugged in. Press DVD to select DVD mode. If unit is connected to an audio amplifier, • If a disc is already inserted, go to step 4. turn the stereo system’s power on. - Page 21 * Important: I f a remote control button does not work when pressed, press the DVD button on the remote and try the button again. Forward/Reverse rapid scene • When appears on the screen while a button search is being operated, it means that the ➛...
-
Page 22: Tv Operation
* Important: If a remote control button does not work TV Operation when pressed, press the button on the remote and try the button again. Ready Checklist Press POWER* on the remote or unit. All connections are made. (See page 11). Your unit is plugged in. -
Page 23: Mts Broadcast / Tv Stereo System
MTS Broadcast / TV Stereo System ® Receivable Broadcast Types Equipped with -TV Noise Reduction for true MTS The following are possible audio broadcast types and ® reproduction. -TV Noise on-screen displays. The signal being received is indicated Reduction is required for good with an “... -
Page 24: Closed Caption System
Closed Caption System Closed Caption is ... This multi-use system not only allows the hearing impaired to enjoy selected programs, but also makes useful information from TV stations available to everyone. Closed Caption Mode Feature Press ACTION* to display MAIN MENU. 1)Press M A I N MENU select “TV.”... - Page 25 * Important: I f a remote control button does not work when pressed, press the button on the remote and try the button again. Caption On Mute Feature Closed Caption narration, if available, is displayed when MUTE button is pressed for silence. Press ACTION to display MAIN MENU.
-
Page 26: Tv Timer Features
TV Timer Features ON-TIMER with Alarm Ready Checklist The clock is set to correct time. This unit can be set to automatically power on in one of 4 modes (TV, VCR Playback, FM radio, or DVD/Video CD/CD.) You can also combine the On-Timer with a one minute alarm that gradually increases in volume. -
Page 27: On-Screen Display (Osd)
* Important: If a remote control button does not work On-Screen Display (OSD) when pressed, press the button on the remote and try the button again. TV/VCR Status & Clock Display Press DISPLAY to display or remove the overlay. Channel Caption (See page 38.) Function Status Current Time... -
Page 28: Fm Radio
FM Radio FM Radio is ... This unit has an FM radio with built-in antenna, 9 station preset, and a band range of 87.5 ~ 108.1 MHz. You can even set the On-Timer (page 26) to wake up to your favourite radio station. - Page 29 * Important: I f a remote control button does not work when pressed, press the FM button on the remote and try the button again. 1)Press SET UP TV CAPT I ON select FM I NPUT SELECT : TUNER SET UP V I DEO / AUD I O ANTENNA.
-
Page 30: Timer Recording
Timer Recording You can set up to 8 programs to be recorded while Ready Checklist you are away. All connections are made. Press PROG* to display SET Your unit is plugged in. PROGRAM screen. The clock is set to correct time. The tape is long enough. - Page 31 * Important: I f a remote control button does not work when pressed, press the button on the remote and try the button again. Review, Replace or Clear Program Cancel a Timer Recording: Contents : ( Recording is not in progress ) (Recording is in progress) Hold down STOP for a few seconds Repeat steps 1 and 2 on page 30.
-
Page 32: Cable Box Universal Remote Control Feature
Cable Box Universal Remote Control Feature Universal Remote Control is... The Remote Control may be set up to control some basic DSS or Cable box functions. The Universal Remote Control Setup Find your DSS box or Cable box Brand Code Number from one of the charts on the next page. - Page 33 Archer ....... 44, 06, 01, 120, 05, 63, 126 Oak Sigma ......... 46, 11, 129, 101 Cableview ..29, 09, 01, 63, 120, 44, 42, 30, 52, Panasonic ......17, 16, 08, 87, 109 04, 124, 126 Philips ....23, 24, 20, 13, 07, 50, 128, 129 Citizen ....
-
Page 34: Tape Operation
Tape Operation Search System is ... Each time a recording is made, an invisible index mark is placed on the tape. When timer recordings are made, program index and information are also included. These index marks can be used to access or scan recordings. Index Search Go directly to the desired recording. - Page 35 * Important: If a remote control button does not work when pressed, press the button on the remote and try the button again. Program End Search Locates end point of recording for continuity. Press SEARCH twice in Playback or Stop mode to display PROGRAM END SEARCH screen .
- Page 36 Tape Operation (continued) Repeat Play Set to see a recording over and over. PLAY REPEAT ON To turn “ON,” press PLAY/REPEAT on the unit repeatedly in Play mode to select “REPEAT ON”. To turn “OFF,” repeat above to select “REPEAT OFF.” •...
- Page 37 * Important: If a remote control button does not work when pressed, press the button on the remote and try the button again. Auto Operation Functions I I I I I Auto Shut Off No broadcast signal in TV mode (Only when Weak Signal Display is set to OFF.), DVD stop, or blank tape is played for 5 minutes ➛...
-
Page 38: Special Vcr Features
Special VCR Features Channel Caption is ... Channel Caption Station names, e.g. ABC, CNN, etc. are set so they will appear when a channel is selected. Choose 24 Press ACTION* preset names. to display MAIN MENU. 1) Press M A I N MENU select “CH.”... - Page 39 * Important: If a remote control button does not work when pressed, press the button on the remote and try the button again. Weak Signal Display Feature Ready Checklist It is necessary to enter TV mode by pressing When “ON” is selected, the picture is displayed even when a broadcast signal is weak or non-existent.
-
Page 40: V-Chip Control Feature
V-Chip Control Feature V-Chip Control Feature is... Process of V-Chip Control Feature This unit has a built-in V-Chip Control which allows Enter Code Setup Blocking you to block unwanted TV usage based on US MOVIES, US TV PROGRAMS, Canadian English Language and Canadian French Language Ratings. - Page 41 * Important: If a remote control button does not work when pressed, press the button on the remote and try the button again. If LOCK menu is not displayed, perform Process of V-Chip Control Feature “Enter Secret Code” steps on page 40. Enter Code Setup Blocking...
- Page 42 V-Chip Control Feature (continued) If LOCK menu is not displayed, do Process of V-Chip Control Feature “Enter Secret Code” steps on page 40. Enter Code Setup Blocking US TV PROGRAMS Ratings 1) Press * to LOCK US TV PROGRAMS RATINGS: US MOV I ES : OFF select US TV...
- Page 43 * Important: If a remote control button does not work when pressed, press the button on the remote and try the button again. If LOCK menu is not displayed, do “Enter Secret Code” steps on page 40. Canadian English Language Canadian English Language RATINGS Ratings Children...
- Page 44 V-Chip Control Feature (continued) If LOCK menu is not displayed, do “Enter Secret Code” steps on page 40. Canadian French Language Ratings 1)Press * to select LOCK US MOV I ES : OFF NEXT PAGE. CHANGE SETT I NGS US TV PROGRAMS : OFF 2)Press SET to CHANGE SETT I NGS...
- Page 45 * Important: If a remote control button does not work when pressed, press the button on the remote and try the button again. Process of V-Chip Control Feature Blocking Message Enter Code Setup Blocking <When V-Chip Control is activated> • If a program or movie exceeds the ratings you have set, a message will appear on a black background and sound is muted.
-
Page 46: Audio Features
Audio Features With the proper audio mode Audio Mode for Playback setting, your unit can: Choose the type of sound track for playback. • record and playback MTS stereo broadcast (main language) in stereo Hi-Fi. Stereo sound is See the “Playback a Tape” section on recorded on the left and right page 18 to playback the tape. - Page 47 * Important: If a remote control button does not work when pressed, press the button on the remote and try the button again. DVD Volume Adjust Audio recorded on a DVD or Video CD often incorporates a dynamic range of sound. This means that, when compared to a music CD, etc., the average volume is generally lower and the peaks may be higher.
-
Page 48: Video / Audio Menu
* Important: If a remote control button does not work Video / Audio Menu when pressed, press the button on the remote and try the button again. This feature allows easy setting of picture and sound suitable for each program source. Video Menu Audio Menu Press ACTION* to display MAIN... -
Page 49: Video / Audio Adjustment
Video / Audio Adjustment Video Adjustment Audio Adjustment Press ACTION to display MAIN Press ACTION to display MAIN MENU. MENU. 1) Press 1) Press M A I N MENU M A I N MENU to select “TV.” to select “TV.” 2) Press SET to 2) Press SET to LOCK... - Page 50 Disc Operation Subtitle Language (DVD only) Ready Checklist Please read “Basic DVD Operation” on You can select a different subtitle language page 20. (if offered) than the one set at the Settings for DVD Operation. (See page 60.) [Subtitle language (No.)] Press SUB TITLE* in Play mode to display [Audio soundtrack language (No.)]...
- Page 51 * Important: If a remote control button does not work when pressed, press the DVD button on the remote and try the button again. When appears on the screen Multiple Angle Viewing (DVD only) while a button is being operated, it means that the corresponding DVDs may contain scenes shot from multiple camera operation is prohibited by the unit...
- Page 52 Disc Operation (continued) Title menu (DVD only) Some DVDs have more than one title, e.g. movies. If the disc offers a title menu, you can select the desired title number. (Operation may vary according to the disc.) Press TITLE* in T I TLE MENU Play mode to Dogs...
- Page 53 * Important: If a remote control button does not work when pressed, press the , DVD button on the remote and try the button again. Program Play (Video CD/CD) Ready Checklist Unit is in TV-VCR mode, press You can program specific tracks and order of play. Video CD or CD is inserted.
- Page 54 * Important: If a remote control button does not work Disc Operation ( continued ) when pressed, press the button on the remote and try the button again. Random Play (Video CD/CD) Tracks are played in a random order. Press ACTION* in Stop mode to display MAIN MENU.
-
Page 55: Dvd
ontrol button does not work DVD Operation using On-Screen Displays d, press the button on nd try the button again. When DISPLAY is pressed, On-Screen Displays show disc information (title/chapter/track number, Ready Checklist elapsed playing time) and unit information (repeat Unit is in DVD mode, press DVD. - Page 56 DVD Operation using On-Screen Displays (continued) Detailed Descriptions of Each On-Screen Display Disc information screen (for DVD) 1. TITLE No. T I TLE • Change the No. by pressing * or the NUMBER CHAPTER : 12 1 : 12 : 55 keys, and press SET.
- Page 57 * Important: I f a remote control button does not work when pressed, press the DVD button on the remote and try the button again. Detailed Descriptions of Each On-Screen Display Unit information screen • Change the desired mode during play by pressing , and press SET.
-
Page 58: Mp3 Playback Operation
MP3 Playback Operation MP3 Playback I MP3 playback (During STOP mode) You can use this unit to play MP3 format audio recorded for personal use with a computer etc. onto a CD-R or CD-RW. 1) Press to select an MP3 file ( Play may not be possible in some cases due to the 2) Press SET or PLAY to start playback. -
Page 59: Dvd Lock Feature
* Important: If a remote control button does not work when DVD Lock Feature pressed, press the , DVD button on the remote and try the button again. You can prevent playback of DVDs with a specific rating level which may be unsuitable for children. -
Page 60: Dvd Settings For Dvd Operation
Settings for DVD Operation Press ACTION* in Stop mode to display Once initial settings are done, they remain in memory (even after the MAIN MENU. power is off) until changed. This means the unit will always 1) Press M A I N MENU operate under the same conditions select “DVD.”... - Page 61 * Important: If a remote control button does not work when pressed, press the , DVD button on the remote and try the button again. AUDIO OUTPUT Select the digital output to be output from the optical digital audio output connector of the unit. Recommended setting Type of amplifier Do steps 1 and 2 on page 60.
- Page 62 Settings for DVD Operation (continued) * Important: STILL MODE If a remote control button does not work when pressed, press the DVD button on Set to reduce jitter in a displayed still picture or a the remote and try the button again. motion picture.
-
Page 63: Warning And Instruction Displays
Warning and Instruction Displays These displays will alert you of a missed operation or provide further instructions. Caution Page If you attempt to set or review a Timer PLEASE SET CLOCK BEFORE 16, 17 PROGRAMMING Recording or set the On-Timer and the Clock is not set... -
Page 64: Before Requesting Service
Before Requesting Service Check the following points once again if you are having trouble with your unit. Power Correction No power… • Completely insert Power Plug into an AC outlet. • Set POWER button to ON. Power turns itself off... •... - Page 65 DVD/Video CD/CD Correction Play fails to start even when • This unit cannot play discs other than DVDs, Video CDs and PLAY is pressed... CDs. • The disc may be dirty and require cleaning. Play starts but then stops • Be sure disc is installed with label side up. immediately...
-
Page 66: Language Code List
Language Code List Enter the appropriate code number for the initial settings “AUDIO”, “SUBTITLE” and/or “MENUS” (see page 60). Code Language Code Language Code Language Code Language 8375 Slovak 6565 Afar 7079 Faroese 7678 Lingala 6566 Abkhazian 7082 French 7679 Laothian 8376 Slovenian... -
Page 67: Warranty/Servicentre List
5770 Ambler Drive, Mississauga, Ontario L4W 2T3 PANASONIC PRODUCT – LIMITED WARRANTY Panasonic Canada Inc. warrants this product to be free from defects in material and workmanship and agrees to remedy any such defect for a period as stated below from the date of original purchase. -
Page 68: Index
Index TV / VCR Accessories ..........4 Head Cleaning ........... 6 AC Power Plug ......... 11 Important Safeguards and Precautions ..2 ACTION button ........8, 16 Information (Unit, Cassette, Disc) ..6 - 7 ADD / DLT / CLEAR button ....8, 17 Initial Setup .......... - Page 69 TV / VCR Warranty ........... 67 Table of Contents ........5 Warning and Instruction Displays ... 63 Tape Erasure Prevention ......4 Weak Signal Display Feature ....39 Tape Operation ......... 34 - 37 Zero Search ..........36 Timer Program Review, Replace, Clear . 31 Timer Recording ........
- Page 70 Montréal: 3075 Louis A. Amos, Lachine, Québec H8T 1C4 (514) 633-8684 Panasonic Canada Inc. Toronto: 5770 Ambler Drive, Mississauga, Ontario L4W 2T3 (905) 238-2181 5770 Ambler Drive, Printed in U.S.A. Mississauga, Ontario L4W 2T3 Calgary: LSQT0585A (905) 624-5010 6835 - 8th Street N.E., Calgary, Alberta T2E 7H7 (403) 295-3922 S0302-0 www.panasonic.ca...