Table of Contents
Advertisement
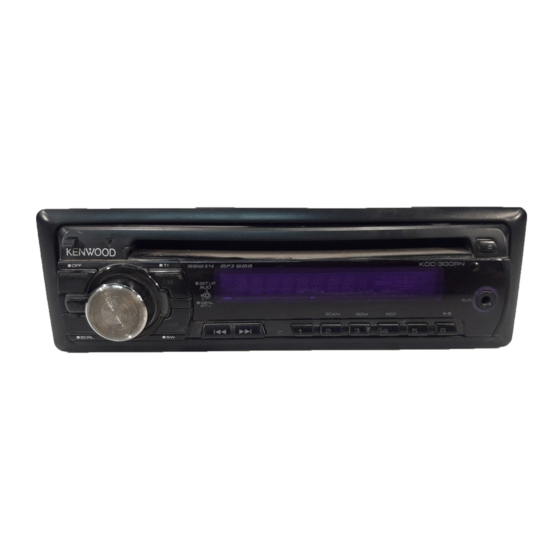
CD-RECEIVER
KDC-300RN
INSTRUCTION MANUAL
For instruction of KDC-300RN, please refer to KDC-W3044.
Declaration of Conformity with regard to the EMC Directive
2004/108/EC
Manufacturer:
Kenwood Corporation
2967-3 Ishikawa-machi, Hachioji-shi, Tokyo, 192-8525 Japan
EU Representative's:
Kenwood Electronics Europe BV
Amsterdamseweg 37, 1422 AC UITHOORN, The Netherlands
© B64-4485-00/00 (EW)
Advertisement
Table of Contents

Related Manuals for Kenwood KDC-300RN


Summary of Contents for Kenwood KDC-300RN
- Page 1 CD-RECEIVER KDC-300RN INSTRUCTION MANUAL For instruction of KDC-300RN, please refer to KDC-W3044. Declaration of Conformity with regard to the EMC Directive 2004/108/EC Manufacturer: Kenwood Corporation 2967-3 Ishikawa-machi, Hachioji-shi, Tokyo, 192-8525 Japan EU Representative's: Kenwood Electronics Europe BV Amsterdamseweg 37, 1422 AC UITHOORN, The Netherlands...
-
Page 2: Table Of Contents
Contents Before use Appendix Basic Operation Accessories/ Installation Procedure 15 General functions Connecting Wires to Terminals Tuner functions Disc play functions Installation/Removing the Unit General Operation Troubleshooting Guide Audio Control Audio Setup Specifications Speaker Setting Switching Display Manual Clock Adjustment Tuner Operation PTY (Program Type) Program Type preset... -
Page 3: Before Use
To prevent injury or fire, take the following • When you purchase optional accessories, check with precautions: your Kenwood dealer to make sure that they work • To prevent a short circuit, never put or leave any with your model and in your area. -
Page 4: Basic Operation
Basic Operation [FM+] Disc slot [SRC] Release [AM–] Display Auxiliary input Search [DISP] [AUD] [2] [3] [4] [5] [6] button knob Auxiliary input General functions Connect a portable audio device with mini-plug cable Power/Source select button : [SRC] (3.5 ø). Turns on the power. -
Page 5: Tuner Functions
Disc ejection : [0] Tuner functions ⁄ FM Band : [FM+] • You can eject the disc for 10 minutes after switching off the Switches between FM1, FM2, and FM3 each time the engine. [FM+] button is pressed. Music search : [4]/[¢] AM Band : [AM–] Changes the music when this button is pressed. -
Page 6: General Operation
General Operation ⁄ Audio Control • Volume offset: Sets each source’s volume as a difference Select the source to adjust from the basic volume. Press the [SRC] button. Adjust the Audio setup item Enter Audio Control mode Turn the [AUD] knob. Press the [AUD] knob. -
Page 7: Manual Clock Adjustment
In Audio file source Information Display Music title & Artist name “TITLE” Album name & Artist name “ALBUM” Folder name “FOLDER” File name “FILE” Play time & Music number “P-TIME” Clock “CLOCK” In Standby/ Auxiliary input source Information Display Source name “SRC NAME”... -
Page 8: Tuner Operation
Tuner Operation PTY (Program Type) Search for the selected Program Type station Press the [4] or [¢] button. Selecting the Program Type and searching for a ⁄ station. • When the selected Program Type is not found, “NO PTY” Enter PTY mode is displayed. -
Page 9: Music Disc/Audio File Operation
Music disc/Audio fi le Operation Music Search (Function of Audio file) Music Search (Function of Music CD) Search for the song you want to listen to by tracing Select the song you want to listen to by turning the the media file structure. [AUD] knob. -
Page 10: Menu Operation
Menu Operation Menu System Display Setting Setting overview Source Setting various functions. “SCL” AUTO/ Specifies whether the text is — MANU* scrolled automatically. Enter Menu mode “AUX” OFF/ON1*/ Sets whether to display AUX Press the Search button for at least 1 second. during source selection. -
Page 11: Activating Security Code
Function of KDC-W3544W Do the step 4 through 7 operation, and enter Activating Security Code the Security Code. “APPROVED” is displayed. When Security Code is set, possibility of theft Now, you can use the unit. is reduced because input of Security Code is ⁄... -
Page 12: Auto Memory Entry
Menu Operation • The Auxiliary input display can be set only when the Auto memory entry built-in auxiliary input or the auxiliary input of optional KCA-S220A is used. On the KCA-S220A, “AUX EXT” is Enter Menu mode displayed by default. Press the Search button for at least 1 second. -
Page 13: Appendix
20 minutes. • AUTO1, AUTO2, MANUAL (Tuning mode select) Select a tuning mode of the radio. An online manual about audio files is put on the site, www.kenwood.com/audiofile/. On this online Tuning mode Display Operation manual, detailed information and notes which are not Auto seek “AUTO1”... - Page 14 Appendix • OFF (Power OFF Timer) This Product is not installed by the manufacturer of a vehicle on the production line, nor by the professional Setting the timer to turn this unit’s power OFF importer of a vehicle into an EU Member State. automatically when Standby mode continues.
-
Page 15: Accessories/ Installation Procedure
Accessories/ Installation Procedure with the ignition, connect the ignition wire to a power Accessories source that can be turned on and off with the ignition key. • Use a commercially available conversion connector if the connector does not fit in the vehicle connector. •... -
Page 16: Connecting Wires To Terminals
Connecting Wires to Terminals To Kenwood disc changer/ External optional accessory (KDC-W3544W only) Rear preout/ Subwoofer preout Fuse (10A) FM/AM antenna input Antenna Cord (JASO) Wiring harness (Accessory1) TEL mute wire (Brown) Connect to the terminal that is grounded when either the telephone rings or during conversation. - Page 17 Connector Function Guide 2WARNING Pin Numbers for Cable Colour Functions Connecting the ISO Connector ISO Connectors The pin arrangement for the ISO connectors depends on External Power the type of vehicle you drive. Make sure to make the proper Connector connections to prevent damage to the unit.
-
Page 18: Installation/Removing The Unit
Installation/Removing the Unit Installation Removing the hard rubber frame Engage the catch pins on the removal tool and remove the two locks on the upper level. Upper the frame and pull it forward as shown in the figure. Lock Catch Bend the tabs of the mounting sleeve with a screwdriver or similar utensil... -
Page 19: Troubleshooting Guide
Troubleshooting Guide Some functions of this unit may be disabled by The messages shown below display your systems condition. some settings made on this unit. TOC ERR: • No disc has been loaded in the disc Cannot display the user of System Q. magazine. -
Page 20: Specifications
Specifi cations FM tuner section Audio section Frequency range (50 kHz space) Maximum output power : 87.5 MHz – 108.0 MHz : 50 W x 4 Usable sensitivity (S/N = 26dB) Output power (DIN 45324, +B=14.4V) : 0.7 μV/75 Ω : 30 W x 4 Quieting Sensitivity (S/N = 46dB) Speaker Impedance...