Table of Contents
Advertisement
Advertisement
Table of Contents

Summary of Contents for Gateway FPD2485W
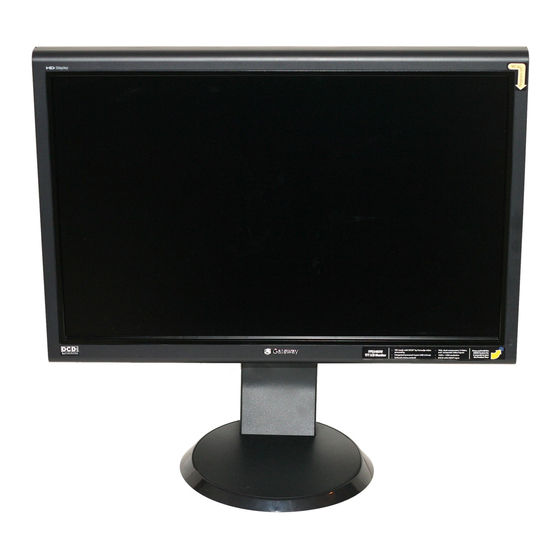
- Page 1 FPD2485W 24-inch Widescreen LCD Monitor USERGUIDE ®...
-
Page 3: Table Of Contents
Contents Chapter 1: Using Your Gateway Flat-Panel Monitor ..........1 Connecting the monitor . - Page 4 Contents Appendix A: Safety, Regulatory, and Legal Information ....33 Recycling ........... 35...
-
Page 5: Chapter 1: Using Your Gateway Flat-Panel Monitor
CHAPTER Using Your Gateway Flat-Panel Monitor • Connecting the monitor • Adjusting the stand • Setting up the optional speaker bar • Starting the monitor • Adjusting monitor settings • Changing Windows screen settings • Power management • Maintaining •... -
Page 6: Connecting The Monitor
CHAPTER 1: Using Your Gateway Flat-Panel Monitor Connecting the monitor To set up the monitor, first attach the base, then make your cable connections. Attaching the stand To attach the stand: Slide the stand’s neck onto the base. Tighten the thumbscrew with your fingers (or a flat screwdriver) under the base to secure the neck into place. - Page 7 Slide the neck’s bracket slots onto the bracket’s mounting tabs. Press the bracket lever to the right and hold it, then lower the neck into place and release the lever. Test the bracket connection to make sure it is secure, then move the monitor upright.
-
Page 8: Connecting Video Inputs
CHAPTER 1: Using Your Gateway Flat-Panel Monitor Connecting video inputs To connect video sources to your monitor: Rotate the screen 90° to make it easier to connect the cables. Position your computer and the monitor so you can reach the back of each. - Page 9 Connect other video sources (such as a DVD player, video camera, or receiver) to the appropriate video jacks on the back of the monitor. S-Video jack Component video 2 jacks Component video 1 jacks Composite video in jack •...
-
Page 10: Connecting Usb Cables
CHAPTER 1: Using Your Gateway Flat-Panel Monitor Connecting USB cables Your monitor has a built-in, four-port USB 2.0 hub that lets you conveniently connect USB devices. Because your computer case may be under your desk or inside a cabinet, these monitor-mounted USB ports can be much easier to access. -
Page 11: Connecting Power
Connecting power To connect power: Position your monitor so you can reach the back, then connect the power cord to the power connector under the back of the monitor. Plug the power cord into a correctly grounded power outlet. We recommend using a surge protector to protect your monitor from voltage spikes. -
Page 12: Adjusting Monitor Height Tension
CHAPTER 1: Using Your Gateway Flat-Panel Monitor You can rotate the screen clockwise 90° to change between landscape and portrait views. For information on automatically rotating the display image as you manually rotate the monitor, see “Using landscape and portrait modes” on page... -
Page 13: Adjusting Monitor Tilt Tension
Insert a Phillips screwdriver through the access hole in the base and onto the height tension screw (on the back of the stand, in the slot above the USB In port). Height tension screw Adjust the height tension screw so the monitor stays in place when you let go. If the monitor lowers by itself when you let go, turn the screw clockwise several complete turns. - Page 14 CHAPTER 1: Using Your Gateway Flat-Panel Monitor Ergonomic guidelines The recommended screen positioning is based upon the following guildelines. These guidelines are based on available scientific literature and published standards. Screen height The recommended screen height for displays (except in special circumstances, such as for bifocal use) is that the top of the display should be set at or slightly below (about 1 inch or 25 mm) your eye level while you are sitting in a comfortable working posture.
-
Page 15: Setting Up The Optional Speaker Bar
Setting up the optional speaker bar An optional speaker bar is available for mounting underneath your monitor. The speaker bar has touch controls and excellent sound. You can order a speaker bar from www.gateway.com. Adjustment slider Mute button Mode (volume, treble, bass) button... - Page 16 CHAPTER 1: Using Your Gateway Flat-Panel Monitor To install the speaker bar: For easier installation, first rotate the monitor into portrait mode so you can install the speaker bar from the side. Tilt the screen back, then match the tabs on each side of the speaker bar with the slots underneath the monitor.
-
Page 17: Starting The Monitor
To remove the speaker bar: Disconnect all audio and power cables from the speaker bar. Press the two release buttons on the back of your monitor, then pull the speaker bar down. Release button Starting the monitor Using the EzTouch menu buttons This monitor features an on-screen display (OSD) and EzTouch menu buttons that let you turn the monitor on and off, and adjust contrast, brightness, and other settings. -
Page 18: Adjusting Monitor Settings
CHAPTER 1: Using Your Gateway Flat-Panel Monitor To mute the volume of the sounds accompanying button presses, press the (Menu) button on the front of your monitor, press (Main Menu), press (Advanced), press (Audio Feedback), then press the lower (Adjust) buttons until the volume bar is at the bottom of the scale. -
Page 19: Using The Shortcut Menu
Using the shortcut menu To use the shortcut menu: Press the (Menu) button on the front of your monitor. The rest of the button icons light up and the shortcut menu opens. Important The buttons are very sensitive, and may be “pressed” by holding your finger just above its surface. -
Page 20: Using The Main Menu
CHAPTER 1: Using Your Gateway Flat-Panel Monitor Using the main menu To use the main menu: Press the (Menu) button on the front of your monitor. The rest of the button icons light up and the shortcut menu opens. Important The EzTouch menu buttons are very sensitive, and may be “pressed”... - Page 21 OSD Menu Description Main menu Auto—Automatically adjusts your monitor to its optimum settings. (VGA input only) Picture—Opens the Picture menu, where you can adjust brightness, contrast, and gamma. PIP—Opens the PIP Settings menu, where you can adjust the source, position, size, and transparency of the Picture-in-Picture image.
- Page 22 CHAPTER 1: Using Your Gateway Flat-Panel Monitor OSD Menu Description Video Adjust menu Unless otherwise indicated, these settings apply only to SD (standard definition) video at 480i and below. Where “PC input” is indicated, the resolutions that apply are from 800 × 600 to 1920 × 1200.
-
Page 23: Using Picture-In-Picture (Pip)
OSD Menu Description Geometry menu H Position—Moves the display image left and right. You can also press the Auto button to configure the vertical and horizontal position automatically. V Position—Moves the display image up and down. You can also press the Auto button to configure the vertical and horizontal position automatically. -
Page 24: Changing Windows Screen Settings
With EzTune, you can: • Change the orientation of the image (landscape to portrait) by just rotating the screen (requires the optional height-adjustable stand available in the U.S. at www.gateway.com) • Change brightness, contrast, and color balance •... - Page 25 Using landscape and portrait modes EzTune automatically switches the display to the appropriate mode (landscape or portrait) when you rotate the screen. This feature works only with VGA or DVI input (the OSD itself does not rotate into portrait mode).
-
Page 26: Video Modes
CHAPTER 1: Using Your Gateway Flat-Panel Monitor Video modes Your monitor supports several video modes. If you do not use the best mode for the monitor, the display image may look slightly “fuzzy.” Mode Resolution Horizontal Vertical Available in DVI... -
Page 27: Using The Speaker Bar
Using the speaker bar To turn on the speaker bar: • Press the power button on the speaker bar. The speaker bar turns on, and the button LEDs turn on. To use headphones: You can connect a pair of headphones to each headphone jack. -
Page 28: Power Management
CHAPTER 1: Using Your Gateway Flat-Panel Monitor Power management Energy declaration When connected to a computer that supports the VESA Display Power Management Signaling (DPMS) Protocol, the monitor can conserve significant energy by reducing power consumption during periods of non-use. When your computer goes into the energy saving mode, the monitor will then enter the Active Off mode (sleep). -
Page 29: Troubleshooting
Troubleshooting Important Make sure that the monitor has warmed up for approximately 30 minutes before making any judgments about the picture quality. If you have problems with the monitor, the information in this troubleshooting section may help you solve them. -
Page 30: Picture Has Shadows Or "Ghosts
This condition is normal and inherent in the TFT technology used in active-matrix LCD screens. Gateway’s inspection standards keep these to a minimum. If you feel these pixels are unacceptably numerous or dense on your display, contact Gateway Customer Care to identify whether a repair or replacement is justified based on the number of pixels affected. -
Page 31: Faqs
Notebook computers typically have an F key combination that lets you toggle between your notebook’s display and an externally attached display. On Gateway notebooks, this key combination is F +F4. The F4 key is located along the top row of... -
Page 32: How To
Make sure that your video card can display at 1920 × 1200 resolution. • This may be caused by older video drivers on your computer. See the Gateway support Web site (support.gateway.com) for updated video drivers for your computer. You can also go directly to your video card’s support Web site for the most up-to-date video drivers. -
Page 33: Video/Display
480i. Can I connect my game console to this monitor? Yes. Using optional video cables (available from the Gateway Accessory Store Web site) you can connect your game console directly to the monitor. If your game console supports Component (YPbPr), this results in the best picture quality. -
Page 34: Specifications
CHAPTER 1: Using Your Gateway Flat-Panel Monitor Specifications Specifications are subject to change without notice or obligation. Many products for Gateway and its subsidiaries are custom engineered by our suppliers to Gateway specifications and may vary from similarly marketed products. Panel size... - Page 35 Temperature Operating: 41~95°F (5~35°C) Storage: -4~140°F (-20~60°C) Humidity Operating: 20~80% (non-condensing) Storage: 5~90% (non-condensing) Altitude Operating: 12,000 feet (3,658 m) Storage: 40,000 feet (12,192 m) Security Kensington lock slot...
- Page 36 CHAPTER 1: Using Your Gateway Flat-Panel Monitor...
- Page 37 APPENDIX Safety, Regulatory, and Legal Information • Important safety information • Environmental information • Regulatory compliance statements • Notices...
- Page 38 Do not expose the monitor to rain or use near water. If the monitor does get exposed to moisture, unplug it and allow it to dry for 24 hours. Call Gateway Customer Care for advice on whether the monitor is safe to turn back on.
- Page 39 When your electrical or electronic equipment is no longer useful to you, “take it back” to your local or regional waste collection administration for recycling. ■ In some cases, your “end of life” product may be “traded in” for credit towards the purchase of new Gateway equipment. Call Gateway to see if this program is available in your area. ■...
- Page 40 Due to continuing system improvements, Gateway is not responsible for inaccurate information which may appear in this manual. For the latest product updates, consult the Gateway Web site at www.gateway.com. In no event will Gateway be liable for direct, indirect, special, exemplary, incidental, or consequential damages resulting from any defect or omission in this manual, even if advised of the possibility of such damages.
- Page 42 MAN FPD2485W USR GDE R1 1/07...