Table of Contents
Advertisement
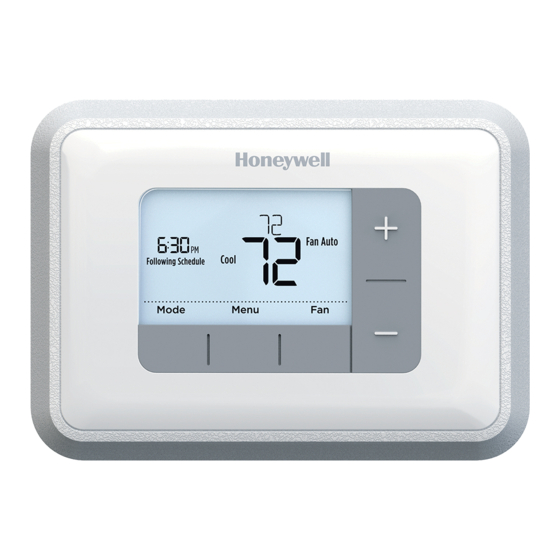
RTH6360 Series
Programmable Thermostat
Quick Installation Guide
Included in your box
Screws and
anchors
UWP™
Mounting
System
(UWP)
Tools you will need
Phillips screwdriver
Small flat head screwdriver
Pencil
Level
Tools you may need
Wire stripper
Needle-nose pliers
Quick Install Guide
RTH6360
Thermostat
Drill and
drill bit (7/32 in)
Advertisement
Table of Contents

Related Manuals for Honeywell RTH6360 Series


Summary of Contents for Honeywell RTH6360 Series
- Page 1 RTH6360 Series Programmable Thermostat Quick Installation Guide Included in your box Quick Install Guide Screws and anchors RTH6360 UWP™ Thermostat Mounting System (UWP) Tools you will need Tools you may need Phillips screwdriver Wire stripper Small flat head screwdriver Pencil...
-
Page 2: Removing Your Old Thermostat
Quick Installation Guide Removing your old thermostat Turn power OFF. To protect yourself and your equipment, Turn off the power at the breaker box or switch that controls your heating/cooling system. Switch Breaker box Check that your system is off. Change the temperature on your old thermostat to be above room temperature in heat mode or below... - Page 3 W2 or AUX The RTH6360 thermostat does not support L/A, S, or U terminals. If there are wires in terminals that are not listed, you will need additional wiring support. Visit yourhome.honeywell.com/support to find out if the thermostat will work for you.
- Page 4 Quick Installation Guide Disconnect the wires and remove the old wall plate. Use a screwdriver to release wires from terminals. Then, use a wire label to identify each wire as it’s disconnected. The letter on the wire label should match the letter on the terminal. Tip: To prevent wires from falling back into the wall, wrap the wires around a pencil.
- Page 5 RTH6360 Series Insert the wall anchors. It is recommended that you use the wall anchors included in the box to mount your thermostat. You can use the UWP to mark where you want to place the wall anchors. a) Level the wall plate.
- Page 6 Quick Installation Guide Connect wires from Step 8. Depress the tabs to put the wires into the inner holes of their corresponding terminals on the UWP (one wire per terminal) until it is firmly in place. Gently tug on the wires to verify they are secure.
-
Page 7: Set Date And Time
RTH6360 Series Turn your power ON. Turn on the power at the breaker box or switch that controls the heating/ cooling system. Switch Breaker box Set date and time NOTE: If this is not a new installation, see pages 15-16 for setting the date and time. -
Page 8: System Setup Options
Quick Installation Guide System Setup NOTE: If this is not a new installation, see page 14 for entering setup menu. Select System Setup options. Press + or - to change values or select from available options. Then press Select to save changes and advance to the next System Setup number. - Page 9 RTH6360 Series Number Description Options (factory default in bold) 0 = O (O/B in Cool) 1 = B (O/B in Heat) Reversing Valve O/B Note: This option is only displayed if the Heat Pump configured. Select whether reversing valve O/B should energize in cool or in heat.
-
Page 10: Fan Operation Settings
Quick Installation Guide System operation settings Press the Mode button to cycle to the next available System mode. Cycle through the modes until the required System mode is displayed and leave it to activate. NOTE: Available System modes vary by model and system settings. -
Page 11: To Adjust Program Schedules
RTH6360 Series Program Schedule You can program four time periods each day, with different settings for weekdays and weekends. We recommend the pre-set settings (shown in the table below), since they can reduce your heating/cooling expenses. Wake - Set to the time you wake up and the... - Page 12 Quick Installation Guide Program schedule override (temporary) Press + or - to adjust the temperature. Once at the desired setpoint temperature, no further action is needed. The new setpoint temperature will be held until the next scheduled time period begins. For more information on schedule time periods, see “Program Schedule”...
-
Page 13: Wiring-Heat Pump
RTH6360 Series Wiring—heat pump Connect wires: heat pump Match each labeled wire with same letter on new thermostat. Insert the wires into the matching terminal. NOTE: If you have difficulty inserting wires, you may have to press down the terminal push button next to the corresponding terminal. -
Page 14: Advanced Menu
Quick Installation Guide Advanced menu Press and hold Menu and + buttons for approximately 5 seconds to enter advanced menu. Press Select to enter System Setup (ISU) menu. Press Select to cycle through System Setup numbers. NOTE: See “System Setup options” on page 8 for a full list of System Setup numbers and options. -
Page 15: Smart Response® Technology
RTH6360 Series Smart Response® Technology This feature allows the thermostat to “learn” how long the furnace and air conditioner take to reach programmed temperature settings, so the temperature is reached at the time you set. For example: Set the Wake time to 6 am, and the temperature to 70°. -
Page 16: Set The Date
Quick Installation Guide Set the date Press Menu to enter the device menu. You will see PROG or Hold. Press + or - to chose DATE. Press Select. You will see the year blinking. Press + or - to adjust the year. Press Select. Press + or - to adjust the month. - Page 17 RTH6360 Series When the alert icon appears, check the error code with the table below to determine the problem. Snooze the alert. Dismiss the alert. Alerts codes Number Alert/Reminder Definition Internal Memory Error The memory of the thermostat has encountered an error.
-
Page 18: Troubleshooting
Quick Installation Guide Troubleshooting If you have difficulty with your thermostat, please try the following suggestions. Most problems can be corrected quickly and easily. Display is blank Make sure fresh AA alkaline batteries are properly installed (see page 6). Cannot change system Check System Setup Option 220 to make sure the options are setting to Cool set to either 1 or 2 (see page 9). - Page 19 This warranty does not cover removal or reinstallation costs. This warranty shall not apply if it is shown by Honeywell that the defect or malfunction was caused by damage which occurred while the product was in the possession of a consumer.
-
Page 20: Customer Assistance
Contact your local waste management authority for instructions regarding recycling and proper disposal. Customer assistance For assistance with this product, please visit http://yourhome.honeywell.com. Or call Honeywell Customer Care toll-free at 1-800-468-1502. Pull to remove the thermostat from the UWP. Home and Building Technologies In the U.S.:...