Advertisement
Quick Links
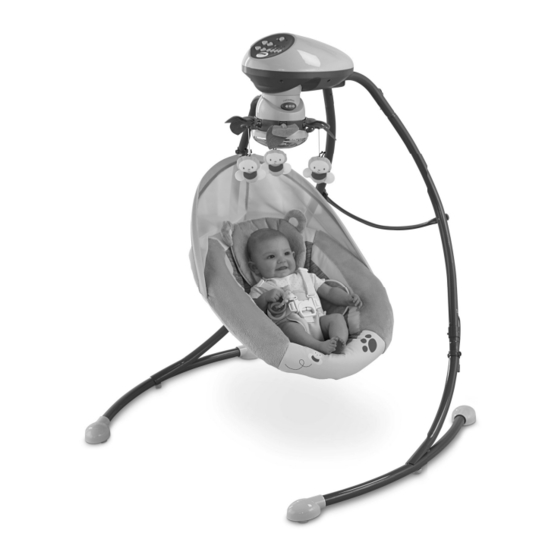
X7347
IMPORTANT! Please keep these instructions for future reference.
Please read these instructions before assembly and use of this product.
¡IMPORTANTE! Guardar estas instrucciones para futura referencia.
Leer estas instrucciones antes de ensamblar y usar el producto.
fisher-price.com
1
Advertisement

Related Manuals for Fisher-Price X7347


Summary of Contents for Fisher-Price X7347
- Page 1 X7347 IMPORTANT! Please keep these instructions for future reference. Please read these instructions before assembly and use of this product. ¡IMPORTANTE! Guardar estas instrucciones para futura referencia. Leer estas instrucciones antes de ensamblar y usar el producto. fisher-price.com...
- Page 2 Consumer Information Información para el consumidor WARNING Prevent death: Keep seat fully reclined until child is at least 4 months old AND can hold head up without help. Young infants have limited head and neck control. If seat is too upright, infant’s head can drop forward and compress the airway, resulting in DEATH.
- Page 3 Consumer Information Información para el consumidor IMPORTANT! Maximum Weight Limit: 25 lbs (11,3 kg). If your child weighs less than 25 lbs (11,3 kg), but is really active and appears to be able to climb out of the swing, immediately discontinue its use. •...
- Page 4 Parts Piezas Motorized Frame Mobile Dome Armazón motorizado Cúpula del móvil 2 Lower Legs 2 patas inferiores 2 Upper Legs 2 patas superiores Pad with Headrest 2 Side Rails Almohadilla con cabezal 2 barandillas laterales Seat with Restraint System Asiento con sistema de sujeción Body Support 4 Feet Canopy Stay...
- Page 5 DO NOT use if any parts are missing or broken. Contact ® Fisher-Price for replacement parts and instructions if needed. Never substitute parts. ¡IMPORTANTE! Antes de cada uso o montaje, inspeccionar este producto para verificar que no tenga piezas dañadas, conexiones sueltas, piezas faltantes o bordes filosos.
- Page 6 Assembly Montaje Upper Leg Pata superior Lower Leg Pata inferior • Fit an upper leg onto a lower leg. Hint: The upper legs are designed to fit the lower legs one way. If it does not seem to fit, try the other upper leg.
- Page 7 Assembly Montaje Motorized Frame Tube Tubo del armazón motorizado PRESS PRESIONAR • While pressing the button on a leg assembly, fit it into a tube on the motorized frame. Make sure the button on the leg “snaps” into the hole in the tube. •...
- Page 8 Assembly Montaje • Plug the power cord from the motorized frame assembly into the power cord in the frame assembly. • Enchufar el cable eléctrico de la unidad del armazón motorizado en el cable eléctrico de la unidad del armazón. Side Rail Barandilla lateral Side Rail...
- Page 9 Assembly Montaje Lower Seat Tube Tubo de asiento inferior Short Tube Tubo corto SIDE VIEW VISTA DEL LADO • Fit the lower seat tube into the short tube on the seat back. • Ajustar el tubo de asiento inferior en el tubo corto del respaldo. M5 x 40 mm Bolt Perno M5 x 40 mm •...
- Page 10 Assembly Montaje Upper Seat Tube Tubo de asiento superior Lower Seat Tube Tubo de asiento inferior • Fit the lower seat tube onto the upper seat tube. • Ajustar el tubo de asiento inferior en el tubo de asiento superior. M5 x 40 mm Bolt Perno M5 x 40 mm FRONT VIEW...
- Page 11 Assembly Montaje Almohadilla Waist Belts Cinturones de la cintura • Insert the waist belts through the lowest slots in the pad. Make sure the waist belts are not twisted. • Fold the top of the pad down. • Insertar los cinturones de la cintura en las ranuras más bajas de la almohadilla. Asegurarse de que los cinturones no estén torcidos.
- Page 12 Assembly Montaje Upper Slots Ranuras superiores Larger Baby • Insert the shoulder belts through the upper slots in the seat pad back. Bebé más grande • Insertar los cinturones de hombro en las ranuras superiores de la parte trasera de la almohadilla.
- Page 13 Assembly Montaje Elastic Loops Ganchos elásticos SIDE VIEW VISTA DEL LADO • Hook both elastic loops at the top of the seat pad around the pegs at the top of the seat. • Hook both elastic loops at the bottom of the seat pad around the pegs at the bottom of the seat.
- Page 14 Assembly Montaje • Fit the end of the canopy stay into the button hole in the canopy sleeve . Slide the canopy stay through the canopy sleeve • Fit the free end of the canopy stay into the button hole •...
- Page 15 Battery Installation Colocación de las pilas Hint: Install batteries if you need to use this swing away from an outlet. We recommend using alkaline batteries for longer battery life. Nota: instalar las pilas para usar este columpio donde no haya tomacorrientes eléctricos. Se recomienda usar pilas alcalinas para una mayor duración.
- Page 16 Battery Safety Information Información de seguridad acerca de las pilas In exceptional circumstances, batteries may leak fluids that can cause a chemical burn injury or ruin your product. To avoid battery leakage: • Do not mix old and new batteries or batteries of different types: alkaline, standard (carbon-zinc) or rechargeable (nickel-cadmium).
- Page 17 Setup and Use Preparación y uso WARNING Prevent death: Keep seat fully reclined until child is at least 4 months old AND can hold head up without help. Young infants have limited head and neck control. If seat is too upright, infant’s head can drop forward and compress the airway, resulting in DEATH.
- Page 18 Setup and Use Preparación y uso Shoulder Belt Shoulder Belt Cinturón de Cinturón de los los hombros hombros Waist Belt Waist Belt Cinturón de Cinturón de la cintura la cintura Restraint Pad Almohadilla de sujeción Restraint System • Place your child in the seat. Position the restraint pad between your child's legs. •...
- Page 19 Setup and Use Preparación y uso TIGHTEN LOOSEN APRETAR AFLOJAR • To tighten the waist belts: Feed the anchored end of the belt up through the buckle to form a loop . Pull the free end of the belt . Repeat this procedure to tighten the other belt.
- Page 20 Setup and Use Preparación y uso PRESS PRESIONAR TURN GIRAR Cradle Cradle Swing Swing Cuna Cuna Columpio Columpio You can adjust the motion of the swing: side to side or front to back. • Press the seat tube button to unlock the seat tube. •...
- Page 21 Setup and Use Preparación y uso Upright Upright Vertical Vertical Recline Recline Reclinada Reclinada PRESS PRESIONAR You can adjust the seat to two different positions: Recline or Upright. • From behind the seat, press both seat position buttons. • Push the seatback up until the buttons “snap” into the upright position. •...
- Page 22 Setup and Use Preparación y uso AC Power Use • Place the swing near a standard wall outlet. • Plug the AC adaptor into the power cord extending from the back of a leg. • Plug the AC adaptor into the wall outlet. •...
- Page 23 Swing Use Uso como columpio Power Switch Swing Speed Buttons Interruptor de encendido Botones de velocidad de columpio Mobile Button Mobile Button Botón del móvil Botón del móvil Volume Buttons Botones de volumen Music & Sounds Buttons Botones de música y sonidos Swing •...
- Page 24 Care and Storage Mantenimento y almacenamiento • Unbuckle the restraint system. • Remove the top of the canopy from the clip on swing tube. Slide the canopy stay out of the canopy sleeve through the buttonhole on the right hand side. •...
- Page 25 Care and Storage Mantenimento y almacenamiento • Pull the end of the frame support bar off the leg and lower it • Push the legs together • Jalar el extremo de la barra de soporte del armazón para separarla de la pata y bajarla •...
- Page 26 Adults Note: If you use this product with the AC adaptor, periodically examine the AC adaptor for damage to the cord, housing or other parts that may result in the risk of fire, electric shock or injury. If the AC adaptor is damaged, do not use the product with the AC adaptor.
- Page 27 Consumer Information Información para el consumidor FCC Statement (United States Only) This equipment has been tested and found to comply with the limits for a Class B digital device, pursuant to Part 15 of the FCC Rules. These limits are designed to provide reasonable protection against harmful interference in a residential installation.
- Page 28 CONSUMER ASSISTANCE AYUDA AL CONSUMIDOR 1-800-432-5437 (US) Fisher-Price, Inc., 636 Girard Avenue, East Aurora, NY 14052. Hearing-impaired consumers/Clientes con problemas auditivos 1-800-382-7470. Centro de Servicio en México: 59-05-51-00 Ext. 5206 ó 01-800-463-59-89 MÉXICO Importado y distribuido por Mattel de México, S.A. de C.V., Miguel de Cervantes Saavedra No. 193, Pisos 10 y 11, Col.