Epson PowerLite 1815p Quick Setup
Epson powerlite 1815p: quick start
Hide thumbs
Also See for PowerLite 1815p:
- User manual (204 pages) ,
- Product support bulletin (45 pages) ,
- Operation manual (47 pages)
Advertisement
Quick Links
Before using the projector, make sure you read the safety
instructions in the User´s Guide on your projector CD.
1
Turn On Your Equipment
1
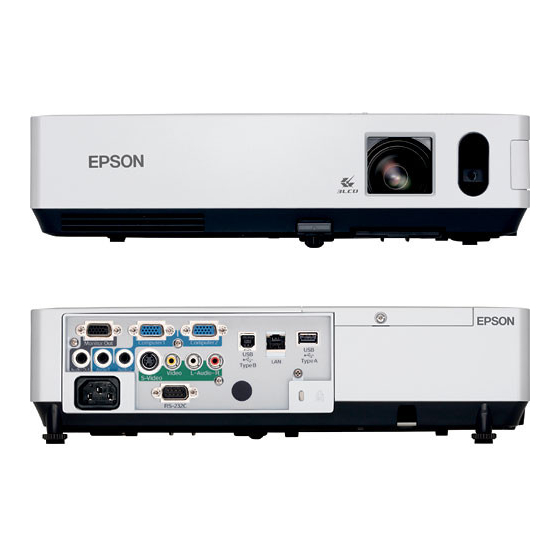
C onnect the power cord to the back of the projector and plug the other
end into an electrical outlet.
2
O pen the A/V Mute slide (lens cover). Make sure the slide is opened
completely.
3
R emove the battery cover on the remote control. Locate the two AAA
batteries that came with the projector and insert them. Then replace
the battery cover.
4
T o turn the projector on, press the Power button on the projector
or the remote control. The projector beeps once, and the projector's
Power light flashes green and then stays on.
Power light
Power button
To shut down the projector:
Power button twice.
1. Press the
2. When the orange light stops flashing and the projector beeps,
you can unplug the projector.
2
Adjust the Image
1
T o raise the image, press the foot release button for the front
adjustable foot and lift the front. Release the button to lock the
foot in position.
PowerLite
1815p
®
Quick Setup
2
Turn the focus ring to sharpen the image.
Turn the zoom ring to reduce or enlarge the image.
Focus
3
I f your image looks like
,
button on the projector and follow the on-screen instructions.
3
Choose a
Presentation Method
How do you want to get images to the projector?
•
T o connect to a notebook, see "If connecting
to a notebook" below.
•
T o project over a wireless network, see
"If projecting wirelessly" on the back of this sheet.
Y ou must have installed the projector's EasyMP™ software and
configured your projector and computer before you can project
wirelessly. See your User's Guide for instructions.
•
T o give a presentation stored on a CompactFlash memory card,
flash drive, digital camera, or other USB storage device, see
Chapter 5 in your User's Guide.
•
T o connect to your notebook using the included USB cable,
see your User's Guide.
If connecting to a notebook...
1
T urn on the projector and adjust the image as described in
sections 1 and 2.
2
L ocate the computer cable that came with the projector.
Connect one end to the projector's blue Computer1 port.
Connect the other end to your notebook's video-out port or
monitor port.
3
P ress the Source Search button on the projector or the
Search button on the remote control until your computer
image is displayed.
NOTE:
If your notebook has a DVI connector, you need to use an
optional DVI-to-VGA adapter with the included computer cable
(see your computer's documentation).
Zoom
,
or
, press the Quick Setup
,
Computer cable
Turn over
Advertisement

Related Manuals for Epson PowerLite 1815p


Summary of Contents for Epson PowerLite 1815p
-
Page 1: Adjust The Image
Power light flashes green and then stays on. Power light Power button To shut down the projector: Power button twice. 1. Press the 2. When the orange light stops flashing and the projector beeps, you can unplug the projector. Adjust the Image T o raise the image, press the foot release button for the front adjustable foot and lift the front. Release the button to lock the foot in position. PowerLite 1815p ®... -
Page 2: Where To Get Help
You can use the registration card or CD included with your projector, or register online at www.epson.com/webreg. Epson is a registered trademark and EasyMP and Exceed Your Vision are trademarks of Seiko Epson Corporation. PowerLite and PrivateLine are registered trademarks of Epson America, Inc.