Table of Contents
Advertisement
Available languages
Available languages
Quick Links
Advertisement
Table of Contents

Related Manuals for Siemens BE555LMS0M


Summary of Contents for Siemens BE555LMS0M
- Page 1 Microwave Oven الميكروويف فرن BE555LMS0M en User manual and 2 ar وتعليمات المستخدم دليل installation instructions التركيب Register your product on My Siemens and discover exclusive ser- vices and offers. siemens-home.bsh-group.com/welcome The future moving in. Siemens Home Appliances...
-
Page 2: Table Of Contents
en Safety 1.2 Intended use Table of contents Only a licensed professional may connect ap- pliances without plugs. Damage caused by in- correct connection is not covered under the USER MANUAL warranty. Safety .............. 2 The appliance can only be used safely if it is correctly installed according to the safety in- Preventing material damage ....... - Page 3 Safety en Loose food remnants, fat and meat juices The hinges on the appliance door move when may catch fire. the door is opened and closed, which could ▶ Before using the appliance, remove the trap your fingers. worst of the food residues and remnants ▶...
-
Page 4: Safety
en Safety 1.5 Microwave Heat is not distributed evenly through baby food. Follow these safety instructions when using ▶ Never heat baby food in closed containers. the microwave. ▶ Always remove the lid or teat. WARNING ‒ Risk of fire! ▶ Stir or shake well after heating. Using the appliance for anything other than its ▶... -
Page 5: Preventing Material Damage
Preventing material damage en delayed boiling. WARNING ‒ Risk of electric shock! The appliance uses a high voltage. ▶ Never remove the casing. WARNING ‒ Risk of serious harm to health! The surface of the appliance may become damaged if it is not cleaned properly. Mi- crowave energy may escape. -
Page 6: Environmental Protection And Saving En- Ergy
en Environmental protection and saving energy Use a maximum microwave output of 600 watts. ▶ Operating the appliance without food in the cooking Always place the popcorn bag on a glass plate. ▶ compartment may lead to overloading. The microwave feed is damaged by the removal of the Do not switch on the microwave unless there is food ▶... -
Page 7: Familiarising Yourself With Your Appliance
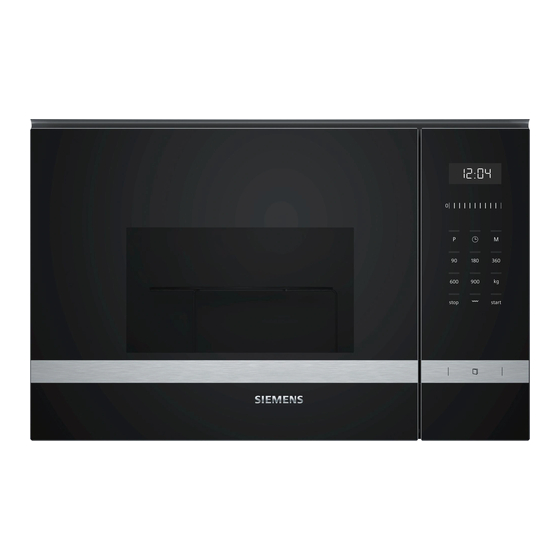
Familiarising yourself with your appliance en 4 Familiarising yourself with your appliance 4.1 Control panel You can use the control panel to configure all functions of your appliance and to obtain information about the operating status. Note: On certain models, specific details such as col- our and shape may differ from those pictured. - Page 8 en Accessories Settings area Notes ¡ In the event of a power cut, the automatic door Use the settings area to change the setting values that opener does not work. You can open the door are shown on the display. manually. The settings area works like a wheel.
-
Page 9: Accessories
Basic operation en Once the cooking compartment has cooled down, 6.4 Fitting the turntable clean the smooth surfaces with soapy water and a Never use the appliance without the turntable. dish cloth. Place the roller ring into the recess in the cooking compartment. -
Page 10: Grill
en Grill Tip: To ensure optimum use of your appliance, you can Cookware and accessor- Reason refer to the information in the recommended settings. → "How it works", Page 17 Cookware with gold or sil- Microwaves can damage Follow the safety instructions. → Page 4 ver decoration gold and silver decora- Read the safety instructions and the section on how tion. -
Page 11: Memory
Memory en 8.2 Changing the cooking time 8.5 MicroCombi You can change the cooking time at any time. To reduce the cooking time, you can use the grill in combination with microwave mode. Use the settings area to set the required cooking ▶ time. -
Page 12: Programmes
en Programmes If it is not possible to enter the exact weight, round 10.2 Pausing operation the weight up or down. Press or open the appliance door. Press to start the operation. a The indicator light lights up via . a The cooking time visibly counts down. To continue the operation, close the appliance door If an audible signal sounds during the programme, and press... -
Page 13: Basic Settings
Basic settings en Cooking food with the automatic programmes Set the programme. → Page 11 Once the programme has finished, stir the food Weigh the food. again. You require the weight in order to set the pro- The food should be left to stand for an additional 5 gramme. -
Page 14: Cleaning And Servicing
en Cleaning and servicing Requirements 11.5 Hiding the clock ¡ An audible signal sounds. To reduce the standby consumption of your appliance, ¡ 12:00 is shown on the display. you can hide the clock. ¡ The indicator light lights up via . Press ... -
Page 15: Troubleshooting
Troubleshooting en Clean the accessory with hot soapy water and a soft 12.4 Cleaning the front of the appliance dish cloth or a scrubbing brush. ATTENTION! Clean the wire rack with stainless steel cleaner or in the dishwasher. Incorrect cleaning may damage the front of the appli- ance. -
Page 16: Disposal
en Disposal 13.1 Malfunctions Fault Cause and troubleshooting The appliance is not working. The mains plug of the power cord is not plugged in. Connect the appliance to the power supply. ▶ The circuit breaker is faulty. Check the circuit breaker in the fuse box. ▶... -
Page 17: Customer Service
Customer Service en This appliance is labelled in accord- ance with European Directive 2012/19/EU concerning used elec- trical and electronic appliances (waste electrical and electronic equip- ment - WEEE). The guideline determines the frame- work for the return and recycling of used appliances as applicable throughout the EU. - Page 18 en How it works Note: Liquid is produced when you defrost meat 16.3 Defrosting and poultry. With your appliance you can defrost frozen food. Drain off any liquid when turning and under no cir- Defrosting food cumstances use it for other purposes or allow it to come into contact with other foods.
-
Page 19: How It Works
How it works en Food Weight in g Microwave power Cooking time in mins setting in W Butter, defrosting 1. 180 1. 1 2. 90 2. 3–4 Loaf of bread 1. 180 1. 6 2. 90 2. 5–10 Loaf of bread 1000 1. 180 1. - Page 20 en How it works Heating frozen food in the microwave Observe the recommended settings for using the microwave to heat frozen food. Food Weight in g Microwave power Cooking time in mins setting in W Set menu, plated meal, ready meal with 2–3 300–400 8–11 components Soup...
- Page 21 How it works en Do not cover the food when grilling. 16.5 Cooking ‒ Do not cover the food when combining the mi- ‒ With your appliance you can cook food. crowave and grill. Always place the cookware on the turntable. Cooking food Always place the wire rack on the turntable when ‒...
- Page 22 en How it works Food Amount Accessories Type of Cooking Information crowave heating time power in mins setting in W Bake, savoury, made 1000 g Cookware 30–40 The maximum thickness of from cooked ingredi- without lid the food is 4 cm. ents, e.g. potato gratin Soups, gratinated, 2–4 cups Cookware 15–20 e.g. onion soup...
-
Page 23: Installation Instructions
Installation instructions en 16.6 Test dishes These overviews have been produced for test institutes to facilitate appliance testing in accordance with EN 60350-1:2013 or IEC 60350-1:2011 and EN 60705:2012, IEC 60705:2010. Cooking with the microwave Recommended settings for cooking with the microwave. Food Microwave power Cooking time in mins Note:... - Page 24 en Installation instructions ¡ Only a licensed professional may connect 17.4 Fitted units appliances without plugs. Damage caused Here, you can find notes on safe installation. by incorrect connection is not covered un- ATTENTION! der the warranty. Any shavings may impair the function of electrical com- ponents.
- Page 25 Installation instructions en Check the clearance to the adjacent appliances. 17.7 Installing the appliance Secure the spacers to the appliance in accordance with the wall thickness. The clearance to the adjacent appliances must be at least 3 mm. Remove any packaging material and adhesive film Note: from the cooking compartment and the door.
- Page 26 ar األمان االستعمال المطابق للتعليمات فهرس المحتويات ال يجوز توصيل الجهاز دون قابس إال بمعرفة فني مؤهل. حيث ال يحق المطالبة بحقوق الضمان في حالة توصيل الجهاز بشك ل ٍ غير دليل المستخدم .صحيح ............... األمان فتركيب الجهاز بشكل سليم وفقًا لدليل التركيب هو...
- Page 27 األمانar يمكن أن تتسبب السخونة الزائدة في نشوب !تحذير ‒ خطر الصعق الكهربائي .حريق تنطوي أعمال اإلصالح غير السليمة فن ي ًا على ال تقم أب د ًا بتركيب الجهاز خلف باب ديكوري ◀ .أخطار .أو باب وحدة مطبخ وحدهم أفراد الطاقم الفن ي ّ المد ر َّبون من ◀...
- Page 28 ar األمان .أزل الغطاء أو الحلمة دائما ال تستخدم الجهاز لتدفئة األحذية، أكياس ◀ ◀ الذرة والحبوب، اإلسفنجات، فوط التنظيف .قم بقلب الطعام وتقليبه جيدا بعد التسخين ◀ .األقمشة الرطبة وما شابهها وتأكد من درجة حرارة الطعام قبل تقديمه ◀ .للطفل...
- Page 29 تجنب األضرار الماديةar يمكن أن يؤدي اإلناء أو الوعاء المصنوع من !تحذير ‒ خطر حدوث أضرار صحية جسيمة المعدن أو اإلناء المشتمل على حليات معدنية يمكن أن يتعرض سطح الجهاز للتلف في حالة .إلى تكون شرر في طريقة تشغيل الميكروويف التنظيف بشكل غير صحيح. يمكن أن تتسرب .ومن...
- Page 30 ar حماية البيئة والتوفير حماية البيئة والتوفير التخلص من مواد التغليف كافة مواد التغليف خاما ت ٌ غير ضارة بالبيئة ويمكن .إعادة استغاللها تخ ل َّص من المك و ِّنات المفردة بشك ل ٍ منفصل حسب ◀ .نوعها توفير الطاقة عندما...
- Page 31 التع ر ّفar التع ر ّف نطاق االستعمال اضبط كل وظائف جهازك واحصل على معلوما ت ٍ حول .حالة التشغيل عبر لوحة االستعمال يمكن أن تختلف التفاصيل الواردة في الصورة :مالحظة .حسب نوع الجهاز، من قبيل اللون والشكل .فتح الباب األوتوماتيكي مفتاح...
- Page 32 ar الملحقات نطاق الضبط مالحظات وعند انقطاع التيار الكهربائي تتوقف وظيفة الفتح ¡ يمكنك باستخدام نطاق الضبط تغيير قيم الضبط التي .األوتوماتيكي للباب. وعندئذ يمكنك فتح الباب يدو ي ًا .تظهر في شاشة العرض يعمل نطاق الضبط كطارة. لتغيير وضع الضبط، مرر إصبعك إذا...
- Page 33 االستعمال األساسيar تركيب الصحن الدوار في في آلية التدوير قم بتثبيت الصحن الدوار .منتصف أرضية حيز الطهي .ال تستخدم جهازك إال مع تركيب الصحن الدوار .تأكد من تثبيت الصحن الدوار بشكل صحيح في التجويف الموجود بحيز ضع الحلقة الدوارة .يمكن إدارة الصحن الدوار إلى اليسار أو اليمين :مالحظة...
- Page 34 ar الشواية اختبار اإلناء من حيث مالءمته للميكروويف لتحقيق أفضل استفادة من الجهاز، استرشد :نصيحة .بالبيانات الواردة في توصيات الضبط .تحقق من مالءمة اإلناء للميكروويف من خالل اختبار اإلناء صفحة ,""هكذا يتم األمر ← حيث ال ي ُسمح بتشغيل الجهاز دون إضافة طعام في .طريقة...
- Page 35 الذاكرةar عندما تفتح باب حيز الطهي أثناء التشغيل، يقطع :مالحظة الميكروويف عملية التشغيل ويتوقف العد التنازلي للوقت المضبوط. وعند إغالق باب حيز الطهي يتم مواصلة .التشغيل الذاكرة تشغيل الذاكرة باستخدام وظيفة »الذاكرة«، يمكنك تخزين وضع الضبط .لوجبة ما واستدعائها مرة أخرى في أي وقت يمكنك...
- Page 36 ar البرامج إذابة التجمد باستخدام البرمجة األوتوماتيكية 10.4 .يمكنك عن طريق برامج إزابة التجمد األربعة إزابة تجمد اللحوم والدجاج والخبز نطاق الوزن بالكيلوجرام اإلناء الطعام البرنامج 0.20-1.00 مفتوح اللحم المفروم 0.20-1.00 مفتوح قطع لحم 0.40-1.80 مفتوح الدجاج، أجزاء الدجاج 0.20-1.00 مفتوح الخبز...
- Page 37 أوضاع الضبط األساسيةar طهي األطعمة باستخدام برنامج الطهي المشترك ضع الطعام على إناء مناسب للميكروويف ومقاوم .للسخونة وغير كبير للغاية .أخرج الطعام من عبوة التغليف صفحة .اضبط البرنامج ← .قم بوزن الطعام إلى عند انتهاء البرنامج، اترك الطعام يهدأ لمدة من .يجب...
- Page 38 ar التنظيف والعناية .اغسل الفوط اإلسفنجية جي د ًا قبل االستخدام ◀ .أعد تركيب الصحن الدوار .ي ُراعى أثناء ذلك تثبيت الصحن الدوار بشكل صحيح يمكنك االطالع على تعليمات التنظيف المعنية لمعرفة .مواد التنظيف المناسبة لألسطح واألجزاء ذات الصلة تنظيف واجهة الجهاز 12.4 تنظيف...
- Page 39 التغلب على االختالالتar .ضع دائما ملعقة في الفنجان لتجنب تأخر الغليان قم بتنظيف زجاج الباب باستخدام فوطة تنظيف رطبة .ضع الفنجان في منتصف حيز الطهي .ومنظف الزجاج .واط اضبط قدرة الميكروويف الظالل الموجودة على زجاج الباب والتي :مالحظة .دقائق اضبط المدة على تبدو...
- Page 40 ar التخلص السبب والتغلب على األعطال العطل .توجد اتساخات أو أجسام غريبة في نطاق آلية تدوير الصحن الدوار .الصحن الدوار به خدش أو جلخ .قم بتنظيف الحلقة الدوارة والتجويف في حيز الطهي ◀ .هناك خلل في الجهاز .تنقطع طريقة تشغيل الميكروويف .إذا...
- Page 41 هكذا يتم األمرar هكذا يتم األمر تجد هنا أوضاع الضبط المناسبة وكذلك أفضل الكماليات النصيحة الهدف واألواني لتحضير الوجبات المختلفة. وقد قمنا بمواءمة ينبغي أن يكون الطعام غير ¡ آلخر حين من الطعام بتقليب قم .التوصيات بما يتناسب مع جهازك بشكل مثالي معرض...
- Page 42 ar هكذا يتم األمر إزابة التجمد باستخدام الميكروويف .احرص على مراعاة توصيات الضبط الخاصة بإذابة تجمد األطعمة المجمدة باستخدام الميكروويف المدة بالدقائق قدرة الميكروويف بالواط الوزن بالجرام الطعام ،لحم بقري، لحم بتلو، لحم دسم، قطع كاملة - بعظم ودون عظم 1000 ،لحم...
- Page 43 هكذا يتم األمرar التسخين 16.4 !تنبيه تالمس المعدن مع جدار حيز الطهي قد ي ُولد شرر ي ُلحق .يمكنك تسخين األطعمة باستخدام جهازك .الضرر بالجهاز ويؤدي إلى كسر زجاج الباب الداخلي تسخين األطعمة يجب أال تقل المسافة بين المعدن – مثل الملعقة ◀...
- Page 44 ar هكذا يتم األمر التسخين باستخدام الميكروويف .احرص على مراعاة توصيات الضبط الخاصة بالتسخين باستخدام الميكروويف المدة بالدقائق قدرة الميكروويف بالواط الكمية الطعام - مل المشروبات - مل المشروبات حوالي مل طعام ال ر ُضع، مثل زجاجة الحليب حوالي مل طعام...
- Page 45 هكذا يتم األمرar إرشادات المدة بالدقائق نوع التسخين قدرة الكماليات الكمية الطعام الميكروويف بالواط ضعها بينما جانب الجلد 30-40 إناء مفتوح جم قطع الدجاج، مثل ربع موجها ألعلى. ال تقلب دجاجة .الطعام الشبكة السلكية .ال تقلب الطعام 15-25 إناء مفتوح جم...
- Page 46 ar دليل التركيب إرشادات المدة بالدقائق نوع التسخين قدرة الكماليات الكمية الطعام الميكروويف بالواط أضف ضعف الكمية من إناء مغلق جم األرز .السوائل 15-18 الجانب الشبكة السلكية شرائح تحميص أولي لخبز :األول التوست الجانب :الثاني تختلف المدة حسب الطبقة 7-10 الشبكة السلكية شرائح...
- Page 47 دليل التركيبar ،إذا لم يعد الوصول إلى القابس ممك ن ًا بعد التركيب ◀ فيجب أن يتوافر في موقع التركيب تجهيزة فصل لجميع مم. يجب أن األقطاب بفجوة تالمس ال تقل عن .تضمن عملية التركيب الحماية من حدوث تالمس مجموعة التجهيزات الموردة 17.3 بعد...
- Page 48 ar دليل التركيب استمر في ربط الجهاز حتى تتم محاذاة الجهاز في تطابق المسافة من الحافة السفلية القيمة :مالحظة .المنتصف .للوح التوصيل إلى أرضية وحدة التركيب .اربط لوح التوصيل على الخزانة المرتفعة .المحددة ي ُراعى أثناء ذلك القيمة .افحص المسافة من األجهزة المجاورة تركيب...
- Page 52 Grand Union House Old Wolverton Road Wolverton, Milton Keynes MK12 5PT United Kingdom Manufactured by BSH Hausgeräte GmbH under the trademark licence of Siemens AG تم التصنيع بواسطة شركةBSH Hausgeräte GmbH بموجب ترخيص العالمة التجاريةSiemens AG *9001611126* 9001611126 (010315) en, ar...