Table of Contents
Advertisement
Quick Links
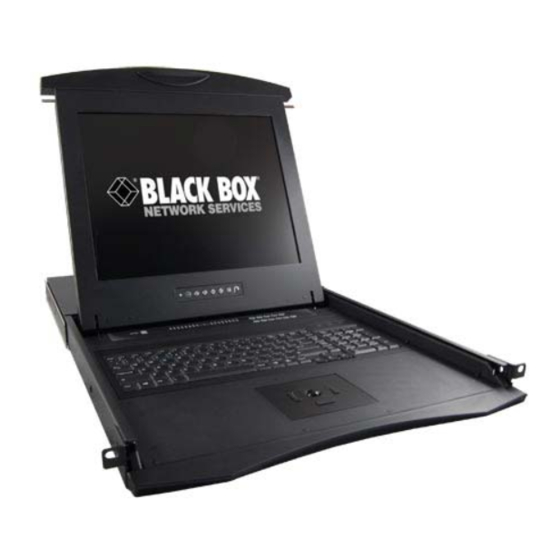
ServView 17
Enterprise KVM
Drawer Range
SW151AE-116
SW151AE-132
SW151AE-216
SW151AE-232
SW151AE-IP16
SW151AE-IP32
KVT151AE-UK
KVT151AE-UK-116
KVT151AE-UK-132
KVT151AE-UK-216
KVT151AE-UK-232
KVT151AE-UK-IP16
KVT151AE-UK-IP32
KVT152AE-UK
KVT152AE-UK-116
KVT152AE-UK-132
KVT152AE-UK-216
KVT152AE-UK-232
KVT152AE-UK-IP16
KVT152AE-UK-IP32
Advertisement
Table of Contents

Related Manuals for Black Box ServSwitch ServView 17 Series

Summary of Contents for Black Box ServSwitch ServView 17 Series
- Page 1 ServView 17 Enterprise KVM Drawer Range KVT151AE-UK KVT151AE-UK-116 KVT151AE-UK-132 KVT151AE-UK-216 KVT151AE-UK-232 KVT151AE-UK-IP16 KVT151AE-UK-IP32 KVT152AE-UK SW151AE-116 KVT152AE-UK-116 SW151AE-132 KVT152AE-UK-132 SW151AE-216 KVT152AE-UK-216 SW151AE-232 KVT152AE-UK-232 SW151AE-IP16 KVT152AE-UK-IP16 SW151AE-IP32 KVT152AE-UK-IP32...
-
Page 2: Table Of Contents
ServView 17 Enterprise KVM Drawer CONTENTS Chapter 1 Getting Started 1.1 Important Safeguards 1.2 Regulatory Notice 1.3 Before Installation 1.4 Installation Chapter 2 How to connect CAT5 KVM Switches 2.1 KVT15XAE-UK-116/132 CAT5 Single Console 2.2 KVT15XAE-UK-216/232 CAT5 Two Console 2.3 KVT15XAE-UK-IP16/IP32 CAT5 Single Console 2.4 KVT150AE-PS2/USB Dongle Connections Chapter 3 How to use your CAT5 KVM Switch 3.1 KVM Installation... - Page 3 ServView 17 Enterprise KVM Drawer Chapter 4 KVT15XAE-UK-IP/16/IP32 IP Remote Setup (Continued) 4.6 User Management 4.7 KVM Settings 4.8 Device Settings 4.9 Maintenance 4.10 Video Modes Chapter 5 Specifications 5.1 Specifications...
-
Page 4: Important Safeguards
ServView 17 Enterprise KVM Drawer 1.1 Important Safeguards Please read all of these instructions carefully before you use the device. Save this manual for future reference. What the warranty does NOT cover ■ Any product, on which the serial number has been defaced, modified or removed. ■... -
Page 5: Regulatory Notice
ServView 17 Enterprise KVM Drawer 1.2 Regulatory Notice Legal Information Information in this document has been carefully checked for accuracy; however, no guarantee is given to the correctness of the contents. The information in this document is subject to change without notice. We are not liable for any injury or loss that results from the use of this equipment. -
Page 6: Before Installation
ServView 17 Enterprise KVM Drawer 1.3 Before Installation ■ It is very important to locate the KVM in a suitable environment. ■ The surface for locating and fixing the KVM switch should be stable and level or mounted ■ Make sure the place has good ventilation, is out of direct sunlight and away from sources into a suitable cabinet. -
Page 7: Kvt15Xae-Uk-116/132 Cat5 Single Console
ServView 17 Enterprise KVM Drawer 2.1 KVT15XAE UK 116/132 CAT5 Single Console Package Contents KVM Switch (x1) Screw M3.2 x 4.5mm (x4) Screw M4 x 10mm (x8). Bracket Set (x1) User Manual on CD-ROM (x1) Power Cord (x1) - Page 8 ServView 17 Enterprise KVM Drawer Connection...
- Page 9 ServView 17 Enterprise KVM Drawer Cascade ■ You can cascade 16 port units to up to 128 servers. With the 32 port unit cascade up to 256 servers. ■ Cascade multiple KVM switches using the KVT152A-CASCADE cable.
-
Page 10: Kvt15Xae-Uk-216/232 Cat5 Two Console
ServView 17 Enterprise KVM Drawer 2.2 KVT15XAE UK 216/232 CAT5 Two Console Package Contents KVM Switch (x1) Screw M3.2 x 4.5mm (x4) Screw M4 x 10mm (x8). Bracket Set (x1) Receiver (x1) User Manual on CD-ROM (x1) 9V Power adaptor for Receiver (x1) Power cord (x1) 2-in-1 USB KVM Cable (x1) - Page 11 ServView 17 Enterprise KVM Drawer Connection...
- Page 12 ServView 17 Enterprise KVM Drawer Receiver Receiver...
-
Page 13: Kvt15Xae-Uk-Ip16/Ip32 Cat5 Single Console
ServView 17 Enterprise KVM Drawer 2.3 KVT15XAE UK IP16/IP32 IP CAT5 KVM Package Contents KVM Switch (x1) Screw M3.2 x 4.5mm (x4) Screw M4 x 10mm (x8). Bracket Set (x1) User Manual on CD-ROM (x1) Power Cord (x1) - Page 14 ServView 17 Enterprise KVM Drawer Connection...
- Page 15 ServView 17 Enterprise KVM Drawer Cascade ■ The cascaded switch (Banks 2 to 8) must be a single console Cat5 KVM (SW151AE-116/132). ■ Cascade up to 128 servers with the 16 port IP-KVM and up to 256 with the 32 port. ■...
-
Page 16: Kvt150Ae-Ps2/Usb Dongle Connections
ServView 17 Enterprise KVM Drawer 2.4 KVT150A PS2/USB Connection KVT150A PS2 PS/2 dongle ■ Connect the DB-15 connector to the computer’s video card. ■ Connect the keyboard connector to the computer’s keyboard port. ■ Connect the mouse connector to the computer’s mouse port. KVT150A USB USB dongle ■... -
Page 17: Kvm Installation
ServView 17 Enterprise KVM Drawer 3.1 KVM Installation Power ON ■ Turn off all servers and KVM switches. ■ Make sure all cables / connectors are properly connected. ■ The recommended Power ON sequence is monitor, KVM switch, and then finally the computer. -
Page 18: Password
Logout of the KVM switch by entering the KVM hotkey Scroll Lock + Scroll Lock + P. Following this you will not need a user name & password to access the KVM OSD menu. ■ Forget your password. Please contact Black Box for further support. Note: ■ You must enter the KVM hotkey within 2 seconds. -
Page 19: Kvm Osd
ServView 17 Enterprise KVM Drawer 3.3 KVM OSD OSD Menu OSD operation next to the system name The PC is powered on next to the system name The PC is selected Access F1 MAIN MENU Logout the OSD menu Previous menu Cancel/Quit Enter Complete/Switch to selected port... - Page 20 ServView 17 Enterprise KVM Drawer LANGUAGE OSD language change PORT NAME EDIT Define port name PORT SEARCH Quick searching by port name USER SECURITY Change password ACCESS LIST Define user access authority HOTKEY Change hotkey TIME SETTINGS Modify scan display time interval OSD MOUSE Modify OSD mouse speed...
-
Page 21: Kvm Hotkey
ServView 17 Enterprise KVM Drawer 3.4 KVM Hotkey Local Console Hotkey Hotkey Function Scroll Lock + Scroll Lock + Space Bar Calling OSD menu Right-button mouse + Esc Calling OSD menu Scroll Lock + Scroll Lock + Switch to previous port Scroll Lock + Scroll Lock + Switch to next port Scroll Lock + Scroll Lock + PgUp/PgDown... - Page 22 ServView 17 Enterprise KVM Drawer Remote Console Hotkey Hotkey Function Caps Lock + Caps Lock + F1 Calls the Help OSD windows Caps Lock + Caps Lock + F2 Select Hotkey *Default is Caps Lock Caps Lock + Caps Lock + C Toggle the switch between remote &...
-
Page 23: Ip Setup
ServView 17 Enterprise KVM Drawer 3.5 IP Setup Note This chapter refers to IP Switch Versions only Quick Installation 1. Power off all KVM hardware and connected devices. 2. Connect the power supply to the IP KVM switch 3. Connect the monitor, keyboard & mouse to the console port of the IP KVM switch (not applicable to integrated LCD drawer version ) 4. -
Page 24: Ip Remote Setup
ServView 17 Enterprise KVM Drawer 4.1 IP Remote Setup Note This chapter refers to IP Switch Versions only Remote Mouse Settings A common problem with KVM devices is the synchronization between the local and remote mouse cursors. This IP KVM switch addresses this situation with an intelligent synchronization algorithm. - Page 25 ServView 17 Enterprise KVM Drawer Host system mouse settings Note: The following limitations do not apply to USB mice While the IP-KVM switch works with accelerated mice and is able to synchronize the local with the remote mouse pointer, there are the following limitations which may prevent this synchronization from working correctly: Special Mouse Driver There are mouse drivers which influence the synchronization process and lead to desynchro-...
-
Page 26: Remote Access
ServView 17 Enterprise KVM Drawer 4.2 Remote Access Use HTTP or HTTPS and enter the IP address of the IP KVM switch into your web browser. The login page will be shown as below. Enter the default user name & password. You will enter the main page of IP KVM switch as below: Note: ■... - Page 27 ServView 17 Enterprise KVM Drawer Navigation Having logged into the IP-KVM switch successfully, the main page of the IP-KVM switch will appear. This page consists of three parts. The buttons at the top allow you to navigate within the front end. The navigation bar at the left allows you to switch between the different sec- tions of the IP-KVM switch.
-
Page 28: The Remote Console
ServView 17 Enterprise KVM Drawer 4.3 The Remote Console General Description The Remote Console is the redirected screen, keyboard and mouse of the remote host system that IP-KVM switch controls. The Remote Console window is a Java Applet that tries to establish its own TCP connection to the IP-KVM switch. - Page 29 ServView 17 Enterprise KVM Drawer The Remote Console window always tries to show the remote screen at its optimal size. It will adapt its size to the size of the remote screen initially and after the screen resolution of the remote screen has been changed. However, you can always resize the Remote Console window in your local window system manually.
- Page 30 ServView 17 Enterprise KVM Drawer To open the Options menu, click on the “Options” button. Options Remote Console Options Menu A short description of the options follows: ■ Monitor Only Toggles the “Monitor Only” filter on or off. If the filter is switched on, no remote console interaction is possible and the connection is view only ■...
- Page 31 ServView 17 Enterprise KVM Drawer ■ Scaling Allows you to scale down the Remote Console. You can still use both the mouse and the keyboard, however the scaling algorithm will not preserve all display details. ■ Mouse Handling The submenu for mouse handling offers two options for synchronising the local and the remote mouse pointer.
- Page 32 ServView 17 Enterprise KVM Drawer ■ Local Cursor Offers a list of different cursor shapes to choose from for the local mouse pointer. The selected shape will be saved for the current user and activated the next time this user opens the Remote Console.
- Page 33 ServView 17 Enterprise KVM Drawer Video Settings Panel ■ Brightness Controls the brightness of the picture. ■ Contrast Controls the contrast of the picture. ■ Clock Defines the horizontal frequency. Different video card types may require different values here. The default settings set by the auto adjustment procedure should be adequate for all common configurations.
- Page 34 ServView 17 Enterprise KVM Drawer ■ Save Changes Save changes permanently. ■ Undo Changes Restore last settings. ■ Soft Keyboard Soft Keyboard Opens up the Menu for the Soft-Keyboard ■ Show Shows the Soft-Keyboard. The Soft-Keyboard is necessary if your host system runs a completely different language and country mapping from your administration machine.
- Page 35 ServView 17 Enterprise KVM Drawer ■ Local Keyboard Used to change the language mapping of your browser machine running the Remote Console Applet. Normally, the applet determines the correct value automatically. However, depending on your particular JVM and your browser settings this is not always possible.
- Page 36 ServView 17 Enterprise KVM Drawer The standard color depth is 16 Bit (65536 colors). The other colour depths are intended for slower network connections in order to allow a faster transmission of data. Only compression level 0 (no compression) uses 16 Bit color depth. At lower bandwidths 4 Bit (16 colors) and 2 Bit (4 gray scales) are recommended for typical desktop interfaces.
-
Page 37: Remote Control
ServView 17 Enterprise KVM Drawer 4.4 Remote Control KVM Console KVM Console To open the KVM console, either click on the menu entry on the left, or on the console picture on the right. To refresh the picture, click on the “Refresh” Button. Telnet The switch features a Telnet server that enables a user to connect via a standard Telnet client. - Page 38 ServView 17 Enterprise KVM Drawer The switch will prompt for a username and password. This is the same as the password for the web interface. Once you have successfully logged into the switch a command line will be presented and you can enter management commands.
-
Page 39: Virtual Media
ServView 17 Enterprise KVM Drawer 4.5 Virtual Media Floppy Disk Virtual Floppy Area Upload a Floppy Image This is a two step process; ■ Click the “Browse” button and select the image file The maximum image size is limited to 1.44MB. Click the “Upload”... - Page 40 ServView 17 Enterprise KVM Drawer CD-ROM Image Use an Image on a Windows Share (SAMBA) To include an image from a Windows share, select “CD-ROM” from the submenu. Selecting CD ROM Select Windows Share...
- Page 41 ServView 17 Enterprise KVM Drawer The following information has to be given to mount the image properly: Share host The server name or IP address Share name The name of the share to be used Path to image The name of the image file on the share User (optional) If necessary, specify the user name for the share If unspecified and a guest account is activated this guest account...
- Page 42 ServView 17 Enterprise KVM Drawer Share configuration dialogue Adjust the settings for the selected directory ■ Activate the selected directory as a share. Select “Sharing this folder”. ■ Choose an appropriate name for the share. You may also add a short description for the folder (using the “Comment”...
- Page 43 ServView 17 Enterprise KVM Drawer Share configuration dialogue From the menu, select the “Read” tab. Enter (or choose) the name of the file in which you would like to save the floppy content. Click on the “Copy” button to initiate the image cre- ation process.
- Page 44 ServView 17 Enterprise KVM Drawer Nero selection dialogue...
- Page 45 ServView 17 Enterprise KVM Drawer Drive redirection Options of Drive Redirection Drive installation Please follow the Drive Redirection Setup Wizard step by step to install the driver from the attached CD ROM. Drive redirection setup...
- Page 46 ServView 17 Enterprise KVM Drawer Drive Redirection Settings Drive Redirection Settings Drive to redirect Device: IP of IP-KVM switch Drive: The local drive you want to share with the remote computer This could be floppy disc, CD-ROMs, USB-Sticks and hard drives. Port: This is a fixed number “443”.
- Page 47 ServView 17 Enterprise KVM Drawer Options USB mass storage option Set this option to disable mass storage emulation (and hide the virtual drive) if no image file is currently loaded. If unset and no file image is found the host system may hang on boot due to changes in the boot order or the boot manager (LILO, GRUB).
- Page 48 ServView 17 Enterprise KVM Drawer 4.6 User Management Change Password Set Password To change your password, enter the new password in the upper entry field. Retype the pass- word in the field below. Click “Apply” to submit your changes.
- Page 49 ServView 17 Enterprise KVM Drawer Users and Groups Set User The switch comes with 2 pre-configured user accounts that have fixed permissions. The “super” account has all possible rights to configure the device and to use all the functions the switch offers. The “user” account has only the permission to open and use the Remote Console.
- Page 50 ServView 17 Enterprise KVM Drawer 4.7 KVM Settings User Console The following settings are user specific. This means the super user can customize these settings for every user separately. Changing the settings for one user does not affect the settings for the other users User Console Settings User select box This selection box displays the user ID for which the values are shown and for which the...
- Page 51 ServView 17 Enterprise KVM Drawer User Console Settings (Part 2) Remote Console Type Specifies which Remote Console Viewer to use. Default Java-VM Uses the default Java Virtual Machine of your Browser. This may be the Microsoft JVM for Internet Explorer, or the Sun JVM if it is configured this way. Use of the Sun JVM may also be forced (see below).
- Page 52 ServView 17 Enterprise KVM Drawer Miscellaneous Remote Console Settings Start in Monitor Mode Sets the initial value for monitor mode. By default monitor mode is off. If you switch it on the Remote Console window will be started in view only mode. Start in Exclusive Access Mode Enables exclusive access mode immediately at Remote Console startup.
- Page 53 ServView 17 Enterprise KVM Drawer Keyboard and Mouse Settings Host Interface Selects the interface the mouse is connected to. You can choose between “Auto” for automatic detection, “USB” for a USB mouse, and “PS/2” for a PS/2 mouse. PS/2 Keyboard Model Enables a specific keyboard layout.
- Page 54 ServView 17 Enterprise KVM Drawer Video Settings Video Settings Miscellaneous Video Settings ■ Noise filter. This option defines how the IP-KVM switch reacts to small changes in the video input signal. A large filter setting creates less network traffic and leads to a faster video dis play, but small changes in some display regions may not be recognized immediately.
- Page 55 ServView 17 Enterprise KVM Drawer 4.8 Device Settings Network The Network Settings panel allows you to change network related parameters. Each parameter is explained below. Once applied the new network settings will immediately come into effect. Network Settings IP auto configuration With this option you can select whether the IP-KVM switch should take its network settings from a DHCP or BOOTP server.
- Page 56 ServView 17 Enterprise KVM Drawer Primary DNS Server IP Address IP address of the primary Domain Name Server in dot notation. This option may be left empty, however the IP-KVM switch will not be able to perform name resolution. Secondary DNS Server IP Address IP address of the secondary Domain Name Server in dot notation.
- Page 57 ServView 17 Enterprise KVM Drawer Dynamic DNS Dynamic DNS A freely available Dynamic DNS service (dyndns.org) can be used in the scenario on the following page..
- Page 58 ServView 17 Enterprise KVM Drawer The IP-KVM switch is accessible via the IP address of the DSL router, which is dynamically assigned by the provider. Since the administrator does not know the IP address assigned by the provider, the IP-KVM switch connects to a special dynamic DNS server at regular intervals and registers its IP address there.
- Page 59 ServView 17 Enterprise KVM Drawer Hostname This is the hostname of the IP-KVM switch that is provided by the Dynamic DNS Server. (Use the whole name including the domain, e.g. testserver.dyndns.org, not just the actual hostname). Username You will have registered this username during the manual registration with the Dynamic DNS Server.
- Page 60 ServView 17 Enterprise KVM Drawer Force HTTPS If this option is enabled access to the web front-end is only possible using an HTTPS connection. The IP-KVM switch will not listen on the HTTP port for incoming connections. If you want to create your own SSL certificate to identify the IP-KVM switch refer to the Certificate section.
- Page 61 ServView 17 Enterprise KVM Drawer However, it is possible to generate and install a new certificate that is unique for to particular IP-KVM switch. In order to do this, the IP-KVM switch is able to generate a new cryptographic key and the associated Certificate Signing Request (CSR) that needs to be certified by a certification authority (CA).
- Page 62 ServView 17 Enterprise KVM Drawer Organisation The name of the organisation to which the IP-KVM switch belongs. Locality/City The city where the organisation is located. State/Province The state or province where the organisation is located. Country (ISO code) The country where the organisation is located. This is the two-letter ISO code, e.g. DE for Germany, or US for the USA.
- Page 63 ServView 17 Enterprise KVM Drawer Serial Port Serial Port The IP-KVM switch’s Serial Settings allow you to specify what device is connected to the serial port and how to use it. Configuration or console login Do not use the serial port for any special function; use it only for the initial configuration Modem The IP-KVM switch offers remote access using a telephone line in addition to the standard ac- cess over the built-in Ethernet adapter.
- Page 64 ServView 17 Enterprise KVM Drawer Serial line speed The speed the IP-KVM switch uses to communicate with the modem. Most modems available today will support the default value of 115200 bps. If you are using an old modem and discovering problems try to lowering this speed. Modem Init String The initialisation string used by the IP-KVM switch to initialise the modem.
- Page 65 ServView 17 Enterprise KVM Drawer This is where the internal real-time clock of the IP-KVM switch can be set. Either adjust the clock manually or to use a NTP timeserver. Without a timeserver, your time setting will not be persistent, so you will have to readjust if the IP-KVM switch loses power for more than a few minutes.
- Page 66 ServView 17 Enterprise KVM Drawer SMTP logging enabled With this option enabled the IP-KVM switch is able to send Emails to the address given in the Email address text field in the Event Log Settings. These mails contain the same description strings as the internal log file and the mail subject is filled with the event group of the log event.
- Page 67 ServView 17 Enterprise KVM Drawer 4.9 Maintenance Device Information Board Summary This section contains a summary with information about this IP-KVM and its current firmware and allows you to reset the unit. The support Data File support allows you to download specific information, such as serial number, that we may require for support.
- Page 68 ServView 17 Enterprise KVM Drawer Connected User displays user activity. From left to right you see the connected user(s), the IP address of host and the user’s activity status. RC means that the Remote Console is open. If the Remote Console is opened in exclusive mode the term (exclusive) is added. Reset Functions This section allows you to reset specific parts of the device.
- Page 69 ServView 17 Enterprise KVM Drawer Update Firmware Update Firmware The IP-KVM switch is a standalone computer. The software it runs is called firmware. The firmware of the IP-KVM switch can be updated remotely in order to install new functionality or special features. A new firmware update is a binary file which will be sent to you by email.
- Page 70 ServView 17 Enterprise KVM Drawer ■ Thirdly, after the firmware has been stored, the panel will request you to reset the IP-KVM switch manually. Half a minute after the reset, the IP-KVM switch will run with the new firmware version and should be accessible. However, you are requested to login once again. Unit Reset Unit Reset This section allows you to reset specific parts of the device.
- Page 71 ServView 17 Enterprise KVM Drawer 4.10 Video Modes The table below lists the video modes the IP-KVM switch supports. Please don’t use other cus- tom video setting as switch may not be able to detect them.
- Page 72 ServView 17 Enterprise KVM Drawer 5.1 Specifications KVT15XAE-UK-116/132 KVM Port Number of ports: 16 or 32 Connector: RJ-45 Connectivity: KVT150AE-USB/PS/2 dongle up to 132 feet Local Console Graphic Connector: HDDB15-pin VGA Resolution: Up to 1600 x 1200 Input Device: 2 x USB type A for keyboard & mouse Management English, France, German, Spanish, Italian, Russian, Multilingual OSD:...
- Page 73 ServView 17 Enterprise KVM Drawer KVT15XAE-UK-116/132 (continued) Environmental Operating Temperature: 0 to 50°C Storage Temperature: -10 to 60°C Relative humidity: 90%, non-condensing Shock: 50G peak acceleration (11ms, half-sine wave) Vibration: 58~100Hz / 0.98G (11ms / cycle) Product Information Dimensions (W x D x H): 443 x 180 x 44 mm / 17.3 x 7.1 x 1.73 inch Net weight: 4 kg / 9 lb...
- Page 74 ServView 17 Enterprise KVM Drawer KVT15XAE-UK-216/232 - SW151AE-216/232 KVM Port Number of ports: 16 or 32 Connector: RJ-45 Connectivity: KVT150AE-USB/PS/2 dongle up to 132 feet Local Console Graphic Connector: HDDB15-pin VGA Resolution: Up to 1600 x 1200 Input Device: 2 x USB type A for keyboard & mouse Remote Console Connector: HDDB15-pin VGA...
- Page 75 ServView 17 Enterprise KVM Drawer KVT15XAE-UK-216/232 - SW151AE-216/232 (continued) Environmental Operating Temperature: 0 to 50°C Storage Temperature: -10 to 60°C Relative humidity: 90%, non-condensing Shock: 50G peak acceleration (11ms, half-sine wave) Vibration: 58~100Hz / 0.98G (11ms / cycle) Product Information Dimensions (W x D x H): 443 x 180 x 44 mm / 17.3 x 7.1 x 1.73 inch Net weight:...
- Page 76 ServView 17 Enterprise KVM Drawer KVT15XAE-UK-IP16/IP32 - SW151AE-IP16/IP32 KVM Port Number of ports: 16 or 32 Connector: RJ-45 Connectivity: KVT150AE-USB/PS/2 dongle up to 132 feet Local Console Graphic Connector: HDDB15-pin VGA Resolution: Up to 1600 x 1200 Input Device: 2 x USB type A for keyboard & mouse IP Remote Console Connector: RJ-45 Ethernet...
- Page 77 ServView 17 Enterprise KVM Drawer KVT15XAE-UK-IP16/IP32 - SW151AE-IP16/IP32 (continued) Environmental Operating Temperature: 0 to 50°C Storage Temperature: -10 to 60°C Relative humidity: 90%, non-condensing Shock: 50G peak acceleration (11ms, half-sine wave) Vibration: 58~100Hz / 0.98G (11ms / cycle) Product Information Dimensions (W x D x H): 443 x 180 x 44 mm / 17.3 x 7.1 x 1.73 inch Net weight:...
- Page 78 Customer Support Information: FREE tech support 24 hours a day, 7 days a week: Call 0118 965 6000 Address: Black Box Network Services (UK) Ltd., 464 Basingstoke Road, Reading, Berkshire, RG2 0BG Web:www.blackbox.co.uk • E-mail: info@blackbox.co.uk © Copyright 2007. Black Box Corporation. All rights reserved.