
Related Manuals for Carrier SmartView


Summary of Contents for Carrier SmartView
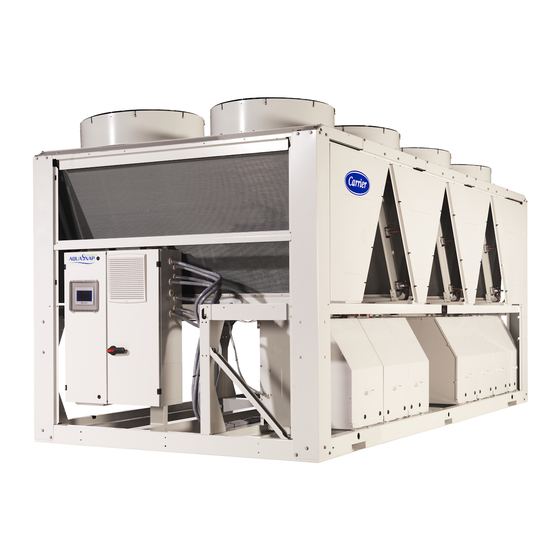
- Page 1 C O N T R O L S M A N U A L SmartView Control 30RBM/RBP (160-520) 30RQM/RQP (160-520) Original document...
-
Page 2: Table Of Contents
4.7 - Other buttons................................... 12 4.8 - Screen calibration..................................12 4.9 - Warning messages .................................. 12 5 - SMARTVIEW CONTROL: MENU STRUCTURE ......................... 13 5.1 - Main menu ....................................13 5.2 - Configuration menu ................................. 22 5.3 - Schedule menu ..................................26 5.4 - Holiday menu .................................. - Page 3 CONTENTS 7 - WEB CONNECTION ..................................48 7.1 - Web interface ..................................48 7.2 - Technical documentation ................................. 48 8 - DIAGNOSTICS .................................... 49 8.1 - Control diagnostics .................................. 49 8.2 - Displaying current alarms ................................ 49 8.3 - E-mail notifications .................................. 49 8.4 - Resetting alarms ..................................
- Page 4 This document does not contain full service procedures for the correct operation of the equipment. The support of a qualified Carrier Service Engineer is strongly recommended to ensure optimal operation of the equipment as well as the optimization of all available functionalities.
-
Page 5: Safety Considerations
1 - SAFETY CONSIDERATIONS 1.1 - Safety guidelines Installation, start-up and servicing of equipment can be hazardous if certain factors particular to the installation are not considered: operating pressures, electrical components, voltages, and the installation site (elevated plinths and built-up structures). Only qualified installation engineers and fully trained technicians ... -
Page 6: Control Overview
2 - CONTROL OVERVIEW 2.1 - Control system SmartView control system: ■ Allows users to control the unit via the SmartView user interface 30RBM/RBP chillers and 30RQM/RQP heat pumps are equipped ■ Provides web connectivity technology with SmartView Control that serves as the user interface and configuration tool for Carrier communicating devices. The advanced ... -
Page 7: Hardware
A light emitting diode (LED) lights on The unit is equipped with the SmartView user interface. The number each board when it is operating properly. of boards available in the electrical box depends on the number of ■... -
Page 8: Terminal Block Connections
3 - HARDWARE 3.6 - Terminal block connections Connections available at the user terminal block may vary depending on the selected options. The following table summarizes the connections at the user terminal block. IMPORTANT: Some contacts can be accessed only when the unit operates in Remote mode. -
Page 9: Pressure Transducers
3 - HARDWARE 3.7 - Pressure transducers 3.9 - Actuators Three types of transducers (high pressure, low pressure, water ■ Electronic expansion valve pressure) are used to measure various pressures in each circuit. The electronic expansion valve (EXV) is used to adjust the These transducers deliver 0 to 5 VDC. -
Page 10: Smartview User Interface
4.1 - Touch screen display 4.3 - Circuit view SmartView is a 4.3 in. colour touch screen with quick display Circuit view is only available from a PC browser. of alarms, current unit operating status, etc. It allows for web connectivity and custom language support (control parameters displayed in the language selected by the user). -
Page 11: Header Buttons
4 - SMARTVIEW USER INTERFACE 4.5 - Header buttons Home Previous screen Main Menu System Menu User Login Start / Stop Alarms Menu Button Description Home screen: Press the button to go to the Home screen. Previous screen: Press the button to go back to the previous screen. -
Page 12: Other Buttons
4 - SMARTVIEW USER INTERFACE 4.7 - Other buttons 4.8 - Screen calibration The purpose of screen calibration is to make sure that the software Button Description acts correctly upon pressing icons on the user interface. Save button: Press the button to save the To calibrate the screen: modification. -
Page 13: Smartview Control: Menu Structure
5 - SMARTVIEW CONTROL: MENU STRUCTURE 5.1 - Main menu Home Previous screen Main Menu System Menu Start / Stop Alarms Menu User Login Main menu General Parameters Temperatures Pressures Inputs Outputs Pump Status Run Times Modes Free Cooling Status... - Page 14 5 - SMARTVIEW CONTROL: MENU STRUCTURE The Main menu provides access to the main control parameters, NOTE: The Trendings menu is displayed in form of a graph. For more information about Trendings, see section 6.26. including general parameters, inputs and outputs status, etc.
- Page 15 5 - SMARTVIEW CONTROL: MENU STRUCTURE Temperatures – TEMP (continued) Name Status Unit Displayed text* Description SST_B °C / °F Saturated Suction Temp B Saturated suction temperature, circuit B SUCT_B °C / °F Compressor Suction Tmp B Compressor suction temperature, circuit B...
- Page 16 5 - SMARTVIEW CONTROL: MENU STRUCTURE Outputs – OUTPUTS Name Status Unit Displayed text* Description CP_A1 off/on Compressor A1 Compressor A1 command CP_A2 off/on Compressor A2 Compressor A2 command CP_A3 off/on Compressor A3 Compressor A3 command CP_A4 off/on Compressor A4...
- Page 17 5 - SMARTVIEW CONTROL: MENU STRUCTURE Run Times – RUNTIME Name Status Unit Displayed text* Description hr_mach hour Machine Operating Hours Unit operating hours st_mach Machine Starts Number Number of unit starts hr_cp_a1 hour Compressor A1 Hours Operating hours, compressor A1...
- Page 18 5 - SMARTVIEW CONTROL: MENU STRUCTURE Modes – MODES (continued) Name Status Unit Displayed text* Description m_night no/yes Night Low Noise Active Night low noise active m_hsm no/yes System Manager Active System Manager active m_slave no/yes Master Slave Active Master/slave mode active...
- Page 19 5 - SMARTVIEW CONTROL: MENU STRUCTURE Free Cooling Status – FREECOOL (continued) Name Status Unit Displayed text* Description fc_dp_b kPa / PSI Pump Pressure Delta B Pump pressure delta (circuit B) *Depends on the selected language (English by default). Energy Management – EMM_STAT...
- Page 20 5 - SMARTVIEW CONTROL: MENU STRUCTURE Msc Status – MSC_STAT Name Status Unit Displayed text* Description Eco pump mode status: When this mode is active, the pump is m_ecopmp no/yes Eco Pump Mode Active stopped periodically when the unit is in Standby *Depends on the selected language (English by default).
- Page 21 5 - SMARTVIEW CONTROL: MENU STRUCTURE Energy Monitoring – ENERGY Name Status Unit Displayed text* Description COOLING MODE Cooling mode cPwrOut Cooling Power Output cPwrIn Electical Power Input Energy Efficiency (EER) cEnergOu Cooling Energy Output cEnergIn Electrical Energy Input energEer Integrated EER...
-
Page 22: Configuration Menu
5 - SMARTVIEW CONTROL: MENU STRUCTURE 5.2 - Configuration menu Home Previous screen Main Menu System Menu Start / Stop Alarms Menu User Login Configuration Menu Configuration menu General Configuration Pump Configuration Reset Configuration Backup Configuration Free Cooling Config Schedule Menu... - Page 23 5 - SMARTVIEW CONTROL: MENU STRUCTURE The Configuration menu gives access to a number of us- System configuration override: In some cases it is possible to er-modifiable parameters such as pump configuration, schedule override system configuration. Note that not all parameters can menu, etc. The Configuration menu is password-protected. be overridden by the control. ■ To access the Configuration menu, press the Main menu button CAUTION: Since specific units may not include additional...
- Page 24 5 - SMARTVIEW CONTROL: MENU STRUCTURE Reset Configuration – RESETCFG Name Status Default Unit Displayed text* Description cr_sel 0 to 4 Cooling Reset Select Cooling reset selection hr_sel 0 to 4 Heating Reset Select Heating reset selection 0=None, 1=OAT, 2=Delta T...
- Page 25 (see also section 6.23) Unit must be OFF The unit should not be operating when installing the Software Activation Key *Depends on the selected language (English by default). NOTE: If you need to add an option, please contact your local carrier Service provider.
-
Page 26: Schedule Menu
5 - SMARTVIEW CONTROL: MENU STRUCTURE 5.3 - Schedule menu 5.4 - Holiday menu The Schedule menu includes two time schedules, where the first The Holiday menu allows the user to set up to 16 holiday periods, one (OCCPC01S) is used to control the unit start/stop and the which are defined by the start month, start day, and duration. ... - Page 27 5 - SMARTVIEW CONTROL: MENU STRUCTURE E-mail Configuration – EMAILCFG Name Status Default Unit Displayed text* Description senderP1 Sender E-mail Part1 Sender e-mail, identifier part senderP2 Sender E-mail Part2 Sender e-mail, domain part recip1P1 Recip1 E-mail Part1 Recipient 1,identifier part recip1P2 Recip1 E-mail Part2 Recipient 1,domain part...
- Page 28 5 - SMARTVIEW CONTROL: MENU STRUCTURE ModbusTCP/IP Config. – MODBUSIP Name Status Default Unit Displayed text* Description modip_en no/yes TCP/IP Server Enable TCP/IP Server Enable ser_UID 1 to 247 Server UID Server UID port_nbr 0 to 65535 IP Port Number...
-
Page 29: System Menu
5 - SMARTVIEW CONTROL: MENU STRUCTURE 5.6 - System menu Home Previous screen Main Menu System Menu User Login Start / Stop Alarms Menu System menu CPU Load EOL Resistor Network Date/Time Configuration Language & Unit System Brightness Software Info... - Page 30 English, Spanish, French, German, Dutch, Chinese, Italian, Portuguese, and Custom1 Custom language: The control system allows users to add new languages to the control. To learn more about language customization, please contact your local Carrier service representative. Custom languages can be uploaded only by Carrier service representative.
- Page 31 5 - SMARTVIEW CONTROL: MENU STRUCTURE Software Info Menu – SWINFO Status Displayed text* Description ECG-SR-20V4B100 Software Version Software version number N.NNN.N SDK Version SDK version number UI Version User interface version CARRIER Brand Brand name *Depends on the selected language (English by default).
-
Page 32: User Login Menu
3. Provide the password (11) and press the Confirm button. 5.7.4 - Service & Factory login Service and factory login menus are dedicated to Carrier service technicians and factory line. To learn more about advanced access control, please refer to the Control Service Guide (service technicians only). -
Page 33: Start / Stop Menu
5 - SMARTVIEW CONTROL: MENU STRUCTURE 5.8 - Start / Stop menu Home Previous screen Main Menu System Menu Start / Stop Alarms Menu User Login 5.8.1 - Unit operating mode 5.8.2 - Unit start With the unit in the Local off mode: To display the list of... -
Page 34: Alarms Menu
5 - SMARTVIEW CONTROL: MENU STRUCTURE 5.9 - Alarms menu Home Previous screen Main Menu System Menu Start / Stop Alarms Menu User Login Alarms menu Current Alarms Alarm Historic Major Alarm Historic Reset Alarms Legend: Basic access (no password) - Page 35 5 - SMARTVIEW CONTROL: MENU STRUCTURE Major Alarm History Menu – ALMHIST2 No. Name Date Hour Alarm text Alarm YYYY/MM/DD HH:MM Alarm text (see section 8.6) Alarm YYYY/MM/DD HH:MM Alarm text (see section 8.6) Alarm YYYY/MM/DD HH:MM Alarm text (see section 8.6) *Depends on the selected language (English by default).
-
Page 36: Standard Control Operations And Options
6 - STANDARD CONTROL OPERATIONS AND OPTIONS 6.1 - Unit start/stop control ■ Start/stop force command [CHIL_S_S]: Chiller start/stop force command can be used to control the chiller state in the The unit state is determined based on a number of factors, Network mode. -
Page 37: Heating/Cooling/Standby
6 - STANDARD CONTROL OPERATIONS AND OPTIONS 6.2 - Heating/Cooling/Standby 6.3 - Heating/Cooling selection The control determines the heat/cool state of the unit. Chillers Heating/Cooling selection applies to chillers with the boiler and fitted with a boiler may operate in cooling or heating mode. Without heat pumps. Heating/cooling selection can be controlled in various a boiler, the unit remains in Cooling mode. -
Page 38: Supplementary Heating
Basic pump configuration can be performed via the Configuration menu (PUMPCONF – Pump Configuration). Only logged-in users can access the menu. The unit must be stopped. IMPORTANT: Pump speed configuration can be performed only by Carrier service. To set pumps sequence 1. Navigate to the Configuration menu. 2. Select Pump Configuration (PUMPCONF). 3. Set Pumps Sequence [pump_seq]. -
Page 39: Hydronic Kit Option
IMPORTANT: The variable speed pump can be set only by Carrier service. 6.5.5 - Pumps protection The control provides the option to automatically start the pump each day at 14:00 for 2 seconds when the unit is off. -
Page 40: Control Point
6 - STANDARD CONTROL OPERATIONS AND OPTIONS 6.7 - Control point The control point represents the water temperature that the unit The following tables summarise possible selections depending on must produce. The required capacity can be decreased depending the control operating type (Local, Remote or Network) and the following parameters: on the unit load operating conditions. -
Page 41: Capacity Limitation
6.7.2 - Reset 6.8 - Capacity limitation Reset means the active setpoint is modified so that less machine SmartView allows for the constant control of the unit capacity by capacity is required. In the cooling mode the setpoint is increased, setting its maximum allowable capacity. whereas in the heating mode it is decreased. -
Page 42: Capacity Control
6 - STANDARD CONTROL OPERATIONS AND OPTIONS 6.9 - Capacity control 6.10 - Night mode The control adjusts the capacity to keep the water exchanger Night mode allows users to configure the unit to operate with temperature at its setpoint. Compressors are started and stopped specific ... -
Page 43: Free Cooling Option
6 - STANDARD CONTROL OPERATIONS AND OPTIONS 6.13 - Free cooling option To set free cooling OAT threshold 1. Navigate to the Configuration menu. Free cooling is a method of using low outside air temperature as 2. Select Free Cooling Config (FREECONF). an aid to chilling water that is later used in the air-conditioning 3. -
Page 44: Desuperheater Option
40°C management system or the programmable controllers to 75 to 122°F 104°F communicate with the SmartView control. Modbus communication settings (Modbus RTU or Modbus TCP). 6.17 - Defrost cycle for heat pumps NOTE: This option requires the Software Activation Key When the outside air temperature is low and the ambient humidity (see section 6.23). -
Page 45: Software Activation Key(S)
6 - STANDARD CONTROL OPERATIONS AND OPTIONS 6.23 - Software Activation Key(s) 6.23.3 - Software key installation To install the Software Activation Key via SmartView 30RB/RQ units with SmartView offer some additional options which require Software Activation Keys: 1. Go to the Main menu. 2. Navigate to the Configuration menu (logged-in users only). -
Page 46: Schedule Setting
6 - STANDARD CONTROL OPERATIONS AND OPTIONS 6.24 - Schedule setting Each program is in unoccupied mode unless a schedule time period is active. The control incorporates two time schedules, where the first one If two periods overlap and are both active on the same day, then (OCCPC01S) is used for controlling the unit start/stop, whereas the occupied mode takes priority over the unoccupied period. -
Page 47: Trending
6 - STANDARD CONTROL OPERATIONS AND OPTIONS 6.26 - Trending This function enables to visualise the operations of the unit and monitor a set of selected parameters. To display trends 1. Go to the Main menu. 2. Select Trendings (TRENDING). 3. -
Page 48: Web Connection
7.2 - Technical documentation The SmartView control provides the functionality to access and When using the SmartView control via a PC web browser, you control unit parameters from a web interface. To connect to the may easily access all technical documents related to the product controller via the web interface, it is necessary to know the IP and its components. -
Page 49: Diagnostics
In the event of an alarm: ■ Alarms can be reset without stopping the machine. ■ The bell on the SmartView user interface starts ringing. ■ Only logged-in users can reset the alarms on the unit. To reset the alarm manually The ringing yellow bell icon indicates that there is an alarm, but the unit is still running. -
Page 50: Alarm Description
8 - DIAGNOSTICS 8.6 - Alarm description 8.6.1 - Alarms JBus Code Alarm description Reset type Action taken Possible cause code Thermistor failure 15001 WATER EXCHANGER ENTERING FLUID Automatic, if thermistor Unit shuts down Defective thermistor THERMISTOR reading returns to normal or connection 15002 WATER EXCHANGER LEAVING FLUID... - Page 51 8 - DIAGNOSTICS JBus Code Alarm description Reset type Action taken Possible cause code 4906 LOSS OF COMMUNICATION WITH As above None As above ENERGY MANAGEMENT SIOB BOARD 4501 LOSS OF COMMUNICATION WITH FAN As above Unit shuts down As above BOARD NUMBER 1 4601 LOSS OF COMMUNICATION WITH DC...
- Page 52 8 - DIAGNOSTICS JBus Code Alarm description Reset type Action taken Possible cause code 10033 COOLER PUMP #2 FAULT Manual As above As above 10034 CIRCUIT A RECLAIM OPERATION Not applicable FAILURE 10035 CIRCUIT B RECLAIM OPERATION Not applicable FAILURE 10037 CIRCUIT A - REPEATED HIGH DISCHARGE Automatic (no discharge...
- Page 53 105 130nn SERVICE MAINTENANCE ALERT NUMBER Servicing action Depending on the severity of the Manual required. Contact Carrier alarm, the unit may continue to service operate or the unit shuts down 001: CIRCUIT A LOSS OF CHARGE 002: CIRCUIT B LOSS OF CHARGE...
- Page 54 EXV motor fault 57024 EXV eco stepper motor Failure - cir B Manual Circuit B shuts down EXV motor fault Replacement mode: Software Activation Key(s) missing 10122 Replacement Mode: please contact Carrier Automatic, if Software Replacement Mode: Please contact SmartView controller service representative to activate options Activation Key is installed Carrier service representative to...
- Page 55 Drive for water pump #2 Code Alarm/Alert Description Action to be taken Variator alarms Alarm Live zero fault Contact Carrier Service Alarm Mains phase loss Check the VFD supply voltage and the phase balance (±3%) Alarm Overvoltage Contact Carrier Service...
- Page 56 Description Action to be taken Alert DC link voltage low Check the VFD supply voltage and the phase balance (±3%) Alert DC overvoltage Contact Carrier Service Alert DC undervoltage Contact Carrier Service Alert Inverter overloaded Check the VFD output current...
-
Page 57: Maintenance
Maintenance Contract with your local Carrier Service Agency. The contract will ensure your Carrier equipment is regularly inspected by Carrier Service specialists, so that any malfunction is detected and corrected quickly, and no serious damage can occur to your equipment. - Page 58 Order No.: 10508, 04.2019. Supersedes order No.: 10508, 04.2019 Manufactured by: Carrier SCS, Montluel, France. Manufacturer reserves the right to change any product specifications without notice. Printed in the European Union.