Table of Contents
Advertisement
Quick Links
B33DHW
Installation & Operation Instructions
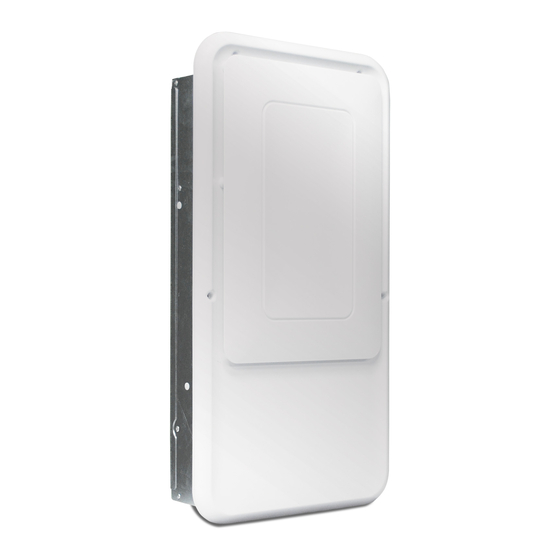
The B33DHW is a built-in dehumidification solution
that can be conveniently installed inside standard
wall framing. The B33DHW provides the ultimate in:
+ Comfort
+ Health
+ Property Protection
800.558.1711
800.558.1711
Serial Number
Install Date
Sold By
Installation & Operation Instructions
1
TS-1210 08/21 Rev A
Advertisement
Table of Contents

Related Manuals for Broan B33DHW


Summary of Contents for Broan B33DHW
- Page 1 Installation & Operation Instructions The B33DHW is a built-in dehumidification solution Serial Number that can be conveniently installed inside standard Install Date wall framing. The B33DHW provides the ultimate in: Sold By + Comfort + Health + Property Protection 800.558.1711 Installation &...
-
Page 2: Table Of Contents
Controls ..................12 Service ..................14 Warranty ..................16 FOR REPAIR & TECH SUPPORT: 1-800-558-1711 (follow prompts) Broan is committed to manufacturing quality products. To maintain our standards, product specifications may change without notice. 926 West State Street, Hartford, WI 53027 www.Broan-Nutone.com 800-558-1711 Installation &... -
Page 3: Safety Instructions
THIS SYMBOL MEANS IMPORTANT INSTRUCTIONS. FAILURE TO HEED THEM CAN RESULT IN INJURY OR MATERIAL PROPERTY DAMAGE. Registrations The B33DHW conforms to unified standard UL 60335-2-40 and CSA Standard C22.2.60335-2-40. WARNING! WARNING! 120 VOLTS MAY CAUSE SERIOUS INJURY FROM ELECTRIC SHOCK. TURN... - Page 4 DE CES INSTRUCTIONS PEUT ENTRAINER DE GRAVES BLESSURES OU DES DOMMAGES MATÉRIELS. ENREGISTREMENTS LE B33DHW EST FIDÈLE À LA NORME UNIFIÉE UL 60335-2-40 AINSI QU’À LA NORME C22.2.60335-2- AVERTISSEMENT! AVERTISSEMENT! UNE DÉCHARGE ÉLECTRIQUE DE 120 VOLTS PEUT CAUSER DES BLESSURES SÉRIEUSES.
-
Page 5: Dehumidifier Set Up
DEHUMIDIFIER SET UP Important Precautions • If used near a water source, be certain that there is no chance the unit could get splashed. Connecting the unit to a dedicated circuit with Ground Fault Circuit Protection is recommended. Electrical wires must be properly grounded, and with the capability to be disconnected to provide for service. -
Page 6: Drain Installation Considerations
DRAIN INSTALLATION CONSIDERATIONS Consult local building codes for condensate drain restriction and additional requirements. The B33DHW is provided with 10' of 3/4" I.D. drain hose. Verify drain hose length is appropriate for application. The hose must be connected to the drain port and routed down the wall cavity and into the air conditioning condensate drain or other acceptable drainage. -
Page 7: Dehumidifier Installation
DEHUMIDIFIER INSTALLATION The B33DHW can be installed in a variety of applications: • 2x6 16" O.C. Stud Wall Installation • 2x4 16" O.C. Stud Wall Installation - If penetrating both walls and the opposite side is a mechanical room, no additional accessories are needed. - Page 8 DEHUMIDIFIER INSTALLATION Step 3. There are three electrical knock outs, one on the back and two on the bottom of the unit. Remove appropriate knock out and install non-metallic cable clamp with clamp screws inside of unit oriented so they are accessible for tightening later. If using included power cord, insert cord through non- metallic cable clamp so that a minimum of ½”...
- Page 9 DEHUMIDIFIER INSTALLATION It is recommended to have two people to lift the unit. Place one hand under the drain pan to support the unit during this step. Steps 9 - 10 Wall Side View MD33 Step 9. Lift the unit and place it near the wall opening to route electrical wires and drain hose through appropriate knock outs.
- Page 10 DEHUMIDIFIER INSTALLATION Step 12. If the drain access cover was removed, Hose Clamp reinstall it by routing the drain hose through the appropriate knock out and reattach the screw. Hose Route the grommet over the drain hose and snap into place at the knock out. Use 1/4"...
-
Page 11: Maintenance
D’ALIMENTATION EST FERMÉ AVANT DE RETIRER LE PANNEAU AVANT POUR ENTRETENIR L’UNITÉ. Filter Maintenance The B33DHW comes with a washable filter. Check filter every two months. Clean or replace the filter as neces- sary. Removing the Filter: Remove the screws on the front cover and then push the front cover up gently to free the cover hooks from the chassis. -
Page 12: Controls
CONTROLS The B33DHW has an illuminated display, user selectable setpoint, and a power ON / OFF button located behind the diffuser. The diffuser is fastened with tamper resistant screws to limit access to the control. The diffuser can also be fastened with the included phillips screws if limiting access to the control is not needed. - Page 13 CONTROLS Diagnostic, Maintenance and Servicing Error codes: • “1” = Prompting a bad RH sensor. • “2” = Condensate pump or external float switch is installed in the drain line and is detecting a closed switch. • “3” = The delta temperature between ambient and evaporator coil not wide enough to reflect a normal operating condition.
-
Page 14: Service
SERVICE Troubleshooting CAUTION! CAUTION! TROUBLESHOOTING SHOULD BE PERFORMED BY A QUALIFIED HVAC TECHNICIAN. MISE EN GARDE! MISE EN GARDE! LES TRAVAUX DE DÉPANNAGE NE DEVRAIENT ÊTRE EFFECTUÉS QUE PAR UN TECHNICIEN CVCA QUALIFIÉ. WARNING! WARNING! ELECTRICAL SHOCK HAZARD: ELECTRICAL POWER MUST BE PRESENT TO PERFORM SOME TESTS. - Page 15 SERVICE Troubleshooting Symptom Possible Reason Troubleshooting Procedure Neither blower 1. No power to unit, circuit • Locate circuit breaker and reset if necessary. breaker tripped nor compressor is • Check all circuit board connections for loose plugs 2. Power board wiring or running and display or wires.
-
Page 16: Warranty
Product is included, abuse, lack of normal care, failure to follow written instructions, tampering, improper repair, or freezing, corrosion, acts of nature or other causes not arising out of defects in Broan’s workmanship or material. If a Product or Component is replaced while under warranty, the applicable limited warranty period shall not be extended beyond the original warranty time period.