Table of Contents
Advertisement
Quick Links
Advertisement
Table of Contents

Related Manuals for Bosch DLN54AA70A


Summary of Contents for Bosch DLN54AA70A
- Page 1 Extractor hood DLN54AA70A User manual and installation instructions [en]...
-
Page 2: Table Of Contents
en Safety Table of contents Do not use the appliance: ¡ With an external timer. 1.3 Restriction on user group USER MANUAL This appliance may be used by children aged 8 or over and by people who have reduced Safety .............. 2 physical, sensory or mental abilities or inad- Avoiding material damage........ -
Page 3: Safety
Safety en When gas burners are in operation without any cookware placed on them, they can build up a lot of heat. A ventilation appliance in- stalled above the cooker may become dam- aged or catch fire. ▶ Only operate the gas burners with cook- ware on them. -
Page 4: Avoiding Material Damage
en Avoiding material damage in the interior of the appliance may cause ex- WARNING ‒ Risk of explosion! plosions. Highly caustic alkaline or highly acidic clean- ▶ Never use highly caustic alkaline or highly ing agents in conjunction with aluminium parts acidic cleaning agents. In particular, do not use commercial or industrial cleaning agents in conjunction with aluminium parts, e.g. -
Page 5: Operating Modes
Accessories vary from one appliance to another. When purchasing accessories, always quote the exact product number (E no.) of your appliance. → Page 9... -
Page 6: Basic Operation
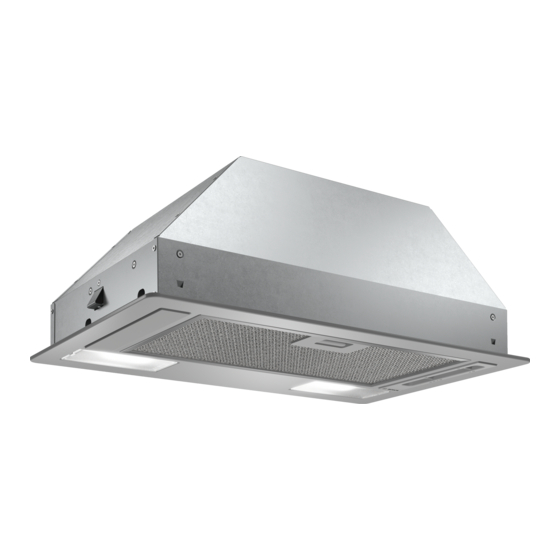
en Basic operation Accessories Order number Accessories Order number Standard odor filter DWZ0IN0A0 Standard recirculation kit DWZ0IN0T0 7 Basic operation 7.1 Switching on the appliance 7.4 Switching on the lighting ▶ Set the slide control to position 1. The lighting can be switched on and off independently of the ventilation system. -
Page 7: Cleaning And Servicing
Cleaning and servicing en 8.4 Removing the grease filter Note: When cleaning the grease filter in the dish- washer, light discolouration may occur. This discoloura- ATTENTION! tion has no effect on the performance of the metal Falling grease filters may damage the hob below. grease filters. -
Page 8: Troubleshooting
en Troubleshooting 9 Troubleshooting ▶ If the appliance is defective, call Customer Service. You can rectify minor faults on your appliance yourself. Read the troubleshooting information before contacting after-sales service. This will avoid unnecessary costs. WARNING ‒ Risk of injury! Improper repairs are dangerous. ▶... -
Page 9: Disposal
Disposal en 10 Disposal Find out here how to dispose of old appliances cor- This appliance is labelled in accord- rectly. ance with European Directive 2012/19/EU concerning used elec- 10.1 Disposing of old appliance trical and electronic appliances (waste electrical and electronic equip- Valuable raw materials can be reused by recycling. -
Page 10: 12.4 Secure Installation
en Installation instructions 12.3 Safety clearances Comply with the safety clearances for the appliance. ▶ Always ensure adequate fresh air in the room if the appliance is being operated in exhaust air mode at the same time as a room-air-dependent heat-producing appli- ance is being operated. - Page 11 Installation instructions en Incorrect installation is dangerous. WARNING ‒ Risk of suffocation! ▶ Connect and operate the appliance only in Children may put packaging material over accordance with the specifications on the their heads or wrap themselves up in it and rating plate. suffocate.
- Page 12 ¡ To optimally detect the cooking vapours, install the 5.25 kW appliance in the middle of the hob. When installing with a gas hob, we recommend using a gas hob from the Bosch brand. 12.8 Instructions for the exhaust air pipe 12.12 Installation The appliance manufacturer does not provide any war- ranty for faults attributable to the pipeline.
- Page 13 Installation instructions en Make the cut-out in the fitted unit. Fit the one-way flaps on the air outlet and click them into place. Note: If the fitted unit is no longer accessible after the appliance is installed, remove the side locking mechan- ism.
- Page 14 en Installation instructions Secure the panel. Push the panel upwards until the latching mech- ‒ anism engages. Fit the grease filters. To avoid causing damage, do not bend the grease filters. Insert the mains plug into the protective contact socket. Removing the appliance WARNING ‒ Risk of injury! Components inside the appliance may have sharp edges.
- Page 16 Expert advice for your Bosch home appliances, help with problems or a repair from Bosch experts. Find out everything about the many ways Bosch can support you: www.bosch-home.com/service Contact data of all countries are listed in the attached service directory.