Table of Contents
Advertisement
Available languages
Available languages
Quick Links
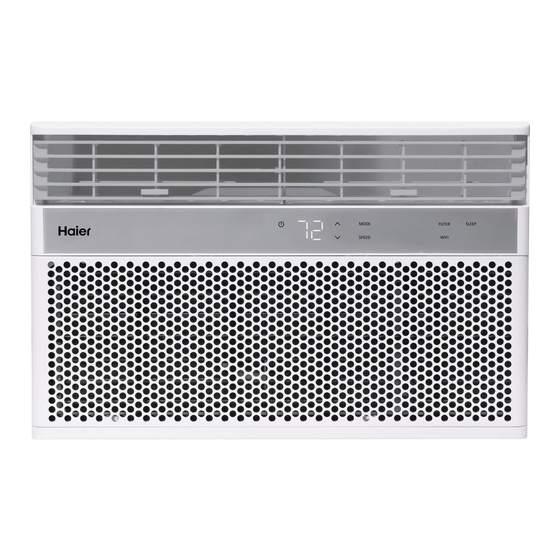
Room Air Conditioner
Accondicionadores de Aire Para Sala
Design may vary by model number.
Some models may have an additional
letter after the model number.
Installation and User Manual
Instrucciones de instalación y
Manual del usuario
El diseño puede variar según el número
de modelo
Algunos modelos pueden tener una
letra adicional después del número de
modelo.
49-5000537 Rev. 2 09-21 GEA
QHNG08AA
QHNG10AA
Advertisement
Chapters
Table of Contents

Related Manuals for Haier QHNG08AA


Summary of Contents for Haier QHNG08AA
- Page 1 Installation and User Manual Instrucciones de instalación y Manual del usuario QHNG08AA QHNG10AA Room Air Conditioner Accondicionadores de Aire Para Sala Design may vary by model number. El diseño puede variar según el número de modelo Some models may have an additional Algunos modelos pueden tener una letter after the model number.
- Page 2 49-5000537 Rev. 2...
-
Page 3: Table Of Contents
Limited Warranty ........................16 Record Keeping Thank you for purchasing this Haier product. This user manual will _______________________________________ help you get the best performance from your new air conditioner. -
Page 4: Safety Information
SAFETY INFORMATION WARNING For your safety, the information in this manual must be followed to minimize the risk of fire, electric shock or personal injury. • Use this appliance only for its intended purpose as • Turn the unit OFF and unplug your air conditioner before described in this Owner’s Manual. -
Page 5: Controls
Delay pad on the remote control. Use the Increase / WiFi. Decrease pads on the remote control to set a new time if Download the Haier Home App desired. For details go to Haierappliances.com. To cancel the timer, press Decrease pad on the remote control until the set time is zero. -
Page 6: Remote Control
USING THE AIR CONDITIONER Do Not Operate in Freezing Outdoor Conditions This cool-only air conditioner was not designed for freezing It must not be used when the outdoor temperature is below freezing (32°F). outdoor conditions. Control Panel Lights On/Off Feature This air conditioner has a control panel lights on/off feature To turn this feature off, press and hold the SLEEP pad, on the where its lights will turn off when there is no activity with the... -
Page 7: Air Direction
USING THE AIR CONDITIONER Air Direction Use the levers to adjust the air direction left or right. Tilt the louver bank to adjust up and down. CARE AND CLEANING Grille and Case Turn the air conditioner off and remove the plug from the wall To clean, use water and a mild detergent. -
Page 8: Installation Instructions
INSTALLATION INSTRUCTIONS BEFORE YOU BEGIN ELECTRICAL REQUIREMENTS (cont) Read these instructions completely and carefully. IMPORTANT – • Save these instructions Power cord includes a current interrupter device. A test for local inspector’s use. and reset button is provided on the plug case. The device IMPORTANT –... -
Page 9: Parts Included
INSTALLATION INSTRUCTIONS Side Curtain Foam top window (Appearance may vary) Frame gasket Left Right Top mounting rail Side Curtain conditioner ON/OFF MODE SPEED DELAY TEMP/TIME TEMP/TIME Bottom Seal and Side Seals (3) Side Curtain Foam (2) Window locking Type A (4) Side Brackets Type B (9) bracket (1) -
Page 10: Window Requirements
INSTALLATION INSTRUCTIONS • These instructions are for a standard double-hung A. Install the top mounting rail with Type A screws, 4 window. You will need to modify them for other for AHH10 and 3 for AHH08, from the outside of the types of windows. -
Page 11: Install The Air Conditioner
INSTALLATION INSTRUCTIONS 4. INSTALL THE AIR CONDITIONER IN THE WINDOW A. Loosen the screw on the right hand side of the air conditioner near the bottom. A. Mark the center of the window. Set the air conditioner in the window so that is it centered. B. -
Page 12: Install Support Brackets
INSTALLATION INSTRUCTIONS 6. INSTALL WINDOW LOCK BRACKET AND FOAM TOP WINDOW GASKET Use Type B Screw to install the window lock bracket on top of the bottom window. CAUTION To prevent broken glass or damage to windows, on vinyl or other similarly constructed windows, attach the window Vinyl locking bracket to the... -
Page 13: Troubleshooting Tips
TROUBLESHOOTING Save time and money! Review the charts on the following pages first and you may not need to call for service. Problem Possible Cause What To Do Air conditioner does not The unit is unplugged. Make sure the air conditioner plug is pushed completely into start. -
Page 14: Normal Operating Sounds
Haier SmartHQ Enabled*. If your Air Conditioner (AC) has a Connected Appliance Information label located on the outside as shown below, your AC is Haier Appliances SmartHQ Enabled. A WiFi communication card is built into the product allowing it to communicate with your smart phone for remote monitoring, control and notifications. -
Page 15: Smarthq Setup
TO 65 Getting Started All connected appliace data is held in strict accordance with the Haier Appliances Connected Data Privacy Policy. Visit To connect your room air conditioner, you’ll need the geappliances.com/privacy/privacy_policy_connected to SmartHq App. The app will walk you through the connection view this policy. -
Page 16: Limited Warranty
To know what your legal rights are, consult your local or state consumer affairs office or your state’s Attorney General. Warrantor US: GE Appliances, a Haier company Louisville, KY 40225 49-5000537 Rev. 2... - Page 17 Garantía LImitada....................... . . 15 INFORMACIÓN A TENER EN CUENTA Le agradecemos la compra de este producto de marca Haier. Este _______________________________________ manual para el usuario le ayudará...
- Page 18 SEGURIDAD DEL ACONDICIONADOR DE AIRE Para su seguridad, siga las instrucciones de este manual a fin de minimizar riesgos de incendio, descargas ADVERTENCIA eléctricas o heridas personales. • Use este electrodoméstico sólo para su propósito original, como • Coloque la unidad en OFF (Apagado) y desenchufe el se describe en el Manual del Propietario.
-
Page 19: Controles
1–24hr (Retraso entre 1 y 24 hrs), presione la tecla Delay 1–24hr Descargue la Aplicación Hogareña de Haier --. (Retraso entre 1 y 24 hrs.) de la unidad o del control remoto. Use las teclas Increase (Incrementar) / Decrease (Reducir) de la Para más detalles, visite Haierappliances.com. - Page 20 USO DEL ACONDICIONADOR DE AIRE No Utilizar con Condiciones Climáticas Exteriores de Congelación Este acondicionador de aire sólo frío no fue diseñado para uso con ser usado con condiciones climáticas exteriores de temperatura condiciones climáticas exteriores de temperatura helada. No deberá helada.
-
Page 21: Dirección Del Aire
USO DEL ACONDICIONADOR DE AIRE Dirección del Aire Use la palanca para ajustar la dirección del aire hacia la izquierda o derecha. Incline la rejilla para hacer ajustes hacia arriba o abajo. CUIDADO Y LIMPIEZA Parrilla y Caja Apague el acondicionador de aire y retire el enchufe del Para limpiar, use agua y un detergente suave. -
Page 22: Instrucciones De Instalación
INSTRUCCIONES DE INSTALACIÓN ANTES DE INICIAR REQUISITOS ELÉCTRICOS (CONT) El cable de alimentación incluye un dispositivo para Lea estas instrucciones completa y cuidadosamente. interrupción de corriente. Se incluye un botón de prueba IMPORTANTE – y de reinicio en el dispositivo. El dispositivo debe ponerse •... -
Page 23: Partes Incluidas
INSTRUCCIONES DE INSTALACIÓN PARTES INCLUIDAS Marcos de la Junta de gomaespuma Cortina Lateral (La apariencia puede variar) de la parte superior de Derecho Izquierda la ventana Riel de montaje superior Cortinas Laterales (2) Acondicionador de aire ON/OFF MODE SPEED DELAY TEMP/TIME TEMP/TIME Sellado Inferior... -
Page 24: Requisitos De La Ventana
INSTRUCCIONES DE INSTALACIÓN 1. REQUISITOS PARA LA VENTANA 3. PREPARE EL ACONDICIONADOR DE AIRE • Estas instrucciones son para una ventana estándar de dos pliegues. Usted necesitará modificar el proceso A. Instale el riel de montaje superior con tornillos Tipo A, 3 para otros tipos de ventanas. - Page 25 INSTRUCCIONES DE INSTALACIÓN 4. I NSTALE EL ACONDICIONADOR DE 5. ASEGURE EL ACONDICIONADOR DE AIRE EN LA VENTANA AIRE A. Marque el centro de la ventana. Coloque el acondicionador A. Afloje el tornillo del lado derecho del acondicionador de de aire en la ventana de modo que se encuentre centrado. aire, cerca de la parte inferior.
- Page 26 INSTRUCCIONES DE INSTALACIÓN 6. INSTALE EL SOPORTE DE LA TRABA DE LA VENTANA Y LA JUNTA SUPERIOR DE GOMAESPUMA DE LA VENTANA Use un tornillo tipo B para instalar el soporte de bloqueo arriba de la parte inferior de la ventana.
- Page 27 SOLUCIÓN DE PROBLEMAS ¡Ahorre tiempo y dinero! Primero revise los cuadros que aparecen en las siguientes páginas y es posible que no necesite solicitar reparaciones. Problema Causas posibles Qué hacer El acondicionador de aire no El acondicionador de aire está Cerciórese de que el acondicionador de aire está...
- Page 28 Conectado, ubicada en la parte externa como se muestra a continuación, su AA cuenta con la aplicación SmartHQ Autorizada de Haier Appliances. El producto cuenta con una tarjeta de comunicación WiFi incorporada, la cual permite que se comunique con su teléfono inteligente para el monitoreo, control y notificaciones de forma remota.
-
Page 29: Configuración Smarthq
Política de A fin de conectar su acondicionador de aire para sala, Privacidad de Datos de Conexión de Haier Appliances. Para necesitará la Aplicación Hogareña de Haier . La aplicación acceder a esta política, visite geappliances.com/privacy/ lo guiará... - Page 30 NOTAS 49-5000537 Rev. 2...
-
Page 31: Garantía Limitada
Para conocer cuáles son sus derechos legales, consulte a la oficina de asuntos del consumidor local o estatal o al Fiscal de su estado. Garante en EE.UU: GE Appliances, a Haier company Louisville, KY 40225 49-5000537 Rev. 2... - Page 32 IMPORTANT Do Not Return This Product To The Store If you have a problem with this product, please call 1-877-337-3639 for the name and telephone number of the nearest authorized service center. DATED PROOF OF PURCHASE REQUIRED FOR WARRANTY SERVICE IMPORTANTE No regrese este producto a la tienda Si tiene un problema con este producto, por favor comuníquese al 1-877-337-...