
Related Manuals for Samsung ES68


Summary of Contents for Samsung ES68
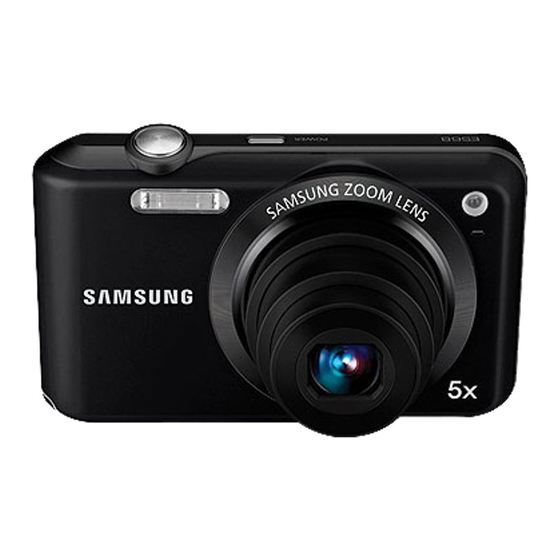
- Page 1 ES68 Thank you for buying a Samsung Camera. This manual will help you learn to capture images, share or print your photos, and edit photos with the accompanying software. Please read this manual thoroughly. User Manual...
- Page 2 å Please check that the camera is operating properly prior to when by an image editing program. (p.89) you intend to use it (e.g. for a trip or an important event) to avoid disappointment. Samsung takes no responsibility for any loss or Take a picture. (p.21) Take a picture damage that may result from camera malfunction.
- Page 3 Internal inspection, maintenance and repairs should only eyesight damage. å For safety reasons keep this product and accessories out of reach be carried out by your dealer or Samsung Camera Service center. å of children or animals to prevent accidents e.g.: explosive gases, as this could increase the risk of explosion.
-
Page 4: Table Of Contents
Caution Contents CAUTION indicates a potentially hazardous situation which, if not READY System chart avoided, may result in a minor or moderate injury. Package Contents Sold Separately å Identification of features Front & Top Back - Do not insert the battery with the polarities reversed. Bottom å... - Page 5 Contents How to use the Movie mode Metering Recording the movie clip without sound Photo Style Selector Pausing while recording a movie clip Image Adjust (Successive Recording) Drive mode Things to watch out for when taking Voice Memo pictures Voice Recording Using the camera buttons to set the camera Recording the movie clip without voice POWER button...
-
Page 6: The Lcd Monitor
Contents File name Resize Imprinting the recording date Rotating an image Auto power off Photo Style Selector Auto Focus lamp Image Adjust Selecting Video out type Starting the Multi Slide Show Setting the USB Start the Multi Slide Show Selecting Images Setting play interval Setting Background Music File Options... - Page 7 Contents SOFTWARE Transferring files to your computer (for Windows) For Windows users Transferring files to your computer (for Mac) For Mac users...
-
Page 8: System Chart
Please check that you have the correct contents before using this product. The contents can vary depending on the sales region. To buy the equipment contact your nearest Samsung dealer or Samsung service center. Parts and accessories illustrated below may differ from exact appearance. - Page 9 Front & Top POWER button Shutter button Flash AF sensor / Self-timer lamp Microphone Speaker Lens/ Lens cover...
-
Page 10: Identification Of Features
Identification of features Back Zoom Tele(T) button / Digital zoom Zoom Wide(W) button / Thumbnail LCD monitor Camera status lamp USB / AV / DC terminal MENU button 5 function button Play mode button Strap eyelet Fn / Delete button... - Page 11 Identification of features Bottom 5 Function button Memory card slot Information / Up button Flash / Self-timer / Left button Right button OK / Play & Pause button Battery chamber Macro / Down button Battery chamber cover Battery holder Tripod socket...
-
Page 12: Self-Timer Lamp
Identification of features Self-timer lamp Mode icon Icon Status Description Refer to p.21 for more information about the camera mode setting. Photo Help intervals. MODE Smart Auto Program Blinking Guide 0.25 seconds intervals. ICON For the 2 seconds, the lamp blinks quickly at Blinking 0.25 seconds intervals. -
Page 13: Connecting To A Power Source
Connecting to a Power Source Important information about battery usage. You should use the rechargeable battery BP70A supplied with the å When camera is not in use, turn off the power. camera. Be sure to charge the battery before using the camera. å... - Page 14 Connecting to a Power Source Important information about USB cable usage. åBefore inserting any cables or AC adapter, check the directions å and do not insert by force. It may cause breakage of cable or å If the camera is connected to the PC through a USB hub : camera.
- Page 15 Connecting to a Power Source When using the battery, please keep the following Guidelines of disposal guidelines. Failure to do so may cause the generation of å Do not throw away the over used battery. å å å The disposal instruction may differ depending on the nation or service center.
-
Page 16: Inserting The Memory Card
Connecting to a power source Inserting the memory card Ê Insert the battery as shown Ê Insert the memory card as shown. - If the camera does not turn on - Turn off the camera’s power after you have inserted battery, before inserting the memory card. -
Page 17: Instructions On How To Use The Memory
å Turn off the camera power whenever the memory card is being recording, deleting (formatting) or reading. å Samsung cannot be held responsible for lost data. inserted or removed. å Repeated use of the memory card will eventually reduce the å... - Page 18 Instructions on how to use the memory card The camera can use SD/SDHC Memory Cards. affected by variables such as subject matter and memory card type. Recorded image Card pins Super Fine Fine 30 FPS 15 FPS Normal size About 147 About 284 About 403 Write protect switch About 167 About 309 About 441 About 202 About 367 About 528...
- Page 19 Ê Charge the rechargeable battery fully before using the camera for Ê Setting up the date, time and date type 1. Select the [Date&Time] menu by Language :English Ê pressing the Up/Down button and press Date & Time :11/01/01 Time Zone :London displayed on the LCD monitor to set date, time, time zone and the Right button.
- Page 20 LCD monitor indicator Ê The LCD monitor displays information about the shooting Description Icons Page functions and selections. Battery p.15 Optical / Digital Zoom bar / p.29 Digital Zoom rate Photo Size / Movie Size p.38 Image Quality / p.39 Frame Rate Metering p.44...
- Page 21 How to use the menu 1. Turn on the camera and press the MENU button. A menu for each camera mode appears. Smart Auto Mode Program Shooting Photo Help... Sound Scene Display Movie Settings Exit Change 2. Use the up or down button to navigate through the menus. Press the Smart Auto Volume...
- Page 22 Starting the recording mode How to use the Smart Auto mode( Selecting modes The camera automatically chooses the appropriate camera settings You can select the shooting modes by using the MENU button on the based on a detected type of scene. It will be helpful if you are not familiar with the camera settings for various scenes.
- Page 23 Starting the recording mode Ê Each scene is recognized in the following conditions; å If the camera does not recognize a proper scene mode, the default settings will be used. [Landscape] ) : When shooting outdoor scenes å Even if there is a face detected, the camera may not select a portrait mode depending on the subject’s position or lighting.
- Page 24 Starting the recording mode How to use the Program mode ( How to use the DIS mode ( Digital Image Stabilization (DIS) mode. This mode will reduce the effect of camera shake and help you get except the aperture value and shutter speed. a well exposed image in dim conditions.
- Page 25 Starting the recording mode Available functions of the photo help guide Using the Photo Help Guide mode ( å Helps the user learn the correct picture taking method and includes å Functions that can be used when the image is blurred solutions for potential problems that may occur.
- Page 26 Starting the recording mode The scene modes are listed below. How to use the Scene modes ( [Beauty Shot] ( ) : Take a photo of portraits by setting shooting situations. options to clear facial imperfections. 1. Select the Scene mode by using the [Frame Guide] ( ) : Use this mode when you want someone Smart Auto...
-
Page 27: How To Use The Movie Mode
Starting the recording mode Ê How to use the [Frame Guide] mode How to use the Movie mode ( Set [Frame Guide] mode when you want someone else to take a A movie clip can be recorded for as long as the available recording picture for you from the angle you choose. -
Page 28: Recording
Starting the recording mode Recording the movie clip without sound Pausing while recording a movie clip (Successive Recording) You can record the movie clip without sound. This camera allows you to temporarily stop during unwanted scenes while recording a movie clip. Using this function, you can Steps from 1-3 are the same as those for Movie mode. -
Page 29: Things To Watch Out For When Taking Pictures
Things to watch out for when taking pictures å Pressing the shutter button down half way. å Compose the image by using the LCD monitor. å Under certain conditions the auto focus system may not perform charge. Press the shutter button all way down to take the picture. as expected. -
Page 30: Using The Camera Buttons To Set The Camera
Using the camera buttons to set the camera ZOOM button The recording mode function can be set up by using the camera buttons. If the menu is not displayed, this button works as the OPTICAL ZOOM or POWER button DIGITAL ZOOM button. This camera has a 5X optical zoom and Used for turning the camera’s power a 3X digital zoom function. - Page 31 ZOOM button Ê WIDE Zoom å Images taken using the digital zoom may take a little longer for the Optical zoom WIDE : Pressing the ZOOM W button. This will camera to process. Allow time for this to take place. å...
-
Page 32: Info(Disp) / Up Button
Info (DISP) / Up button Macro ( ) / Down button While the menu is showing, the Up button operates as a direction While the menu is showing, the Down button operates as a direction button. In the recording modes or playback mode, pressing this button. - Page 33 Macro ( ) / Down button Ê Types of focus mode and focus range (W : Wide, T : Tele) Ê Available focusing method, by recording mode (Unit: cm) ( o : Selectable, ä Mode Auto macro Macro Normal Mode Program ( Focus Type Macro (...
-
Page 34: Focus Lock Setup
Focus lock Flash ( ) / Left button To focus on a subject not positioned in the center of the picture, use When the menu is displayed on the LCD the focus lock function. monitor, pressing the Left button makes the cursor shift to the left tab. - Page 35 Flash ( ) / Left button å Ê Flash mode indicator Icon Flash mode Description å Select this mode when capturing images in å Under normal operating conditions the recharging time for the is prohibited. When you capture an image Flash off charging time will be longer.
-
Page 36: Self-Timer / Right Button
Self-timer ( ) / Right button Flash ( ) / Left button Ê When the menu is displayed on the LCD monitor, pressing the Right button makes the cursor shift to the right tab. Mode When the menu is not displayed on the LCD monitor, the Right button operates as the Self-timer ( ) button. - Page 37 Self-timer ( ) / Right button Ê Selecting the self-timer Ê Motion Timer 1. Select a Recording mode with the Motion Icon & Self-timer lamp exception of Voice recording mode.(p.21) Pressing the Shuter button after Blink (1 second interval) 2. Press the Self-timer / Right ( setting the Motion Timer button until the desired mode indicator Detecting the subject's movement...
-
Page 38: Menu Button
MENU button Shooting ( - When you press the MENU button, a menu related to each Use the menu that enables the functions, or the Fn button to bring up camera mode will be displayed on the LCD monitor. Pressing it the menus below: again will return the LCD to the initial display. -
Page 39: How To Enable Functions Using The Menu Button
Shooting ( How to enable functions using the MENU button Use the Fn button on the rear of the camera to bring up the menus that enable frequently used functions faster. 1. Press the MENU button in an available mode. 2. -
Page 40: Quality / Frame Rate
Shooting ( Quality / Frame rate Exposure compensation You can select the compression ratio appropriate for your application This camera automatically adjusts the exposure according to the of the captured images. The higher the compression ratio, the lower ambient lighting conditions. the picture quality. -
Page 41: Iso
Shooting ( White balance You can select the ISO sensitivity when taking pictures.The speed or The white balance control allows you to adjust the colors to appear more natural. Adjust the white balance according to the light source. [Auto] : The camera's sensitivity is White Balance automatically changed by variables such as lighting value... -
Page 42: Face Detection
Shooting ( Face Detection Ê Using the Custom White Balance White balance settings may vary slightly depending on the If you use face detection options, your shooting environment. You can select the most appropriate camera can detect a human face. When white balance setting for a given shooting environment by setting focusing on a human face, the brightness up the custom white balance. - Page 43 Shooting ( Ê Self Portrait å This function can detect up to 10 persons. å When the camera recognizes many people at the same time, When taking pictures of yourself, the area of your face is automatically it will focus on the nearest person. detected so that you can take self pictures more easily and quickly.
-
Page 44: Face Tone
Shooting ( Ê Smile Shot Face Tone Selectable modes: Program, DIS, Photo Help Guide, Beauty shot, Portrait, This menu allows you to control the skin tone in images in beauty shot Children, Beach & Snow mode. The higher the level you select, the brighter the skin tone. The camera automatically takes a picture by 1. -
Page 45: Auto Focus Type
Shooting ( Metering Auto Focus type If you cannot obtain suitable exposure conditions, you can change You can select your preferred Focus Area according to the shooting the metering method to take brighter pictures. conditions. [Center AF] ( ) : The rectangular area in [Multi] ( ) : Exposure will be calculated the center of the LCD... -
Page 46: Photo Style Selector
Shooting ( Photo Style Selector Ê Custom RGB : You can change the R (Red), G (Green) and You can add various effects to the image B (Blue) values of the without using image editing software. image. Photo Style Selector Set a photo style to evoke a mood. -
Page 47: Image Adjust
Shooting ( Image Adjust Ê Saturation You can change the saturation of the image. Ê Contrast 1. Select [Saturation] by pressing the Contrast You can change the contrast of the image. Up/Down button. Sharpness Saturation 2. Change the saturation by pressing the 1. -
Page 48: Acb
Shooting ( Drive mode This function is to adjust the contrast automatically when taking You can select continuous shot, and AEB (Auto Exposure Bracketing). photos in an environment with big exposure difference i.e. backlight [Single] ( : Take one picture only. or contrast. -
Page 49: Voice Memo
Shooting ( Voice Memo Voice Recording You can add your voice-over to a stored A voice can be recorded for as long as the still image. (Max. 10 sec.) available recording time (Max. 10 hours) allows. Set the voice memo feature. Enable voice recording. -
Page 50: Recording The Movie Clip Without Voice
Shooting ( Ê Pausing while recording a voice Recording the movie clip without voice Using this function, you can record your favorite voice clips into a voice recording You can record the movie without voice. Select [Off] of [Voice] menu in the Movie mode. -
Page 51: Sound
Sound ( ) Ê The items indicated by * are default settings. Shutter sound Ä Menus are subject to change without prior notice. You can select the shutter sound. Volume - Shutter sound : [Off], [1]*, [2], [3] Volume :Medium Start Sound :Off... -
Page 52: Af Sound
Sound ( ) Display ( AF sound Ê The items indicated by * are default settings. Ä Menus are subject to change without prior notice. If you set AF sound to on, AF sound will be activated when the Language Shutter button is pressed down half way so that you can be aware of the camera operation status. - Page 53 Display ( Start up image Quick View If you enable Quick View before capturing an image, you can view whenever the camera is turned on. the image you just captured on the LCD monitor for the duration set in the [Quick View] setup. Quick view is possible only with still - Sub menus : [Off]*, [Logo], [User Image] images.
- Page 54 Settings ( Ê The items indicated by * are default settings. Initialization Ä Menus are subject to change without prior notice. All camera menu and function settings will be restored to their default values. However, values for Date & Time, Language and Formatting the memory Video Out will not be changed.
-
Page 55: File Name
Settings ( Setting up the Date / Time / Date type File name You can change the date and time that will be displayed on the captured images and set up the date type. Setting [Time Zone] enables you to display the local date and time on the LCD monitor [Reset] : After using the reset function, Format when travelling overseas. -
Page 56: Auto Power Off
Settings ( Imprinting the recording date Auto power off This function switches the camera off after a set amount of time in There is an option to include Date&Time on still images. order to prevent unnecessary battery drainage. - Sub menus - Sub menus [Off]* : The Date&Time will not... -
Page 57: Auto Focus Lamp
Settings ( Selecting Video out type Auto Focus lamp You can turn on and off the Auto Focus lamp. The Video output signal from the camera can be NTSC or PAL. Your choice of output will be governed by the type of device - Sub menus (monitor or TV, etc.) to which the camera is connected. -
Page 58: Setting The Usb
Settings ( Setting the USB - PAL : Australia, Austria, Belgium, China, Denmark, Finland, If the camera fails to automatically connect with a PC or a printer using Germany, U.K., Holland, Italy, Kuwait, Malaysia, New Zealand, Singapore, Spain, Sweden, Switzerland, a USB cable, you can manually set [Computer] or [Printer]. -
Page 59: Playing Back A Still Image
Starting play mode Turn the camera on and select Play mode by pressing the play mode Playing back a movie clip button ( Î ). The camera can now play back the images stored on 1. Select the recorded movie clip that you the memory. -
Page 60: Movie Clip Capture Function
Starting play mode Movie clip capture function Playing back a recorded voice You can capture still images from the movie clip. 1. Select the recorded voice that you want to play back by using the Left / Right Ê How to capture the movie clip button. -
Page 61: Lcd Monitor Indicator
LCD monitor Indicator The LCD monitor displays shooting information about the displayed Description Icon Page image. Î Playback mode p.58 Voice Memo p.74 DPOF p.75 Protect p.73 Folder name & File name 100-0010 p.54 Memory indicator Battery p.15 80~1600 p.40 Aperture value F3.5 ~ F15 Shutter speed... -
Page 62: Using The Camera Buttons To Set The Camera
Using the camera buttons to set the camera Thumbnail ( ) / Enlargement ( ) button º í In Play mode, you can use the buttons on the camera to conveniently Ê Searching or Deleting Files set up the Play mode functions. 1. -
Page 63: Thumbnail / Enlargement Button
Thumbnail ( ) / Enlargement ( ) button º í Ê Details of Each Category Ê The maximum enlargement rate in proportion to the image size Category Description File Format Image size Type Maximum (e.g., picture, video, or voice) X12.5 X10.4 X10.0 X10.2 X8.0 X6.4 X5.0 X3.2 enlargement Categorized depending on the sequence rate... -
Page 64: Info (Disp) / Up Button
Info (DISP) / Up button Play & Pause / OK button When the menu is displayed on the LCD monitor, the Up button In Play mode, the play & pause / OK button works as follows: operates as a direction button. - When the menu is displayed on the LCD monitor, the OK button When the menu is not displayed on the LCD monitor, pressing the is used for confirming data that is changed by using the 5 function... -
Page 65: Left / Right / Down / Menu Button
Delete ( Õ ) button Left / Right / Down / MENU button Left / Right / Down / MENU buttons activate the following. This deletes images stored on the memory. 1. Select an image that you want to delete by pressing the - Left button : While the menu is showing, the Left button Left / Right button and press the Delete ( Õ... -
Page 66: Setting Up The Play Back Function Using The Lcd Monitor
Setting up the play back function using the LCD monitor Play mode functions can be changed by using the LCD monitor. Secondary Menu Tab Main Menu Sub Menu Page In the Play mode, pressing the MENU button displays the menu on Menu the LCD monitor. - Page 67 Setting up the play back function using the LCD monitor This menu is available while the camera is connected to a PictBridge Menu Tab Main Menu Sub Menu Secondary Menu Page supporting printer (direct connection to the camera, sold separately) Auto with a USB cable.
-
Page 68: Edit
Edit ( Resize Change the resolution (size) of pictures taken. Select [Start image] to save an image to be the start-up image. 1. Press the play mode button and press the MENU button. Resize 2. Click the Up / Down button from the Edit menu to select [Resize] ( menu tab and press the OK button. -
Page 69: Rotating An Image
Edit ( After using [Edit] feature, the edited image will be saved as a smaller Photo Style Selector size than the original image. (Only with image size from 8M) It is possible to add various effects to your images by using this function. Rotating an image 1. -
Page 70: Image Adjust
Edit ( Ê Custom RGB Ê Red eye Removal You can change the R (Red), G Red eye effect can be removed from the captured image. (Green) and B (Blue) values of the 1. Select ( ) by pressing the Left / image. - Page 71 Edit ( Ê Brightness control Ê Saturation control You can change the brightness of the image. You can change the saturation of the image. 1. Select ( ) by pressing the Left 1. Select ( ) by pressing the Left / Right button and press the OK / Right button and press the OK button.
-
Page 72: Starting The Multi Slide Show
Starting the Multi Slide Show ( Images can be displayed continuously at preset intervals. Selecting Images You can view the Multi Slide Show by connecting the camera to an external monitor. You can select image to view 1. Press the play mode button and press the MENU button. 1. -
Page 73: Setting Play Interval
Starting the Multi Slide Show ( Setting play interval Unique screen effects can be used for the Multi Slide Show. Set the Multi Slide Show play interval. 1. Select the [Effect] sub menu by pressing 1. Select the [Interval] sub menu by Start Start the Up / Down button and press the... -
Page 74: File Options
File Options ( 1. Press the play mode button and press the MENU button. å Of all the files stored on the memory, the unprotected files 2. Press the Up / Down button and select the [File Options] menu tab in the DCIM subfolder will be deleted. -
Page 75: Voice Memo
File Options ( [All] : Protect / release all saved images Voice memo - If you protect an image, the protect You can add your voice to a stored still image. icon will be displayed on the LCD Protect All? monitor. -
Page 76: Dpof
File Options ( DPOF Ê Standard This function allows you to embed printing quantity information on Ê DPOF(Digital Print Order Format) allows you to embed printing a stored image. information on your memory card’s MISC folder. Select the 1. Press the Up / Down button and select pictures to be printed and how many prints to make. - Page 77 File Options ( Ê Index Ê Print size Images (except for movie clips and voice files) are printed as index You can specify the print size when printing images stored on the type. memory card. The [Size] menu is available only for DPOF 1.1 compatible printers.
-
Page 78: Copy To Card
File Options ( Copy to Card å If there is not enough space available on the memory card to copy saved images on the internal memory (About 7.5MB), the This enables you to copy image files, movie clips and voice [Copy to Card] command will copy only some of the images and display [Memory Full] message. -
Page 79: Pictbridge
PictBridge You can use the USB cable to connect this camera to a printer that Ê Easy printing supports PictBridge (sold separately) and print the stored images When you connect the camera to printer directly. Movie clips and voice files cannot be printed. in the Play back mode, you can print a picture easily. -
Page 80: Pictbridge : Picture Selection
PictBridge : Picture Selection PictBridge : Print Setting You can select images you want to print. You can select the Paper Size, Print Format, Paper Type, Print Quality, Date Print and File Name Print menus for printed pictures. Ê Setting the Number of Copies to Print 1. -
Page 81: Pictbridge : Reset
PictBridge : Reset Important notes Initializes user-changed configurations. Be sure to observe the following precautions! å This unit contains precision electronic components. Do not 1. Use the Up / Down button to select the use or store this unit in the following locations. Date :Auto [Reset] menu tab. - Page 82 Important notes å å Camera Maintenance - If the camera is transferred from a cold to a warm and humid - Use a soft brush (available from photo stores) to gently clean the environment, condensation can form on the delicate electronic lens and LCD assemblies.
-
Page 83: Warning Indicator
Warning indicator There are several warnings that may appear on the LCD display. [File Error] åFile error à Delete the file [Card Error] åMemory card error åMemory card error à Contact a camera service center à Turn off the camera power and turn it on again Ã... -
Page 84: Before Contacting A Service Center
Before contacting a service center Please check the following. Camera does not take images when pressing the Shutter button åThere is insufficient memory capacity à Delete unnecessary image files The camera doesn’t switch on åThe memory card has not been formatted åThere is low battery capacity Ã... - Page 85 Before contacting a service center The flash does not fire åFlash off mode has been selected å The external monitor has not been connected properly with à Disengage flash off mode the camera åThe camera mode can't use the flash Ã...
- Page 86 - Range : Wide : 0.2m ~ 2.85m Tele : 0.5m ~ 1.59m (ISO AUTO) Lens - Focal Length : SAMSUNG Lens f = 4.9 ~ 24.5mm - Recharging Time : Approx. 4 sec (35mm film equivalent : 27 ~ 135mm) - F No.
-
Page 87: Specifications
· Movie Editing (Embedded): Pause during Normal About 403 About 441 About 528 About 537 About 792 About 1065 About 1437 About 1872 recording, Still Image Capture Ä These figures are measured under Samsung standard conditions and Storage - Media may vary depending on shooting conditions and camera settings. - Page 88 Specifications Power Source - Rechargeable battery : BP70A, 3.7V 740mAh (Minimum: 700 mAh) Ä Included battery may vary depending on sales region. Dimensions (WxHxD) - 96.3 X 58 X 21.9mm (excluding protrusions) Weight - Approx. 112.4g (without battery and card) Operating Temperature - 0 ~ 40°C Operating Humidity - 5 ~ 85%...
- Page 89 For Windows users Ê Programs contained on the CD Program Purpose Transfer files by connecting your camera to your PC. Intelli-studio Edit photos and videos. Ê Installing programs Hardware and software requirements Item Requirements å Using a self-assembled PC or a PC and OS that are not supported may void your warranty.
- Page 90 1. Insert the installation CD in a compatible CD-ROM drive. Ê Transferring files to your PC Once you connect the camera to your PC, the camera will be 2. When the setup screen is displayed, click Samsung Digital recognized as a removable drive. Camera Installer to start installation.
- Page 91 2. Turn on the camera. Ê Disconnecting the camera (for Windows XP) - The computer recognizes the camera automatically. The way to disconnect the USB cable for Windows Vista/7 is similar. 1. If the status lamp on your camera is blinking, wait until it stops. å...
- Page 92 Ê Using Intelli-studio Once you have installed the Intelli-studio on your PC, the Intelli-studio starts automatically when a camera is connected with your PC. If the Intelli-studio does not start after you have connected the camera to your PC, double-click the Intelli-studio icon on your Windows desktop. The Intelli-studio allows you to play back and edit files.
- Page 93 (for Windows) (for Mac) For Mac users Icon Description When you connect the camera to a Macintosh computer, the computer Open menus will recognize the device automatically. You can transfer files directly Display files in the selected folder from the camera to the computer without installing any programs. MAC OS 10.3 or later is supported.
- Page 94 2. Turn on the camera. The computer recognizes the camera automatically and a removable disk icon will be displayed. 3. Double click the removable disk icon. 4. Transfer photos or videos to the computer.
- Page 95 Case 6 When I open the Device Manager (by clicking Start Please check the following if the USB connection malfunctions. (Settings) Control Panel (Performance and Maintenance) System (Hardware) Device Case 1 USB cable is not connected or it is not the supplied USB Manager), there are Unknown Devices or Other Devices cable.
- Page 96 Ê When the DirectX 9.0c or later is not installed à Install the DirectX 9.0c or later 1) Insert the CD provided with the camera 2) Run the windows explorer and select the [CD-ROM drive:\ DirectX] folder and click the DXSETUP.exe file. The DirectX will be installed.
- Page 97 This product and its electronic accessories through your local, free battery return system. should not be mixed with other commercial wastes for disposal. PlanetFirst represents Samsung Electronics’ This Class [B] digital apparatus complies with Canadian ICES-003. commitment to the sustainable development and social responsibility through eco-driven business and management activities.
- Page 98 This equipment has been tested and found to comply with the limits for a Class B digital device, pursuant to part 15 of the FCC Trade Name : Samsung Electronics America, Inc. Rules. These limits are designed to provide reasonable Model No.