Table of Contents
Advertisement
Available languages
Available languages
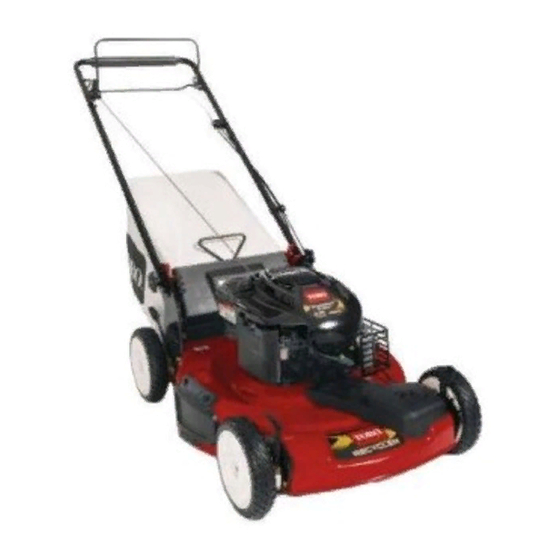
22in Recycler
Model No. 20331—Serial No. 312000001 and Up
Replacement parts are available from an Authorized Service Dealer or at www.shoptoro.com.
Introduction
This rotary-blade, walk-behind lawn mower is intended to
be used by residential homeowners. It is designed primarily
for cutting grass on well-maintained lawns on residential
properties. It is not designed for cutting brush or for
agricultural uses.
Read this information carefully to learn how to operate and
maintain your product properly and to avoid injury and
product damage. You are responsible for operating the
product properly and safely.
You may contact Toro directly at www.Toro.com for product
and accessory information, help finding a dealer, or to register
your product.
Whenever you need service, genuine Toro parts, or additional
information, contact an Authorized Service Dealer or Toro
Customer Service and have the model and serial numbers of
your product ready. Figure 1 identifies the location of the
model and serial numbers on the product.
1. Model and serial number plate
Write the product model and serial numbers in the space
below:
Model No.
Serial No.
This manual identifies potential hazards and has safety
messages identified by the safety alert symbol (Figure 2),
which signals a hazard that may cause serious injury or death
if you do not follow the recommended precautions.
© 2012—The Toro® Company
8111 Lyndale Avenue South
Bloomington, MN 55420
®
Register at www.Toro.com.
Figure 1
Register at www.Toro.com.
Lawn Mower
1. Safety alert symbol
This manual uses 2 words to highlight information.
Important calls attention to special mechanical information
and Note emphasizes general information worthy of special
attention.
The engine exhaust from this product
contains chemicals known to the State of
California to cause cancer, birth defects,
or other reproductive harm.
Important: This engine is not equipped with a spark
arrester muffler. It is a violation of California Public
Resource Code Section 4442 to use or operate the engine
on any forest-covered, brush-covered, or grass-covered
land. Other states or federal areas may have similar laws.
This spark ignition system complies with Canadian ICES-002.
The enclosed Engine Owner's Manual is supplied for
information regarding the US Environmental Protection
Agency (EPA) and the California Emission Control
Regulation of emission systems, maintenance, and
warranty. Replacements may be ordered through the
engine manufacturer.
For models with stated engine horsepower, the gross
horsepower of the engine was laboratory rated by the engine
manufacturer in accordance with SAE J1940. As configured
to meet safety, emission, and operating requirements, the
actual engine horsepower on this class of lawn mower will
be significantly lower.
Form No. 3373-753-ASM Rev A
Operator's Manual
Figure 2
WARNING
CALIFORNIA
Proposition 65 Warning
Original Instructions (EN)
All Rights Reserved *3373-753-ASM*
Printed in the USA
Advertisement
Chapters
Table of Contents

Related Manuals for Toro Recycler 20331


Summary of Contents for Toro Recycler 20331
- Page 1 You are responsible for operating the product properly and safely. WARNING You may contact Toro directly at www.Toro.com for product and accessory information, help finding a dealer, or to register CALIFORNIA your product. Proposition 65 Warning...
-
Page 2: Table Of Contents
Contents General Operation • Read, understand, and follow all instructions on the Introduction ..............1 machine and in the manual(s) before starting. General Operation ..........2 • Do not put hands or feet near or under the machine. Slope Operation ............2 Keep clear of the discharge opening at all times. -
Page 3: Children
• Watch for holes, ruts, bumps, rocks, or other hidden WARNING objects. Uneven terrain could cause a slip and fall Exhaust contains carbon monoxide, an odorless, accident. Tall grass can hide obstacles. deadly poison that can kill you. • Do not mow on wet grass or excessively steep slopes. Poor footing could cause a slip and fall accident. -
Page 4: Safety And Instructional Decals
Safety and Instructional Decals Important: Safety and instruction decals are located near areas of potential danger. Replace damaged decals. Setup Important: Remove and discard the protective plastic sheet that covers the engine. Manufacturer's Mark 1. Indicates the blade is identified as a part from the original machine manufacturer. -
Page 5: Filling The Engine With Oil
Product Overview Filling the Engine with Oil No Parts Required Procedure Important: Your mower does not come with oil in the engine, but it does come with a bottle of oil. Before starting the engine, fill the engine with oil. Max. -
Page 6: Operation
Checking the Engine Oil Level Operation Service Interval: Before each use or daily Filling the Fuel Tank 1. Remove the dipstick, wipe it clean, and fully install the dipstick (Figure 8). DANGER Gasoline is extremely flammable and explosive. A fire or explosion from gasoline can burn you and others. -
Page 7: Starting The Engine
Starting the Engine Adjust the cutting height as desired. Set the front wheels to the same height as the rear wheels (Figure 9). 1. Hold the blade control bar against the handle Note: To raise the mower, move all the cutting height levers (Figure 10). -
Page 8: Stopping The Engine
Check the grass bag frequently. If it is damaged, install a new Toro replacement bag. If the side discharge chute is on the mower, remove it (refer to Removing the Side Discharge Chute (page 10)) before bagging the clippings. -
Page 9: Side-Discharging The Clippings
WARNING The blade is sharp; contacting the blade can result in serious personal injury. Stop the engine and wait for all moving parts to stop before leaving the operating position. Figure 12 1. Notches 3. Grass bag pin (2) 2. Rear deflector 2. -
Page 10: Operating Tips
• For best performance, install a new blade before the cutting season begins. • Replace the blade when necessary with a Toro replacement blade. Cutting Grass • Cut only about a third of the grass blade at a time. Do not... - Page 11 Cutting Leaves • After cutting the lawn, ensure that half of the lawn shows through the cut leaf cover. You may need to make more than one pass over the leaves. • If there are more than 5 inches (13 cm) of leaves on the lawn, set the front cutting height one or two notches higher than the rear cutting height.
-
Page 12: Maintenance
• Refer to your engine operator's manual for any additional yearly maintenance procedures. Important: Refer to your engine operator's manual for additional maintenance procedures. Note: Replacement parts are available from an Authorized Service Dealer (go to www.toro.com to find the nearest dealer) or at www.shoptoro.com. Preparing for Maintenance pump to remove the fuel. -
Page 13: Replacing The Air Filter
Replacing the Air Filter Service Interval: Every 25 hours 1. Use a screw driver to open the air filter cover (Figure 15). 2. Replace the air filter (Figure 15). 3. Install the cover. Figure 16 1. Dipstick 4. Tip the mower onto its side with the air filter up to drain the used oil out through the oil fill tube (Figure 17). -
Page 14: Adjusting The Self-Propel Drive Cable
blade edge is dull or nicked, have it sharpened and balanced, or replace it. WARNING The blade is sharp; contacting the blade can result in serious personal injury. Wear gloves when servicing the blade. 1. Refer to Preparing for Maintenance (page 12). 2. -
Page 15: Cleaning The Mower
Cleaning the Mower Service Interval: After each use WARNING The mower may dislodge material from under the mower housing. • Wear eye protection. • Stay in the operating position (behind the handle) when the engine is running. • Do not allow bystanders in the area. For best results, clean the mower soon after you have completed mowing. -
Page 16: Storage
Storage 2. Fold the upper handle forward as shown in Figure 22. Important: Route the cables to the outside of the Store the mower in a cool, clean, dry place. handle knobs as you fold the handle. Preparing the Mower for Storage WARNING Gasoline vapors can explode. - Page 17 Notes:...
- Page 18 Notes:...
- Page 19 Notes:...
- Page 20 Countries Other than the United States or Canada Customers who have purchased Toro products exported from the United States or Canada should contact their Toro Distributor (Dealer) to obtain guarantee policies for your country, province, or state. If for any reason you are dissatisfied with your Distributor's service or have difficulty obtaining guarantee information, contact the Toro importer.
- Page 21 Cuando necesite asistencia técnica, piezas genuinas Toro o ADVERTENCIA información adicional, póngase en contacto con un Servicio Técnico Autorizado o con Asistencia al Cliente Toro, y tenga CALIFORNIA a mano los números de modelo y serie de su producto. Advertencia de la Propuesta 65 Figura 1 identifica la ubicación de los números de modelo...
- Page 22 En los casos en que se indica la potencia en cv del motor, la Observe siempre todos los mensajes de seguridad que siguen a potencia bruta del motor fue calculada en el laboratorio por el este símbolo con el fin de evitar posibles lesiones o la muerte. fabricante del motor, con arreglo a lo estipulado en SAEJ1940.
-
Page 23: Operación En Pendientes
• • No utilice nunca el cortacésped en hierba mojada. Apague cualquier cigarrillo, cigarro, pipa u otra fuente Asegúrese de pisar firmemente; camine; no corra nunca. de ignición. • Desengrane el sistema de transmisión, si la máquina está • Utilice solamente un recipiente de gasolina homologado. equipada con uno, antes de arrancar el motor. - Page 24 • Nunca haga ajustes o reparaciones con el motor en marcha. Desconecte el cable de la bujía y haga masa con él contra el motor para evitar un arranque accidental. • Compruebe frecuentemente los componentes del recogedor y el protector de descarga y sustitúyalos por piezas recomendadas por el fabricante cuando sea necesario.
-
Page 25: Pegatinas De Seguridad E Instrucciones
Pegatinas de seguridad e instrucciones Importante: Hay pegatinas de seguridad e instrucciones colocadas cerca de zonas de potencial peligro. Sustituya cualquier pegatina dañada. Marca del fabricante 1. Indica que la cuchilla ha sido identificada como pieza del fabricante original de la máquina. 114-7982 1. -
Page 26: Montaje
Montaje Importante: Retire y deseche la hoja protectora de plástico que cubre el motor. Llenado del cárter de aceite No se necesitan piezas Procedimiento Instalación del agarradero Importante: El cortacésped se suministra sin aceite en el motor, pero incluye una botella de aceite. Antes de No se necesitan piezas arrancar el motor, llene el motor de aceite. -
Page 27: El Producto
El producto 4. Vuelva a colocar la varilla firmemente. Importante: Cambie el aceite del motor después de las primeras 5 horas de operación , y después cada año. Consulte 2 Llenado del cárter de aceite (página 6). Figura 5 1. Palanca de altura de corte 7. -
Page 28: Operación
Operación Cómo llenar el depósito de combustible PELIGRO La gasolina es altamente inflamable y explosiva. Un incendio o una explosión provocado(a) por la gasolina puede causarle quemaduras a usted y a otras personas. • Para evitar que una carga estática incendie la gasolina, coloque el recipiente y/o el cortacésped directamente sobre el suelo antes de repostar, no en un vehículo o sobre otro objeto. -
Page 29: Ajuste De La Altura De Corte
clasificación de servicio API SF, SG, SH, SJ, SL o superior.) Importante: Evite llenar el cárter demasiado y arrancar el motor. Drene el exceso de aceite hasta que el nivel de aceite llegue a la marca Lleno de la varilla. 3. -
Page 30: Uso De La Transmisión Autopropulsada
Figura 11 Para desengranar la transmisión autopropulsada, suelte la barra de control de transmisión autopropulsada. Nota: La velocidad máxima sobre el terreno con transmisión autopropulsada es fija. Para reducir la velocidad sobre el terreno, aumente el espacio entre la barra de la transmisión autopropulsada y el manillar. -
Page 31: Descarga Lateral De Los Recortes
Compruebe frecuentemente la bolsa de recogida. Si está dañada, instale una bolsa de recambio Toro nueva. Si el conducto de descarga lateral está ins- talado en el cortacésped, retírelo (consulte Cómo retirar el conducto de descarga lateral (página 12)) -
Page 32: Consejos De Operación
Si la bolsa está instalada en el cortacésped, retírela antes de proceder a la descarga lateral de los recortes. ADVERTENCIA La cuchilla está muy afilada; cualquier contacto con la cuchilla puede causar lesiones personales graves. Pare el motor y espere a que se detengan todas las piezas en movimiento antes de abandonar el puesto del operador. - Page 33 • Sustituya la cuchilla cuando sea preciso por una cuchilla de repuesto Toro. Cómo cortar la hierba • Corte solamente un tercio de la hoja de hierba cada vez.
-
Page 34: Mantenimiento
Importante: Consulte en el Manual del operador del motor procedimientos adicionales de mantenimiento. Nota: Puede adquirir piezas de repuesto en un Servicio Técnico Autorizado (vaya a www.toro.com para encontrar el distribuidor más cercano) o en www.shoptoro.com. Preparación para el Importante: Antes de inclinar el cortacésped para... -
Page 35: Cómo Cambiar El Aceite Del Motor
3. Coloque la tapa. Figura 16 1. Varilla 4. Coloque el cortacésped de lado con el filtro de aire Figura 15 hacia arriba para drenar el aceite usado a través del tubo de llenado de aceite (Figura 17). Cómo cambiar el aceite del motor Intervalo de mantenimiento: Después de las primeras 5 horas... -
Page 36: Ajuste Del Cable De La Transmisión Autopropulsada
Examine la cuchilla cada vez que se acabe la gasolina. Si la cuchilla está dañada o agrietada, sustitúyala inmediatamente. Si el filo de la cuchilla está romo o mellado, mande a afilar la cuchilla o cámbiela. ADVERTENCIA La cuchilla está muy afilada; cualquier contacto con la cuchilla puede causar lesiones personales graves. -
Page 37: Limpieza Del Cortacésped
Figura 21 1. Orificio de lavado 5. Abra el grifo de la manguera. 6. Arranque el motor y hágalo funcionar hasta que no salgan más recortes de debajo de la carcasa. 7. Pare el motor. 8. Cierre el grifo y desconecte la manguera del cortacésped. -
Page 38: Almacenamiento
Almacenamiento 1. Afloje los pomos del manillar hasta que pueda mover libremente la sección superior del mismo. Almacene el cortacésped en un lugar fresco, limpio y seco. 2. Pliegue hacia adelante la sección superior del manillar (ver Figura 22). Preparación del cortacésped Importante: Asegúrese de que los cables quedan para el almacenamiento por fuera de los pomos del manillar al plegar la... - Page 39 Notas:...
- Page 40 Si por cualquier razón usted no está satisfecho con el servicio ofrecido por su distribuidor, o si tiene dificultad en obtener información sobre la garantía, póngase en contacto con el importador Toro. Si fallan todos los demás recursos, puede ponerse en contacto con nosotros en Toro Warranty Company.