Table of Contents
Advertisement
20210720082450_42MKE6020_eng_BOOK Page 1 Tuesday, July 20 2021 08:26:26 JST
This manual should be considered a permanent part of the vehicle
and should remain with the vehicle when it is resold.
This publication includes the latest production information available
before printing. Honda Motor Co., Ltd. reserves the right to make
changes at any time without notice and without incurring any
obligation.
No part of this publication may be reproduced without written
permission.
The vehicle pictured in this owner's manual may not match your
actual vehicle.
© 2021 Honda Motor Co., Ltd.
Advertisement
Chapters
Table of Contents

Related Manuals for Honda CRF450RX


Summary of Contents for Honda CRF450RX
- Page 1 This publication includes the latest production information available before printing. Honda Motor Co., Ltd. reserves the right to make changes at any time without notice and without incurring any obligation.
- Page 2 20210720082450_42MKE6020_eng_BOOK Page 2 Tuesday, July 20 2021 08:26:26 JST IMPORTANT NOTICE THIS VEHICLE IS DESIGNED AND MANUFACTURED FOR COMPETITION USE ONLY AND IS SOLD “AS IS” WITH NO WARRANTY. IT DOES NOT CONFORM TO FEDERAL MOTOR VEHICLE SAFETY STANDARDS AND OPERATION ON PUBLIC STREETS, ROADS, OR HIGHWAYS IS ILLEGAL.
- Page 3 Welcome Congratulations on your purchase of a new Be aware that off-road racing/motocross is a Honda vehicle. Your selection of a Honda physically demanding sport that requires makes you part of a worldwide family of more than just a fine vehicle. To do well, you...
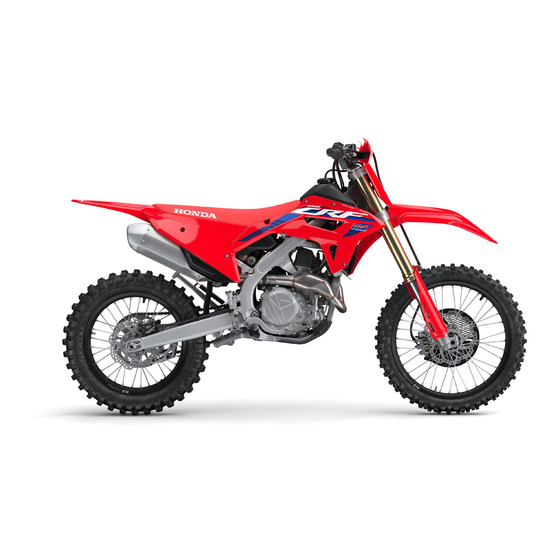
- Page 4 ● contained in this owner's manual, *The specifications may vary with each locale. competition handbook and on the vehicle. The following codes in this manual ● indicate each country. The illustrations here in are based on the ● CRF450RX type.
- Page 5 20210720082450_42MKE6020_eng_BOOK Page 5 Tuesday, July 20 2021 08:26:26 JST A Few Words About Safety Your safety, and the safety of others, is very DANGER important. Operating this vehicle safely is an You WILL be KILLED or SERIOUSLY important responsibility. HURT if you don’t follow instructions. To help you make informed decisions about safety, we have provided operating WARNING...
-
Page 6: Table Of Contents
20210720082450_42MKE6020_eng_BOOK Page 6 Tuesday, July 20 2021 08:26:26 JST Contents Vehicle Safety P. 2 Operation Guide P. 16 Maintenance P. 35 Troubleshooting P. 54 Information P. 60 Specifications P. 71... -
Page 7: Vehicle Safety
20210720082450_42MKE6020_eng_BOOK Page 7 Tuesday, July 20 2021 08:26:26 JST Vehicle Safety This section contains important information for safe riding of your vehicle. Please read this section carefully. Safety Guidelines ..........P. 3 Safety Labels............P. 6 Image Labels............P. 8 Safety Precautions.......... -
Page 8: Safety Guidelines
20210720082450_42MKE6020_eng_BOOK Page 8 Tuesday, July 20 2021 08:26:26 JST Safety Guidelines Safety Guidelines Before Riding Make sure that you are physically fit, mentally Follow these guidelines to enhance your safety: focused and free of alcohol and drugs. Check Perform all routine and regular inspections ●... - Page 9 Keep Your Honda in Safe Condition Maintaining your vehicle properly is critical to your safety. A loose bolt, for example, can cause a breakdown in which you can be seriously...
- Page 10 20210720082450_42MKE6020_eng_BOOK Page 10 Tuesday, July 20 2021 08:26:26 JST Safety Guidelines WARNING Carbon Monoxide Hazard Exhaust contains poisonous carbon monoxide, a Running the engine of your vehicle colourless, odorless gas. Breathing carbon while in an enclosed or even partially monoxide can cause loss of consciousness and enclosed area can cause a rapid build- may lead to death.
-
Page 11: Safety Labels
20210720082450_42MKE6020_eng_BOOK Page 11 Tuesday, July 20 2021 08:26:26 JST Safety Labels Safety Labels warn you of potential hazards that could cause serious injury. Read these labels carefully and don't remove them. U type Safety and information labels on your vehicle If a label comes off or becomes hard to read, provide important safety information and may contact your dealer for a replacement. - Page 12 20210720082450_42MKE6020_eng_BOOK Page 12 Tuesday, July 20 2021 08:26:26 JST Safety Labels...
-
Page 13: Image Labels
20210720082450_42MKE6020_eng_BOOK Page 13 Tuesday, July 20 2021 08:26:26 JST Image Labels Image Labels Read instructions contained in Owner's ED type The following pages describe the label Manual carefully. meanings. Some labels warn you of potential hazards that could cause serious Read instructions contained in Shop Manual injury. - Page 14 20210720082450_42MKE6020_eng_BOOK Page 14 Tuesday, July 20 2021 08:26:26 JST Image Labels BATTERY LABEL DANGER • Do not dismantle, modify or solder the main unit and battery terminals. Doing so may cause leakage, heat generation, explosion, fire or loss of vision due to leaked electrolyte. If electrolyte gets into one's eye, immediately wash the eye with plenty of water, and receive treatment from an eye specialist (ophthalmologist) as soon as possible.
- Page 15 20210720082450_42MKE6020_eng_BOOK Page 15 Tuesday, July 20 2021 08:26:26 JST Image Labels FUEL LABEL Unleaded petrol only ETHANOL up to 10 % by volume CAUTION LABEL IMPORTANT INFORMATION Operator only. No passengers. ● This vehicle is sold as is without warranty, and the entire risk as to ●...
-
Page 16: Safety Precautions
20210720082450_42MKE6020_eng_BOOK Page 16 Tuesday, July 20 2021 08:26:26 JST Safety Precautions Safety Precautions WARNING Not wearing a helmet increases the Protective Apparel chance of serious injury or death in a Make sure that you are wearing an approved crash. helmet, eye protection, and other appropriate riding gear. -
Page 17: Riding Precautions
20210720082450_42MKE6020_eng_BOOK Page 17 Tuesday, July 20 2021 08:26:26 JST Riding Precautions Riding Precautions Parking CRF450RX Running-in Period Park on a firm, level surface. ● If you must park on a slight incline or loose During the first operating day or 25 km (15 ●... - Page 18 20210720082450_42MKE6020_eng_BOOK Page 18 Tuesday, July 20 2021 08:26:26 JST Riding Precautions Refuelling and Fuel Guidelines Follow these guidelines to protect the engine and fuel system: Use only unleaded petrol. ● Use recommended octane number. Using ● lower octane petrol will result in decreased engine performance.
- Page 19 Honda selectable torque control applying throttle. When the Honda selectable torque control (Torque Control) detects rear wheel spin during Always use the recommended tyres and acceleration, the system will limit the amount of...
-
Page 20: Accessories & Modifications
We strongly advise that you do not add any accessories that were not specifically designed Do not attempt modify the vehicle to carry a for your vehicle by Honda or make passenger. The subframe was not designed to modifications to your vehicle from its original carry the additional weight of a passenger. -
Page 21: Operation Guide
20210720082450_42MKE6020_eng_BOOK Page 21 Tuesday, July 20 2021 08:26:26 JST Parts Location Throttle grip Front brake lever Engine oil level inspection window Rear brake pedal... - Page 22 20210720082450_42MKE6020_eng_BOOK Page 22 Tuesday, July 20 2021 08:26:26 JST Clutch lever Fuel fill cap (P.33) Fast idle knob (Engine idle speed) (P.28) Main fuse (P.58) Battery (P.52) Shift lever (P.32) Side stand CRF450RX...
- Page 23 20210720082450_42MKE6020_eng_BOOK Page 23 Tuesday, July 20 2021 08:26:26 JST Indicators PGM-FI malfunction indicator lamp (MIL) (amber) Comes on briefly when the engine is started. If it comes on while engine is running: (P.56) Engine mode indicator (blue) Indicates the currently selected mode by blinking the mode number once when the engine is started.
- Page 24 20210720082450_42MKE6020_eng_BOOK Page 24 Tuesday, July 20 2021 08:26:26 JST Switches Engine mode select button Start button (P.20) (P.28) Torque control button Engine stop button (P.23) (P.31) Continued...
- Page 25 20210720082450_42MKE6020_eng_BOOK Page 25 Tuesday, July 20 2021 08:26:26 JST Switches (Continued) Engine Mode Engine mode indicator (blue) You can change engine output characteristic depending on track conditions by using the engine mode select button. PGM-FI mode 1: standard setting ● PGM-FI mode 2: smooth setting ●...
- Page 26 20210720082450_42MKE6020_eng_BOOK Page 26 Tuesday, July 20 2021 08:26:26 JST Current Mode Start the engine and push the engine mode The engine mode indicator also indicates the select button with your vehicle stopped. The currently selected mode by blinking the mode engine mode indicator over the engine number once when the engine is started.
- Page 27 20210720082450_42MKE6020_eng_BOOK Page 27 Tuesday, July 20 2021 08:26:26 JST Switches (Continued) Mode Selection PGM-FI mode 1 Start the engine. With your vehicle stopped and the throttle closed, push and hold the engine mode select button for 1 or more second. PGM-FI mode 2 Make sure that the fast idle knob is pushed (P.28)
- Page 28 20210720082450_42MKE6020_eng_BOOK Page 28 Tuesday, July 20 2021 08:26:26 JST Honda selectable torque control Torque Control level can be selected or Current Mode turned on/ off, according to your skill and Start the engine. The Torque Control track conditions by using the Torque Control indicator indicates the selected mode by button.
- Page 29 20210720082450_42MKE6020_eng_BOOK Page 29 Tuesday, July 20 2021 08:26:26 JST Honda selectable torque control (Continued) Mode Selection Start the engine. Torque Control mode 1 Press the Torque Control button to select a mode level. The mode changes every Torque Control mode 2 Torque Control off time you press the button.
- Page 30 20210720082450_42MKE6020_eng_BOOK Page 30 Tuesday, July 20 2021 08:26:26 JST HRC-Launch Control System The HRC-Launch Control System reduces slip The system may become disabled if you and assists for an effective start by snap the throttle excessively. If the idle speed is low, the system may temporarily decreasing the rev limit when not go into standby.
- Page 31 20210720082450_42MKE6020_eng_BOOK Page 31 Tuesday, July 20 2021 08:26:26 JST HRC-Launch Control System (Continued) Press and hold the start button. The level Level 1 changes every time you press and hold. The level selected last is saved. The factory setting is level 2. Level 2 To continue using the system, refer to step 2 in “To operate the system”...
- Page 32 20210720082450_42MKE6020_eng_BOOK Page 32 Tuesday, July 20 2021 08:26:26 JST When the launch control system To operate the system operates, these following conditions will Perform steps 1 and 2 in “To change the disable launch control: level”. Vehicle is in 3rd gear Shift into 1st or 2nd gear.
- Page 33 20210720082450_42MKE6020_eng_BOOK Page 33 Tuesday, July 20 2021 08:26:26 JST Starting the Engine Start your engine using the following procedure. To restart a warm engine, follow the procedure for “Warm Engine Starting”. NOTICE • If the engine does not start within 5 seconds, wait 10 seconds before trying to start the engine again to recover battery voltage.
- Page 34 20210720082450_42MKE6020_eng_BOOK Page 34 Tuesday, July 20 2021 08:26:26 JST This vehicle does not have a start inhibitor. Cold Engine Starting Pull the clutch lever all the way in when Shift the transmission to neutral. pressing the start button. If the temperature is 10 °C (50 °F) or below, pull the fast idle knob fully out.
- Page 35 20210720082450_42MKE6020_eng_BOOK Page 35 Tuesday, July 20 2021 08:26:26 JST Starting the Engine (Continued) Starting the engine excessively charged When starting the engine, the PGM-FI with fuel by throttle blipping or other malfunction indicator lamp (MIL) (amber) will reasons stay on for 2 seconds, then go off. And then the engine mode indicator (blue) indicates Shift the transmission into neutral.
- Page 36 20210720082450_42MKE6020_eng_BOOK Page 36 Tuesday, July 20 2021 08:26:26 JST When you stop the engine Emergency Engine Stop To stop the engine in an emergency, push Normal Engine Stop and hold the engine stop button. Shift the transmission into neutral. Push and hold the engine stop button until the engine stops completely.
- Page 37 20210720082450_42MKE6020_eng_BOOK Page 37 Tuesday, July 20 2021 08:26:26 JST Shifting Gears Your vehicle transmission has 5 forward gears in a one-down, four-up shift pattern.
- Page 38 Fuel type: Unleaded petrol only Breather tube Fuel octane number: Your vehicle is Steering stem nut designed to use Research Octane Number (RON) 95 or higher. CRF450RX Tank capacity: 8.0 L (2.11 US gal, 1.76 Imp gal) CRF450R Tank capacity: Lower edge of 6.3 L (1.66 US gal, 1.39 Imp gal)
- Page 39 20210720082450_42MKE6020_eng_BOOK Page 39 Tuesday, July 20 2021 08:26:26 JST Refuelling (Continued) Closing the Fuel Fill Cap After refuelling, close the fuel fill cap securely. Insert the breather tube into the steering stem nut. WARNING Petrol is highly flammable and explosive. You can be burned or seriously injured when handling fuel.
-
Page 40: Maintenance
20210720082450_42MKE6020_eng_BOOK Page 40 Tuesday, July 20 2021 08:26:26 JST Maintenance Please read “Importance of Maintenance”, “Maintenance Fundamentals” and Competition Handbook carefully before attempting any maintenance. Refer to Competition Handbook for service data. Importance of Maintenance ......P. 36 Maintenance Schedule........P. 38 Maintenance Fundamentals ...... -
Page 41: Importance Of Maintenance
WARNING Stop the engine. ● Improperly maintaining your vehicle or CRF450RX ● Place your vehicle on a firm, level surface failing to correct a problem before you using the side stand, an optional workstand ride can cause a crash in which you can or a maintenance stand to provide support. - Page 42 20210720082450_42MKE6020_eng_BOOK Page 42 Tuesday, July 20 2021 08:26:26 JST Importance of Maintenance Allow the engine, muffler, brakes, and other ● high-temperature parts to cool before servicing as you can get burned. Run the engine only when instructed, and ● do so in a well-ventilated area.
-
Page 43: Maintenance Schedule
Honda Shop Manual task or need assistance, remember that your available for purchase from your dealer. Honda dealer knows your vehicle best and is fully equipped to maintain and repair it. If you decide to do your own maintenance, use only... - Page 44 Engine Oil Filter NOTE 3 Engine Idle Speed WE RECOMMEND THESE ITEMS BE SERVICED BY REFERRING TO THE OFFICIAL HONDA SHOP MANUAL. This maintenance schedule is based upon average riding condition. Machine subjected to severe use require more frequent servicing.
- Page 45 ITEMS Each race or Every 2 races or Every 4 races or Every 6 races or Every 8 races or CRF450RX about 3.5 hours about 7.5 hours about 15.0 hours about 22.5 hours about 30.0 hours Piston and Piston Rings...
- Page 46 NOTE ITEMS Each race or Every 2 races or Every 4 races or Every 6 races or Every 8 races or CRF450RX about 3.5 hours about 7.5 hours about 15.0 hours about 22.5 hours about 30.0 hours Clutch Fluid NOTE 2...
-
Page 47: Maintenance Fundamentals
20210720082450_42MKE6020_eng_BOOK Page 47 Tuesday, July 20 2021 08:26:26 JST Maintenance Fundamentals Air cleaner for condition and contamination. Pre-ride Inspection ● Clutch lever freeplay. ● To ensure safety, it is your responsibility to Breather drain for cleaning. ● perform a pre-ride inspection and make sure Steering head bearing and related parts for ●... - Page 48 20210720082450_42MKE6020_eng_BOOK Page 48 Tuesday, July 20 2021 08:26:26 JST Maintenance Fundamentals Between Heats & Practice Maintenance CRF450RX After practice or between races you have a chance to make additional checks and adjustments. CRF450R After practice or between heats you have a chance to make additional checks and adjustments.
- Page 49 20210720082450_42MKE6020_eng_BOOK Page 49 Tuesday, July 20 2021 08:26:26 JST Maintenance Fundamentals • After adjustment, check that the chain • Suspend the front wheel above the ground adjuster index marks are in the same and use the pressure release screws to position on each side.
- Page 50 20210720082450_42MKE6020_eng_BOOK Page 50 Tuesday, July 20 2021 08:26:26 JST Maintenance Fundamentals Take care to prevent catching your fingers After Competition Maintenance between the chain and sprocket. It is important to the long term performance of your vehicle to practice a consistent Remove the drive chain, clean and lubricate it.
- Page 51 Take care to prevent catching your fingers Replacing Parts between the chain and sprocket. Always use Honda Genuine Parts or their equivalents to ensure reliability and safety. A variety of reasonably priced cleaning brushes are available from variety, drug, food, and WARNING hardware stores.
- Page 52 20210720082450_42MKE6020_eng_BOOK Page 52 Tuesday, July 20 2021 08:26:26 JST Maintenance Fundamentals Electrolyte splashes into your mouth Lithium-Ion (Li-Ion) Battery ● Rinse mouth thoroughly with water, and Your vehicle has a lithium-ion (li-ion) battery. do not swallow. Clean the battery terminals if they become dirty WARNING or corroded.
- Page 53 Cleaning the Battery Terminals NOTICE Remove the battery. P. 52 Installing non-Honda electrical accessories can If the terminals are starting to corrode and overload the electrical system, discharging the are coated with a white substance, wash battery and possibly damaging the system.
- Page 54 20210720082450_42MKE6020_eng_BOOK Page 54 Tuesday, July 20 2021 08:26:26 JST Maintenance Fundamentals Blown fuse NOTICE Replacing a fuse with one that has a higher rating greatly increases the chance of damage to the electrical system. If a fuse fails repeatedly, you likely have an electrical fault.
- Page 55 20210720082450_42MKE6020_eng_BOOK Page 55 Tuesday, July 20 2021 08:26:26 JST Maintenance Fundamentals Inspecting Rims and Valve Stems Tyres (Inspecting/Replacing) Inspect the rims for damage and loose spokes. Checking the Air Pressure Also inspect the valve stems for their positions. Visually inspect your tyres and use an air A tilted valve stem indicates the tube is slipping pressure gauge to measure the air pressure inside the tyre or the tyre is slipping on the rim.
- Page 56 20210720082450_42MKE6020_eng_BOOK Page 56 Tuesday, July 20 2021 08:26:26 JST Maintenance Fundamentals Have your tyres replaced by your dealer. WARNING For recommended tyres and air pressure, see Installing improper tyres on your “Specifications.” P. 71 vehicle can adversely affect handling Follow these guidelines whenever you replace and stability, and can cause a crash in tyres.
-
Page 57: Removing & Installing Body Components
20210720082450_42MKE6020_eng_BOOK Page 57 Tuesday, July 20 2021 08:26:26 JST Removing & Installing Body Components Battery Battery -mark Negative Negative terminal Battery lid terminal Battery +mark Positive terminal Battery rubber Removal Remove the battery lid by removing the bolts. Disconnect the negative - terminal from the battery. - Page 58 20210720082450_42MKE6020_eng_BOOK Page 58 Tuesday, July 20 2021 08:26:26 JST Removing & Installing Body Components Battery Installation Install the battery lid and tighten the bolts to the specified torque: Assemble the battery and battery rubber. Make sure the + and - marks on the Torque: 5.2 N·m (0.5 kgf·m, 3.8 lbf·ft) bottom of the battery rubber align with the positive + and negative - of...
-
Page 59: Troubleshooting
20210720082450_42MKE6020_eng_BOOK Page 59 Tuesday, July 20 2021 08:26:26 JST Troubleshooting Engine Will Not Start........P. 55 Warning Indicators On or Flashing....P. 56 PGM-FI (Programmed Fuel Injection) Malfunction Indicator Lamp (MIL)....P. 56 Electrical Trouble ..........P. 57 Battery Goes Dead ..........P. 57 Blown Fuse ............ -
Page 60: Engine Will Not Start
P. 48). Check the condition of the battery. ● P. 57 If the problem continues, have your vehicle inspected by your dealer as soon as possible or refer to an official Honda Shop Manual available for purchase from your dealer. -
Page 61: Warning Indicators On Or Flashing
If the indicator comes on while riding, you may have a serious problem with the PGM-FI system. Reduce speed and have your vehicle inspected by your dealer as soon as possible or refer to an official Honda Shop Manual available for purchase from your dealer. -
Page 62: Electrical Trouble
20210720082450_42MKE6020_eng_BOOK Page 62 Tuesday, July 20 2021 08:26:26 JST Electrical Trouble Battery Goes Dead Check the battery voltage using a digital multi meter with the cable connected. Battery charging is needed. Below 1V: The battery has failed; replace the A battery charger recommended by your battery. -
Page 63: Blown Fuse
20210720082450_42MKE6020_eng_BOOK Page 63 Tuesday, July 20 2021 08:26:26 JST Electrical Trouble Blown Fuse Blown Fuse Starter magnetic switch stay bolt Starter magnetic switch Before handling fuses, see “Inspecting and Connector Replacing Fuses.” P. 48 Disconnect the negative - terminal. P. 52 Pull back the coupler cover. - Page 64 20210720082450_42MKE6020_eng_BOOK Page 64 Tuesday, July 20 2021 08:26:26 JST Electrical Trouble Blown Fuse Install the starter magnetic switch cover. Install and tighten the starter magnetic switch stay bolt. Install the connector and coupler cover. Connect the negative - terminal. NOTICE If a fuse fails repeatedly, you likely have an electrical problem.
-
Page 65: Information
20210720082450_42MKE6020_eng_BOOK Page 65 Tuesday, July 20 2021 08:26:26 JST Information Caring for Your Vehicle........P. 61 Storing Your Vehicle......... P. 65 Transporting Your Vehicle ......P. 66 You & the Environment........P. 68 Serial Numbers........... P. 69 Fuels Containing Alcohol......... P. 70... -
Page 66: Caring For Your Vehicle
Frequent cleaning and polishing is important to Thoroughly rinse your vehicle with plenty of ensure the life of your Honda. A clean vehicle clean water and dry with a soft, clean cloth. makes it easier to spot potential problems. - Page 67 20210720082450_42MKE6020_eng_BOOK Page 67 Tuesday, July 20 2021 08:26:26 JST Caring for Your Vehicle Washing Precautions Steering head bearings Follow these guidelines when washing: Do not use high-pressure washers: ● High-pressure water cleaners can damage moving parts and electrical parts, rendering them inoperable. Water in the air intake can be drawn into the throttle body and/or enter the air cleaner.
- Page 68 20210720082450_42MKE6020_eng_BOOK Page 68 Tuesday, July 20 2021 08:26:26 JST Caring for Your Vehicle Do not use wax or polishing compounds on ● NOTICE mat painted surface: Do not use steel wool to clean the frame as it Use a soft cloth or sponge, plenty of could damage or discolor the frame surface.
- Page 69 20210720082450_42MKE6020_eng_BOOK Page 69 Tuesday, July 20 2021 08:26:26 JST Caring for Your Vehicle Exhaust Pipe and Muffler The exhaust pipe and muffler are stainless steel but may become stained by mud or dust. To remove mud or dust, use a wet sponge and a liquid kitchen abrasive, then rinse well with clean water.
-
Page 70: Storing Your Vehicle
20210720082450_42MKE6020_eng_BOOK Page 70 Tuesday, July 20 2021 08:26:26 JST Storing Your Vehicle Storing Your Vehicle Store your vehicle in an unheated area, free ● of dampness, away from sunlight, with a If you won't be riding for an extended period, minimum of daily temperature variation. -
Page 71: Transporting Your Vehicle
20210720082450_42MKE6020_eng_BOOK Page 71 Tuesday, July 20 2021 08:26:26 JST Transporting Your Vehicle Transporting Your Vehicle To remove your vehicle from storage, follow these guidelines: If your vehicle needs to be transported, it Uncover and clean your vehicle. ● should be carried on a motorcycle trailer or a Change the engine oil if more than 4 ●... - Page 72 20210720082450_42MKE6020_eng_BOOK Page 72 Tuesday, July 20 2021 08:26:26 JST Transporting Your Vehicle If you use a truck or motorcycle trailer to To secure your vehicle, brace the front wheel transport your vehicle, we recommend that you against the front of the truck bed or trailer rail. follow these guidelines: Attach the lower ends of two straps to the tie- Use a loading ramp.
-
Page 73: You & The Environment
20210720082450_42MKE6020_eng_BOOK Page 73 Tuesday, July 20 2021 08:26:26 JST You & the Environment You & the Environment Recycle Wastes Put oil and other toxic wastes in approved Owning and riding a vehicle can be enjoyable, containers and take them to a recycling centre. but you must do your part to protect the Call your local or state office of public works or environment. -
Page 74: Serial Numbers
20210720082450_42MKE6020_eng_BOOK Page 74 Tuesday, July 20 2021 08:26:26 JST Serial Numbers Serial Numbers The frame and engine serial numbers uniquely identify your vehicle and are required in order to register your vehicle. They may also be required when ordering replacement parts. You should record these numbers and keep them in a safe place. -
Page 75: Fuels Containing Alcohol
20210720082450_42MKE6020_eng_BOOK Page 75 Tuesday, July 20 2021 08:26:26 JST Fuels Containing Alcohol Fuels Containing Alcohol NOTICE Use of blended fuels containing higher than Some conventional fuels blended with alcohol approved percentages can damage metal, are available in some locales to help reduce rubber, plastic parts of your fuel system. -
Page 76: Specifications
20210720082450_42MKE6020_eng_BOOK Page 76 Tuesday, July 20 2021 08:26:26 JST Specifications Dimension Frame ■ ■ CRF450RX 2,174 mm (85.6 in) CRF450RX 90/90-21 54M Overall length Front CRF450R 2,182 mm (85.9 in) CRF450R 80/100-21 51M Tyre size CRF450RX 839 mm (33.0 in) - Page 77 (cold) 0.28 ± 0.03 mm (0.011 Drive train Exhaust ■ ± 0.001 in) Primary reduction 2.357 Honda 4-stroke motorcycle oil API Service 2.133 Classification SG or higher, excluding oils Recommended 1.706 marked as “Energy Conserving” or “Resource engine oil Conserving” SAE 10W-30, JASO T 903 Gear ratio 1.421...
- Page 78 20210720082450_42MKE6020_eng_BOOK Page 78 Tuesday, July 20 2021 08:26:26 JST Specifications Electrical Torque specifications ■ ■ HY85S lithium-ion (li-ion) Fork air pressure release screw 1.3 N·m (0.1 kgf·m, 1.0 lbf·ft) Battery 12 V-2.0 Ah (20 HR) Battery bolt 2 N·m (0.2 kgf·m, 1.5 lbf·ft) (standard) SILMAR10A-9S Battery lid bolt...
- Page 79 Manufacturer, Authorized Representative and Importer Honda Motor Co., Ltd. Manufacturer 2-1-1, Minami-Aoyama, Minato-ku, Tokyo, 107-8556, Japan Honda Motor Europe Ltd - Aalst Office Authorized representative and Wijngaardveld 1 (Noord V) importer for EU market 9300 Aalst - Belgium Honda Motor Europe Ltd...