Table of Contents
Troubleshooting

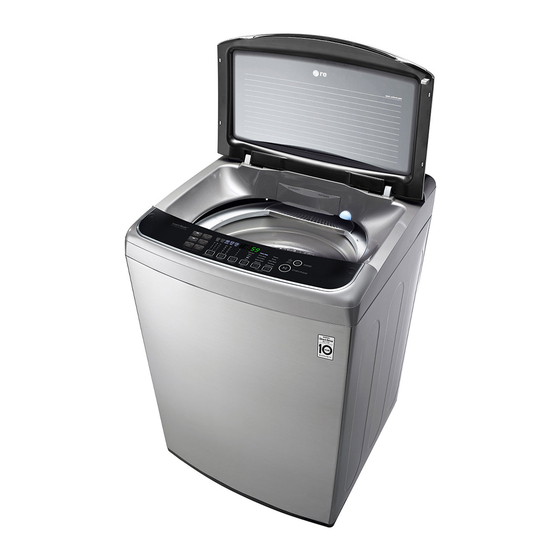
Related Manuals for LG WTG1032VF


Summary of Contents for LG WTG1032VF
- Page 1 WASHING MACHINE SERVICE MANUAL CAUTION Before servicing the washer, Read the safety precautions in the manual. MODELS: WTG1032VF / WTG1032WF / WTG1030SF Copyright © 2017 LG Electronics Inc. All rights reserved. Only training and service purposes.
-
Page 2: Table Of Contents
4-5. Troubleshooting by Common Washing Problems ..............43 4-6. Trouble Shooting With Error Code ..................44 4-7 . How to Diagnose and Repair by Symptom ................47 5. Exploded View ..........................55 Copyright © 2017 LG Electronics Inc. All rights reserved. Only training and service purposes. -
Page 3: Specifications
Applied DISPENSER BLEACH INILET Applied AUTO POWER OFF Applied Smart RinseTM Applied with Jet Spray Heater Applied * Program can be different according to the model. Copyright © 2017 LG Electronics Inc. All rights reserved. Only training and service purposes. -
Page 4: Installation Instructions
2. Install the washing machine on a level and firm surface, any tilt should be less than 1° . Copyright © 2017 LG Electronics Inc. All rights reserved. Only training and service purposes. - Page 5 2 cm. the adjusting plate. More than 10cm More than 2cm More than 2cm Copyright © 2017 LG Electronics Inc. All rights reserved. Only training and service purposes.
- Page 6 After connecting the hose, open the tap to check for any water leakage. In case of water leakage, close the tap and start again from step 1. Copyright © 2017 LG Electronics Inc. All rights reserved. Only training and service purposes.
- Page 7 In case of water leakage, close the tap and start again from step 1. If you skip step1, it may cause water leakage. Copyright © 2017 LG Electronics Inc. All rights reserved. Only training and service purposes.
- Page 8 Check to see if there is a rubber seal inside the Hose connector connector. Rubber seal Copyright © 2017 LG Electronics Inc. All rights reserved. Only training and service purposes.
- Page 9 • Do not install the washer where it is directly exposed to sunlight, wind, rain etc. • Plug the power cord of this washer into a properly installed standard electrical outlet that is switched & earthed. Copyright © 2017 LG Electronics Inc. All rights reserved. Only training and service purposes.
-
Page 10: Operating Instructions
If the drain hose is not elevated, the water will syphon out completely. ADJUSTABLE LEGS Use to level the washing machine for correct BASE balance & spin operation. Copyright © 2017 LG Electronics Inc. All rights reserved. Only training and service purposes. -
Page 11: Before Starting To Wash
Fasten zippers, hook, and strings to make sure that these items don't snag on other clothes. Nylon net is not supplied by LG. ※ Copyright © 2017 LG Electronics Inc. All rights reserved. Only training and service purposes. - Page 12 At the end of the cycle, you may see water in the compartments. This is part of the normal operation of the washer. NOTE: Do not use bleach in the dispenser drawer. Copyright © 2017 LG Electronics Inc. All rights reserved. Only training and service purposes.
- Page 13 Detergent usage may need to be adjusted for water temperature, water hardness, size and soil level of the load. Avoid using too much detergent in your washer, as it can lead to oversudsing and detergent residue being left on the clothes. Copyright © 2017 LG Electronics Inc. All rights reserved. Only training and service purposes.
- Page 14 5th wash should be at least a warm one. • Fabric softener of thinner consistency is less likely to leave residue on the dispenser and contribute to a build-up. Copyright © 2017 LG Electronics Inc. All rights reserved. Only training and service purposes.
- Page 15 LIQUID : Pretreat with a paste of granular Detergent and water. PASTE : Scrape residue from fabric. Pretreat with prewash stain remover or nonflammable dry cleaning fluid. Rub Detergent into dampened area, Wash using bleach safe for fabric. Copyright © 2017 LG Electronics Inc. All rights reserved. Only training and service purposes.
-
Page 16: Function Of Each Button
10 minutes (not including spin irregularity correction time) or decrease by a maximum of 4 minutes. * The control panel may differ according to different models. Copyright © 2017 LG Electronics Inc. All rights reserved. Only training and service purposes. - Page 17 Rinses to effectively seconds to select or Cycle to suit the remove detergent residue. deselect. clothes type and soil level. (Refer to page 28) Copyright © 2017 LG Electronics Inc. All rights reserved. Only training and service purposes.
-
Page 18: Washing Programs
Soiled Detergent as indicated by the program on the Detergent level indicator. cotton loads. Control panel. Or follow the Detergent manufacturer's instructions. Copyright © 2017 LG Electronics Inc. All rights reserved. Only training and service purposes. - Page 19 • For best washing results, we recommend dilute the detergent powder (Drum Type) in WARM water and pour directly into tub. Copyright © 2017 LG Electronics Inc. All rights reserved. Only training and service purposes.
- Page 20 Detergent on the Control level indicator. is preferable. panel. Or follow the Detergent manufacturer's instructions. Copyright © 2017 LG Electronics Inc. All rights reserved. Only training and service purposes.
- Page 21 • To reduce the overall noise during spin, the spin speed is reduced, therefore the clothes will have a higher moisture level at the end of the wash. Copyright © 2017 LG Electronics Inc. All rights reserved. Only training and service purposes.
-
Page 22: Other Functions
Water will then be supplied and the Soak wash will begin. When the Soak wash program ends, the chime will sound for 10 seconds before the Power turns off automatically. Copyright © 2017 LG Electronics Inc. All rights reserved. Only training and service purposes. - Page 23 10 seconds before the Power turns off automatically. NOTE • Use Intensive Rinse to remove detergents more effectively. • Intensive Rinse will be cancelled if the Water Level is changed during operation. Copyright © 2017 LG Electronics Inc. All rights reserved. Only training and service purposes.
- Page 24 • After performing tub clean, will disappear until next Tub clean reminder. • Tub Clean reminder is automatically determined by the washer's usage. (Generally once after 30 usages) Copyright © 2017 LG Electronics Inc. All rights reserved. Only training and service purposes.
- Page 25 2) Always keep the laundry amount to 2kg or less and make sure to spread it out evenly. 3) Select 60 minutes for cotton clothing and 120 minutes for synthetic fiber clothing for effective Moisture removal. Copyright © 2017 LG Electronics Inc. All rights reserved. Only training and service purposes.
- Page 26 Wash, Wash/Rinse or Rinse only program has ended. • If you do not specify the water level, then Medium will be automatically selected. Copyright © 2017 LG Electronics Inc. All rights reserved. Only training and service purposes.
- Page 27 • To cancel any Time Delay setting, press Time Delay (Reservation) button repeatedly until the reservation is canceled or press the POWER button to turn off the power. Copyright © 2017 LG Electronics Inc. All rights reserved. Only training and service purposes.
- Page 28 If you want to unlock during wash, press the Rinse button again. NOTE • “C J ” & the remaining time are alternatively shown on the display while the child lock is active during the wash. Copyright © 2017 LG Electronics Inc. All rights reserved. Only training and service purposes.
-
Page 29: Cleaning And Maintenance
Then use a brush to clean the filter. NOTE • Before cleaning the filter, the impurities in the water supply hose should be removed. Copyright © 2017 LG Electronics Inc. All rights reserved. Only training and service purposes. - Page 30 We do not recommend the use of dye strippers in your washer. • Do not use your washer lid as a work surface. Copyright © 2017 LG Electronics Inc. All rights reserved. Only training and service purposes.
-
Page 31: Service Information
4. Service Information 4-1. WIRING DIAGRAM 1) For Pump Model Copyright © 2017 LG Electronics Inc. All rights reserved. Only training and service purposes. -
Page 32: Main Pcb Picture
4-2. Main PCB Picture 1) For Pump Model P/N : EBR78073758 Copyright © 2017 LG Electronics Inc. All rights reserved. Only training and service purposes. -
Page 33: Disassembly Instruction
② Push the front panel to the left side then pull it out. ③ Disconnect the leads from the controller. ④ Remove 4 screw from the front panel. ⑤ Remove the PCB Assembly. Copyright © 2017 LG Electronics Inc. All rights reserved. Only training and service purposes. - Page 34 ⑤ Remove the inlet valve. ⑥ Disconnect the leads & the pressure tube from the BP sensor. ⑦ Remove the BP sensor. Copyright © 2017 LG Electronics Inc. All rights reserved. Only training and service purposes.
- Page 35 * The shape of harness may differ according to the model get into the connectors. ⑤ Reattach the harness to the cabinet above the plastic bag with the strain relief mounted on the wiring harness. Copyright © 2017 LG Electronics Inc. All rights reserved. Only training and service purposes.
- Page 36 ③ Damper assembly shall not be disassembled. Replace damper as assembly. ④ For assembly, keep the following. (Location & color) Location P/No. PIVOT(Color) Ⓐ,Ⓑ A102 MIDDLE BLUE Ⓒ,Ⓓ A101 WHITE Copyright © 2017 LG Electronics Inc. All rights reserved. Only training and service purposes.
- Page 37 ② Disassemble rotor, pull out the rotor as shown Fixing Bolt ③ water guide. Water Guide Stator Housing ④ Before disassemble stator, disconnect the stator housing. Copyright © 2017 LG Electronics Inc. All rights reserved. Only training and service purposes.
- Page 38 Stator Housing Water Guide 7) Replacement of Bearing housing ④ Loosen 14 Fixing screws on the Bearing Housing ASM and pull up it. Copyright © 2017 LG Electronics Inc. All rights reserved. Only training and service purposes.
-
Page 39: How To Use Test Mode
(40~90rpm) area for 200 sec. Error value/ UB No sense Check RSt: UB value Current RPM is displayed in the units of 2 sec. Power off Copyright © 2017 LG Electronics Inc. All rights reserved. Only training and service purposes. -
Page 40: Troubleshooting By Common Washing Problems
· Remove objects in pockets. See page 9 for caring before loading. · Overloading the washer · Do not overload the washer. · Degradation of fabric Copyright © 2017 LG Electronics Inc. All rights reserved. Only training and service purposes. -
Page 41: Troubleshooting With Error Code
(horizontal) 2. When the washer is installed on • Adjust the leg heights for a slope the washer to be leveled. (When dehydration is not working) Copyright © 2017 LG Electronics Inc. All rights reserved. Only training and service purposes. - Page 42 (If it is damaged, replace the part) (When there is a • Check the pulsator locking by problem in the clutch) foreign object (Remove the foreign object) Copyright © 2017 LG Electronics Inc. All rights reserved. Only training and service purposes.
- Page 43 • Check and repair any air leakages at the air hose connector on the outer tub and at any connecting parts. Copyright © 2017 LG Electronics Inc. All rights reserved. Only training and service purposes.
-
Page 44: How To Diagnose And Repair By Symptom
If there are no defects in the above, Over 120% voltage Change the controller if all than rating check the electrical parts have no it should be defect of the controller. defects. Copyright © 2017 LG Electronics Inc. All rights reserved. Only training and service purposes. - Page 45 Controller 1. If mains voltage and the drain motor Change the controller. have no defects a defect of the controller is highly possible. Copyright © 2017 LG Electronics Inc. All rights reserved. Only training and service purposes.
- Page 46 Controller 1. Defect of controller is highly possible if Change the controller. inlet valve and Ball Pressure Sensor have no defects in the above. Copyright © 2017 LG Electronics Inc. All rights reserved. Only training and service purposes.
- Page 47 Result of Check Motor coil is open. Change the motor 1) Check resistance of the motor. Normal Resistance Contact defect of the leak. Remove the cause Copyright © 2017 LG Electronics Inc. All rights reserved. Only training and service purposes.
- Page 48 Defect of the controller Change the controller. 1. Check whether the drain motor or the (Triac defect) drain pump works immediately after power is turned on. Copyright © 2017 LG Electronics Inc. All rights reserved. Only training and service purposes.
- Page 49 Change the lead wire switch is welded. assembly. terminals of the lid switch with the lid open. ∞ Ω Defect of the controller. Change the controller. Copyright © 2017 LG Electronics Inc. All rights reserved. Only training and service purposes.
- Page 50 It is very important to find out what kinds of noise & where comes from to settle noise during spin and accumulately service experiance. Copyright © 2017 LG Electronics Inc. All rights reserved. Only training and service purposes.
- Page 51 (It happens specially when a high frequency equipment is a used around the washer or in the case voltage fluctuation is big.) Copyright © 2017 LG Electronics Inc. All rights reserved. Only training and service purposes.
-
Page 52: Exploded View
5. EXPLODED VIEW TOP COVER ASSEMBLY TUB ASSEMBLY CABINET ASSEMBLY Copyright © 2017 LG Electronics Inc. All rights reserved. Only training and service purposes. - Page 53 A020 A010 A030 A040 A240 A050 A202 A201 A200 A062 A064 A152 A061 A190 A151 A101 A150 A163 A165 A230 A410 A100 A101 A241 A165 A163 A180 A270 COLD A183 A186 A140 A390 A157...
- Page 54 F032 F016 F070 F001 F001 F000 F100 F090 F020 F086 F080 F027 F023 F082...
- Page 55 K005 K000 K012 K021 K020 K030 K040 K050 K061 K060 A203 NATURAL K100 K250 K064 K080 K170 K140 K345 K340 K200 K290 K230 K210 K201 K305 K300...
- Page 56 October, 2017 PRINTED IN THAILAND P/No. MFL70079806...