
Related Manuals for Mitsubishi PD-4225

Summary of Contents for Mitsubishi PD-4225
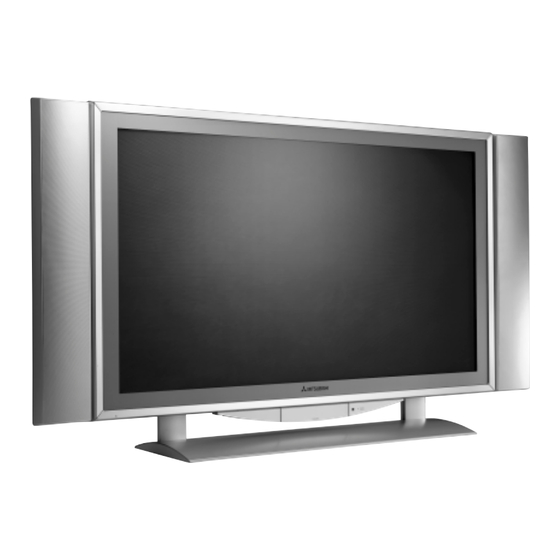
- Page 1 Owner’s Guide Mitsubishi Plasma TV PD-4225 ® Technically Anything is Possible © Copyright 2003, Mitsubishi Digital Electronics America...
-
Page 2: Warning
Any changes or modifications not expressly approved by the party responsible for compliance could void the user’s authority to operate the equipment. CAUTION: Do not attempt to modify this product in any way without written authorization from Mitsubishi Digital Electronics America. Unauthorized modification could void the user’s authority to operate this product. COMPLIANCE: The responsible party for this product’s compliance is:... -
Page 3: Safety Instructions
Safety Instructions Safety Instructions Safety Instructions Important safeguards for you and your new product Your product has been manufactured and tested with your safety in mind. However, improper use can result in potential elec- trical shock or fire hazards. To avoid defeating the safeguards that have been built into your new product, please read and observe the following safety points when installing and using your new product, and save them for future reference. - Page 4 Safety Instructions Safety Instructions continued Safety Instructions continued 14. Outdoor Antenna Grounding 19. Servicing If an outside antenna or cable system is connected to the Do not attempt to service this product yourself as opening or product, be sure the antenna or cable system is grounded so removing covers may expose you to dangerous voltage or as to provide some protection against voltage surges and other hazards.
-
Page 5: Important Information
Part 15 of the FCC Rules. These limits are designed to 7. Do not attempt to service or repair the unit. Mitsubishi is provide reasonable protection against harmful interfer- not liable for any bodily harm or damage caused if unquali- ence when the equipment is operated in a commercial fied persons attempt service or open the back cover. - Page 6 In some instances the ORBITER shift might be evident while displaying static guides or menus. The default setting for ORBITER is On. Mitsubishi chose this setting to help reduce uneven phosphor aging. Please do not shut the ORBITER off.
- Page 7 Important Information WARNING: Do not leave stationary or letterbox images on-screen for extended periods of time. Mix types of pictures shown. Uneven phosphor aging is NOT covered by your warranty. The normal use of a TV should include a mixture of TV pic- Still or stationary images may be received from broadcast- ture types.
-
Page 8: Cleaning Safeguards
• DO NOT scrub or rub the screen or cabinet. Wipe it gently. IMPORTANT For further information, assistance in operating your Plasma TV or if you are in need of service, please con- tact us at www.mitsubishi-tv.com or call Consumer Relations at 800-332-2119 8 Plasma TV... -
Page 9: Introduction
The PDP Manufacturing Process: Why minute colored dots may be present on the PDP screen The plasma display panel consists of more than one million fine picture elements (cells). Although Mitsubishi utilizes plasma display panels with more than 99.99 percent active cells, there may be some cells that do not produce light or remain lit. -
Page 10: Table Of Contents
Contents Contents Contents Warning ........2 Manual Sound Control . -
Page 11: Installation
Installation Installation Installation Ensure that the following accessories are included with your TV. If an accessory is missing, please contact the dealer where you purchased the product. CABLE/DBS/DTV AUDIO POWER GUIDE MUTE DEVICE TV MENU HOME DEVICE MENU CANCEL SLEEP INFO AUDIO VIDEO... -
Page 12: Installing The Plasma Tv On The Stand
Installation Installing the Plasma TV on the Stand Installing the Plasma TV on the Stand Preparations 3. Remove the stand from the box. 4. Insert the stand into the mounting legs of 1. Unpack the plasma TV. the plasma TV and fasten it. 1. - Page 13 Installation • Wall mounts not included. • Be sure to use mounting hardware that is designed specifically for this product • For correct installation and mounting, it is strongly recommended to use a trained, authorized dealer. all Mount Installation all Mount Installation For proper ventilation, allow a clearance of 4”...
-
Page 14: Matching Speaker Installation
Matching Speaker Installation Matching Speaker Installation 1. Remove Speaker Brackets from the bottom of Plasma box. 5. Remove Speaker wire from Accessories box. Remove pre- They are located underneath the styrofoam packaging at cut plastic from both ends of the Speaker Wire. This will the bottom of the Plasma box. -
Page 15: Controls - Front Panel Controls
Controls Controls Front Panel Controls Front Panel Controls AUDIO S-VIDEO VIDEO (FRONT) (MONO) DEVICE POWER MENU POWER/ STANDBY 1. ON/OFF SWITCH 6. CHANNEL Turns the TV’s power on and off. Changes channels. Functions as the Adjust ( D / E ) buttons in the On-Screen Menu mode. -
Page 16: Connection Options - Front Panel
Connection Options Connection Options Front Connection Panel Front Connection Panel AUDIO S-VIDEO VIDEO (FRONT) (MONO) DEVICE POWER MENU POWER/ STANDBY 1. VIDEO (FRONT) INPUT Connection for audio/video out from external equipment. 2. S-VIDEO Connection for video out from external equipment. 16 Plasma TV... -
Page 17: Connection Options - Back Panel
Connection for an over-the-air or terrestrial antenna, a MonitorLink when used with MonitorLink Control is a cable TV wire, or cable box. Mitsubishi exclusive digital interface for the display of high quality digital video signals from a Mitsubishi HD 2. VIDEO (REAR) INPUT Receiver/Controller, such as the HD-5000. -
Page 18: Remote Control Functions Care And Operation
DVD, and AUDIO products. Select the product you want to control by moving the slide switch to the appropriate position. The remote control has been preset to operate the TV and other Mitsubishi prod- ucts. To program the remote control to operate other products, see Use of the Remote Control with Other A/V Products, page 20. -
Page 19: Overview Of The Tv Layer Buttons
Remote Control Functions: Overview of the TV Remote Control Functions: Overview of the TV Layer Buttons Layer Buttons Overview Overview (Figure 1, preceding page) PIP CH: Scroll up or down through memorized channels in PIP. Slide Switch: Select A/V product to be controlled by the remote control. - Page 20 When set to TV, the PLAY, STOP, REW/REV, and FF/FWD Satellite brand Code to enter: If your buttons will operate the VCR after the VCR codes have Mitsubishi DTV - DBS satellite been properly programmed into the remote control. receiver DishNetwork...
- Page 21 Mitsubishi A/V receiver 010, 015, 011, 012, audio and/or CD player 013, 014 If you have a Mitsubishi A/V receiver, the audio position code is not 234, 235, 236, 245, listed here, may be used in conjunction with select Mitsubishi CD...
-
Page 22: Special Functions
Remote Control Functions: Special Functions Remote Control Functions: Special Functions When your remote control has been Programmed to operate another manufacturer’s product, the function performed on each layer may vary. The most common functions are: Remote Control Functions: Operation of PIP Remote Control Functions: Operation of PIP Picture-In-Picture (PIP) -
Page 23: External Equipment Connections
External Equipment Connections External Equipment Connections Antenna Connection Antenna Connection - Antenna or Cable Service without a Cable Box Connection - For optimum picture quality, adjust antenna direction if needed. Multi-family Dwellings/Apartments (Connect to wall antenna socket) Wall Antenna RIGHT LEFT Socket RIGHT LEFT (MONO) -
Page 24: Vcr Setup
NOTE: Not all cables shown are included with the TV. VCR Setup VCR Setup - To avoid picture noise (interference), leave an adequate distance between the VCR and TV. - Use the Long Life feature to avoid having a fixed image remain on the screen for a long period of time, i.e. a frozen still picture from a VCR. -
Page 25: External A/V Source Setup
External A/V Source Setup External A/V Source Setup How to connect Connect the audio and video cables from the external equipment's output RIGHT LEFT RIGHT LEFT (MONO) VIDEO VIDEO AUDIO AUDIO ANT IN TO DISPLAY jacks to the TV input jacks, as shown in the figure. VIDEO (REAR) INPUT AV OUTPUT When connecting the TV to external equipment, match the jack colors (Video... -
Page 26: Monitor Out Setup
Monitor Out Setup Monitor Out Setup The TV has a special signal output capability which allows you to hook up a second TV or monitor. Connect the second TV or monitor to the TV AV OUTPUT. See the Operating Manual of the second TV or monitor for further ANT OUT details regarding that device’s input settings. -
Page 27: Hd-5000/Monitorlink Setup
INPUT INPUT 2. Connect the MonitorLink Control/RS-232 cable from the TV back panel to the Mitsubishi HD Receiver/Controller back panel. 3. By using a Stereo Mini-plug to L and R RCA adapter, connect the L (left) and R (right) audio cables from the HD-5000 receiver/controller to the Audio Input Mini-plug on the back of the TV. -
Page 28: Turning On The Tv
Operation Operation urning on the TV urning on the TV POWER 1. Plug the power cord into an active AC power outlet. 2. Press the (on/off) button located underneath the left side of the front panel/frame. The TV’s POWER/STANDBY indicator turns red and the TV is switched to standby mode. 3. -
Page 29: Channel Menu Options
Channel Menu Options Channel Menu Options Auto Programming is used to memorize all the active channels in your area before you can use the TV. There are two ways of storing channels in the Tuner's memory. One is called AUTO PROGRAM and the other is called MANUAL PROGRAM. In AUTO PROGRAM mode, the TV will memorize the channels in ascending numerical order. -
Page 30: Picture Menu Options
Picture Menu Options Picture Menu Options - PICTURE menu adjustments are unique to each input source. Readjust PICTURE menu settings for each input source as preferred. • RGB (PC) / DVI (PC), • RGB (DTV) / DVI (DTV) / Component (480p, 720p, 1080i) •... -
Page 31: Sound Menu Options
Sound Menu Options Sound Menu Options Audio Mode Audio Mode - Audio Mode lets you enjoy the best sound without any special adjustment. - When adjusting sound options (treble, bass, and balance) manually, Audio Mode automatically changes Programmable 1. Press the TV MENU button and then use button to select the menu. -
Page 32: Timer Menu Options
imer Menu Options imer Menu Options Auto Clock Setup Auto Clock Setup - The time is set automatically from the PBS broadcast signal. - The PBS channel signal includes information for the correct time and daylight savings time. 1. Press the TV MENU button and then use D / E button to select the menu. -
Page 33: Auto Off
imer Menu Options continued imer Menu Options continued Auto Of Auto Of - If there is no input signal, Auto off can be set to turn the TV off automatically after 10 TIMER TIMER minutes. Clock Off timer 1. Press the TV MENU button and then use D / E button to select the menu. -
Page 34: Special Menu Options
Uneven phosphor aging/burn-in reduction feature. To minimize the risk of uneven phosphor aging/burn-in when dis- playing still images, the Mitsubishi PD-4225 offers a built-in feature known as ORBITER. The ORBITER feature inter- mittently shifts the screen image horizontally and vertically in small increments. This intermittent screen movement is usually not evident in full motion video. - Page 35 Special Menu Options continued Special Menu Options continued Closed Captions Closed Captions Closed captioning is a process which converts the audio portion of a television program into written words which then appear as sub- titles on the television screen. Closed captions allow viewers to read the dialogue and narration of television programs. Using Closed Captions Captions are the subtitles of the dialogue and narration of television programs.
-
Page 36: Caption/Text
Caption/T Caption/T 1. Press the TV MENU button and then use D / E button to select the menu. SPECIAL SPECIAL SPECIAL 2. Press the button and then use button to select D / E Caption/Text. Language CC 1 Button Lock 3. -
Page 37: Screen Menu Options
Screen Menu Options Screen Menu Options Auto Auto Adjustment Adjustment - RGB (PC) mode only; This function doesn’t work for RGB-DTV mode. - Automatically adjusts picture position and minimizes image shaking. are not active in DVI mode. Auto Adjust Manual Adjust 1. -
Page 38: Adjusting Horizontal/Vertical Position
Adjusting Horizontal/ V Adjusting Horizontal/ V ertical Position ertical Position - This function works in the following modes: SCREEN SCREEN RGB-PC, RGB-DTV (480p,720p,1080i), COMPONENT (480p,720p,1080i). Auto Adjust Format Zoom in/out 1. Press the TV MENU button and then use D / E button to select the menu. -
Page 39: Luminance Noise Reduction
Screen Menu Options continued Screen Menu Options continued Luminance Noise Reduction (TV ideo(Exp.), V ideo, S-V ideo and Component 480i modes only) Luminance Noise Reduction (TV ideo(Exp.), V ideo, S-V ideo and Component 480i modes only) - Use YNR to reduce the picture noise that may appear on the screen. 1. -
Page 40: Pip (Picture-In-Picture) Feature
(Picture-In-Picture) Feature (Picture-In-Picture) Feature - PIP lets you view 2 different inputs (sources) on your TV at the same time. One source will be large, and the other source will show a smaller inset image. - PIP is not available if the option in menu is set to lock on/off... -
Page 41: Sub Picture Size Adjustment
Sub Picture Size Adjustment Sub Picture Size Adjustment 1. Press the TV MENU button and then use D / E button to select menu. 2. Press the button and then use D / E button to select Win. Size. F / G 3. -
Page 42: Lock Menu Options
Lock Menu Options Lock Menu Options Parental Control can be used to block specific channels, ratings and other viewing sources. The password will be required to gain access to Parental Control. The Parental Control Function (V-Chip) is used to block program viewing based on the ratings sent by the broadcasting station. The default setting is to allow all programs to be viewed. -
Page 43: Lock Setup
Lock Menu Options continued Lock Menu Options continued Lock Setup Lock Setup - Select TV, Video (Rear), Video (Front), or S-video input source to use this function. 1. Press the TV MENU button and then use D / E button to select the menu. -
Page 44: External Control Device Setup
- Connect the MONITORLINK CONTROL/RS-232C input jack to an external control device (such as the Mitsubishi HD-5000 Receiver/Controller or an A/V control system) and control the TV’s functions externally. - Connect the serial port of the control device to the RS-232C jack on the TV back panel. -
Page 45: Troubleshooting Checklist
roubleshooting Checklist roubleshooting Checklist • Check whether the TV is turned on. • Power cord inserted into wall outlet? No picture & No sound • Test the wall power outlet, plug other product’s power cord into the wall outlet where the TV’s power cord was plugged in. •... - Page 46 roubleshooting Checklist continued roubleshooting Checklist continued No output from one of • Adjust in the menu. (Refer to p.31) BALANCE SOUND the speakers Unusual sound from • A change in ambient humidity or temperature may result in an unusual noise inside the TV when the TV is turned on or off and does not indicate a fault with the TV.
-
Page 47: Product Specifications
Specification Product Specifications Product Specifications PD-4225 MODEL TV w/ Speakers & Base 40 3/4" 49 5/8" Width (inches) 26" 27 5/8" Height (inches) 4 3/8" 10 7/8" Depth (inches) 65.2 81.7 Weight (pounds) AC100-240V ~ 50/60Hz Power requirement NTSC Television System... -
Page 48: Appendix
DVD Players ABC ..124 Mitsubishi ..003 Mitsubishi ..010, 011, 012, 013, Archer ..125 Aiwa ..261, 274 ..014, 360 Cableview . - Page 49 Codes, continued Codes, continued Satellite Receivers VCRs VCRs /DBS/DTV Mitsubishi ..001, 002, 060, 067, Penney ..044, 020, 065, 025, Mitsubishi 068, 061, 062 ..030, 031 HD/Satellite Receiver 006, 173 Admiral .
- Page 50 Notes Notes Notes 50 Plasma TV...
- Page 51 Parts used for replacement are warranted for the remainder of the original war- ranty period. b. Labor. We will provide the labor for a warranty repair by an authorized MITSUBISHI service center without charge for one year from the original date of purchase at retail.