Sony SU-WL500 Installation Manual
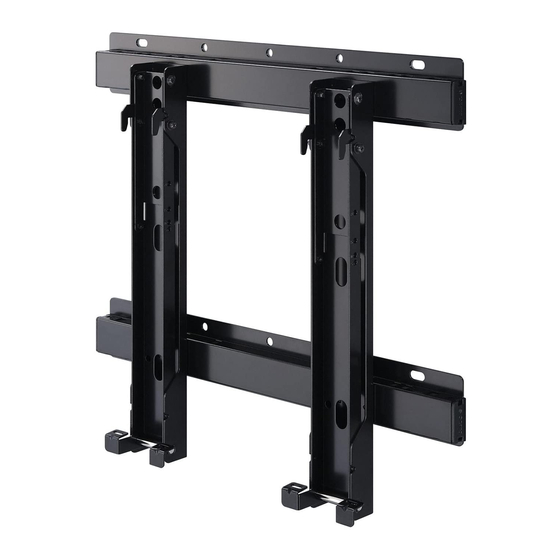
Wall-mount bracket
Hide thumbs
Also See for SU-WL500:
- Installation manual (554 pages) ,
- Instructions manual (112 pages) ,
- Additional information (8 pages)

Related Manuals for Sony SU-WL500


Summary of Contents for Sony SU-WL500
- Page 1 C-646-100-12(1) To Customers and Sony Dealers Wall-Mount Bracket Installation Manual SU-WL500 © 2017 Sony Corporation...
- Page 2 Sufficient expertise is required for installing this product. Be sure to read this manual thoroughly to do the installation work safely. Sony is not liable for any damages or injury caused by mishandling or improper installation. Please give this manual to the customer after installation.
- Page 3 C: Portrait, no leaning D: Portrait, +20° leaning To install the TV to the wall, the SU-WL500 Wall Mount Bracket is necessary. Screws and spacers listed below are also necessary depending on the way of installation. For further details/terms & conditions, contact the sales representative for professional use.
- Page 4 Others Be sure to read thoroughly the all safety information described in the instruction manual of SU-WL500. Do NOT use SU-WL450 for installation in the way • When installing in portrait orientation, only the noted in this manual.
- Page 5 TV installation Remove the stand if it is Follow Step 1 in the SU-WL500 instruction manual to installed to the TV. check the parts. Lay down the TV and lay a soft cloth under the TV to protect the TV monitor.
- Page 6 Remove the screws from the Referring to the Screw and Hook rear of the TV. locations diagram/table on page 20, determine the screw KD-65X9000E/KD-55X9000E/KD-49X9000E/ positions, and secure the KD-65X8500E Mounting Hook to the rear of the Secure the Mounting Hook to the rear of the (*1, *2) TV temporarily, using the four screws ...
-
Page 7: Step 5: Installing The Tv On The Wall
Step 5: Adjust the angle of the Mounting Hook with the Installing the TV on the supplied hex key. Perform following and . Make sure that wall screw firmly secures the arm base of the Mounting Hook (both left and right). ... -
Page 8: Confirming The Completion Of The Installation
If you fail to do so, the TV may fall when it is pushed upward and cause injury. Confirming the completion of the Mounting Hook installation Follow the instructions in the SU-WL500 instruction manual to confirm. When removing the TV Follow the instructions in the SU-WL500 instruction manual to remove. (GB) - Page 9 TV installation Remove the stand if it is Follow Step 1 in the SU-WL500 instruction manual to installed to the TV. check the parts. Lay down the TV and lay a soft cloth under the TV to protect the TV monitor.
- Page 10 Remove the screws from the Referring to the Screw and Hook rear of the TV. locations diagram/table on page 20, determine the screw KD-65X8500E positions, and secure the Mounting Hook to the rear of the Secure the Mounting Hook to the rear of the (*1, *2) TV temporarily, using the four screws ...
- Page 11 Make sure that the screw Step 5: firmly secures the arm base of Installing the TV on the the Mounting Hook (both left and right). wall WARNING Be sure to complete the installation before connecting the AC power cord to the wall outlet. If you allow the AC power cord to be pinched under or between pieces of equipment, this may result in a short circuit or an electric shock.
- Page 12 If you fail to do so, the TV may fall when it is pushed upward and cause injury. Confirming the completion of the installation Follow the instructions in the SU-WL500 instruction manual to confirm. Base Bracket When removing the TV Mounting Hook Follow the instructions in the SU-WL500 instruction manual to remove.
- Page 13 TV installation Remove the stand if it is Follow Step 1 in the SU-WL500 instruction manual to installed to the TV. check the parts. Lay down the TV and lay a soft cloth under the TV to protect the TV monitor.
- Page 14 Make sure that the screw Remove the screws from the rear of the TV. firmly secures the arm base of the Mounting Hook (both left KD-65X9000E/KD-55X9000E/KD-49X9000E/ and right). KD-65X8500E Referring to the Screw and Hook locations diagram/table on Notes page 20, determine the screw •...
- Page 15 Step 5: Install the TV onto the Base Bracket. Installing the TV on the Referring to the Screw and Hook locations diagram/table on page 20, determine the wall holes of the Base Bracket for latching the upper hooks of the Mounting Hook. ...
- Page 16 Firmly secure the TV and the D: Portrait, +20° leaning Base Bracket using the screw supplied with SU-WL500 (+BVST4 × 12). C: Portrait, no leaning Screw (+BVST4 × 12) Mounting Hook Base Bracket (GB)
- Page 17 If you fail to do so, the TV may fall when it is pushed upward and cause injury. Confirming the completion of the installation Follow the instructions in the SU-WL500 instruction manual to confirm. When removing the TV Follow the instructions in the SU-WL500 instruction manual to remove.
-
Page 18: Tv Installation Dimensions Table
TV installation dimensions table The table below shows the dimensions of the TV that is mounted on this product. Refer to this table to decide on the installation location. A: Landscape, -20° leaning B: Landscape, +60° leaning Screen centre point Unit: mm Length for each mounting angle Display dimensions... - Page 19 C: Portrait, no leaning D: Portrait, +20° leaning Screen centre point Unit: mm Length for each mounting angle Display dimensions Screen centre dimensions Model Name Angle (0º) Angle (20º) KD-65X9000E 1,447 —...
-
Page 20: Screw And Hook Locations Diagram/Table
Screw and Hook locations diagram/table A: Landscape, -20° leaning B: Landscape, +60° leaning C: Portrait, no leaning D: Portrait, +20° leaning Model Name Screw Hook Screw Hook Screw Hook Screw Hook location location location location location location location location KD-65X9000E d, g —... - Page 22 特定產品 經銷商或經授權的承包商進行安裝,且安裝期間需特 別注意安全。Sony 對操作不當或安裝不正確,或安 以下產品若有變更、無存貨或是已停產的情形,恕不另 裝任何非指定產品而引起的任何損壞或傷害概不負 行通知。 責。您的相關法律權利 (若有)將不受影響。 某些地區可能無法購得某些型號。 KD-65X9000E KD-55X9000E KD-49X9000E 警告 KD-75X8500E LCD 彩色電視機 KD-65X8500E KD-55X8000E 如果不遵守安全事項或未正確使用本產品,將可能導致 KD-49X8000E 嚴重傷害或引起火災。 KD-43X8000E 本手冊介紹了正確使用本產品與防止事故發生需知的重 要事項。請務必詳讀本手冊,以確保正確使用本產品。 請妥善保管本手冊,以備將來參考。 致 Sony 經銷商 安裝本產品需要足夠的專業技術。請務必詳讀本手冊, 以確保安裝本產品時之安全。Sony 對於因為錯誤操作或 不當安裝所造成的任何損壞或傷害,概不承擔責任。請 在安裝後將本手冊交給用戶。 安全事項 Sony 的產品設計非常注重安全。但是,如果使用不正 確,則可能因火災、電擊、產品傾倒或墜落而導致嚴重 傷害。請務必遵守安全事項,以防止此類事故發生。 (CT)
- Page 23 KD-55X8000E KD-49X8000E KD-43X8000E 您不能安裝上述類型除外的電視機。 對於標註 的電視機,需要以下配件。 墊片:墊圈外徑為 18 毫米,內徑為 10 毫米,厚度為 2 毫米 (SONY 零件編號 7-688-000-32)× 20 螺絲:PSW M6 × 25 毫米 (SONY 零件編號 4-577-326-01)× 4 (1 組) 將亮度設定設為標準或自訂 45 和較低。 將亮度設定設為標準或自訂 35 和較低。 (CT)
- Page 24 請勿遮蔽電視機的通風孔。 警告 如果您用膠帶或其他物品遮蔽通風孔,則熱量會積聚在 如果不遵守下列注意事項,則可能因火災、電擊、 電視機內,可能造成火災。 產品傾倒或墜落而導致嚴重傷害或死亡。 其他 請務必要徹底閱讀 SU-WL500 使用說明書中所敘述的所有 安全資訊。 請勿將 SU-WL450 用於以本說明書所述的方式安裝。 • 以縱向安裝時,只能使用下列輸入 / 輸出插孔: – HDMI 輸入 1/2/3/4 (支援 4K 解析度,相容於 HDCP 在電視機周圍提供充分空間。 2.2) 光纖數位聲音輸出 (OPTICAL) – 下圖顯示電視機周圍需要多少空間。 – 聲音輸出 / (立體聲迷你插孔) 務必根據下圖所示的方向安裝電視機。 USB 1/2、 USB 3 –...
- Page 25 A:橫向,傾斜 -20° 步驟 1: 步驟 4: 檢查安裝所需的零件 準備安裝電視機 按照 SU-WL500 使用說明書中的步驟 1 來檢查零件。 如果底座已安裝於電視機上,請將 其取下。 步驟 2: 將電視機平放於軟布上,以保護電視機顯示器。 確定安裝位置 KD-65X9000E/KD-55X9000E/KD-49X9000E/ KD-75X8500E/KD-65X8500E/KD-55X8000E 按照 SU-WL500 使用說明書中的步驟 2 來確定安裝位置。 請參閱本說明書的第 18 頁,查看電視機安裝尺寸表。 步驟 3: 在牆壁上安裝底座支架 按照 SU-WL500 使用說明書中的步驟 3 來安裝底座支架。 KD-49X8000E 如果使用電動螺絲起子,請將扭矩設定為大約 2 N·m {20 kgf·cm}。...
- Page 26 取下電視機背面的螺絲。 請參閱第 20 頁上的螺絲和掛鉤位置 圖 / 表,確定螺絲位置,然後將掛 KD-65X9000E/KD-55X9000E/KD-49X9000E/ 鉤固定到電視機背面上。 KD-65X8500E 使用四顆螺絲 (*1、 *2) ,將掛鉤暫時固定到電 視機背面。 請確認兩個螺絲以相同扭矩力,穩固鎖緊到電 視機背面。 螺絲 *1、 *2 掛鉤 KD-75X8500E 墊片 *1、 *2 10 毫米 需要 5 個墊片 (無附帶) 和螺絲 PSW M6 × 25 毫 米 (無附帶) : KD-75X8500E/KD-65X8500E 不需要墊片,但需要...
- Page 27 步驟 5: 用隨附的六角扳手調整掛鉤角度。 執行以下 和 。 確認螺絲 穩固固定掛鉤的懸 將電視機安裝至牆上 掛臂底座 (左邊和右邊) 。 從掛鉤的懸掛臂底座 (左邊和右邊)取下 2 顆 螺絲 ,然後確定您打算改變的角度 (20°) 的螺絲孔。 警告 以適當的角度固定上臂 和下臂 的螺絲孔, 將 AC 電源線連接牆壁插座之前,請務必完成安裝。 將在步驟 取下的螺絲放入螺絲孔,然後固定 如果 AC 電源線壓在設備的零件下或零件之間,可能 兩個懸掛臂。 會造成短路或電擊。...
- Page 28 將電視機安裝在底座支架上。 使用 SU-WL500 隨附的螺絲 (+BVST4 × 12) ,穩固固定電視機 請參閱第 20 頁上的螺絲和掛鉤位置圖 / 表, 確定 鎖緊掛鉤上方掛鉤的底座支架孔。 和底座支架。 用雙手抬電視機,輕輕對準以安裝到牆壁上。 警告 • 搬動電視機時,請務必由兩人或更多人抬電視機。 • 搬動電視機時,請以橫向握持,在安裝時請注意不要 掉落。請勿對電視機施加過大力量,否則可能會變 形。 螺絲 (+BVST4 × 12) 注意 如果使用電動螺絲起子,請將扭矩設定為大約 1.5 N·m 底座支架 {15 kgf·cm}。 警告 請務必穩固鎖緊固定螺絲。否則,向上推時電 視機可能會掉落,並造成傷害。...
- Page 29 B:橫向,傾斜 +60° 步驟 1: 步驟 4: 檢查安裝所需的零件 準備安裝電視機 按照 SU-WL500 使用說明書中的步驟 1 來檢查零件。 如果底座已安裝於電視機上,請將 其取下。 步驟 2: 將電視機平放於軟布上,以保護電視機顯示器。 確定安裝位置 KD-75X8500E/KD-65X8500E/KD-55X8000E 按照 SU-WL500 使用說明書中的步驟 2 來確定安裝位置。 請參閱本說明書的第 18 頁,查看電視機安裝尺寸表。 步驟 3: 在牆壁或掛鉤上安裝底座 支架 KD-49X8000E 按照 SU-WL500 使用說明書中的步驟 3 來安裝底座支架。 如果使用電動螺絲起子,請將扭矩設定為大約 2 N·m {20 kgf·cm}。...
- Page 30 取下電視機背面的螺絲。 請參閱第 20 頁上的螺絲和掛鉤位置 圖 / 表,確定螺絲位置,然後將掛 KD-65X8500E 鉤固定到電視機背面上。 使用四顆螺絲 (*1、 *2) ,將掛鉤暫時固定到電 視機背面。 請確認兩個螺絲以相同扭矩力,穩固鎖緊到電 視機背面。 螺絲 *1、 *2 掛鉤 KD-75X8500E 墊片 *1、 *2 10 毫米 需要 5 個墊片 (無附帶) 和螺絲 PSW M6 × 25 毫 米 (無附帶) : KD-65X8500E 不需要墊片,但需要...
- Page 31 步驟 5: 將電視機安裝在底座支架上。 請參閱第 20 頁上的螺絲和掛鉤位置圖 / 表, 確定 將電視機安裝至牆上 鎖緊掛鉤上方掛鉤的底座支架孔。 用雙手抬電視機,輕輕對準以安裝到牆壁上。 警告 • 搬動電視機時,請務必由兩人或更多人抬電視機。 警告 • 搬動電視機時,請以橫向握持,在安裝時請注意不要 掉落。請勿對電視機施加過大力量,否則可能會變 將 AC 電源線連接牆壁插座之前,請務必完成安裝。 形。 如果 AC 電源線壓在設備的零件下或零件之間,可能 會造成短路或電擊。 小心,請勿被 AC 電源線或電視機絆倒,否則您可能 會因而受傷。 將隨電視機提供的 AC 電源線和連接 纜線連接到電視機。 將 AC 電源線和連接纜線連接至電視機背後的連接 器。關於連接...
- Page 32 使用 SU-WL500 隨附的螺絲 (+BVST4 × 12) ,穩固固定電視機 和底座支架。 螺絲 (+BVST4 × 12) 注意 如果使用電動螺絲起子,請將扭矩設定為大約 1.5 N·m {15 kgf·cm}。 警告 請務必穩固鎖緊固定螺絲。否則,向上推時電 視機可能會掉落,並造成傷害。 確認安裝完成 按照 SU-WL500 使用說明書中的指示來確認。 拆除電視機時 按照 SU-WL500 使用說明書中的指示來拆除。 (CT)
- Page 33 C:縱向,沒有傾斜 / D:縱向,傾斜 +20° 步驟 1: 步驟 4: 檢查安裝所需的零件 準備安裝電視機 按照 SU-WL500 使用說明書中的步驟 1 來檢查零件。 如果底座已安裝於電視機上,請將 其取下。 步驟 2: 將電視機平放於軟布上,以保護電視機顯示器。 確定安裝位置 KD-65X9000E/KD-55X9000E/KD-49X9000E/ KD-65X8500E/KD-55X8000E 按照 SU-WL500 使用說明書中的步驟 2 來確定安裝位置。 請參閱本說明書的第 19 頁,查看電視機安裝尺寸表。 步驟 3: 在牆壁或掛鉤上安裝底座 支架 KD-49X8000E/KD-43X8000E 按照 SU-WL500 使用說明書中的步驟 3 來安裝底座支架。...
- Page 34 確認螺絲 穩固固定掛鉤的懸掛臂 取下電視機背面的螺絲。 底座 (左邊和右邊) 。 KD-65X9000E/KD-55X9000E/KD-49X9000E/ KD-65X8500E 請參閱第 20 頁上的螺絲和掛鉤位置 注意 圖 / 表,確定螺絲位置,然後將掛 • 以縱向安裝時,請務必將掛鉤的角度保持於 0 度。 請勿 使用其他角度。 鉤固定到電視機背面上。 • 確認兩個懸掛臂底座以螺絲固定。 使用四顆螺絲 (+PSW6 × 25) ,將掛鉤暫時固 定到電視機背面。 請確認兩個螺絲以相同扭矩力,穩固鎖緊到電 視機背面。 螺絲 (+PSW6 × 25) (無附帶) 掛鉤...
- Page 35 步驟 5: 將電視機安裝在底座支架上。 請參閱第 20 頁上的螺絲和掛鉤位置圖 / 表, 確定 將電視機安裝至牆上 鎖緊掛鉤上方掛鉤的底座支架孔。 用雙手抬電視機,輕輕對準以安裝到牆壁上。 警告 • 搬動電視機時,請務必由兩人或更多人抬電視機。 警告 • 搬動電視機時,請以橫向握持,在安裝時請注意不要 掉落。請勿對電視機施加過大力量,否則可能會變 將 AC 電源線連接牆壁插座之前,請務必完成安裝。 形。 如果 AC 電源線壓在設備的零件下或零件之間,可能 會造成短路或電擊。 C:縱向,沒有傾斜 小心,請勿被 AC 電源線或電視機絆倒,否則您可能 會因而受傷。 將隨電視機提供的 AC 電源線和連接 纜線連接到電視機。 將 AC 電源線和連接纜線連接至電視機背後的連接 器。關於連接...
- Page 36 使用 SU-WL500 隨附的螺絲 D:縱向,傾斜 +20° (+BVST4 × 12) ,穩固固定電視機 和底座支架。 C:縱向,沒有傾斜 螺絲 (+BVST4 × 12) D:縱向,傾斜 +20° 掛鉤 底座支架 螺絲 (+BVST4 × 12) 注意 如果使用電動螺絲起子,請將扭矩設定為大約 1.5 N·m {15 kgf·cm}。 警告 請務必穩固鎖緊固定螺絲。否則,向上推時電 視機可能會掉落,並造成傷害。 (CT)
- Page 37 確認安裝完成 按照 SU-WL500 使用說明書中的指示來確認。 拆除電視機時 按照 SU-WL500 使用說明書中的指示來拆除。 (CT)
- Page 38 電視機安裝尺寸表 下表顯示能安裝於本產品上的電視機尺寸。請參閱本表格,以決定安裝位置。 A:橫向,傾斜 -20° B:橫向,傾斜 +60° 螢幕中央點 單位:毫米 每一安裝角度的長度 顯示幕 角度 (20º) 角度 (60º) 機型名稱 KD-65X9000E 1447 — — — — KD-55X9000E 1228 — — — — KD-49X9000E 1093 — — — — KD-75X8500E 1677 KD-65X8500E 1454 KD-55X8000E 1232 KD-49X8000E 1096 某些地區可能無法購得某些型號。...
- Page 39 C:縱向,沒有傾斜 D:縱向,傾斜 +20° 螢幕中央點 單位:毫米 每一安裝角度的長度 顯示幕 螢幕中央尺寸 角度 (0º) 角度 (20º) 機型名稱 KD-65X9000E 1447 — — KD-55X9000E 1228 — — KD-49X9000E 1093 — — KD-65X8500E 1454 1369 KD-55X8000E 1232 1162 KD-49X8000E 1096 1034...
- Page 40 螺絲和掛鉤位置圖 / 表 A:橫向,傾斜 -20° B:橫向,傾斜 +60° C:縱向,沒有傾斜 D:縱向,傾斜 +20° 機型名稱 螺絲位置 掛鉤位置 螺絲位置 掛鉤位置 螺絲位置 掛鉤位置 螺絲位置 掛鉤位置 KD-65X9000E d, g — — d, g — — KD-55X9000E d, g — — d, g — — KD-49X9000E f, j —...
- Page 41 http://www.sony.net/...