
Related Manuals for Huawei U1305


Summary of Contents for Huawei U1305
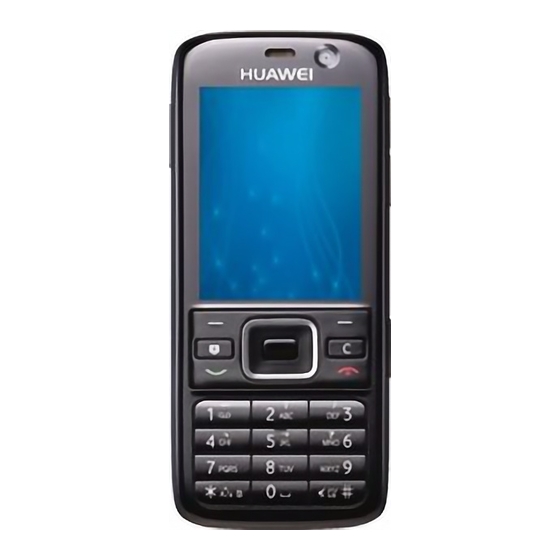
- Page 1 Wonderful Communication, Mobile Life Welcome to U1305 Mobile Phone from Huawei Technologies Co., Ltd. HUAWEI U1305 Mobile Phone User Guide...
- Page 2 All Rights Reserved No part of this manual may be reproduced or transmitted in any form or by any means without Huawei Technologies Co., Ltd. prior written consent of Huawei Technologies Co., Ltd. Address: Administration Building, Huawei Technologies Co., Ltd., Bantian, Longgang District, Shenzhen, Trademarks P.
- Page 3 Safety Precautions Please read the safety precautions carefully to Do not attempt to disassemble your ensure the correct and safe use of your wireless phone or its accessories. Only qualified device. For detailed information, refer to the personnel are allowed to service or section “Warnings and Precautions”.
- Page 4 Observe any laws or regulations on the use of wireless device. Respect others’ privacy and legal rights when using your wireless device. Strictly follow the relevant instructions on 58 of this manual while using the USB cable. Otherwise your phone or PC may be damaged.
-
Page 5: Table Of Contents
Table of Contents Table of Contents 1 Messaging 20 Messages..........20 Getting to Know Your Phone 1 Email ............22 Packing List ..........1 Broadcast Inbox ........25 Your Phone ..........2 Templates ..........25 Getting Started 6 Music 26 Loading the SIM Card ........6 Music Library.......... - Page 6 Saved pages ..........35 Operating Environment ......55 History ............36 Cleaning and Maintenance ...... 55 Resume ............36 Environmental Protection......56 Settings ............36 Emergency Calls........56 Entertainment 37 Battery............56 Charger ............ 57 Games............37 Using the USB Cable ....... 58 Camera.............37 Certification Information (SAR) ....58 Connections 39 Acronyms and Abbreviations 62 Bluetooth ..........39...
-
Page 7: Table Of Contents
Getting to Know Your Phone Your HUAWEI U1305 phone can operate in virtually all countries, automatically switching between WCDMA 2100 and GSM/GPRS/EDGE 850/1800/ 1900 networks. This allows you to enjoy communica- tion wherever you use your mobile phone. The services supported by your phone... -
Page 8: Your Phone
Your Phone Your Phone Camera Earpiece Scroll key Right function key • Press this key to scroll through a menu. • To activate the function indicated at the right of the • To quick access Quick Menu, Contacts, text prompt bar on the screen. message editor and My Files. - Page 9 Your Phone Back View Home Screen Icon bar Speaker Camera Desktop To display the operations and the function options. Prompt bar To display the operations currently available. ◆ Icon bar This area displays the phone status. The following Side View table illustrates all the icons that may appear on this bar.
- Page 10 Your Phone Icon Description Icon Description You are using the roaming service. SD card is inserted. Bluetooth is enabled. Ringtone is enabled. Indicates network connection state. The vibration mode is enabled. Indicates security connection state of The phone is in mute mode. the network.
- Page 11 Your Phone Messaging, My Files, Organizer & Tools, Contacts, Calls, Profiles, Video call and Settings. In the standby mode, press to display the main menu. Press the scroll key to scroll through the menu, and then press to select. If the menu contains further submenus, repeat step 2.
-
Page 12: Getting Started
Getting Started Loading the SIM Card Load your SIM card before using your phone. To use the SIM card properly, please read the following instructions carefully. Fit the battery into the battery slot on back of the • Keep the SIM card out of the reach of chil- Note phone. -
Page 13: Unloading The Sim Card
Unloading the SIM Card Press the SIM card with one finger and slide it Unloading the SIM Card out of the slot. Only unload the SIM card and the battery after pow- ering off your phone. Otherwise, your phone may be damaged. -
Page 14: Loading/Removing A Memory Card
Loading/Removing a Memory Card shorter time period than usual after being charged normally, replace it with a battery of the same type. • Do not strike, throw or cause any kind of violent shock to the battery, otherwise liq- uid leakage, body damage, overheating, •... -
Page 15: Powering On/Off
Powering On/Off Powering On/Off Powering On Ensure that the SIM card is in your phone and that the battery has been charged. Press and hold to power on your phone. Insert the memory card into the slot, as shown in the following figure. - Page 16 Powering On/Off ally provided when you get the SIM card from your ◆ The personal identification number (PIN) code is service provider. If you have not received a PUK2 used to protect your SIM card from unauthorized use. code or if you have forgotten it, contact your service The PIN code is usually provided when you get the provider.
-
Page 17: Call Service
Call Service • Select a number from the Calls screen. Making or Answering Calls • Select a number from the Contacts screen. Making a Video Call Press to dial. You can make a video call to other person whose Press to end the call. -
Page 18: Operations During A Voice Call
Operations During a Voice Call Operations During a Voice Call Operation Description Answer • If the answer mode is Any key, press Icon Description a call any key. except • If the answer mode is Send key, press : A call is ongoing. : The call is on hold. -
Page 19: Operations During A Video Call
Operations During a Video Call • Other applications: To access the SMS screen, the Icon Description Contacts screen, the Call Log screen or Calendar Press the left or right scroll key to zoom screen. in or zoom out. • Answer/Reject: Your phone allows you to handle Press the volume keys to adjust the vol- two calls simultaneously. -
Page 20: Calls
Calls • Image quality: To set the image quality to fine qual- • Call: To make a voice call or a video call. ity or more smooth. • Display mode: You can select Normal to display all records or select Simple to ignore the duplicated •... -
Page 21: Text Input
Text Input You can use the keypad to enter alphanumeric char- didate words composed by the letters you have acters and symbols. For example, you can add entered in the drop-down menu. entries to the contacts, write messages or schedule For example, to enter the word "good"... -
Page 22: 123" Numeric Input Method
"123" Numeric Input Method ters. Repeatedly press the key that carries the letter to be entered when it appears on the screen. "123" Numeric Input Method For example, to enter the word "Hello" with the tradi- In a text editing screen, press and hold the character/ tional input method, follow these steps. -
Page 23: Contacts
Contacts Contacts enables you to save and manage such screen. Select Options > Search, and then enter the information as phone numbers and addresses of your contact name you are searching for. The contact is contacts. You can save such information in your displayed. -
Page 24: Groups
Groups • Details:To view the detailed information of the con- • My business card: To save your own information tact. to a Business Card. You can send the information • Call: To make a voice call, a video call or edit the by Message or Bluetooth. - Page 25 Groups Select Options > Add new users. Select a con- tact and press Add. The member you added is displayed in the group member list. To delete a group member, select a member from the group member list, and then select Options > Remove.
-
Page 26: Messaging
Messaging Press or select Options > Send to send Messages the message. The maximum content for a single text message is Messages Mailboxes 160 characters. If the characters you enter exceed this limit, the text is divided into two or more continu- The phone provides four mailboxes for messages, ous messages when it is sent. - Page 27 Messages Viewing Messages in Inbox : A multimedia message saved to the phone. Select Messaging > Inbox. Viewing and Editing Messages in the Draft Select Messaging > Drafts. Press the up/down scroll key to view the mes- sages and then press to view the details.
-
Page 28: Email
Email • Signature: To set whether your signature will : A multimedia message has been sent. be sent along with the message. You can edit Viewing Messages in Sent the signature while creating a new message. Select Messaging > Sent. •... - Page 29 Email Creating an Email Mailboxes Your phone provides five mailboxes for email, Select Messaging > Email from the main menu. namely, Inbox, Drafts, Sent, Outbox and Blocked. Select Options > New Email to access the ◆ Inbox email editing screen. All Emails received are saved in the Inbox.
- Page 30 Email • Delete: To delete the selected email. Edit the related information. For details, perform • Call sender: To call the email sender by a voice the same operations as those of the Inbox. call, a video call or edit before call. ◆...
-
Page 31: Broadcast Inbox
Broadcast Inbox • Auto delete: to set whether to auto delete earlier The related account information contains: messages when the broadcast inbox memory is General, Incoming, Outgoing and Online help. full. Return to the Account screen. Select Options > Set as default to activate this account. Templates After completing all settings, press Back. -
Page 32: Music
Music Music enables you to manage your music files easily • Shuffle: To enable/disable the random play. and conveniently. It also enables you to purchase a • Loop: To play current music circularly, loop all wide variety of latest music. music or close. -
Page 33: Playlists
Playlists Operation Description Press the left scroll key to access the last music file. Press and hold the left scroll key to fast backward the current music file. Press to pause the playing. Press again to resume the playing. Press the volume keys to adjust the vol- ume. -
Page 34: Organiser & Tools
Organiser & Tools This function provides you with various helpful tools. If your phone is powered off, the alarm clock will still You can access the Organiser & Tools screen by ring. When the alarm rings, you can choose to power selecting Organiser &... -
Page 35: Task
Task • Settings: To set save location, view mode, week You can create up to 500 schedules in total Note begin day. and 15 for each day. While creating a new • Memory status: To view the memory status, includ- schedule, you need to set the alarm on ing the used space and the total space. -
Page 36: Memo
Memo New Tasks Memo To define a new task, press or select Options > You can store important events on your phone. You New on the Tasks screen. can save up to 100 such memos. In the screen for editing task, you can set the follow- Select Memo from Organiser &... -
Page 37: Calculator
Calculator To create a profile, select Options > New to cre- Calculator ate a profile. You can perform addition, subtraction, multiplication, Press the left/right scroll key to switch between division and extraction operations on your phone. Synchronise items, Server Setting, and Network •... -
Page 38: Currency Converter
Currency converter Press the number keys to enter a numeric value On the To bar, press the left/right scroll key to to be converted in the Input bar. select the currency to be converted to. On the From bar, press the left/right scroll key to On the Rate bar, enter the currency rate. -
Page 39: World Time
World Time Alternatively, you can select Options for the follow- ing operations: send by Message, Email or Blue- Timer tooth, set as ringtone and delete. You can set a timer for up to 99 hours and 59 min- utes. After you have set it, the timer is displayed on the home screen. -
Page 40: My Files
My Files My Files enables you to manage the Pictures, Music, • Info.: To view the properties of one or more files. Ringtones, Videos, Games, Applications and other Some sound files are protected by Digital Note files conveniently. You can access My Files by Rights Management (DRM), and may not be selecting My Files from the main menu. -
Page 41: Browser
Browser The built-in browser makes it easy and pleasant to • Open new page: To enter a website address and tour around the Internet. You can access the Browser access it. screen by selecting Browser from the main menu. • History: To access the visited webpage. •... -
Page 42: History
History History With this option, you can access the visited webpage. Resume To link to the latest visited webpage. Settings These are preset for you to use the Internet service. If you need to modify them, open the Browser and select Settings. -
Page 43: Entertainment
Entertainment You can use the phone to play games, take photos, and listen to online music. Camera In the main menu, select Camera to start the camera. You can also press the camera key to start the cam- Games era. You can play games and download more games. - Page 44 Camera Operations After Taking a Picture Icon Operation Press the up/down scroll key to adjust In the viewfinder screen, you can press to take a the brightness. picture. Pictures taken are auto saved to the Press the volume keys to adjust the My Files/Pictures directory.
-
Page 45: Connections
Run the driver software for Bluetooth on the PC, access the Internet with a PC, or exchange data with and pair the Huawei U1305 phone. After the PC other Bluetooth devices. You can also talk by using detects and recognises the Huawei U1305 serial the Bluetooth headset or Bluetooth loudspeaker. - Page 46 Accessing the Internet using the Huawei U1305 Mobile Phone PC Assistant Select Search to search a Bluetooth device. To access the Internet by Bluetooth using the Huawei When a Bluetooth device is found for the first U1305 Mobile Phone PC Assistant, make sure that time, authentication is required.
-
Page 47: Usb
Install the Huawei U1305 Mobile Phone PC Assistant supplied with your phone. You can synchronise data between your phone and Run the Huawei U1305 Dial-up Internet on the PC, surf the Internet with your phone and read the PC to access the Internet. - Page 48 Help of the Huawei U1305 Mobile Phone PC from a PC to your phone. Assistant. With a USB cable and Huawei U1305 Mobile Phone PC Assistant, your phone can communicate with a Accessing the Internet by USB PC. You can back up the contact entries and mes-...
- Page 49 The function of micro-SD card reader and dial-up connection. Note the other functions using the USB cable are • Run the Huawei U1305 Dial-up Internet on the incompatible. If you enable the micro-SD PC to create the dial-up connection. card reader, other functions using the USB •...
- Page 50 When this has finished, wait for modem driver to appear in the modem list on your PC (this can be If the "Huawei" icon is not present, create a NEW found by clicking on start, then control panel, connection by clicking on the top left icon then phone and modem options, then modems.
- Page 51 Note please disconnect the cable from the PC and then the U1305. Then reconnect the cable to the U1305 and then the PC. The dialog box should appear after this activity. If the dialog box still does not appear, please disconnect and reconnect the cable as above using a different USB port on the PC.
-
Page 52: Settings
Settings You can access the Settings screen by selecting Set- Phone Language tings from the main menu. Your phone supports several languages. Select Set- tings > Phone settings > Phone language to select Phone Settings a language. In addition to these languages, you can You can change the settings of the phone, including also select Auto. -
Page 53: Display Settings
Display Settings • Brightness: To set the brightness of the screen. Shortcuts • Keypad backlight: To turn the keypad backlight on This option is used to assign the frequently used or off. functions to the scroll keys as shortcut keys. •... - Page 54 Call Settings Select Call settings > Call barring for the following Call Forwarding options: This option is used to forward incoming calls. ◆ Call Barring: In the main screen, select Settings > Call set- Select the barring condition from All outgoing tings >...
- Page 55 Call Settings barring screen. Then you can change the call barring Answer Mode password. It is used to set the mode for answering an incoming The old call barring password is provided by Note call. Two options are available: Any key and Send your network operator if it is the first time for key.
-
Page 56: Video Call
Video Call If select Auto, whether your phone number will be • Audio off: To open or close the audio channel dur- shown on the called phone depends on the network. ing a video call. • Auto voice call: To enable the auto voice call Select Line function. -
Page 57: Connectivity
Connectivity Password Lock Connectivity This option is used to enable or disable the "Phone The data connection function provides several data lock" and "PIN lock". communication functions. You can synchronise data between your phone and a PC through a USB cable Select Phone lock/PIN lock. -
Page 58: Drm Setting
DRM Setting Enter a new password. DRM Setting Enter the new password again to confirm. Digital Rights Management (DRM) can protect the • To modify the PIN code, you must set the digital content from piracy and protect the provider’s Note "PIN locked"... -
Page 59: Warnings And Precautions
Warnings and Precautions • Do not take your phone into the operating room Electronic Device (OR), intensive care unit (ICU), or coronary care • Turn off your phone near high-precision electronic unit (CCU). devices. The phone may affect the performance of •... -
Page 60: Storage Environment
Storage Environment • Area with chemical substances and particles (such • Do not place sharp metal objects such as pins near as: granule, dust, metal powder) in the air the earpiece. The earpiece may attract these objects and hurt you when you are using the phone. •... -
Page 61: Operating Environment
Operating Environment • Do not touch the antenna when a call is going on. Operating Environment Touching the antenna may affect call quality and • The phone, battery, and charger are not water- cause the phone to operate with more power. As a resistant. -
Page 62: Environmental Protection
Otherwise, explosion may occur. old phone in municipal waste. • Do not dispose of the battery in fire. Otherwise, the • This HUAWEI device complies with Directive 2002/ battery may ignite or explode. 95/EC on the restriction of the use of certain haz- ardous substances in electrical and electronic •... -
Page 63: Charger
Charger flame to avoid fire or explosion. Then turn to an • If you do not use the battery for a long time, store it authorized maintenance engineer for help. in normal temperature after charging. • The battery is not fully charged when delivered. Charger Plug the charger cable into the bottom of the phone, plug the power supply unit into a mains... -
Page 64: Using The Usb Cable
Using the USB Cable • Ensure the charger is properly plugged into the • To connect your phone and PC with the USB cable, power socket properly when charging the battery. connect to the phone at first, and then connect to Improper insertion may result in electric shock, fire, the PC. - Page 65 0.497 W/kg. surement for the amount of radio frequency energy All models of Huawei’s mobile phone are designed to absorbed by the body when using a mobile phone. meet radio frequency exposure guidelines. Before a...
- Page 66 Class B digital device, pursuant to Type Designation/Trademark: HUAWEI/U1305 Part 15 of the FCC Rules. These limits are designed Manufacturer's Name: Huawei Technologies Co.,Ltd. to provide reasonable protection against harmful interference in a residential installation. This equip-...
- Page 67 Warning: Changes or modifications made to this reception, which can be determined by turning the equipment not expressly approved by HUAWEI may equipment off and on, the user is encouraged to try to void the FCC authorization to operate this equipment.
- Page 68 Acronyms and Abbreviations DRM Content Format Digital Rights Management Fixed Dial Number GPRS General Packet Radio Service Global System for Mobile communica- tion Over-The-Air Personal Identification Number PLMN Public Land Mobile Network PIN Unblocking Key Secure Digital Card Specific Absorption Rate SIM Tool Kit Universal Resource Locator Universal Serial Bus...
- Page 69 Appendix The phone supports image files, video files and audio files of many formats. For details, see the following table. File type Formats Image JPG, PNG, BMP, GIF, BCI, WBMP, SVG, and SVGZ. Audio MP3, AAC/AAC+, AMR, MID, WAV (ADPCM), MMF, QCP, and XMF/DLS. Video 3GP, MP4, 3G2, and PMD.
- Page 70 Index "123" Numeric Input Method ........16 Calls............... 14 Access Codes ............9 Camera..............37 Accessing the Internet by USB ......42 Certification Information (SAR)......58 Adding/Deleting Group Members......18 Change Password ..........51 Alarm Prompt ............28 Charger..............57 Alarms..............
- Page 71 Hospital ..............53 Open homepage............ 35 JAVA Settings ............50 Open new page ............. 35 Icon Description ............. 12 Operating Environment.......... 55 Icon Description ............. 13 Operations After Taking a Picture ......38 Input Different Languages........16 Operations During a Video Call ......13 Input Language .............
- Page 72 Service dial number ..........33 Setting Alarm Clocks..........28 Settings ..............36 Shortcuts..............47 Side View ..............3 Stopping the Alarm Clock ........28 Stopwatch .............. 33 Storage Environment ..........54 Symbol Input Method ..........16 Synchronise ............30 T9® Input Method ..........15 Task Prompt............