Table of Contents
Advertisement
Quick Links
Advertisement
Table of Contents

Related Manuals for Acer Liquid Mini


Summary of Contents for Acer Liquid Mini
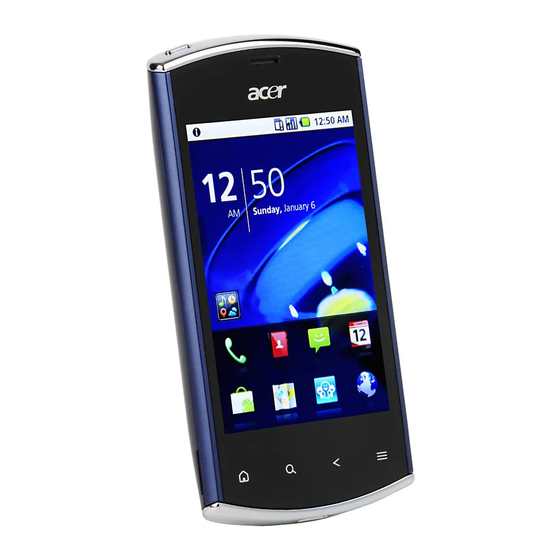
- Page 1 Acer Liquid Mini E310 User Guide...
- Page 2 © 2010 All Rights Reserved Acer Liquid Mini E310 User Guide First issue: 12/2010 Acer Liquid Mini E310 Smartphone Model number: __________________________________ Serial number: ___________________________________ Date of purchase: ________________________________ Place of purchase: ________________________________...
-
Page 3: Table Of Contents
Acer SocialJogger ........ - Page 4 Using the Camera Camera icons and indicators ........37 Taking a photo .
-
Page 5: End User License Agreement
Sublicense or otherwise make the Software available to third parties, except that you may, after prior written notification to Acer, transfer the Software as a whole to a third party so long as you do not retain any copies of the Software and such third party accepts the terms of this Agreement. - Page 6 Your use of the Third Party Software and Third Party Services is also subject to additional terms and conditions and policies which can be accessed through our global website. Privacy policy During registration you will be asked to submit some information to Acer. Please refer to Acer’s privacy policy at http:// www.acer.com or your local Acer website.
-
Page 7: Features And Functions
When using your product for the first time, it is recommended that you immediately register it. This will give you access to some useful benefits, such • Faster service from our trained representatives. • Membership in the Acer community: receive promotions and participate in customer surveys. • The latest news from Acer. -
Page 8: Unpacking Your Smartphone
Your new smartphone comes packed in a protective box. Carefully unpack the box and remove the contents. If any of the following items is missing or damaged, contact your dealer immediately: • Acer Liquid Mini E310 Smartphone • Battery • Quick Guide •... -
Page 9: Led Indicators
Item Search button Back button Menu button Volume up/down buttons Camera button Micro USB connector Microphone Handsfree speaker Camera LED indicators Charge indicator: LED state Description Normal status. Constantly on Battery is fully charged and the device is plugged in. Slow flashing Device plugged in: Battery is charging. -
Page 10: Installing Or Removing The Battery
Your smartphone uses a replaceable battery to provide power. It is packed separately from your smartphone and needs to be inserted and charged before you can use the smartphone. Installing the battery Insert your fingernail into the cutout between the battery cover and the phone. Unclip the cover and lift off the battery cover. -
Page 11: Installing A Sim Or Microsd Card
To take full advantage of your smartphone’s telephony capabilities, you must install a SIM card. The SIM card holder is located at the bottom of the battery bay. Additionally, you may wish to increase your smartphone’s storage by inserting a microSD Card into the slot provided. -
Page 12: Using Your Smartphone
Turning on for the first time To turn on your smartphone for the first time, press and hold the power button until the screen turns on. You will then be asked to configure some settings before you can use your smartphone. To start, tap to select your language, then tap the green android on the next screen. -
Page 13: Using The Touchscreen
Waking your smartphone If the screen is off and the smartphone does not react to any taps on the screen, then it has been locked and is in sleep mode. To wake your smartphone, press the power button. Your smartphone will display the lock screen. Tap and drag starting from the bottom left corner to peel the screen and unlock the smartphone. -
Page 14: Xt9 Text Input
Predictive text Both XT9 Text Input and Android keyboard provide a keyboard with predictive text. As you tap the letters of the word, a selection of words are displayed above the keyboard that would continue the sequence of letters tapped, or are a close match allowing for errors. -
Page 15: The Home Screen
Tap the ?123 button to see numbers and special characters, and then tap the Alt key to see even more. Tap and hold a key to select alternative characters, such as letters with accents. Additional keys vary depending on the type of text you enter. E.g. a key to add a smiley is available when typing a message. - Page 16 At the bottom of the screen is the application dock which shows favorite or recommended applications. Tap an icon to open the application. Tap the menu button or drag the application dock towards the top of the screen to see the application menu.
- Page 17 This area contains a variety of icons to inform you of your phone’s status. The left side of the Notification area displays the time and event icons. The icons on the right side indicate connectivity and battery status. Tap the Notification area to view more information about new events and connectivity.
-
Page 18: Shortcuts And Folders
Personalizing the screen You may personalize your screen by adding or removing icons, shortcuts or widgets, or changing the wallpaper. Changing application dock icons You can set icons for installed applications in the application dock. Open the application menu and find application you want to add. Tap and hold the icon, then drag it to a position in the dock, it will be added in place of the existing application. - Page 19 Drag it to the trash icon to remove it from the screen. Acer Widget Settings From the widget overlay screen, tap the menu button and select Acer Widget Settings to see settings for Acer-designed widgets. The home screen...
-
Page 20: Changing The Wallpaper
Changing the wallpaper On the home screen, simply tap and hold the current wallpaper. A screen showing alternative wallpapers and sounds will be displayed. Select a wallpaper from the first row, or open your own pictures from the second row. Tap the image you wish to use as your smartphone’s wallpaper. -
Page 21: Managing Contacts
Managing your contacts Your smartphone features an address book that allows you to save contacts to the internal memory, SIM card or Google. Tap Contacts from the application dock or the Contacts tab from the Phone to view your contacts. If you don’t have any contacts stored on your phone, you can sync your Google account contacts, add a new contact or import any SIM contacts. -
Page 22: Creating A Group
Tip: Set the phone number to match the type of network as this can determine some functions. I.e. certain applications only recognise ‘Mobile’ numbers as they require a mobile network. Tip: You may also create a contact from an already dialed or received number, see “Saving a dialed number to contacts“... - Page 23 Warning: Backup your contacts before making any changes. You may do this from the Contacts tab: Tap Menu and select Import/Export. You may then Export your contact list to the SD card in your smartphone. Managing your contacts...
-
Page 24: Making Calls
This chapter shows you how to make phone calls, and the various options available to you during your call. Before making a call Check that the phone function is on before you make a call. You can confirm the phone status from the icon on the right-hand side of the Notification area. Icon Description Connected to the network: You may make a call. -
Page 25: The Voice Call Screen
‘a’, ‘b’ or ‘c’; 3 or ‘d’, ‘e’ or ‘f’; etc.). If the letter combinations match a contact name, it will be displayed. If the contact you need is displayed, simply tap the contact name to make a call. Dialing a number from Call Log Your call history can be viewed by tapping the Call Log tab. -
Page 26: Voice Call Options
Answering or declining a call When you have an incoming call, the number will be shown on the screen. To accept or decline the call, slide the appropriate bar. Ending a call To end a call, press End from the voice call screen. Voice call options Using the speakerphone The speakerphone function allows you to make calls... -
Page 27: Viewing Missed Calls
Viewing missed calls Missed calls will be displayed by the call indicator in the Notification area with the icon You can also view missed calls from the Notification area. 1. Open the notification list by tapping the Notification area to display the details of the missed calls. -
Page 28: Messaging
This chapter shows you how to set up and use the SMS and MMS functions of your smartphone. All SMS and MMS messages are accessed via Messaging. Messaging automatically arranges received and sent messages into threads. To access Messaging tap Messaging on the Home screen. Creating a new message You can use your phone to compose SMS or MMS messages. -
Page 29: Replying To A Message
When a new text message arrives a message icon appears in the Notification area and the message icon on the top of the phone lights up. Tap Messaging on the Home screen to view the message list or expand the Notification area to see a summary of the message. - Page 30 Receiving MMS messages When a new MMS message arrives, a message icon appears on the notification bar and a notification message is displayed. 1. Open Messaging to view a summary of the message. 2. Tap Download to download the message content. Note: Downloads can take a long time, depending on your connection quality.
-
Page 31: Going Online
Browsing the Internet In order to browse the Internet with your smartphone, you must be connected to a data or wireless network. Using the browser Tap Browser on the Home screen to start browsing. To open a new website, tap the address box at the top of the page. -
Page 32: Setting Up Your Google Email
Voice Search With voice actions, you can send text messages, place calls, send emails, find directions of establishments, automatically call establishments, search the Internet and even send a note to yourself using your voice. Open Voice Search from the application menu, or press and hold the Search button. Press and hold the Search button again to display the “Speak now”... -
Page 33: Setting Up Email
Your smartphone has a variety of applications installed on it from the factory. Note: Applications installed may vary according to your region. These applications may include: • Acer Sync: Sync your data between your computer and the Google servers. • SocialJogger: View updates to your social networks in one location. - Page 34 Location Plus: If you upload a picture with the SocialJogger uploader through the gallery or from the camera review screen, the uploaded picture will display its geotag. Note: For geotag to display, pictures must be taken with Store Location activated in the camera settings. Acer SocialJogger...
-
Page 35: Android Market
Easily organize your Web favorites, such as photos, videos, bookmarks and more, with a urFooz ID. urFooz gives you: • One identity for all your online activities; Acer SocialJogger... - Page 36 Facebook, MySpace, blogs and more. Go to www.urfooz.com. Note: urFooz, Fooz Avatars, Fooz Creator, Fooz Card, and Fooz World are trademarks or registered trademarks of Fuhu, Inc. in the U.S. and/or other countries. Acer SocialJogger...
-
Page 37: Using The Camera
Your smartphone features a 5-megapixel digital camera mounted on the rear. This section will take you through all the steps in taking photos and videos with your smartphone. Note: You need to have a microSD Card inserted into the microSD slot before using the camera. -
Page 38: Taking A Photo
Icon Description Set brightness, contrast, saturation, and sharpness. Set white balance. Set timer. Access camera settings menu. Taking a photo 1. Ensure you have adjusted the parameters described above. 2. Frame your subject and steady your smartphone. 3. Zoom in or out as needed. 4. -
Page 39: Viewing Photos And Videos
Viewing photos and videos After you have taken your photo or video, it is automatically saved. Once you have taken a photo or video, you can view it in Gallery by tapping the thumbnail icon in the upper right corner. Alternatively, open the applications tab and tap Gallery. -
Page 40: Advanced Settings
Putting your smartphone in Airplane mode You can enter Airplane mode (also known as flight mode) to turn off telephone and Bluetooth functions and use your smartphone as a handheld device during a flight. Check with your airline to make sure this is permitted onboard. Switch your smartphone off during takeoff and landing as it may interfere with aircraft electronic systems. -
Page 41: Adjusting Connection Settings
Adjusting connection settings This section will show you how to adjust detailed settings for your phone, data, Wi-Fi and Bluetooth connections. Item Description Airplane mode Disable all wireless connections so you can safely use this device onboard an aircraft. Wi-Fi Turn the Wi-Fi function on or off. -
Page 42: Phone Settings
Selecting a network Your phone will automatically detect your carrier/network settings when you insert a new SIM card. However, you may prefer to manually select a network. This may be a good idea when roaming. Tip: When you are traveling, manually selecting a network may help to reduce your roaming charges. -
Page 43: Connecting To A Pc
If you wish to transfer information between the microSD Card in your phone and your computer, you can connect your phone to a PC using the supplied USB cable. Plug the USB sync cable into the micro USB connector on your smartphone. -
Page 44: Multimedia Playback
Note: You need a Google account to sync your calendar and appointments. Acer Sync Acer Sync allows you to easily synchronize your contacts, calendar, photos and videos between your smartphone, PC and corresponding Google services. Download and install Acer Sync and Acer PIM for the PC from http://mobile.acer.com/. - Page 45 Spinlets Spinlets gives you access to your favorite music, movie and television content. Get your favorite music, photos and videos from your mobile phone and share your favorite Spinlets on social networks, websites and more. Note: Some contents may not be available in some countries. Launching Spinlets To launch the Spinlets application, tap Spinlets in the applications menu.
-
Page 46: Media Server
Exploring Spinlets widgets When you select an album, you will see a Spinlet. To play the featured song, select the red Play button. To play selected songs, select the Music tab and choose which songs you would like to play. To view artist photos, select the Photos tab. -
Page 47: Adjusting The Volume
Adjusting the volume Adjust the volume of your phone using the volume buttons on the side of the phone. Alternatively, you can set the Ringer volume and Media volume by opening the applications menu and going to Settings > Sound. Setting the date and time To set the date and time, open the application menu and tap Settings >... -
Page 48: Updating Your Phone's Operating System
If your phone is not responding to screen input Turn off your phone, then press and hold the power and volume down buttons until you feel your smartphone vibrate and/or you see the Acer logo screen, then release the buttons and wait for the phone to boot. -
Page 49: Accessories And Tips
This chapter shows you how to use accessories with your smartphone, as well as provide useful tips for when you are using your smartphone. Using the headset Your smartphone comes packaged with a headset with built-in microphone for handsfree use when making calls. To use the headset, plug it into the 3.5 mm headphone jack at the top of the phone. -
Page 50: Appendix
FAQ and troubleshooting This section lists frequently asked questions that may arise during the use of your smartphone, and gives easy answers and solutions to these questions. Aspect Question Audio Why is there no sound coming from the device? Multimedia files Why can’t I view my picture files? Why can’t I view my... -
Page 51: Other Sources Of Help
It is also normal for the phone to heat up during long periods of use, such as watching a video or a long phone conversation. All Acer phones are factory tested before release. Refer to: www.acer.com mobile.acer.com... -
Page 52: Battery Information
When the talk and standby times are noticeably shorter than normal, buy a new battery. Use only Acer approved batteries, and recharge your battery only with Acer approved chargers designated for this device. -
Page 53: Replacing The Battery Pack
Replacing the battery pack Your smartphone uses lithium batteries. Replace the battery with the same type as that which came bundled with your product. Use of another battery may present a risk of fire or explosion. Warning! Batteries may explode if not handled properly. Do not disassemble or dispose of them in fire. -
Page 54: Emergency Calls
Vehicles RF signals may affect improperly installed or inadequately shielded electronic systems in motor vehicles such as electronic fuel injection systems, electronic antiskid (antilock) braking systems, electronic speed control systems, and air bag systems. For more information, check with the manufacturer, or its representative, of your vehicle or any equipment that has been added. - Page 55 Mercury advisory For projectors or electronic products containing an LCD/CRT monitor or display: Lamp(s) inside this product contain mercury and must be recycled or disposed of according to local, state or federal laws. For more information, contact the Electronic Industries Alliance at www.eiae.org. For lamp-specific disposal information, check www.lamprecycle.org.
-
Page 56: Taking Care Of Your Smartphone
1. DO take care not to scratch the screen of your smartphone. Keep the screen clean. When working with your smartphone, use your finger or fingernail. Never use an actual pen or pencil or other sharp object on the screen surface. 2. -
Page 57: Specifications
Performance • Qualcomm MSM7227-1, 600 MHz • System memory: • 512 MB of SDRAM • 512 MB of Flash ROM • Google Android operating system Display • 3.2” TFT-LCD capacitive touchscreen • 320 x 480 resolution • 262K colors support Multimedia •... -
Page 58: Specifications
Expansion • microSD memory card (up to 32 GB) Battery • High density, rechargeable 1300 mAh Lithium-ion battery (replaceable) Note: Length of battery operation will depend on power consumption which is based on system resource use. For example, constantly using the backlight or using power- demanding applications will shorten battery life between charges. -
Page 59: Regulatory Information
Regulatory information Compliant with Russian regulatory certification RoHS compliance This product is in compliance with Directive 2002/95/EC of the European Parliament and of the Council of 27 January 2003, on the restriction of the use of certain hazardous substances in electrical and electronic equipment (RoHS) and its amendments. -
Page 60: List Of National Codes
• 100 mW for frequencies between 2446.5 MHz and 2483.5 MHz Note: Channels 10 through 13 inclusive operate in the band 2446.6 MHz to 2483.5 MHz. There are few possibilities for outdoor use: On private property or on the private property of public persons, use is subject to a preliminary authorization procedure by the Ministry of Defense, with maximum authorized power of 100 mW in the 2446.5 - 2483.5 MHz band. -
Page 61: Fcc Regulations
FCC regulations This mobile phone complies with part 15 of the FCC Rules. Operation is subject to the following two conditions: (1) This device may not cause harmful interference, and (2) this device must accept any interference received, including interference that may cause undesired operation. - Page 62 Important: Body-worn measurements differ among phone models, depending upon available enhancements and FCC requirements. While there may be differences between the SAR levels of various phones and at various positions, they all meet the government requirements. The FCC has granted an Equipment Authorization for this model phone with all reported SAR levels evaluated as in compliance with the FCC RF exposure guidelines.
- Page 63 your hearing aid. Hearing devices may also be measured for immunity to this type of interference. Your hearing device manufacturer or hearing health professional may help you find results for your hearing device. The more immune your hearing aid is, the less likely you are to experience interference noise from wireless devices.
-
Page 64: Important Note
For Canadian users Operation is subject to the following two conditions: (1) this device may not cause interference, and (2) this device must accept any interference, including interference that may cause undesired operation of the device. This Class B digital apparatus complies with Canadian ICES-003. This Category II radiocommunication device complies with Industry Canada Standard RSS-310. - Page 65 Lithium-ion battery warning ATTENZIONE! Rischio di esplosione della batteria se sostituita in modo errato. Sostituire la batteria con un una di tipo uguale o equivalente consigliata dalla fabbrica. Non disperdere le batterie nell’ambiente. VORSICHT! Explosionsgefahr bei unsachgemäßen Austausch der Batterie. Ersatz nur durch denselben oder einem vom Hersteller empfohlenem ähnlichen Typ.
-
Page 66: Declaration Of Conformity
• EN 50332-1:2000/-2:2003 • EN 50360:2001/ EN 62209-1:2006/ EN 62311:2008/ OET65C All R&TTE related features of Acer E310 containing the RF technology as below: GSM 900: TX: 880 MHz – 915 MHz, RX: 925 MHz – 960 MHz DCS 1800: TX: 1710 MHz – 1785 MHz, RX: 1805 MHz – 1880 MHz IEEE 802.11b/g: 2412 ~ 2462 MHz... - Page 67 Identification mark: 0682 (Notified Body) CE The technical documentation relevant to the above equipment will be held at: Acer Incorporated 8 F., No. 88, Sec. 1, Hsin Tai Wu Rd., Hsichih, Taipei hsien, 221, Taiwan Authorized person: Jerry Lee / Project Manager, Acer Inc.