Table of Contents
Advertisement
Quick Links
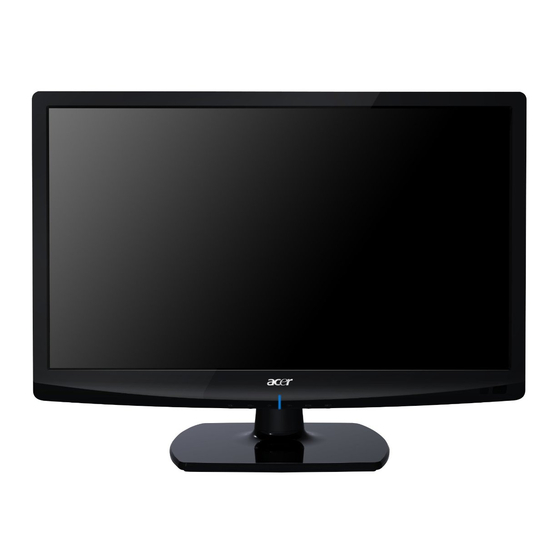
Acer LCD TV
AT1919MF
AT1926ML
AT2219MF
AT2226ML
User Guide
Contents
Important safety instructions............................................... 3
Disposal instructions . . . . . . . . . . . . . . . . . . . . . . . . . . . . . . . . . . . . . . 4
Your LCD TV overview .......................................................... 5
Front and side panels . . . . . . . . . . . . . . . . . . . . . . . . . . . . . . . . . . . . . 5
Rear panel view . . . . . . . . . . . . . . . . . . . . . . . . . . . . . . . . . . . . . . . . . . 6
Remote control . . . . . . . . . . . . . . . . . . . . . . . . . . . . . . . . . . . . . . . . . . 7
Connecting devices ............................................................... 9
Wall mount preparation / removing the base . . . . . . . . . . . . . . . . . . 9
Basic connections . . . . . . . . . . . . . . . . . . . . . . . . . . . . . . . . . . . . . . . . . 9
Enjoying analog and digital TV . . . . . . . . . . . . . . . . . . . . . . . . . . . . . 10
Connecting external audio/video devices ......................... 12
Connecting a DVD, VCR, STB or audio/video equipment . . . . . . . . 12
Connecting a camera, camcorder or game console . . . . . . . . . . . . . 13
Connecting a PC or notebook computer . . . . . . . . . . . . . . . . . . . . . 14
Selecting the input source . . . . . . . . . . . . . . . . . . . . . . . . . . . . . . . . . 14
Channel controls.................................................................. 15
Channel list . . . . . . . . . . . . . . . . . . . . . . . . . . . . . . . . . . . . . . . . . . . . . 15
Favourite channel list . . . . . . . . . . . . . . . . . . . . . . . . . . . . . . . . . . . . . 16
Electronic programme guide . . . . . . . . . . . . . . . . . . . . . . . . . . . . . . . 16
OSD navigation ................................................................... 18
Navigating the OSD with the remote control . . . . . . . . . . . . . . . . . 18
Adjusting the OSD settings . . . . . . . . . . . . . . . . . . . . . . . . . . . . . . . . 19
OSD Menus .......................................................................... 21
Picture settings . . . . . . . . . . . . . . . . . . . . . . . . . . . . . . . . . . . . . . . . . . 21
Audio settings . . . . . . . . . . . . . . . . . . . . . . . . . . . . . . . . . . . . . . . . . . 22
Channel management . . . . . . . . . . . . . . . . . . . . . . . . . . . . . . . . . . . . 23
Settings . . . . . . . . . . . . . . . . . . . . . . . . . . . . . . . . . . . . . . . . . . . . . . . . 25
Advanced . . . . . . . . . . . . . . . . . . . . . . . . . . . . . . . . . . . . . . . . . . . . . . 26
Troubleshooting .................................................................. 27
There is no picture or sound . . . . . . . . . . . . . . . . . . . . . . . . . . . . . . . 27
Picture is not clear . . . . . . . . . . . . . . . . . . . . . . . . . . . . . . . . . . . . . . . 27
Picture is too dark, too light or tinted . . . . . . . . . . . . . . . . . . . . . . . 27
Remote control does not work . . . . . . . . . . . . . . . . . . . . . . . . . . . . . 27
Product specifications ......................................................... 28
Advertisement
Table of Contents

Related Manuals for Acer AT2219MF


Summary of Contents for Acer AT2219MF
-
Page 1: Table Of Contents
Acer LCD TV AT1919MF AT1926ML AT2219MF AT2226ML User Guide Contents Important safety instructions... 3 Disposal instructions ........4 Your LCD TV overview ... - Page 2 © 2011 All Rights Reserved Acer LCD TV User Guide First issue: 01/2011 Model number: __________________________________ Serial number: ___________________________________ Date of purchase: ________________________________ Place of purchase: ________________________________ HDMI, the HDMI logo and High-Definition Multimedia Interface are trademarks or registered trademarks of HDMI Licensing LLC.
-
Page 3: Important Safety Instructions
Important safety instructions Read these instructions carefully. Please put them somewhere safe for future reference. 1. Only use attachments/accessories specified by the manufacturer. 2. Use only with the cart, stand, tripod, bracket, or table specified by the manufacturer, or sold with the apparatus. When a cart is used, use caution when moving the cart/ apparatus combination to avoid injury from tip-over. -
Page 4: Disposal Instructions
Do not throw this electronic device into the rubbish bin / container when discarding. To minimize pollution and ensure utmost protection of the global environment, please recycle. For more information regarding WEEE, please refer to http://global.acer.com/about/environmental.htm. Соответствует сертификатам, обязательным в РФ Compliant with Russian regulatory certification. -
Page 5: Your Lcd Tv Overview
Your LCD TV overview Front and side panels No. Item Common interface Earphone Power LED Remote control receiver Power button Volume down Volume up Channel down Channel up Menu key Source (Input) key Description Insert a common interface module here. A module may be required by certain channels (e.g. -
Page 6: Rear Panel View
Rear panel view No. Item AC-in Service port HDMI VGA-in + PC Audio-in SPDIF out AV in-S-video, CVBS, Audio L/R AV in-COMPONENT + Audio L/R SCART Tuner* * Tuner could support analog, digital and mixed signal. -
Page 7: Remote Control
Remote control General keys No. Item Description POWER Press to turn your TV on/off. DISPLAY Press to display or change input/channel information (dependent on input/source type). GUIDE Press to launch Electronic Programme Guide (EPG) mode (Digital TV mode only). See “Electronic programme guide” on page 16. SOURCE Press to select correct source/input mode. - Page 8 No. Item Description OK/ENTER/ ENTER: Press to confirm channel number selection. CH LIST CH LIST: Press to launch the channel list. See “Channel list” on page 15. MUTE Press to toggle audio on and off. Press to display the favorite channel list. VOL (+/-) Press to increase or decrease the volume.
-
Page 9: Connecting Devices
3. Assemble the wall mount following the instructions included with the wall mount. Basic connections Connecting the power cord 1. Connect the AC cord into the AC input on the back of the set. 2. Connect the plug to the wall outlet as shown. AT2219MF/AT2226ML... -
Page 10: Enjoying Analog And Digital Tv
Setting up the remote control 1. Open the cover on the back of the remote unit. 2. Insert two AA batteries (supplied) to match the polarity indicated inside the battery compartment. Enjoying analog and digital TV Connecting an antenna/cable Connect the antenna cable to the appropriate antenna terminal on the back of the TV set as shown below. - Page 11 Tip: You can also adjust these settings using the front control panel. See “Front and side panels” on page 5. Select the setup language you prefer. Please select the correct country for signal reception. Ensure that your co-axial cables are connected correctly before proceeding. Scan for digital channels and analog channels.
-
Page 12: Connecting External Audio/Video Devices
Connect your DVD player, VCR or audio/video equipment using the SCART port located at the rear of your LCD TV as shown below. Source-in D-Sub Yellow D-Sub White Blue Green Acer recommends the following priority for connection types: HDMI -> COMPONENT -> SCART -> Composite. HDMI COMPONENT PC-Audio in SCART COMPOSITE... -
Page 13: Connecting A Camera, Camcorder Or Game Console
TV-out Analog TV signal output through SCART is only available when watching an analog TV channel. Connecting a camera, camcorder or game console Connect your camera or camcorder to the video/audio ports on the TV set as shown below. SPDIF Recorder COMPONENT COMPOSITE... -
Page 14: Connecting A Pc Or Notebook Computer
To display PC output on your TV, connect your PC or notebook computer to the TV as shown below. For VGA connections, Acer recommends setting your PC’s external monitor resolution to 1366 x 768 pixels @ 60 Hz refresh rate... -
Page 15: Channel Controls
Channel controls Channel list Channel list allows you to quickly find the TV channel you are searching for. To open the channel list feature: Press the OK key on the remote control. This will bring up the channel list menu. The current channel will be highlighted. -
Page 16: Favourite Channel List
Favourite channel list The favourite channel list allows you to store your favourite TV channels and flick between them at the touch of a button. To set a favourite channel, follow the steps described on this page. Viewing your favourite channels Adding favourite channels Back Electronic programme guide... - Page 17 Guide screen There are four main areas of the EPG screen: Information bar The top of the screen shows the type of signal being viewed and the current time; with the channel number, channel title and selected program name on the right. Programme guide The section on the left shows the programme guide, with the start time and title.
-
Page 18: Osd Navigation
OSD navigation Many of the advanced settings and adjustments are available through using the OSD (onscreen display) menus, as shown in the example screenshot below. Basic operations required to navigate these menus (Picture, Audio, Channel management, Settings and Advanced) are described in this section. Navigating the OSD with the remote control MENU Tip: You can also interact with these menus using the right panel controls. -
Page 19: Adjusting The Osd Settings
Adjusting the OSD settings The OSD can be used for adjusting the settings of your LCD TV. Press the MENU key to open the OSD. You can use the OSD to adjust the picture quality, audio settings, channel settings and general settings. For advanced settings, please refer to following page: Adjusting picture quality Adjusting audio settings... - Page 20 Adjusting settings Adjusting advanced settings The options available on the OSD may vary depending on the TV signal source and model. Some digital options may not be available with an analog signal and vice versa. 1. Press the MENU key to bring up the OSD. 2.
-
Page 21: Osd Menus
OSD Menus Picture settings Open the Picture menu as described in the OSD navigation section. This menu provides the following settings: Scenario mode Scenario mode provides preset viewing modes designed to give you the best picture quality when watching a particular kind of programme. These provide preset values for brightness, contrast, hue colour and sharpness. -
Page 22: Audio Settings
Change the hue of the image. Colour temp This setting adjusts the colour temperature of the image. You can set it to Standard, Cold, User or Warm depending on your preference. With the User setting, you may change the colour values individually. Noise reduction This setting filters noise from the image. -
Page 23: Channel Management
Treble Boost or reduce high audio tones. Bass Boost or reduce low audio tones. Balance Change the balance between the left and right speakers. Steady sound This function prevents sudden changes in the audio output level. If this function is On, volume levels will be consistent when switching between input sources and changing channels. -
Page 24: Channel Edit
Channel edit You can edit the detected channels, to change how they are displayed in the channel list. Use the up or down directional keys to select a channel, you may then use the coloured keys to perform different actions: •... -
Page 25: Settings
Settings Open the Settings menu as described in the OSD navigation section. This menu provides the following settings: Parental control Parental control is a handy feature that can block chosen TV sources. Parental control allows you to enter a password and effectively stop anyone without the password from watching TV. -
Page 26: Advanced
Accessibility You can choose between normal subtitles and subtitles for the hearing impaired, when these are available. Sleep You can set a time delay, after which the TV will turn off. The delay can be 15, 30, 45, 60, 90 or 120 minutes. Automatic power off If Automatic Power Off is active, if the TV on for four hours without any channel changes or other activity, it will turn off. -
Page 27: Troubleshooting
Troubleshooting Before you call the Acer service center, please check the following items: Here is a list of possible situations that may arise during the use of your LCD TV. Easy answers and solutions are provided for each. There is no picture or sound •... -
Page 28: Product Specifications
PCM / MPEG ( Layer I & II ) Stereo 32 / 44.1 / 48 KHz 7/8 MHz 1080P Hybrid CVBS (In/Out), RGB (In), Audio R/L (In/Out), ATV/DTV YPbPr, Audio (R/L) AV-in CVBS, S Video, Audio (R/L) Yes (HDMI 1.3) Yes (Coxial) AT2219MF/AT2226ML 1920 x 1080 46 W 512.2 x 393.2 x 169.4 9.03... -
Page 29: Pc Input Signal Reference Chart
(Hz) 31.5 60.0 37.9 72.8 37.5 75.0 35.0 66.7 31.5 70.1 35.2 56.3 37.9 60.3 48.1 72.2 46.9 75.0 49.7 74.6 48.4 60.0 56.5 70.1 60.0 75.0 45.0 59.9 47.7 59.7 AT2219MF/AT2226ML Standard VESA SVGA SVGA SVGA SVGA VESA WXGA... - Page 30 AT2219MF/AT2226ML Resolution 640x480 640x480 640x480 640x480 720x400 800x600 800x600 800x600 800x600 832x624 1024x768 1024x768 1024x768 1280x720 1152x864 1280x800 1360x768 1366x768 1600x900 1600x900 1280x1024 1400x1050 1680x1050 1920x1080 1920x1080 1. The PC input does not support Sync on Green or Composite Sync.