
Related Manuals for ABB ACS 300 Series


Summary of Contents for ABB ACS 300 Series
- Page 1 ACS 300 User’s Manual ACS 300 Frequency Converters for Speed Control of 0.55 to 11 kW Squirrel Cage Motors...
- Page 2 ACS 300 Frequency Converters for Speed Control of 0.55 to 11 kW Squirrel Cage Motors User’s Manual 3AFY 61229965 R0225 Effective: 1.7.1996 Valid from software version CDS02E.1 / CDH02E.1 © 1996 ABB Industry Oy. All Rights Reserved.
-
Page 3: Safety Instructions
Safety Instructions Overview This chapter states the safety instructions which must be followed when installing, operating and servicing the ACS 300. If neglected, physical injury and death may follow, or damage may occur to the frequency converter, the motor and driven equipment. - Page 4 Safety Instructions Notes Readers are notified of the need for special attention or additional information available on the subject with the following symbols: CAUTION! Caution emphasises a matter in order to draw special attention to it. Note! Note gives additional information or points out more information available on the subject.
- Page 5 Safety Instructions voltage when mains power is applied regardless of motor operation. There can be dangerous voltages inside the ACS 300 from external control circuits when the ACS 300 mains power is shut off. Exercise appropriate care when working with the unit. Negligence to these instructions can cause physical injury and death.
-
Page 6: Emergency Stop Devices
Safety Instructions The motor rotational direction can be locked to forward only by using the DIR parameter. See page 67 for more details. Mechanical faults on the motor, power failure or other faults may cause stoppages. Correcting the fault may cause the motor to restart. -
Page 7: Product Conformity In Eea
Product Conformity in EEA Information given here is applicable only for the ACS 300 Frequency Converter with which this information is attached. This information may not be applicable for other ACS 300 Frequency Converters or for ACS 300 User´s Manuals with later revisions than R0225. -
Page 8: Acs 301 Frame Size R2
Product Conformity in EEA EN 50081-2: 1993 EMC, Emission Industrial environment EN 50081-2: 1995 EMC, Immunity Industrial environment The converter can be used in residential, commercial and light industrial or industrial electromagnetic environments. ACS 301 Frame Size R2 The converters with type codes ACS 301-8P7-3, ACS 301-012-3 and ACS 301-016-3 are in conformity with prEN 61800-3: Adjustable speed electrical power drive systems - Part 3: EMC product standard including specific test methods... - Page 9 Product Conformity in EEA Clause 5.3.1 Supply disconnecting (isolating) device - manufacturer of the machine is responsible of the installation - please, refer to Chapter “Safety Instructions” Clause 6.2.1 Protection by enclosures - degree of protection is chosen according to the place of use - please refer to Chapter 9 “Environmental Limits”...
- Page 10 Product Conformity in EEA • the following clauses of technical standards and specifications have been used: EN 60529: 1991 IEC 664-1: 1992 Installation Category III, Pollution Degree 2 IEC 721-3-1: 1987 Combination of classes 1K4/1Z2/1Z3/1Z5/1B2/1C2/1S3/1M3 IEC 721-3-2: 1985 Combination of classes 2K4/2B2/2C2/2S2/2M3 IEC 721-3-3: 1987 Combination of classes 3K3/3Z2/3Z4/3B1/3C2/3S2/3M1 Furthermore it is not allowed to put the equipment into service...
-
Page 11: Table Of Contents
Table of Contents Safety Instructions Overview............iii Warnings and Notes . - Page 12 Table of Contents Chapter 2 - Mechanical Installation Cooling ............11 Mounting .
- Page 13 Table of Contents Chapter 7 - Drive Parameters Page 1 parameters ..........51 Page 2 parameters .
- Page 14 Table of Contents ACS 300 User’s Manual...
-
Page 15: Chapter 1 - Overview Of This Manual
• Have a basic knowledge of physical and electrical fundamentals, electrical wiring practices, electrical components and electrical schematic symbols. • Have no prior experience of ABB products. • Have no prior experience of the ACS 300 family. • Have no prior experience of installing, commissioning, operating and servicing the ACS 300. -
Page 16: Limitation Of Liability
Purchaser or other third parties for such or other damages. ABB´s liability on any claim whether in contract, warranty, negligence, tort, strict liability, or otherwise for any loss or... -
Page 17: Delivery Checks
Equipment or part thereof or services which give rise to the Claim. All clauses of action against ABB arising out of or relating to the contract or the performance or breach hereof shall expire unless brought within one year of the time of accrual thereof. -
Page 18: Identification Labels
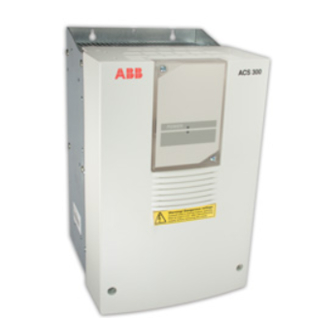
Type designation of the ACS 300 frame sizes R0 and R1 (code printed on the nameplate located at the right side of the heatsink). Wall mounted Power 3 = 380...480 V and 1 = 200... 240 V ABB Industry Oy 0=internal RFI-filter 1=without RFI-filter ACS30108P73DE Type 380...480 V 0- 380...480 V... - Page 19 Chapter 1 - Overview of This Manual ACS 300 is always delivered with the panel replacement cover. Enclosure class is IP 21 (with top cover attached). Manufacturing date is determined by unit´s serial number in the name plate. First digit shows the last figure of the year. Digits two and three tell the manufacturing week.
-
Page 20: General Information About Acs 300
Chapter 1 - Overview of This Manual General Information About ACS 300 Overview of ACS 300 Product Family ACS 300 is a PWM frequency converter using the latest technology. Concept ACS 300 refers to ACS 300 product family. There are options available besides the basic unit. For instance control panel, IP 65 set, serial communication set, braking resistor, braking chopper and chokes. - Page 21 Chapter 1 - Overview of This Manual Type Series Table 1-1 ACS 300 frequency converter types for 50 Hz and 60 Hz supplies. Mains supply 200 to 240 V. Rated input Output current current Maximum permissible Type Weight Frame rated motor Short-term designation Rated...
- Page 22 Chapter 1 - Overview of This Manual Table 1-2 ACS 300 frequency converter types for 50 Hz and 60 Hz supplies. Mains supply 380 to 480 V. Output current Rated Maximum input Type permissible rated Weight Short-term Frame current Rated designation motor power [kg]...
- Page 23 Chapter 1 - Overview of This Manual C ontrol Panel R S232 Field Bus (option) Adapter Adapters (option) (option) C O N TR O L B O A R D 1..6 3 4 5 7 8 9 10 11 12 13 14 15 16 17 18 D DC S...
- Page 24 Chapter 1 - Overview of This Manual ACS 300 User’s Manual...
-
Page 25: Chapter 2 - Mechanical Installation
Chapter 2 - Mechanical Installation Cooling Cooling of the ACS 300 is based on natural air circulation or by fan, depending on the type. The maximum allowable ambient operating temperature is 50°C when the load current is lower than or equal to the continuous maximum load current I and switching frequency is lower than or equal to 8 kHz (3 kHz for model ACS 3_1-016-3). -
Page 26: Mounting
Chapter 2 - Mechanical Installation If multiple units are installed adjacent to or above each other, the following minimum distances apply: • Units side by side, clearance 12 mm • Units above each other, clearance 300 mm Figure 2-2 ACS 300 Dimensional drawing. Mounting Mounting the ACS 300 To ensure proper cooling and safe installation, check that the... -
Page 27: Emc
Chapter 2 - Mechanical Installation Mounting the The control panel can be detached from the frequency converter Control Panel and installed with a separate approximately 3 m long special connection cable to the cabinet door for example. When installed correctly on a flat surface with proper cable entry and sealing (optional), the panel provides enclosure class IP 65 (NEMA 4) (IP 30 as standard). - Page 28 Chapter 2 - Mechanical Installation ACS 300 User’s Manual...
-
Page 29: Chapter 3 - Power Connections
Chapter 3 - Power Connections The ACS 300 is designed for use on 200 to 240 V and on 380 to 480 V supplies. Refer to tables 3-1 and 3-2 to see allowable voltages. WARNING! NEVER connect voltage higher than 240 V to the mains input terminals of the 200 to 240 V ACS 300. - Page 30 Chapter 3 - Power Connections ACS 311-1P1-1 and 1P6-1 Braking Mains Motor only ! resistor BRAKE RES U2 ACS 3_1-2P1-1 to 4P1-1 Braking Motor only ! Mains resistor BRAKE U2 V2 W2 ACS 3_1-1P6-3 to 6P6-3 Braking Motor only ! Mains resistor BRAKE RES U2...
-
Page 31: Motor Cable
100 m. The capacitive current can be diminished with an output choke coil. If the cable length exceeds 100 m, please contact your local distributor or ABB office. Brake Cable Use also screened cable for brake unit connections. The cross section of an individual wire should be at least equal to that recommended for mains cable in Table 3-1. - Page 32 Chapter 3 - Power Connections Figure 3-3 Recommended motor cables. Earthing terminal Figure 3-4 The principle of cable connections for frame sizes R0 and R1 (cable connection order according to frame size R1). ACS 300 User’s Manual...
- Page 33 Chapter 3 - Power Connections Figure 3-5 Cable connections for frame size R2. ACS 300 User’s Manual...
- Page 34 Chapter 3 - Power Connections Table 3-1 Cables and fuse recommendations, 200-240 V. Rated input Recommended Recommended mains current input fuse Type and motor cable [mm designation 208-240 V 1-phase 3-phase phase phase phase phase ACS 311-1P1-1 2∗1.5+1.5 3∗1.5+1.5 ACS 311-1P6-1 2∗1.5+1.5 3∗1.5+1.5 ACS 301-2P1-1...
-
Page 35: Insulation Checks
Chapter 3 - Power Connections Insulation Checks Warning! Insulation checks are to be done before connecting the ACS 300 to the mains. Before proceeding with the insulation resistance measurements, make sure that the ACS 300 is disconnected from the mains. Failure to disconnect the mains could result in death or serious injury. - Page 36 Chapter 3 - Power Connections Earthing and The ACS 300 must always be earthed through an earthing earth faults conductor connected to the earthing terminal, PE. Note! Earth connection is essential before connecting supply because of high leakage current. When the ACS 300 is not connected to the system earth, the earth fault protection must be capable of operating at earth fault currents containing high frequency and DC components.
-
Page 37: Chapter 4 - Control Connections
Chapter 4 - Control Connections The ACS 300 can be controlled by the ACS 300 Control Panel or by external control signals connected to the terminal block X1 of the control card. Serial communication interface is available as an option. Control Cables The ACS 300 control cables should be 0.5 to 1.0 mm screened,... - Page 38 Chapter 4 - Control Connections R191 Figure 4-1 Control Card The analogue input signal is selected with jumper X5 as shown in figure 4-1 enlargement A: I = current 0(4) to 20 mA and U = voltage 0(2) to 10 V. X1 = Terminal block for control connections.
- Page 39 Chapter 4 - Control Connections Figure 4-2 Control Card Connections. Terminal Function block X1 Reference for potentiometer +10 V DC, maximum permitted burden 10 mA, 1 kΩ < R < 10 kΩ Analogue input, reference 0 to 10 V (or 0 to 20 mA) or 2 to = 250 Ω...
- Page 40 Chapter 4 - Control Connections Terminal block X1 Motor Standard Alternate 3-wire Potentio-meter +24 V Start Start Start forward Start/Stop Stop Reverse Start reverse Reverse Reverse Increment frequency Constant speed Constant speed Constant speed Decrement frequency Constant speed Constant speed Constant speed Constant speed ACC2/DEC2...
-
Page 41: Input/Output Option Selection
Chapter 4 - Control Connections Input/output Option I/O option switch S1 on the control card is used to configure the digital inputs and the control panel lock-out. The ACS 300 control Selection input can be configured for eight differently wired control modes with S1, A and S1, B and parameter PARAM SET: •Standard, refer to Figure 4-3, Table 4-1 and Table 4-2 •3-wire, refer to Figure 4-4, Table 4-5 and Table 4-6... - Page 42 Chapter 4 - Control Connections Standard The ACS 300 comes from the factory preset to standard. Table 4-1 shows the functions of the digital inputs in standard mode. Table 4-1 Standard digital input functions. Digital input Function Notes Start / Stop Connect +24 V DC to start Reverse Connect +24 V DC to reverse...
- Page 43 Chapter 4 - Control Connections Standard 2 Switch S1 is in the same position as in Standard selection. Parameter PARAM SET has value 2. Table 4-3 Standard 2 digital input functions. Digital input Function Notes Start / Stop Connect +24 V DC to start Reverse Connect +24 V DC to reverse Constant speed (=CS) selection,...
- Page 44 Chapter 4 - Control Connections The stop input is active even when operating from the keypad, allowing the normally closed contact from a motor overload relay or other external interlock to stop the frequency converter when operating from the keypad. Control voltage is connected to X1:7. Parameter PARAM SET has value 1.
- Page 45 Chapter 4 - Control Connections Table 4-6 Constant speed selection. Result Speed reference from AI1 +24 V Constant speed 1 +24 V Constant speed 2 +24 V +24 V Constant speed 3 3-wire 2 Switch S1 is in the same position as in 3-wire selection. Parameter PARAM SET has value 2.
- Page 46 Chapter 4 - Control Connections Alternate Alternate mode has both Start forward and Start reverse inputs (+24 V). The drive is stopped if both inputs are connected to 0 V or +24 V. Parameter PARAM SET has value 1. Table 4-9 Alternate digital input functions. Digital Function Notes...
- Page 47 Chapter 4 - Control Connections Table 4-11 Constant speed selection. Result Speed reference from AI1 +24 V Constant speed 1 +24 V Constant speed 2 +24 V +24 V Constant speed 3 Alternate 2 Switch S1 is in the same position as in Alternate selection. Parameter PARAM SET has value 2.
- Page 48 Chapter 4 - Control Connections Motor Motor Potentiometer mode has motor potentiometer function Potentiometer programmed to digital inputs 3 and 4. Parameter PARAM SET has value 1. Table 4-14 shows the functions of the digital inputs when in Motor Potentiometer mode. Table 4-14 Motor Potentiometer digital input functions.
- Page 49 Chapter 4 - Control Connections Motor potentiometer Figure 4-6 Motor Potentiometer switch S1 selection. Motor Switch S1 is in the same position as in Motor potentiometer Potentiometer 2 selection. Parameter PARAM SET has value 2. Table 4-15 Motor Potentiometer 2 selection. Digital input Function Notes...
- Page 50 Chapter 4 - Control Connections ACS 300 User’s Manual...
-
Page 51: Chapter 5 - Start-Up
Chapter 5 - Start-up Flowchart Commissioning Checklist SAFETY •Read and follow the safety instructions on page iii. INSTALLATION • Check for proper earthing. • Check supply and motor cables. • Check Star/Delta connection. • Check control cables. PARAMETERS •Check and complete the parameter values. TEST RUNS •Check the operation of the ACS 300 without motor. -
Page 52: Checking The Parameters
Chapter 5 - Start-up Checking the Use the parameter tables starting on page 47 to write down your customised settings. Parameters Start-up data Before proceeding with the commissioning, check and complete the following Page 1 and Page 4 parameters which define the motor connected to the ACS 300 and mains supply (400 V series only): NOM RPM... -
Page 53: Chapter 6 - Control And Parameter Logic
Chapter 6 - Control and Parameter Logic Control Panel The control panel incorporates a 16 character alphanumeric LCD and keypad. The features are shown in Figure 6-1 on Page 40. Control panel Operational information, parameters and fault indications are display displayed in nine languages. - Page 54 Chapter 6 - Control and Parameter Logic Blinking Indicates Setting Parameter name Mode after pressing Parameter value MODE key, used to DECREMENT & toggle between INCREMENT keys, used parameter scrolling for scrolling through and setting. parameter lists and setting parameter values FAULT LED lights if a START/STOP key, fault has occurred in...
-
Page 55: Panel Operation
Chapter 6 - Control and Parameter Logic Panel Operation The ACS 300 frequency converter can be operated from external controls or directly from the control panel. The panel is an option. The first time the ACS 300 is connected to the mains, the default control place is Remote. - Page 56 Chapter 6 - Control and Parameter Logic Table 6-1 Control panel keys. Control Panel Secondary Key Function Press to change between Display mode and Setting mode. Hold down to set the display contrast and: Press to adjust contrast darker Press to adjust contrast lighter. Press and hold for three seconds to change between remote control and local control.
- Page 57 Chapter 6 - Control and Parameter Logic Control Panel Secondary Key Function Press to change up to the next parameter in Display mode Press to increment the current parameter value in Setting mode. Press to change down to the next parameter in Display mode Press to decrement the current parameter value in Setting mode.
-
Page 58: Parameter Logic
Chapter 6 - Control and Parameter Logic Parameter Logic The parameters are divided into four pages. A complete table of parameters is presented in chapter 7 on Page 47. PAGE 1 (*P2) PAGE 2 (*P3) PAGE 3 (*P4) PAGE 4 (*P1) OUTPUT f OUTPUT V... - Page 59 Chapter 6 - Control and Parameter Logic To change to Page 2, press Select the required Parameter by pressing Change to Setting mode. Blinking indicates that the parameter value can now be changed. Set the parameter value. Save the selected value to permanent memory. Blinking stops, indicating that the parameter value is stored in memory.
- Page 60 Chapter 6 - Control and Parameter Logic ACS 300 User’s Manual...
-
Page 61: Chapter 7 - Drive Parameters
Chapter 7 - Drive Parameters Note! The factory setting for display language is English, refer to Page 1 parameter LANGUAGE for display language selection. Parameters marked with (0) can only be altered with the ACS 300 stopped otherwise START IS ACTIVE message is displayed. - Page 62 Chapter 7 - Drive Parameters Code Parameter Range Default Page Description tomer DEC 2 0.1 – 1800 s Time for Ref Max f - Ref Min f deceleration ramp FAULT MEMORY Display only The last three fault indications NOM RPM (0) 0 –...
- Page 63 Chapter 7 - Drive Parameters Code Parameter Range Default Page Description tomer PAGE 2 (* P3) Display only – – Press to change to page 3 OUTPUT V Display only – – Output voltage to motor CON f 1 0.0 – 200/500 Hz 5.0 Hz Preset speed 1 CON f 2...
- Page 64 Chapter 7 - Drive Parameters Code Parameter Range Default Page Description tomer 1. RELAY 1-11 Relay 1 function selection 2. RELAY 1-11 Relay 2 function selection F SUPERV 0.0 to 500 Hz Relay function output freq. limit 1) Depends on the selected nominal motor frequency (Page 1 parameter NOM FREQ) Code Parameter Range...
-
Page 65: Page 1 Parameters
Chapter 7 - Drive Parameters Custo- Code Parameter Range Default Page Description PAGE 4 (*P1) – – – Press to change to page 1 2ACC 1 0.1 - 1800 s Parameter set 2 parameters are similar to the parameters in pages 1 and 2. 2DEC 1 0.1 - 1800 s 2NOM RPM (0) - Page 66 Chapter 7 - Drive Parameters OUTPUT I Calculated motor phase current. Accuracy ±10%. Includes cable losses. Note! This display is not for accurate measurement. COPY Copy is used to transfer all parameter settings from one ACS 300 to another. EXIT Copy function not selected.
- Page 67 Chapter 7 - Drive Parameters Note! The ACS 300 incorporates a controller that prevents over current and overvoltage trips caused by too rapid acceleration and deceleration settings for a given system, by slowing down the acceleration/deceleration. If a short time is entered for acceleration time in a system with high inertia, the acceleration time will be limited by the I LIMIT parameter.
-
Page 68: Parameters
Chapter 7 - Drive Parameters NOM VOLT Nominal motor voltage (from the motor rating plate). NOM VOLT sets the maximum output voltage supplied to the motor by the ACS 300. NOM FREQ sets the frequency where the voltage to the motor is equal to NOM VOLT. With these two parameters, it is possible to adapt the ACS 300 to the motor. - Page 69 Chapter 7 - Drive Parameters Note! Min and Max Freq parameters are ignored when constant speed is used. I LIMIT This setting is the maximum output current the ACS 300 will supply to the motor. START(FUNCTION) ACC RAMP Ramp acceleration as set on Page 1 / Page 4 parameter ACC 1 (or ACC 2 as selected by digital inputs in Standard and Alternate I/O mode, refer to pages 28 to 32).
- Page 70 Chapter 7 - Drive Parameters FLY+BOOST Activates both the Flying Start and Automatic Start Current Boost. STOP (FUNCTION) COASTING The ACS 300 stops supplying voltage when a Stop command is given and the motor coasts to a stop. DEC RAMP Ramp deceleration as set in Page 1 / Page 4 parameter DEC 1 (or DEC 2) as selected by digital inputs in Standard and Alternate I/O mode, refer to pages 28 to 32.
- Page 71 Chapter 7 - Drive Parameters FAST S Suitable for ramp times less than one second. MEDIUM S Suitable for ramp times less than 1.5 seconds. SLOW S Suitable for ramp times up to 15 seconds. [Hz] Linear Fast S Medium S Slow S t [s] Figure 7-1 Acceleration/deceleration ramp shapes.
- Page 72 Chapter 7 - Drive Parameters Reference input signal minimum level can be set to either 0 V / 0 mA or 2 V / 4 mA. The latter value provides a “living zero” function. The drive will stop if the reference drops below the minimum limit.
- Page 73 Chapter 7 - Drive Parameters MAX FREQ MIN FREQ - MIN FREQ Hysteresis 4% of Full Scale MIN FREQ - MAX FREQ 2V / 4mA 10V / 20mA 0V / 0mA - MIN FREQ Figure 7-2 Joystick control. CUSTOM Use this setting if you want to set and use customised minimum and maximum limits for the reference input.
- Page 74 Chapter 7 - Drive Parameters apply the analogue input signal that represents minimum frequency in your system. Press and hold the key for three seconds. The setting is accepted when * blinks once on the Control Panel display. To set the maximum reference signal level, scroll to SET MAX and repeat the procedure as for SET MIN.
- Page 75 Chapter 7 - Drive Parameters A. OUT OFFS The analogue output signal minimum can be set to 0 mA or 4 mA. The maximum output remains 20 mA. Selecting 4 mA provides a “living zero” function. If a fault occurs, the output current will drop to 0 mA as an alternate fault indicator signal.
- Page 76 Chapter 7 - Drive Parameters Example: Fan system with bad vibration from 18 Hz to 23 Hz and from 46 Hz to 52 Hz. Running speed set to 60 Hz with reference. Set the parameters as follows: CRIT f1L = 18 Hz and CRIT f1H = 23 Hz CRIT f2L = 46 Hz and CRIT f2H = 52 Hz motor [Hz]...
- Page 77 Chapter 7 - Drive Parameters The following is an alternative way to enter the LOW and HIGH settings for critical frequency: • Run the drive with external reference. • Using the analogue input, set the frequency to the critical frequency LOW value. •...
- Page 78 Chapter 7 - Drive Parameters higher frequency. If the IR compensation is set too high, the motor can “saturate” and will not rotate at all, but will draw current. No compensation wanted. 0.1 - 60 V The compensation voltage given by the user. AUTO The compensation voltage is automatically given to maintain or reduce current accordingly.
- Page 79 Chapter 7 - Drive Parameters DC BRAKE When the STOP parameter is set to DC BRAKE or DEC+HOLD, this parameter sets the DC injection time in seconds. If the braking time is too short, the drive stops by coasting after the DC braking time has elapsed.
- Page 80 Chapter 7 - Drive Parameters RESTART # Number of times the ACS 300 will automatically reset the fault and restart after any of the following faults: Undervoltage, Overvoltage, Overcurrent, Low AI-Signal, Unit Fault. For further information on fault tracing refer to chapter 8 Fault Tracing, page 77.
- Page 81 Chapter 7 - Drive Parameters TEMP” fault. The fault can be reset, when the motor has cooled down to a safe temperature. The ACS 300 will continue to calculate the motor temperature even if the motor is not running. If the ACS 300 is disconnected from the mains, the overload protection calculation is reset, and the motor is assumed to be at ambient.
- Page 82 Chapter 7 - Drive Parameters Code Function Fault Power I>Current limit >Frequency limit <Frequency limit Motor is running forward Motor is running Motor overtemperature trip Under panel control (LOCAL) None Fault (-1) 1 (Fault) Relay is de-energised (and the Fault LED on the Control Panel illuminates), when a fault occurs.
- Page 83 Chapter 7 - Drive Parameters hysteresis is 20 % of F SUPERV. 5 (<Frequency limit) Relay is de-energised when the output frequency falls below the value selected with parameter F SUPERV. Relay is energised when output frequency is more than (F SUPERV + hysteresis). If F SUPERV is greater than 10 Hz the hysteresis is 2 Hz, otherwise hysteresis is 20 % of F SUPERV.
- Page 84 Chapter 7 - Drive Parameters do not forget that the relay is always de-energised when the drive power is shut off. F SUPERV F SUPERV is the frequency limit for relay functions 4 and 5. Please look at the previous parameter. ACS 300 User’s Manual...
-
Page 85: Parameters
Chapter 7 - Drive Parameters Page 3 parameters PAGE 3 (*P4) Press to change to Page 4. DC HOLD This parameter enables the DC HOLD feature. There are three options for using this parameter. 0 (Off) DC HOLD is disabled. 1 (Normal) This option provides “less”... - Page 86 Chapter 7 - Drive Parameters When both reference and output frequency drop below 1.5 Hz, the ACS 300 will stop generating sinusoidal current and inject DC into the motor. When the reference frequency rises above 1.5 Hz, the DC will be removed and normal ACS 300 function resumed. DC Hold has no effect if the Start signal is deactivated.
- Page 87 Chapter 7 - Drive Parameters Output frequency change Output frequency change PI-GAIN for a 10 % change in error for a 50 % change in error 50 % 0.75 Hz 3.75 Hz 100 % 1.5 Hz 7.5 Hz 300 % 4.5 Hz 22.5 Hz Some points of view must be taken in consideration when this...
- Page 88 Chapter 7 - Drive Parameters Process Error Value AAAA AAAA AAAA AAAA AAAA AAAA AAAA AAAA AAAA AAAA PI Controller Output Gain AAAA AAAA AAAA AAAA Gain PI Integration Time Figure 7-8 PI Controller Gain, I-Time and Error Value. PI-SCMIN Minimum scaling factor of the actual value.
- Page 89 Chapter 7 - Drive Parameters Example B Example A Figure 7-9 PI Controller, the scaling of actual value. Figure 7-10 Operating range, example B. ACS 300 User’s Manual...
-
Page 90: Parameters
Chapter 7 - Drive Parameters PI-REF Reference value for the PI Controller. The setting range is 0.0 to 100.0. It is not recommended to set this parameter value higher than 0.8 x measuring scale. This value can be changed through the control panel when in local mode. -
Page 91: Fault Indications
Chapter 8 - Fault Tracing This chapter describes the ACS 300 fault indications and fault memory. It also explains how to trace faults. Fault Indications The ACS 300 continuously monitors itself for faulty operation. If a fault condition should arise, a fault indication is displayed, the fault LED illuminates and the ACS 300 waits for the operator to acknowledge the fault before resuming operation. -
Page 92: Fault Tracing
Chapter 8 - Fault Tracing occurs and automatic restart (RESTART #) is off. If the automatic restart is on, the undervoltage fault is not stored in the FAULT MEMORY unless the fault persists after restart. F1 OVERVOLTAGE F2 UNIT FAULT 12 Figure 8-1 Examples of fault indications in the fault memory. - Page 93 Chapter 8 - Fault Tracing Table 8-1 Fault tracing. Fault indication Possible cause Remedy (1) NO FAULT This message only appears in the fault memory. (2) OVERVOLTAGE DC bus voltage has exceeded • In case of temporary supply 130 % nominal voltage. Overvolt- voltage peak, reset and start.
- Page 94 Chapter 8 - Fault Tracing Fault indication Possible cause Remedy (6) PANEL COM ERR Control Panel was removed • Attach the Control Panel and when control was in Local mode. reset the fault, then change to Due to safety reasons, the drive Remote mode and remove stops in this fault condition.
- Page 95 Chapter 8 - Fault Tracing Fault indication Possible cause Remedy (9) MOTOR TEMP ACS 300 has calculated that the • Check the motor temperature. If motor is overheated. As the fault it is within acceptable range, indication is based on calculated adjust TEMP LIM and I LIMIT temperature rise, the motor may and restart.
- Page 96 Chapter 8 - Fault Tracing Fault indication Possible cause Remedy THE DRIVE DOES NOT CHECK: FUNCTION • the polarity of the signals CORRECTLY IN • the position of switch S1 REMOTE CONTROL • the position of jumper X5 CONTROL PANEL Processor incompatible with •...
-
Page 97: Chapter 9 - Technical Data
Chapter 9 - Technical Data Mains Connection ± Voltage 1 and 3 phase 10 % 208 to 240 V 1 and 3 phase 200 to 240 V +10% ± 3 phase 10 % 380 to 480 V Frequency 48 to 63 Hz Fundamental power factor approximately 0.98 Motor Connection... -
Page 98: Environmental Limits
Chapter 9 - Technical Data Environmental Limits 0 - 40 °C Ambient operating output current I temperature 40 - 50 °C see derating curves, Figure 2-1 -25 °C to 70 °C Storage temperature -40 °C to 70 °C Transport temperature Cooling method natural air circulation ACS 311-1P1-1 and 1P6-1... - Page 99 Chapter 9 - Technical Data ± Auxiliary +24 V DC max. 50 mA voltage <500 Ω One analogue Current output 0 (4) to 20 mA output Source (selected by Output scaled 0 to maximum parameter) frequency frequency Output (motor) scaled 0 to 1.5 x I current Output frequency scaled 0 to maximum...
-
Page 100: Protection
Chapter 9 - Technical Data Protection Short-circuit overcurrent trip limit 3.5 x I Output current regulation limit 0.5 -1.5 x I Overvoltage trip limit 1.35 x U , 1.3 x U Undervoltage trip limit 0.65 x U 90 °C, heatsink Overtemperature limit Auxiliary voltage short-circuit protected... - Page 101 ABB Industry Oy VSD Products P.O. Box 211 FIN-00381 Helsinki FINLAND Telephone +358-0-5641 Telefax +358-0-564 2681...