Table of Contents
Advertisement
Advertisement
Table of Contents

Related Manuals for Sym CRUiSYM A


Summary of Contents for Sym CRUiSYM A
- Page 1 Owner's Manual LV12W2-EU / LV30W2-EU...
-
Page 2: Table Of Contents
1. Contents ........................1 2. Before Riding ....................... 3 3. Safe Riding ........................3 4. Driving .......................... 4 5. Use Genuine Spare Parts ................... 4 6. Parts Location ......................5 ...................... 7 Combination instrument ........................ 12 Ignition switch ....................14 Right handlebar switches .................... - Page 3 ..................... 28 Throttle free play inspection ................... 28 Tire / tire pressure inspection ..................28 Steering / front fork inspection ......................29 Fuse inspection ......................29 Battery inspection ...................... 30 Spark plug inspection ................30 Air cleaner/ V-belt air cleaner inspection ......................
-
Page 4: Before Riding
This manual describes the correct usage of this scooter including safety riding, simple inspection methods and so on. For a more comfortable and safety riding, please read this manual carefully. For your benefit, please ask your authorized SYM dealer the operating manual and carefully read the following: Correct use of the scooter. -
Page 5: Driving
Also, it may result in unexpected troubles and lower the scooter’s performance. Always use SYM Genuine Spare Parts to keep your scooters pure blood and to ensure its long service life. -
Page 6: Parts Location
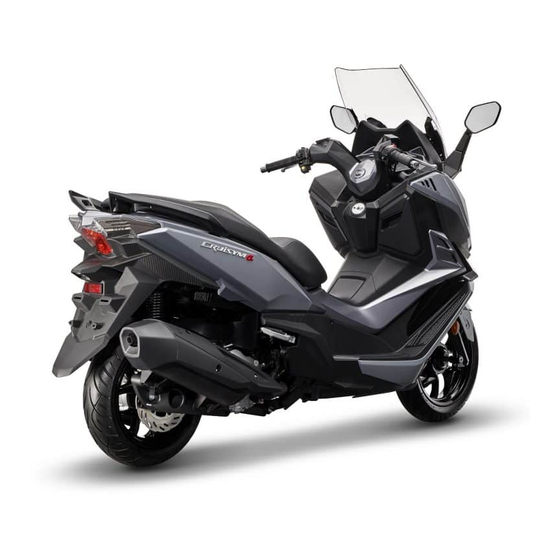
6. Parts Location CRUiSYM α 300 (LV30W2-EU) (10) (11) (12) (13) (1). Windscreen (6). Fuel Lid (11). Rear Shock Absorber (2). Front Fork (7). Seat / Luggage Box (12). Muffler (3). Coolant Level Inspection Window (8). Tail / Brake Light (13). - Page 7 CRUiSYM α 125 (LV12W2-EU) (10) (11) (12) (13) (1). Windscreen (6). Fuel Lid (11). Rear Shock Absorber (2). Front Fork (7). Seat / Luggage Box (12). Muffler (3). Coolant Level Inspection Window (8). Tail / Brake Light (13). Main Stand (4).
-
Page 8: Combination Instrument
Combination Instrument ○ ○ ○ ○ ○ ○ ○ ○ ○ ○ ○ ○ ○ ○ ○ NOTE : Do not wipe plastic components, such as the instrument panel, the headlight, body covers, etc. with solvents, such as gasoline. Wiping plastic components with solvents can damage these components. WARNING: Never operate the instrument buttons while riding the scooter. - Page 9 “On” position; this indicator will not go off until the engine is started. If the indicator does not go on after turning the ignition switch on, or if the indicator remains on when the engine is started, have the scooter checked by an authorized SYM dealer. Refer to page 8 for more information. ○...
- Page 10 ○ ○ Multifunction Meter ○ ○ Fuel gauge ○ ○ Oil distance meter ○ Trip meter ○ ○ Odometer ○ Multifunction display ○ - Clock - Battery voltage gauge ○ Coolant temperature gauge ○ ○ Fuel Gauge This digital fuel gauge shows the fuel level. There are 7 sectors in the fuel gauge.
- Page 11 ○ Odometer This odometer shows the total distance in kilometers the scooter has been ridden. It cannot be reset. NOTE : The data is maintained in the combination instrument even when the battery is disconnected. When the figures come to 99999, they will return to 0, and the odometer starts working again. ...
- Page 12 CAUTION: If the battery voltage is below 10.0V or above 16.0V when the ignition switch is turned on, and the engine is hard to start or cannot be started, have your scooter checked by an authorized SYM dealer. If the battery voltage is below 10.0V or above 16.0V when the engine is running, have your scooter checked by an authorized SYM dealer.
-
Page 13: Ignition Switch
Ignition Switch ○ ○ ○ ○ ○ ○ ○ ○ ○ ○ ○ ○ IGNITION SWITCH IGNITION KEY ○ Ignition Key Slot Insert the ignition key into the ignition key hole to operate the ignition switch. ○ “On” Position Engine can be started in this position. Ignition key cannot be removed. Electrical equipment can be used. Headlight (position light) comes on in this position. - Page 14 ○ Magnetic Shutter This magnetic shutter button is designed to close the ignition key slot. In “Off” position, remove the ignition key and push this button to close the slot. In “Lock” position, remove the ignition key and push this button to close the slot. ○...
-
Page 15: Right Handlebar Switches
Right Handlebar Switches ○ ○ ○ Engine Stop Switch This switch should normally remain in the position for the scooter to operate. In an emergency, switch to the position to stop the engine. NOTE : Even though the engine stop switch can stop the engine, it does not turn off all the electrical circuits. ○... -
Page 16: Windscreen
○ Dimmer Switch High and low beam can be selected with this switch. When the headlight is on high beam , the high beam indicator comes on (page 7). High beam Low beam ○ Hazard Switch position with the ignition switch in “On” position. All the turn signal lights and turn Push the switch to signal indicators will blink. -
Page 17: Fuel Tank Cap
Fuel Tank Cap ○ ○ Turn the ignition key to “Fuel Lid” position (page 12) to release the fuel lid ○ To open the fuel tank cap ○ , turn it anti-clockwise. Put or hold the fuel tank cap securely. ... -
Page 18: Front Compartment
Front Compartment ○ ○ ○ ○ The front compartment is located on the right side of the ignition switch. The USB charge unit ○ and DC power outlet (12V, 10A, 120W) ○ are in the front compartment. Pull the latch ○ to open the compartment cover ○... -
Page 19: Side Stand
Side Stand ○ ○ This scooter is equipped with a side stand ○ . The side stand is used for parking the scooter. Do not sit on the scooter when it is on its side stand. Always kick the side stand fully up before riding. This scooter is equipped with a side stand switch ○... -
Page 20: Passenger Footrest
Passenger Footrest ○ ○ This scooter is equipped with 2 passenger footrests ○ . Push ○ the footrests for passenger to use. NOTE : Fold up the passenger footrests when there is no passenger sitting on the scooter. 7. How to Start the Engine To Start the Engine ... -
Page 21: How To Ride The Scooter
8. How to Ride the Scooter Break-In During the first 1,000 km of running, follow the below guidelines to ensure your scooter’s reliability and performance. Avoid full throttle starts and rapid acceleration. Avoid hard braking. Ride conservatively. Throttle Control ○... -
Page 22: Anti-Lock Brake System
Anti-lock Brake System (ABS) (if equipped) ABS is designed to help prevent the wheel from locking up when hard brakes are applied while running straight. The ABS automatically regulates brake force. Intermittently gaining gripping force and braking force helps prevent wheel lock-up and allows stable steering control while stopping. Brake control function is identical to that of a conventional scooter. -
Page 23: Park The Scooter
If the above mentioned happens, stop the scooter at a safe place and turn the ignition switch off, and turn it on, then start the engine to reset, the TCS indicator should go off. If the TCS indicator does not go off after resetting, have your scooter checked by an authorized SYM dealer as soon as possible. NOTE : ... -
Page 24: Maintenance And Adjustment
Always follow the inspection, maintenance recommendations, and schedules in this owner’s manual. SYM cannot warn you of every conceivable hazard that can arise in performance. Only you can decide whether or not you should perform a given task. If you lack proper experience or doubt your ability, please contact your authorized SYM dealer for adjustments, maintenance, and repair work. -
Page 25: Oil Level Inspection / Oil Change
The genuine “SYMOIL” are designed and recommended for your scooter. Please choose oil grade that is equal to (or greater than) SAE 10W-30 or 10W-40, API SL. SYM is not responsible for any damage caused by improper oil. -
Page 26: Transmission Oil Change
The transmission oil should be changed by an authorized SYM dealer. Grade: SAE 10W30 or 85W90. SYM is not responsible for any damage caused by improper oil. Total capacity: 180 cc (CRUiSYM α 300), 110 cc (CRUiSYM α 125). -
Page 27: Coolant Level Inspection / Filling
“SYM Long Life Coolant” is premixed and contains a 50% solution of ethylene glycol based antifreeze, and does not need to be diluted before topping up or changing. “SYM Long Life Coolant” also contains corrosion inhibitor to protect the cooling system. -
Page 28: Brake System Inspection
With the front brake reservoir held horizontal, the brake fluid level in the inspection window must be above the “LOWER” line ○ If the brake fluid level is below the lower level, contact your authorized SYM dealer to adjust the fluid level. -
Page 29: Throttle Free Play Inspection
Compress the front forks by pushing down the steering handle to check that the forks can be operated smoothly. Check that the steering axle locknut is tightened. If any irregularity is found on the handlebar / front fork, contact your authorized SYM dealer. ○... -
Page 30: Fuse Inspection
If a fuse fails, replace it with a new fuse of proper amperage. Do not replace it with any material other than the specified fuse. Have the scooter checked by an authorized SYM dealer if the fuse fails repeatedly. Battery Inspection This scooter is equipped with a sealed type battery. -
Page 31: Spark Plug Inspection
Spark Plug Inspection Have the spark plug checked by an authorized SYM dealer. If the electrodes are contaminated with heavy deposits or the insulator is damaged, replace with a new one. Measure the spark plug gap with a wire type feeler gauge. -
Page 32: Headlight Adjustment
This scooter is equipped with an ECU that can record or collect vehicle data for trouble diagnosis and research. The data must be received by a special diagnostic tool when carrying out maintenance or check-up. SYM will not transfer the data to any third party except: The owner or user agrees. -
Page 33: Taking Care Of Your Scooter
10. Taking Care of Your Scooter Washing Fully cool down the engine, muffler, brakes and other high-temperature parts before washing. We suggest you to cover the muffler’s exhaust vent and shut the ignition switch slot. Rinse your scooter with cold water from a water hose to remove dirt. ... -
Page 34: Trouble Shooting
Check the operation of the radiator fan then turn off the ignition switch. If the fan is not operating, do not start the engine and transport your scooter to an authorized SYM dealer. If the fan is operating, cool down the engine, inspect the cooling system hose and check if there is a leak. If there is a leak, do not start the engine and transport your scooter to an authorized SYM dealer. -
Page 35: Periodic Maintenance Schedule
☆ The above maintenance schedule has to be done if either mileage or duration had reached its designated maintenance criteria . If any problem or question raised about your scooter, please contact your SYM authorized dealer regardless the service schedule. -
Page 36: Specification
13. Specification CRUiSYM α 125 CRUiSYM α 300 (LV12W2-EU) (LV30W2-EU) Overall length 2,175 mm Overall width 760 mm Overall height 1,440 mm Wheel base 1,530 mm 1,550 mm Ground clearance 130 mm 28 ∘ Caster Trail 140 mm Frame 2.6 m Min. - Page 37 CRUiSYM α 125 CRUiSYM α 300 (LV12W2-EU) (LV30W2-EU) Front / rear tire 120/70-14 55P, 140/60-13 63P Front / rear tire pressure 2.0 kgf/cm (28 psi), 2.5 kgf/cm (35 psi) 14 × MT3.0, 13 × MT4.0 Front / rear rim Aluminum alloy Rim material Brake Front brake disk...
-
Page 38: Serial Number/Labels Location
14. Serial Number/Labels location The labels on your scooter provide important safety information. Read the labels thoroughly and do not remove them. Contact your authorized SYM dealer for replacement if any label is missing or damaged. Tire Pressure Caution Label...